Instant Savings
 Rebate Claims
 Support
 Find a Dealer
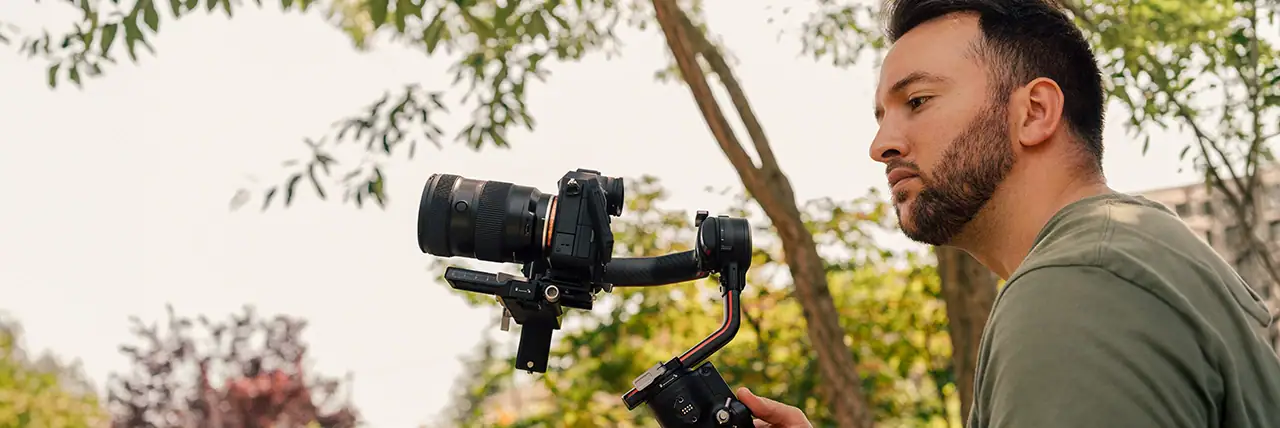
If you already understand photography, you already have many of the skills needed to shoot video. This guide shares practical videography tips for photographers and beginners, covering essential techniques, camera settings, lens selection, focus, movement, audio, lighting, and what to shoot first. The biggest transition is learning how motion, time, sound, and sequencing change the way you capture a scene.
Most early video problems come from photography habits that do not translate to motion, not from the camera. Learn a handful of fundamental differences and you will shoot natural, consistent, engaging video on the equipment already in your bag.
Table of Contents
- What Changes When You Move From Photography to Video?
- What Camera Settings Do You Need to Change for Video?
- What Should You Look for in a Lens for Video vs. Stills?
- Which Lenses Should You Start With for Video?
- How Do You Shoot in Sequences Instead of Single Frames?
- When Should the Camera Move — and How Do You Handle Focus?
- Why Audio and Lighting Matter More Than Photographers Expect
- What Should You Shoot First? Four Beginner Projects
- Start With the Lens You Have, Then Choose the One You Need
- Where to Buy Tamron Lenses
- Frequently Asked Questions About Videography for Photographers & Beginners
What Changes When You Move From Photography to Video?
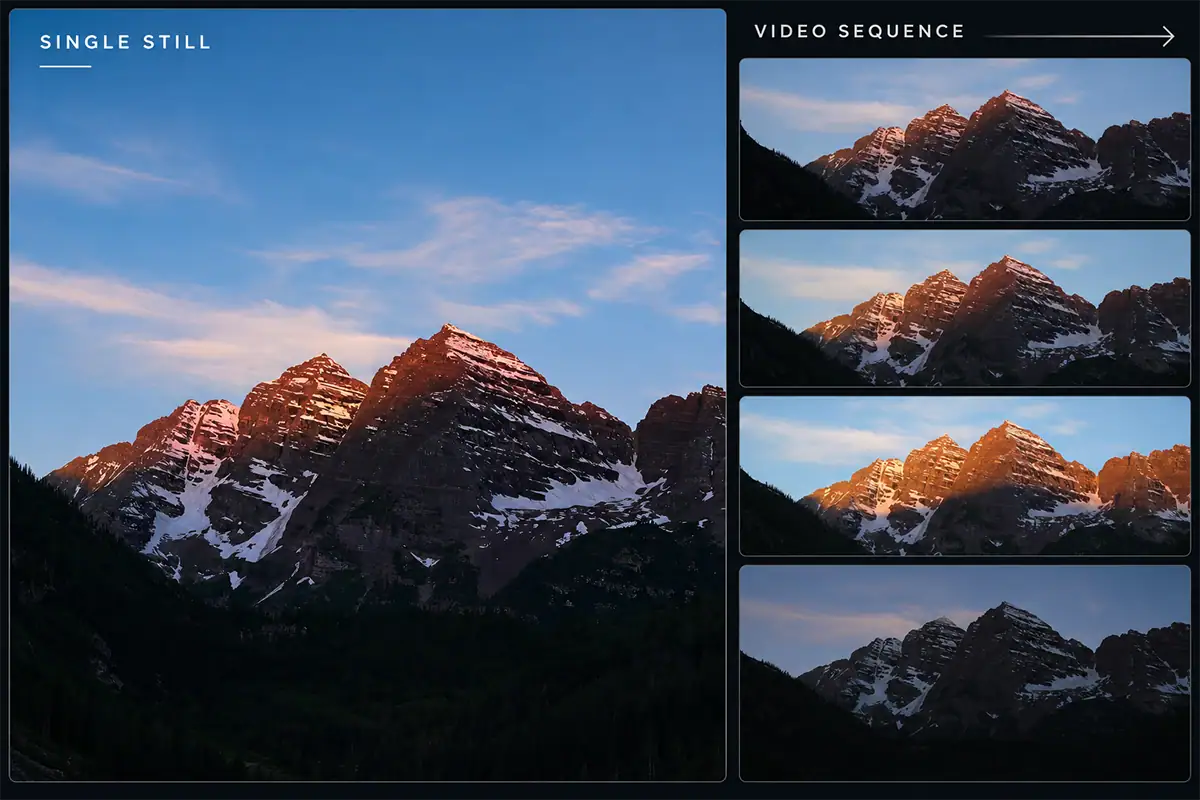
Photography captures a decisive moment, while video captures what happens over time. Each video shot must work for several seconds and connect naturally to the shots around it. Video therefore adds four important variables to the skills you already use as a photographer: time, movement, sound, and continuity.
Exposure, composition, light, color, focal length, and depth of field remain important. What changes is how you use them. Instead of trying to create one perfect frame, you begin thinking about a collection of shots that can work together to tell a story.
What You Already Know That Transfers
Almost every photography fundamental transfers directly to video. Exposure, aperture, ISO, focal length, perspective, compression, depth of field, composition, white balance, and your eye for good light all carry over unchanged. Only one thing is different: in video these choices have to hold steady for the length of a shot, not just for one frame.
If you already understand how focal length changes perspective or how aperture influences depth of field, you do not need to relearn those principles. You need to learn how to apply them over time. If you are new to motion altogether, our videography basics guide provides a broader introduction to the equipment, shooting principles, and terminology used in video.
The Habits That Cause Problems in Video
Five photography habits produce distracting video: changing shutter speed to control exposure, relying on Auto White Balance, shooting everything wide open, moving the camera without a reason, and hunting for one hero shot instead of collecting coverage. Video demands consistency from one moment, and one shot, to the next.
Learn it in this order: lock your settings, hold steady shots, capture enough coverage, add deliberate movement, fix your audio, then focus on storytelling. Once those fundamentals become familiar, practicing these basic videography techniques can help you strengthen framing, lighting, camera movement, and lens control.
What Camera Settings Do You Need to Change for Video?
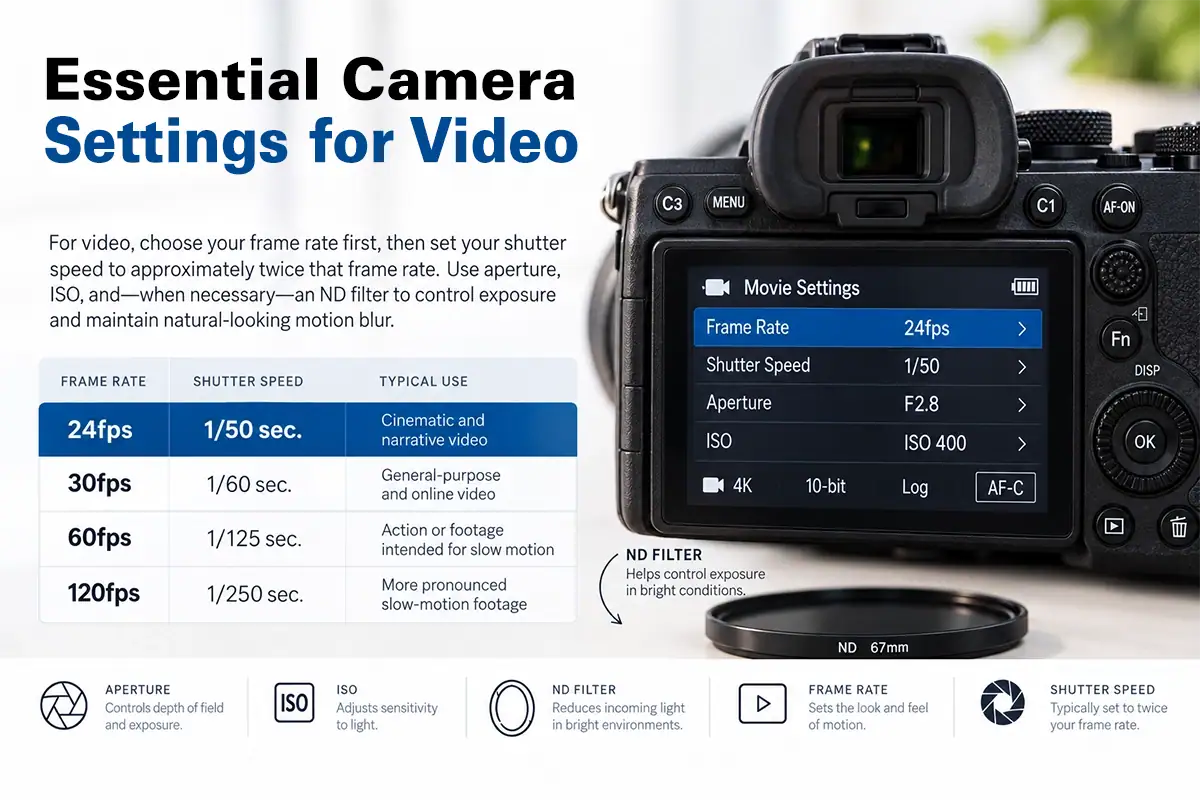
Choose your frame rate first, then set shutter speed to roughly twice that frame rate. Shutter speed is no longer an exposure control in video. It sets motion blur and stays fixed, so exposure moves to aperture, ISO, and an ND filter when the light demands one.
Many cameras crop the sensor at higher frame rates or certain resolutions, which changes your effective focal length. Check your camera’s crop behavior before you pick a lens.
A practical starting point is:
If you are still learning how these settings work together, our guide to shooting video with a mirrorless camera explains the key camera controls and setup considerations for recording video.
Frame Rate: What 24fps, 30fps, and 60fps Actually Communicate
Frame rate determines how movement reads on screen, and you set it before you shoot. 24fps delivers the motion cadence of narrative film. 30fps reads slightly smoother and suits general-purpose and online video. 60fps and 120fps capture fast action and give you frames to slow down in the edit.
Frame rate is a creative and delivery decision, not a quality setting. Higher is not better.
The 180-Degree Shutter Rule and Why It Matters
The 180-degree shutter rule sets shutter speed to twice the frame rate. At 24fps that is 1/50 second. The rule comes from film cameras, whose rotating shutters exposed each frame for half its duration, and it produces the motion blur viewers read as natural. Faster shutter speeds make movement look crisp and staccato. Slower speeds smear it.
This is why shutter speed stops working as an exposure control in video.
Why ND Filters Become Necessary
An ND filter cuts the light reaching the sensor so you can hold your frame rate, shutter speed, and aperture in bright conditions. Outdoors at F2.8 and 1/50 second, most cameras overexpose in daylight even at base ISO. An ND filter is the only way to keep those settings and still expose correctly.
A variable ND adjusts across a range of strengths as the light changes, which suits run-and-gun shooting. Match the filter to your largest filter thread and use step-up rings to share one filter across several lenses.
Set White Balance Manually
Set white balance manually and your color stays consistent across a shot and between every clip in the scene. Auto White Balance reacts to color and light changes while the camera rolls, and the resulting shift happens on screen in front of the viewer. A still photograph hides that behavior because it shows only one frame.
Choose an appropriate preset or Kelvin setting and keep it consistent until the lighting changes. Once your exposure and color are under control, techniques such as depth of field, lighting, framing, and camera movement can help you get a cinematic look without relying on effects to create it later.
What Should You Look for in a Lens for Video vs. Stills?
A photography lens is judged by the image it produces at a single instant. A video lens is judged by how it behaves while something is changing. Six things determine that behavior: aperture consistency, focus breathing, autofocus smoothness and noise, stabilization, focal length, and whether a zoom or prime suits how you shoot.
Understanding these differences can make choosing camera lenses for videography much easier because you can evaluate how a lens behaves during a shot rather than looking only at traditional still-photography specifications.
Zoom or Prime for Video?
Start with a zoom. One lens covers wide, medium, close, and detail framing with no lens changes, which lets you practice coverage and sequencing, the two skills that matter most once you start editing shots together. Primes serve low light, shallow depth of field, compact rigs, and controlled filmmaking.
Shooting video is not a reason to switch to primes. Pick the one that matches the shot you are trying to get.
For further information, explore our guide to camera lenses for videography and our Prime vs Zoom Lens: What’s the Difference and Which Should You Choose? article.
Which Lenses Should You Start With for Video?
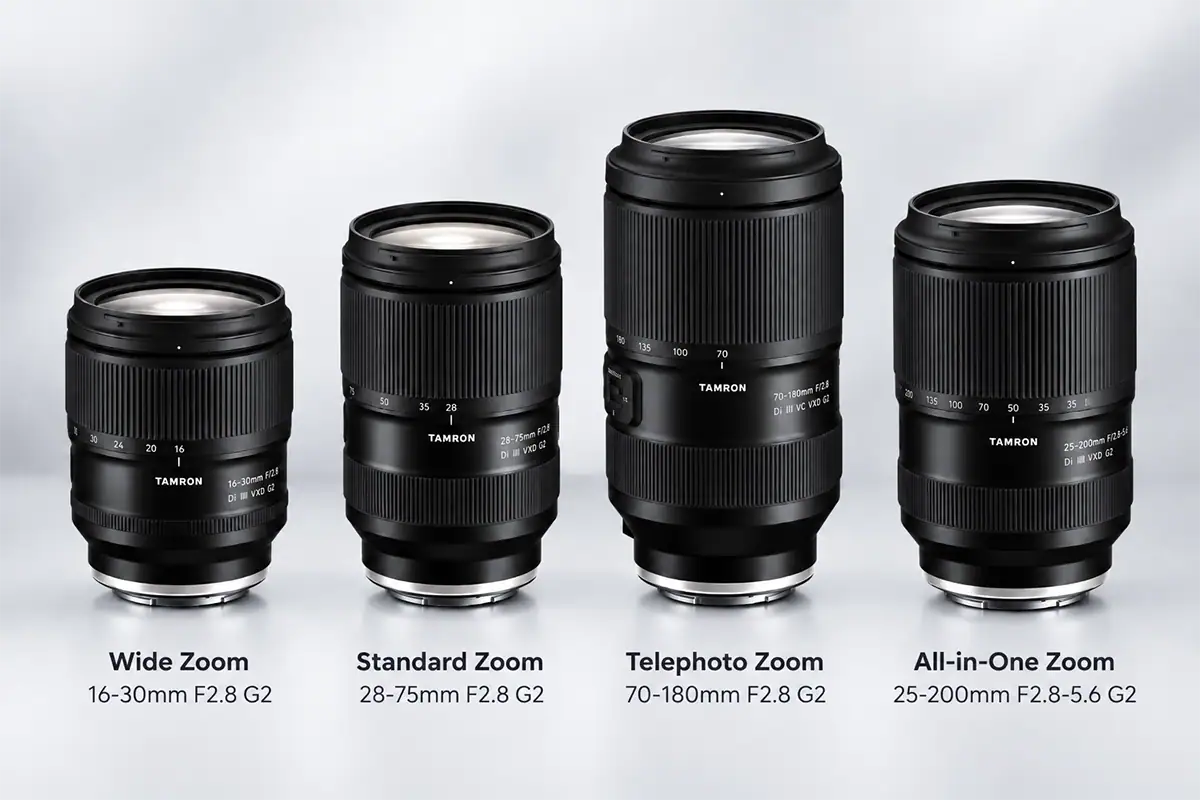
Start with one versatile lens rather than rebuilding your entire photography kit. A constant-aperture standard zoom is particularly useful because it can capture establishing shots, medium framing, people and details while keeping exposure predictable. Shoot first, then identify the specific limitation that another lens would actually solve.
Your First Lens: A Constant-Aperture Standard Zoom
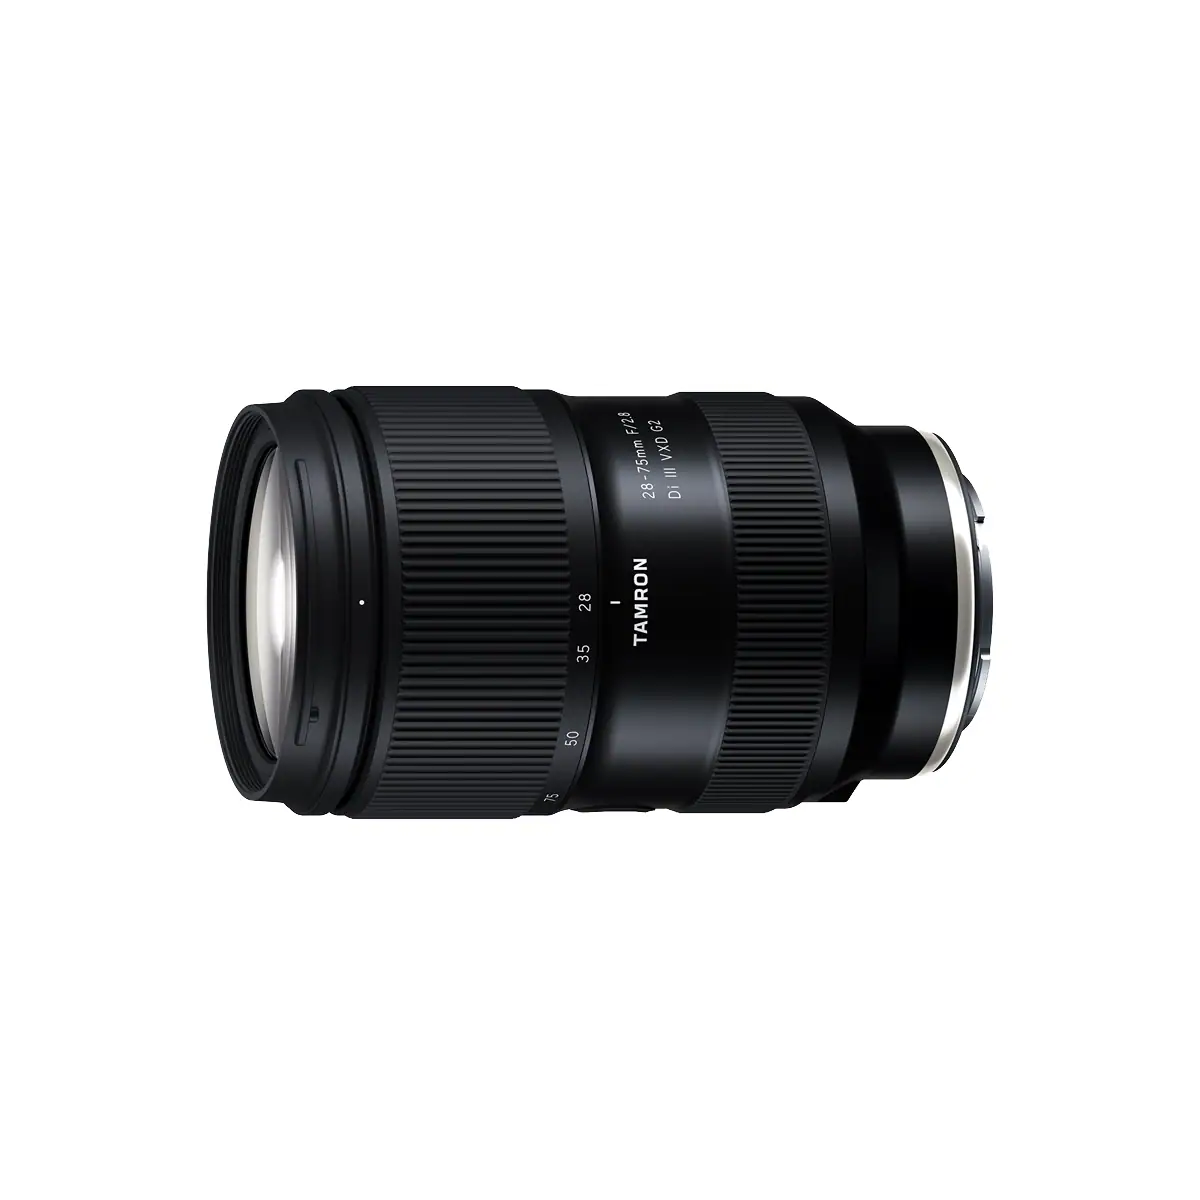
For full-frame mirrorless shooters, the Tamron 28-75mm F/2.8 Di III VXD G2 (A063) provides a versatile range and constant F2.8 aperture for general-purpose video. For APS-C cameras, the Tamron 17-70mm F/2.8 Di III-A VC RXD (B070) combines an extended standard zoom range, constant F2.8 aperture and Tamron VC stabilization.
Either type of lens allows you to learn framing and coverage without constantly interrupting the shoot to change lenses.
For Wide Work, Vlogging, and Handheld Movement
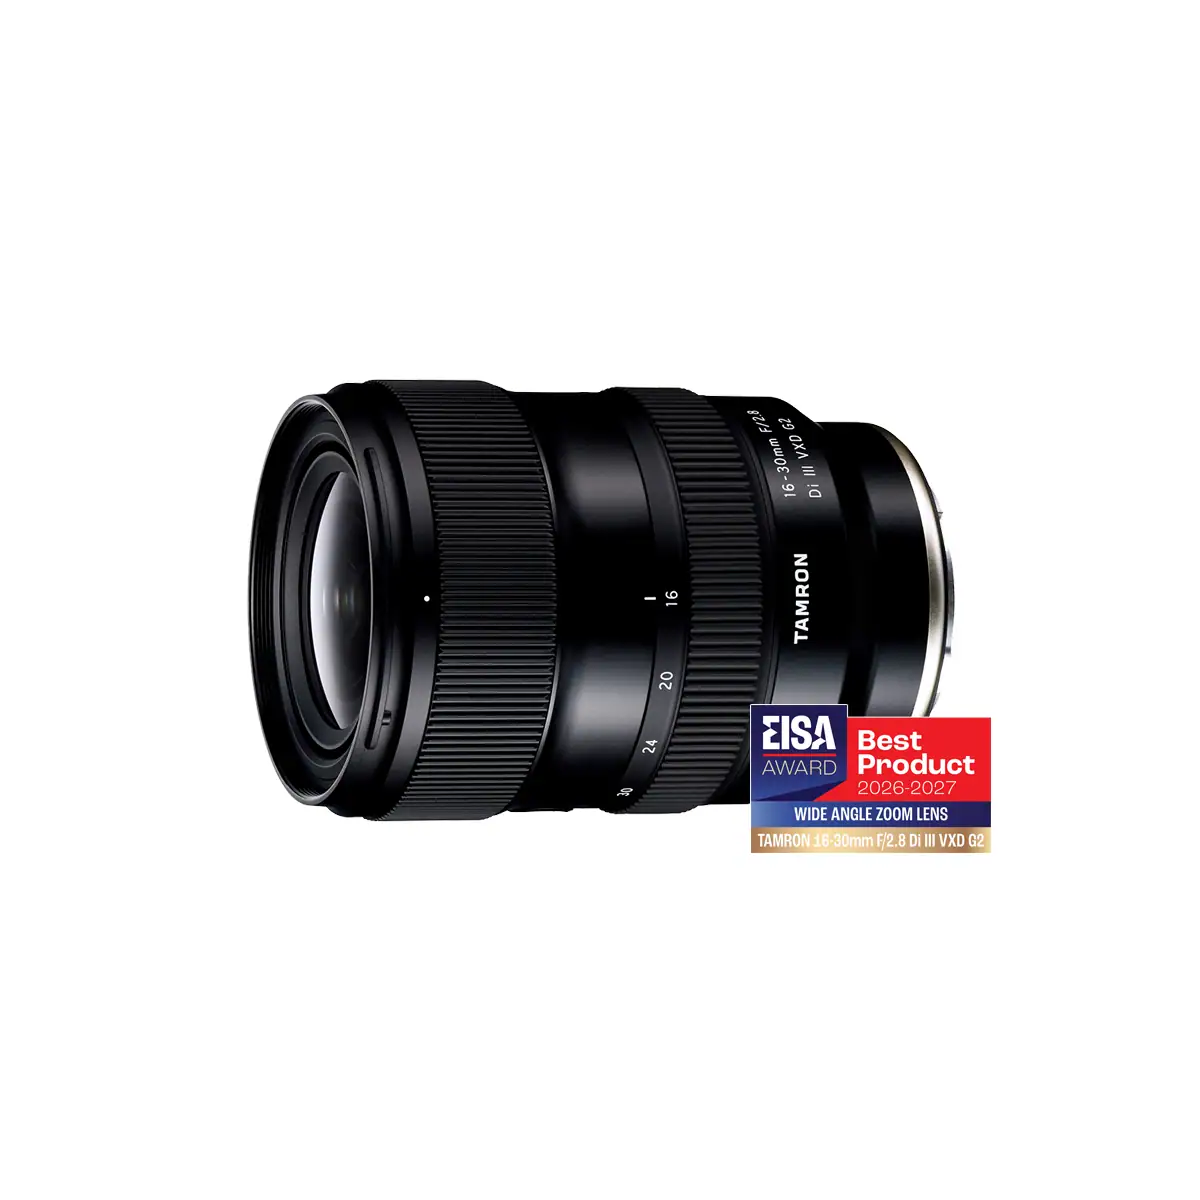
Wide lenses are useful when filming in tight spaces, vlogging at arm’s length, capturing establishing shots, or moving with a subject. The Tamron 20-40mm F/2.8 Di III VXD (A062) provides a compact wide-to-normal range, while the Tamron 16-30mm F/2.8 Di III VXD G2 (A064) reaches farther into ultra-wide territory.
Photographers planning to spend more time in front of the camera can also explore which focal ranges and lens characteristics work particularly well as camera lenses for vlogging.
For Reach: Events, Performances, and Compressed Detail
Telephoto focal lengths allow you to isolate subjects, record candid moments from farther away, and create strong compression. Because camera movement becomes more visible as focal length increases, stabilization or solid camera support becomes increasingly valuable.
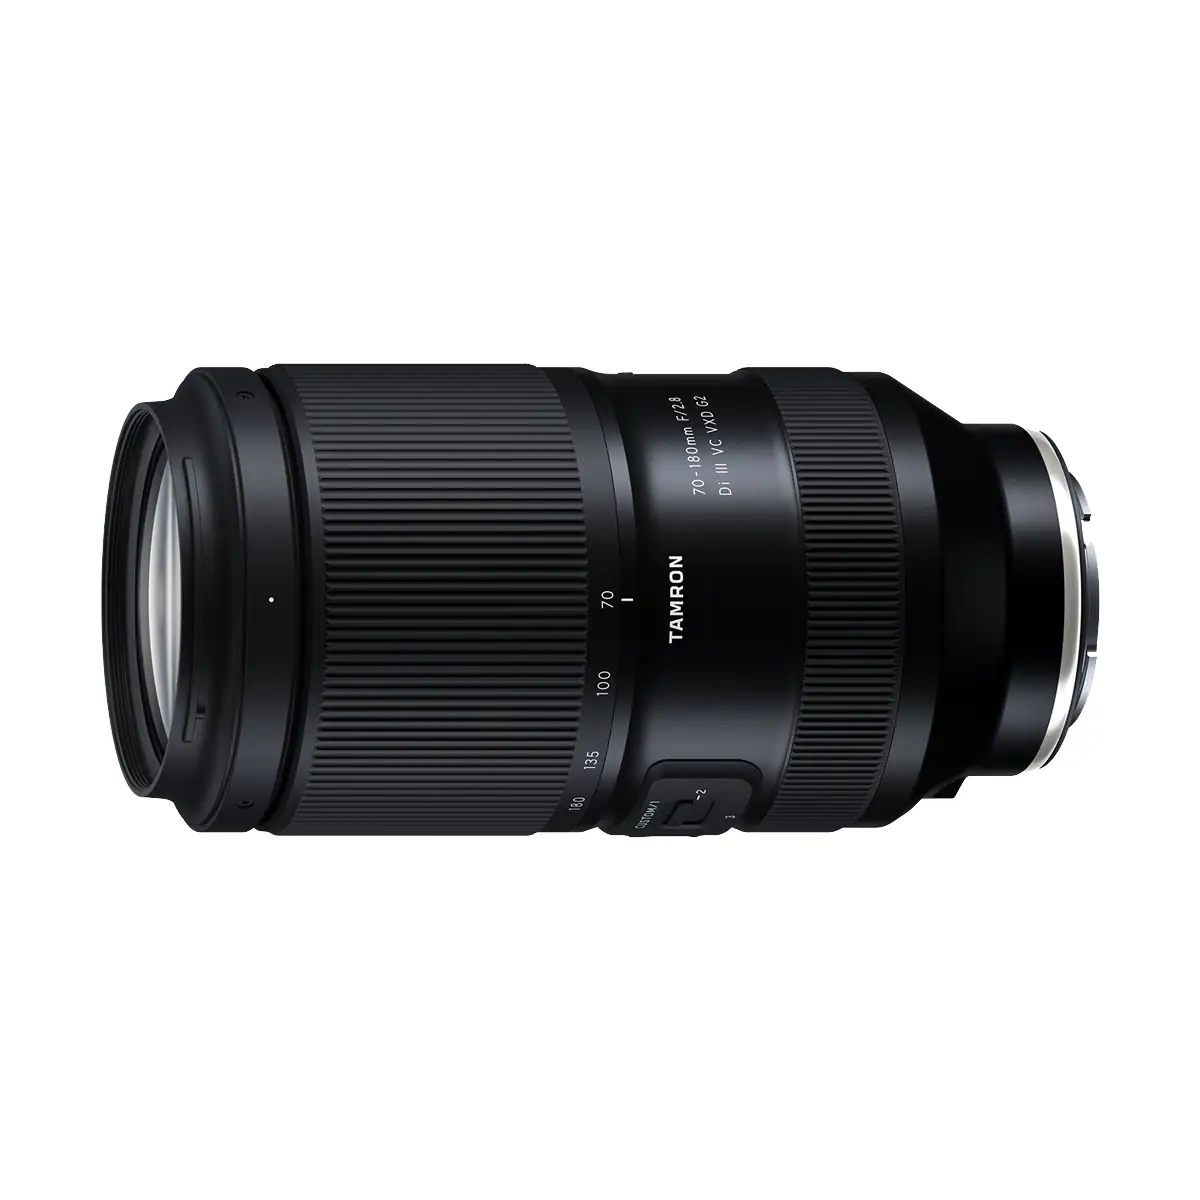
A fast telephoto zoom such as the Tamron 70-180mm F/2.8 Di III VC VXD G2 (A065) provides additional reach while adding VC stabilization for handheld shooting.
The All-in-One Option: One Lens, Fewer Changes
An all-in-one zoom gives up some of the aperture consistency of an F2.8 zoom in exchange for a much broader focal range. That can be an excellent tradeoff when travel, documentary, or run-and-gun shooting makes lens changes inconvenient.
The Tamron 25-200mm F/2.8-5.6 Di III VXD G2 (A075) can cover wide views, people, details and distant subjects with one lens. If you plan to zoom while recording, remember that its maximum aperture changes through the zoom range and set exposure accordingly.
That versatility can be especially valuable on location, where our guide to Tamron lenses for travel filmmaking explores how lens choice, portability, focal length, and shot variety work together when documenting a trip.
How Do You Shoot in Sequences Instead of Single Frames?
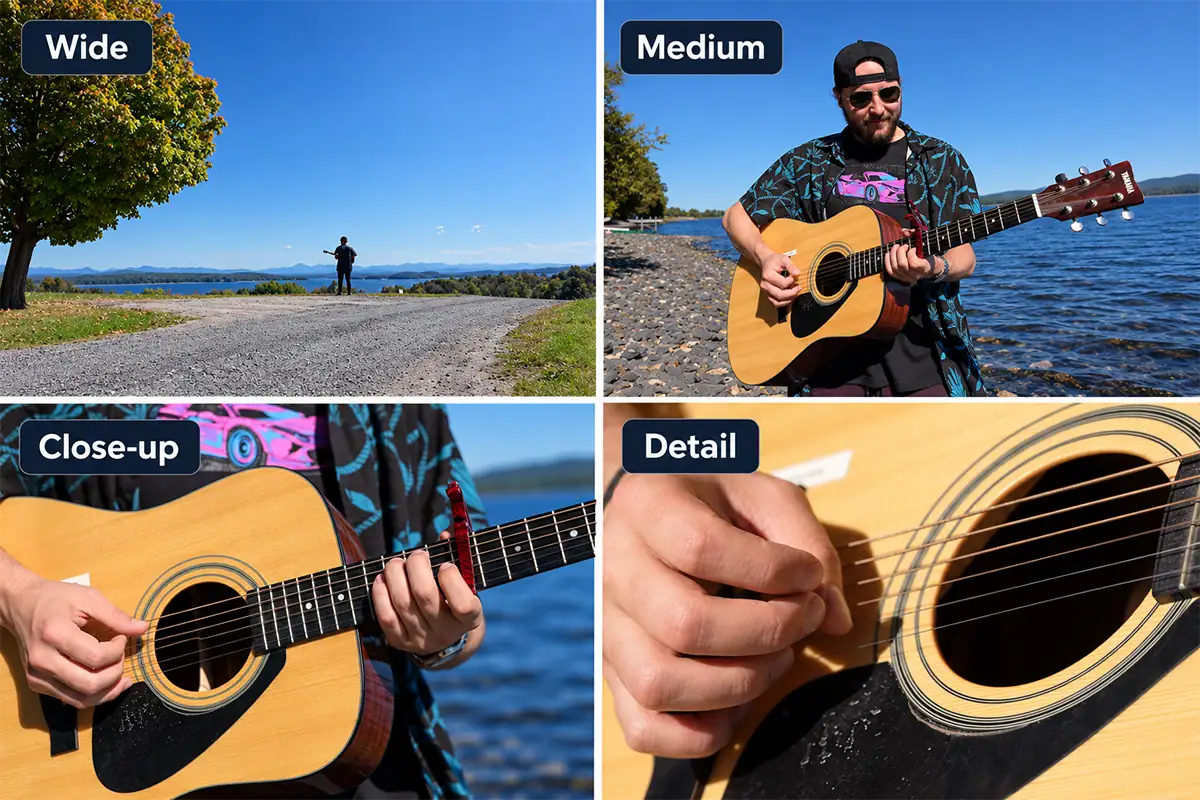
A photograph succeeds as one frame. Video succeeds as a set of shots that work together, so stop hunting for the perfect angle and start collecting coverage. Shoot the same action four ways: wide, medium, close-up, and detail.
Thinking this way is one of the biggest changes when moving from photography into filmmaking because composition now has to guide the viewer from one shot to the next. Our guide to filmmaking composition, direction, and focus work explores these storytelling decisions in greater depth.
The Wide, Medium, Close, Detail Pattern
The wide shot establishes the location. The medium shot shows the action. The close-up emphasizes the person or the object that matters. The detail shot adds texture. Shoot all four of every action and you hand the editor a sequence that cuts together instead of four unrelated clips.
For someone making coffee, for example, you might capture the room, the person at the counter, coffee pouring into the cup, and a close detail of steam or hands.
A-Roll and B-Roll: What the Terms Mean
A-roll is the primary content or action, while B-roll is supporting footage used to provide context, variety, or additional information. If someone is talking about making handmade guitars, the interview is A-roll; shots of the workshop, tools, hands shaping wood, and finished instruments are B-roll.
Photographers often adapt to B-roll quickly because each clip can be approached like a carefully composed moving photograph.
Composition Changes When the Subject Moves
Most photography composition principles remain useful in video, but you must also consider where the subject is going. Leave visual space in front of movement or the direction of a person’s gaze so the subject has room to move naturally within the frame.
Screen direction matters just as much. A person moving left to right in one shot and right to left in the next will disorient the viewer at the cut unless you made that choice deliberately.
Editing Basics That Make Sequences Work
Two editing techniques can dramatically improve a sequence: cutting on action, which hides a cut inside movement, and J-cuts or L-cuts, where audio begins before the next image or continues after the picture changes. Both help separate shots feel like part of one continuous experience.
Use clean cuts. Skip elaborate transitions. Coverage beats effects every time.
When Should the Camera Move — and How Do You Handle Focus?
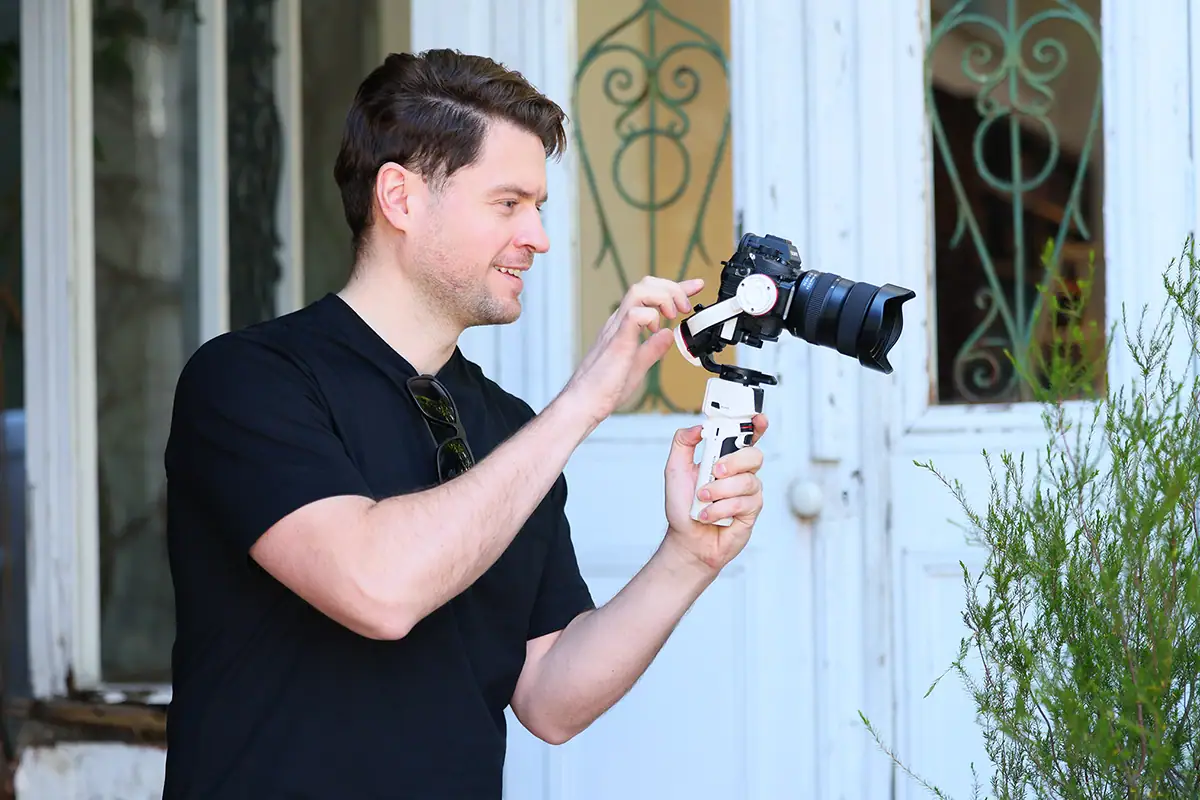
One of the most useful videography tips for beginners is to move the camera less, not more. Start with stable, intentional compositions and let your subject provide the movement. When the camera does move, give the movement a clear purpose. The same principle applies to focus: every visible change should direct the viewer’s attention rather than distract from it.
Learning the basics of camerawork for video shooting can help photographers understand how pans, tilts, tracking shots, and other movements affect the mood and meaning of a scene.
Start With Locked-Off Shots
A locked-off shot is a static shot on a tripod or other stable support, with the action unfolding inside a fixed frame. It is the most useful building block in video. Put the camera on support, frame carefully, and let the scene play. Stable footage cuts together reliably, and it makes your deliberate moving shots land harder by contrast.
A tripod with a fluid video head is what you want as soon as you add pans and tilts. A photo ball head will not produce a smooth move.
Pans, Tilts, Push-Ins, and Handheld
Every camera move follows the same structure: start still, make one controlled movement, end still. Those still frames on each end are what make the shot usable in an edit. Start with four moves: pan, tilt, push in or pull out, and track alongside the action.
For handheld shooting, keep your elbows close, soften your knees, hold the camera near your center of gravity, and move slowly. Controlled handheld footage can look natural and engaging; not every shot requires a gimbal.
Continuous Autofocus vs. Manual Focus
Use continuous autofocus with face, eye, or subject detection for interviews, family, travel, events, and any moving subject. It is the right default for mirrorless video. Switch to manual focus when you control both the subject’s movement and the camera position, and when the focus transition is itself part of the shot.
Learn to use focus peaking, focus magnification, and your camera’s autofocus transition speed and sensitivity controls where available.
Focus Pulls: Shifting Attention Without Moving the Camera
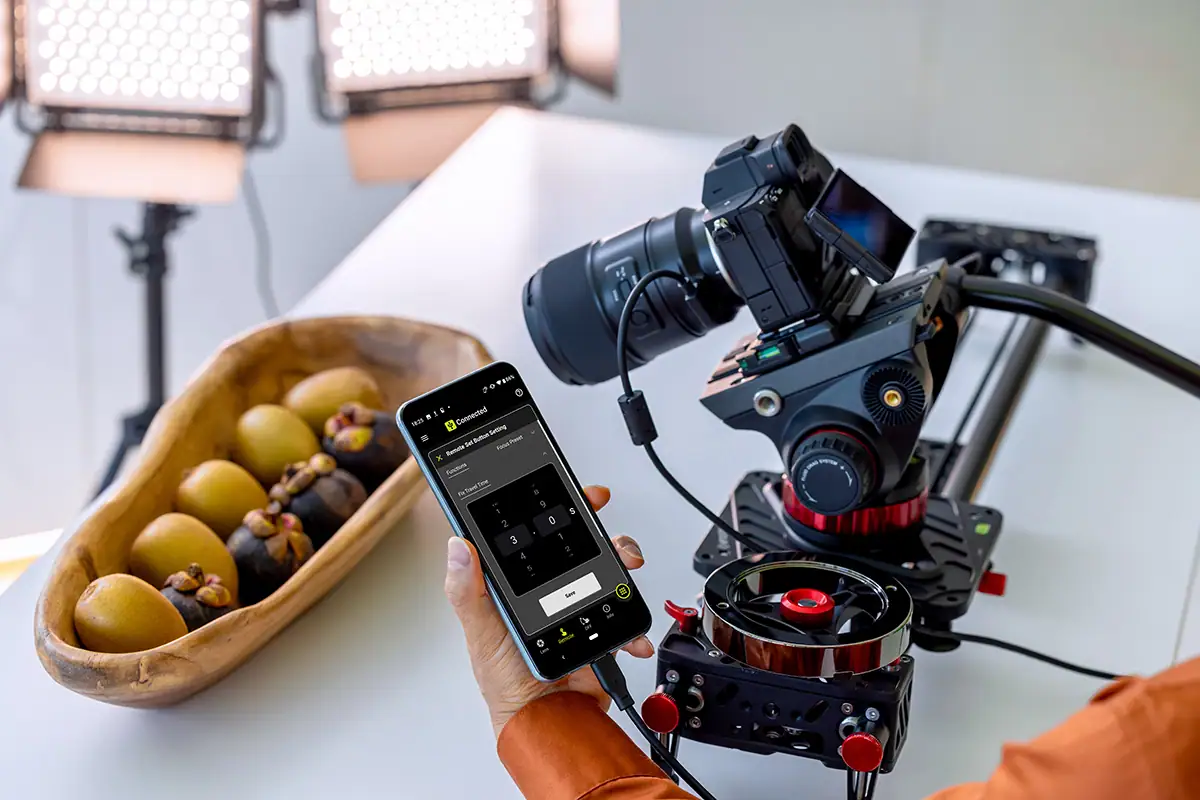
A focus pull changes what the viewer notices by moving focus from one part of the frame to another. You might begin with a coffee cup sharp in the foreground and then shift focus to the person sitting behind it, creating visual storytelling without moving the camera.
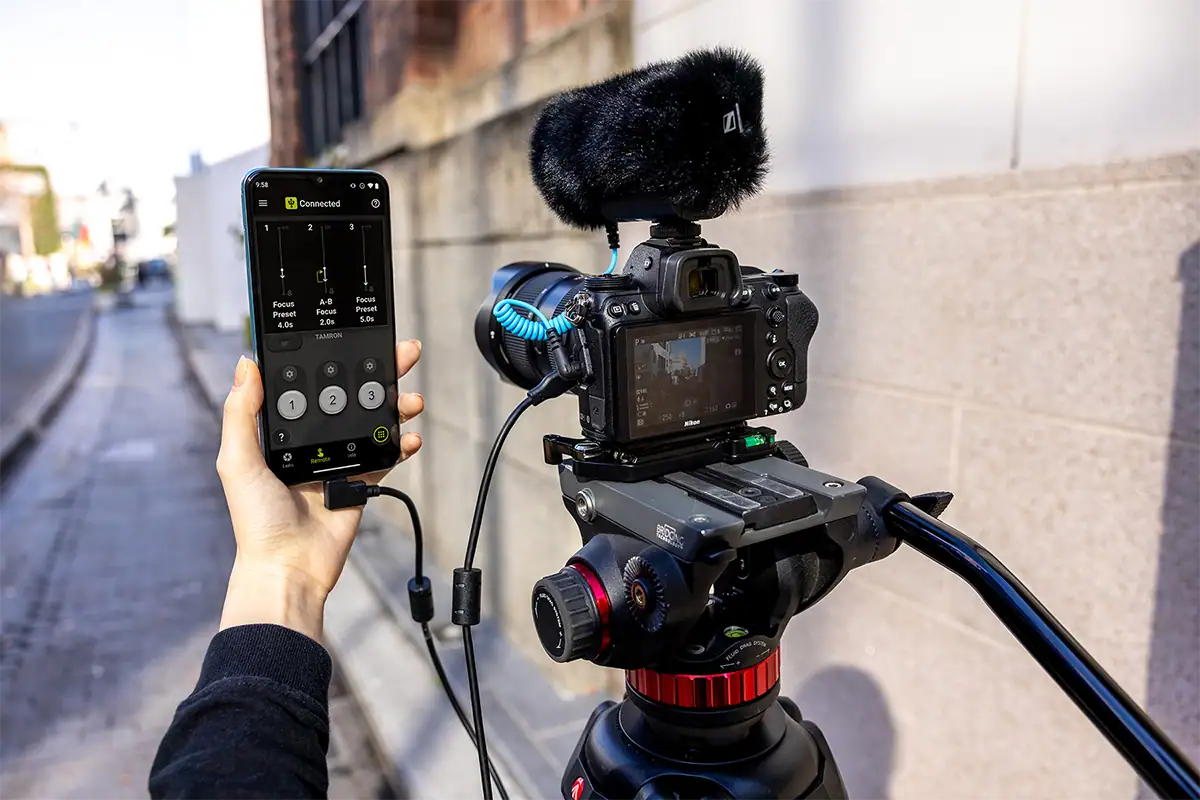
This is also one of the situations where focus breathing becomes most noticeable. For compatible lenses, TAMRON Lens Utility Mobile focus work provides additional ways to plan and control focus transitions for video.
Use Less Depth of Field Than You Think
Shoot most video between F2.8 and F5.6. That range gives you subject separation and enough focus depth to survive a moving subject. Very shallow depth of field flatters a still portrait, but it fails in motion: a person leaning a few inches forward drops straight out of a shallow focus plane, and the shot is unusable.
Open up because the story calls for it, not because the lens can do it.
Why Audio and Lighting Matter More Than Photographers Expect
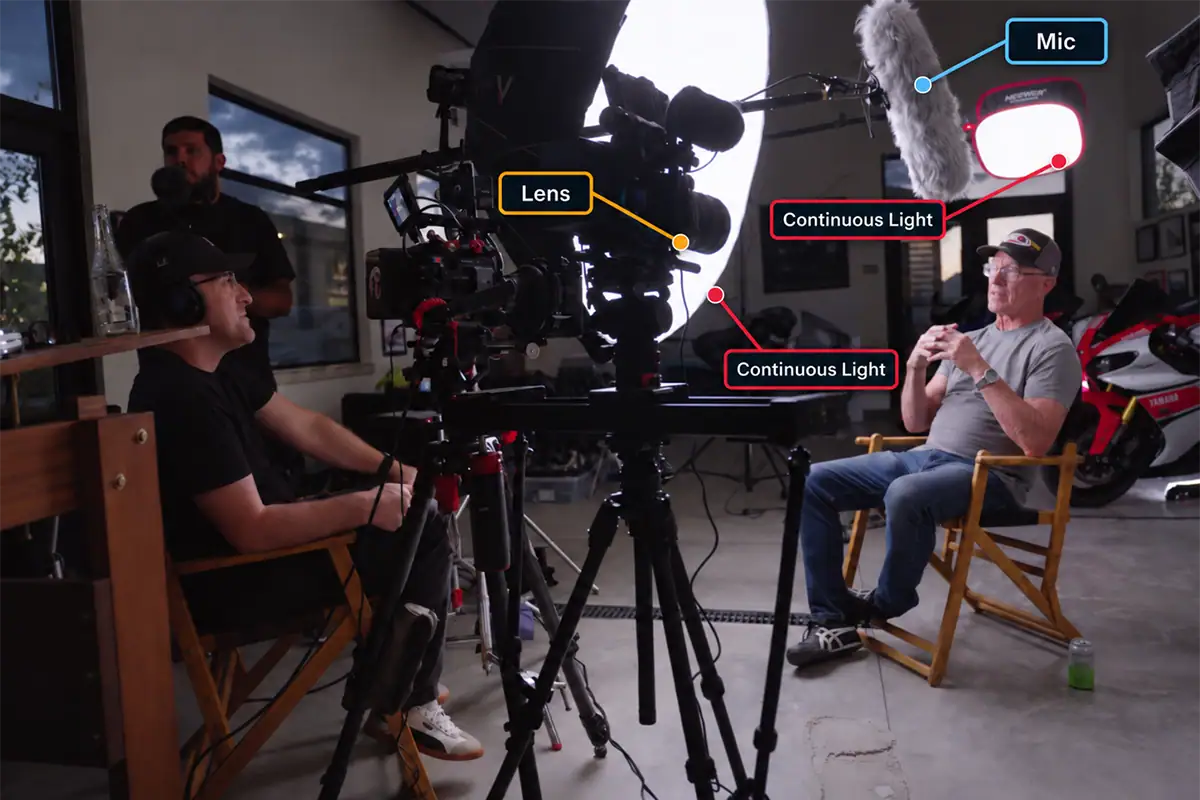
Audio and continuous lighting are the two genuinely new skills photographers pick up in video. A photograph needs no sound at all, and a flash only has to light one fraction of a second. Video has to record usable sound and hold usable light for the entire length of every shot.
These skills also become increasingly important as you progress beyond basic videography tips and into advanced videography techniques, where lighting, lens behavior, stabilization, and camera movement become more deliberate parts of visual storytelling.
Audio: Placement Beats Price
Getting a microphone closer to the speaker generally improves recording quality more effectively than placing a more sophisticated microphone far away. Your camera’s internal microphone can be useful for ambient or reference sound, but dialogue often benefits from an on-camera shotgun microphone or wireless lavalier placed closer to the subject.
Choose quiet locations when possible, avoid highly reflective rooms, and use headphones to monitor important recordings.
Lighting: Flash Does Not Help Here
Video requires continuous light rather than a momentary flash, but the lighting knowledge you already have still applies. Direction, softness, color, contrast and the size of the light source remain fundamental.
A simple place to start is to position your subject roughly 45 degrees from a large window and expose for the face. A reflector, practical lamp or small LED can then provide additional control without building a complicated lighting setup.
What Should You Shoot First? Four Beginner Projects
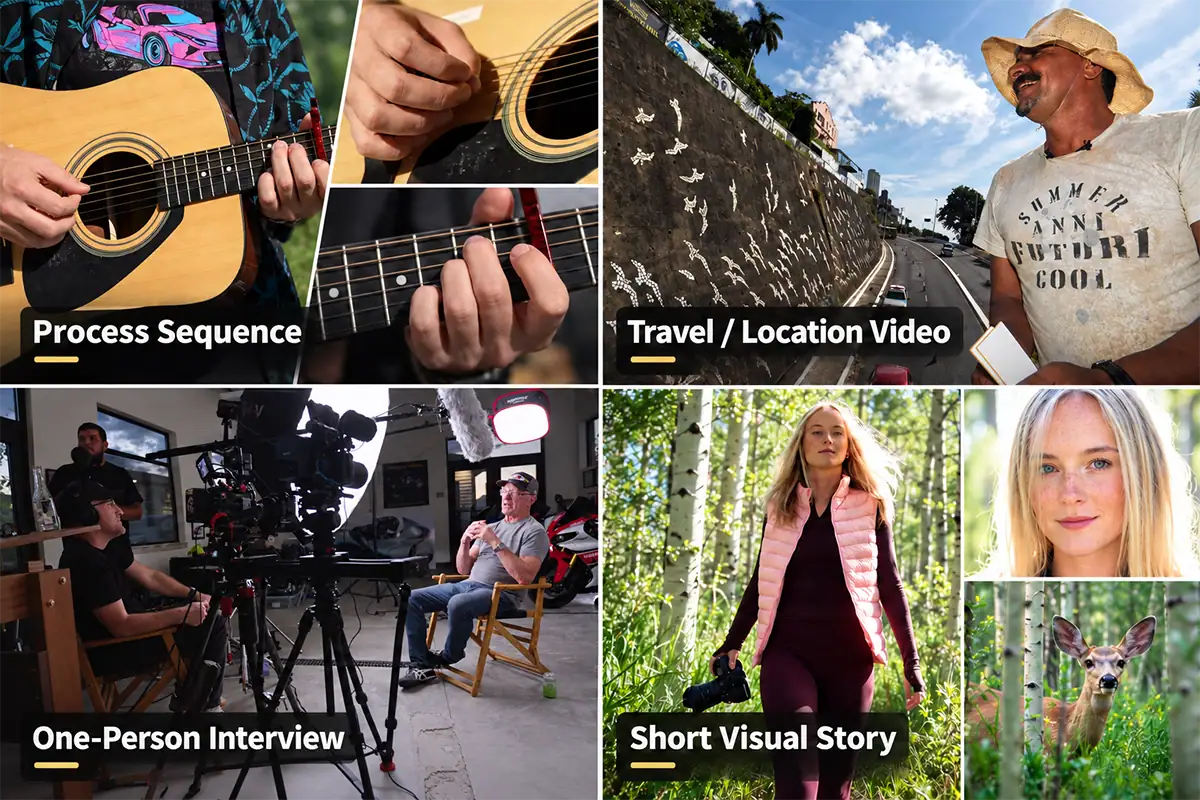
The best way to put these videography tips for photographers and beginners into practice is to begin with a small project that removes unnecessary complications. Start with a short visual sequence with no dialogue, then add location coverage, audio and eventually storytelling. Each project should introduce one new skill without requiring an entirely new camera kit.
Project 1: A Ten-Shot Process Sequence
Choose a simple activity such as making coffee, preparing breakfast, painting, packing a camera bag, or arranging flowers. Capture approximately ten shots using wide, medium, close and detail framing, then edit the sequence into a 20- to 30-second video.
Do not use dialogue. Concentrate on holding each shot long enough and learning how one composition connects to another.
Project 2: A Location Sequence
Visit a visually interesting location and create a 30- to 60-second sequence. Capture an establishing shot, wide view, medium framing, close-up, detail, one moving shot, a human element and a closing image.
This exercise helps photographers move from simply recording attractive clips to constructing a sense of place—an essential skill for travel video. The same approach is explored further in our guide to travel filmmaking with Tamron lenses.
Project 3: A One-Question Interview
Ask one person one question and record the answer, then capture B-roll related to what they discussed. Cutting the interview and B-roll together introduces several fundamental skills at once: exposure consistency, framing people, autofocus, audio, continuous lighting, coverage and editing rhythm.
Keep the question and answer short so the exercise remains focused on technique rather than production complexity.
Project 4: A Sixty-to-Ninety Second Story
Create a simple story with a beginning, middle and end. For example, film a photographer selecting equipment, traveling to a location, setting up a shot and making the final image.
At this stage, you are no longer simply collecting attractive clips. You are deciding what information the viewer needs, when they need it, and how each shot advances the story.
Where to Go After These
Once you complete several small projects, your actual limitations become much clearer. You may discover that you need more stabilization, better audio, additional lighting, a different focal range, or more advanced control over focus and camera movement.
From there, you can build specific skills instead of trying to learn everything at once. You might practice how to start vlogging, move into mastering cinematic videography, or challenge yourself to create a complete piece using a two-shot music video tutorial.
Start With the Lens You Have, Then Choose the One You Need
Your best first video lens is probably already in your bag. Shoot enough footage to find a real limitation before you buy anything. Each limitation points at a specific fix: autofocus noise or hunting means you need a quieter focusing system, unstable handheld footage means you need stabilization, and visible breathing during focus pulls means focus behavior is what matters on your next lens.
Video demands different things from a lens than stills do. That does not mean you need a separate video kit. One versatile lens that performs in both disciplines is what carries a hybrid creator through the transition.
When you know what you need to improve, use the Tamron lens finder and filter/compare tool to compare focal lengths, mounts and lens options for the type of video you want to create.
Where to Buy Tamron Lenses
Explore Tamron lenses for photography and video using the Tamron lens finder, then choose the focal range and features that fit your camera and shooting style. Tamron lenses are available at an authorized Tamron dealer near you or directly at the official TAMRON Store.
Frequently Asked Questions About Videography Tips for Photographers & Beginners
What frame rate should I shoot video at?
For general video, start with 24fps or 30fps. Use approximately 1/50 second shutter speed for 24fps and 1/60 second for 30fps. Choose 60fps or higher when you need smoother fast-action capture or want footage that can be slowed during editing.
What is the 180-degree shutter rule?
The 180-degree shutter rule recommends a shutter speed approximately twice your frame rate. At 24fps, for example, a camera setting around 1/50 second produces the amount of motion blur commonly associated with natural-looking video movement.
Do I need special lenses for video?
No. Start with the photography lenses you already own and determine whether they meet your needs. Video may make features such as quiet autofocus, stabilization, aperture consistency, focus behavior and focal range more noticeable, but a separate set of dedicated video lenses is not necessary for most photographers beginning to shoot motion.
What is focus breathing?
Focus breathing is an apparent change in framing or angle of view when a lens shifts focus from one distance to another. It is particularly noticeable during video focus pulls because the viewer sees the entire transition rather than only the final focused frame.
What is the difference between A-roll and B-roll?
A-roll is the primary video content, such as an interview or main action. B-roll is supporting footage that provides context, illustrates what is being discussed, adds visual variety, or helps cover edits in the primary footage.
What lens is best for photographers learning video?
A versatile constant-aperture standard zoom is an excellent starting point because it can cover wide, medium, close and detail shots without frequent lens changes. For many photographers, an F2.8 standard zoom also provides a useful combination of low-light capability, depth-of-field control and predictable exposure throughout the zoom range.
About the Author

André Costantini is an Emmy Award-winning professional photographer, filmmaker, and educator with more than 30 years of experience in visual storytelling. His work encompasses documentary filmmaking, commercial production, fine art photography, portraiture, and travel. André received a Regional Emmy Award for Ground Intelligence: Covering COVID With John Moore and co-directed the feature documentary Bel Borba Aqui. He has taught photography and filmmaking seminars throughout the United States, Canada, and the Caribbean. Through his articles for the Tamron blog, André shares practical techniques, creative inspiration, and professional insights that help photographers create stronger, more meaningful images. Read André’s full bio>>