Instant Savings
 Rebate Claims
 Support
 Find a Dealer
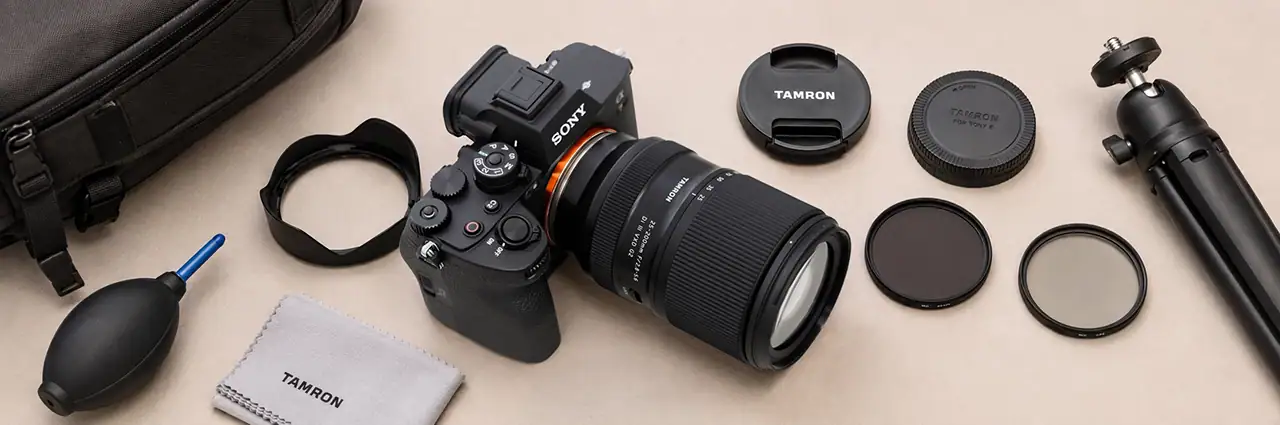
The right camera lens accessories can solve real problems in the field, from controlling reflections and bright light to reducing flare, extending focal reach, protecting expensive lenses, and keeping gear organized. Understanding what each accessory does makes it easier to build a photography kit around the subjects you actually shoot rather than buying equipment you rarely use.
Table of Contents
- What are the Different Types of Camera Lens Accessories?
- What Are Lens Filters?
- What Are Lens Hoods?
- What Is a Camera Teleconverter?
- What are Extension Tubes for Cameras?
- Camera Lens Protection Accessories
- Camera Bags, Lens Pouches, and Straps
- Other Camera Accessories Worth Knowing
- How to Pick Camera Lens Accessories
- Choosing the Right Camera Lens Accessories for Your Photography
- Frequently Asked Questions
What are the Different Types of Camera Lens Accessories?
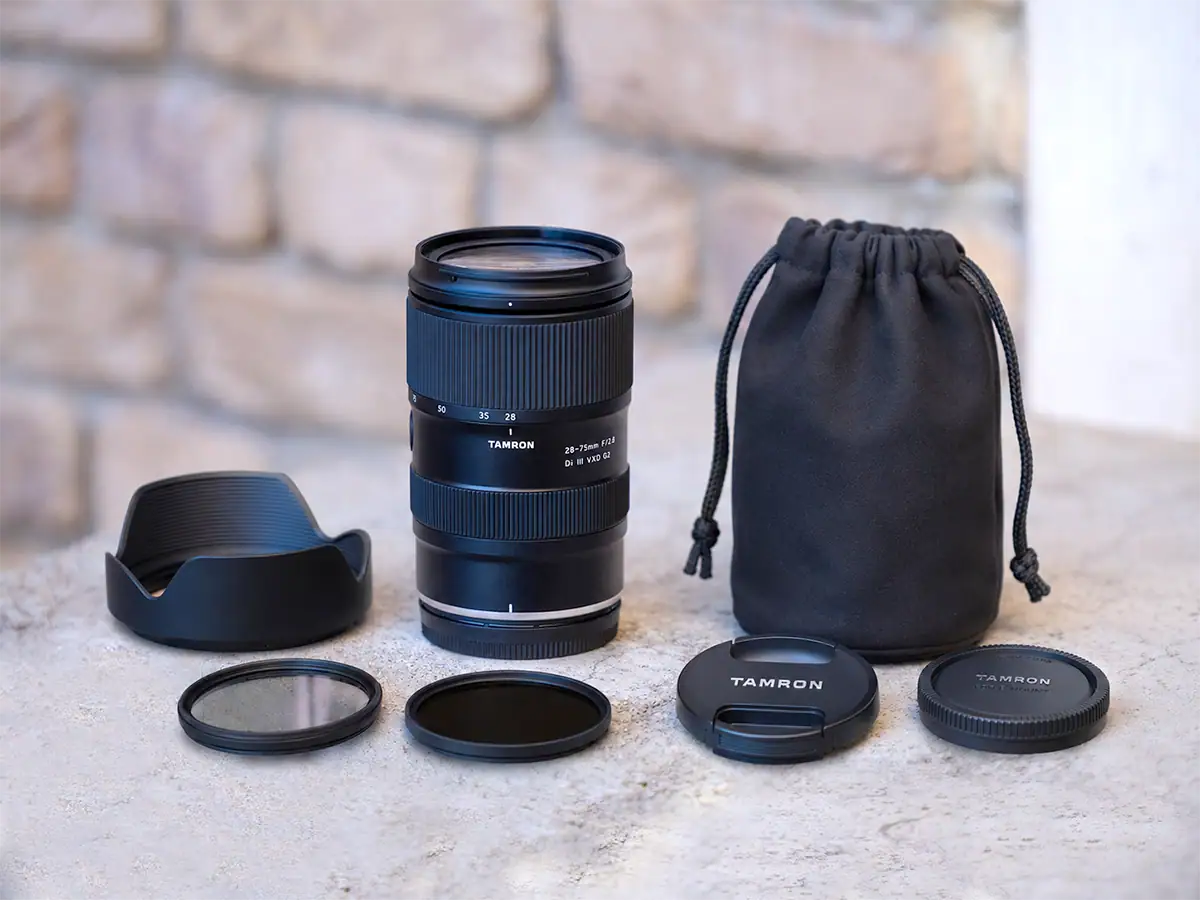
Camera lens accessories are supplementary tools—including filters, hoods, teleconverters, extension tubes, and protective gear—that attach to or work alongside a lens to enhance image quality, expand creative possibilities, and safeguard optical equipment. Choosing the right accessories directly improves what you can capture in the field.
Different types of camera lens accessories solve different photographic problems. Filters control light and reflections, hoods reduce flare, teleconverters extend reach, extension tubes improve close-focus capability, and protective accessories help safeguard expensive glass. Broader photography gear accessories such as camera bags, memory cards, spare batteries, straps, and tripods complete a practical working kit.
For beginners, memory cards, lens protection such as a UV filter or hood, a camera bag, spare batteries, and a tripod are commonly among the first accessories worth considering. This guide begins with accessories that directly attach to or interact with lenses before moving into the supporting gear that helps photographers carry, stabilize, protect, and use their equipment effectively.
Key Takeaways:
- Start with accessories that solve problems you encounter regularly.
- A lens hood and circular polarizer provide value across many photography styles.
- ND and GND filters are especially useful for landscape and video work.
- Teleconverters trade some light and image quality for additional reach.
- Extension tubes provide an affordable route into close-up photography.
- Lens protection, cleaning tools, and a secure carrying system help protect your investment.
What Are Lens Filters?
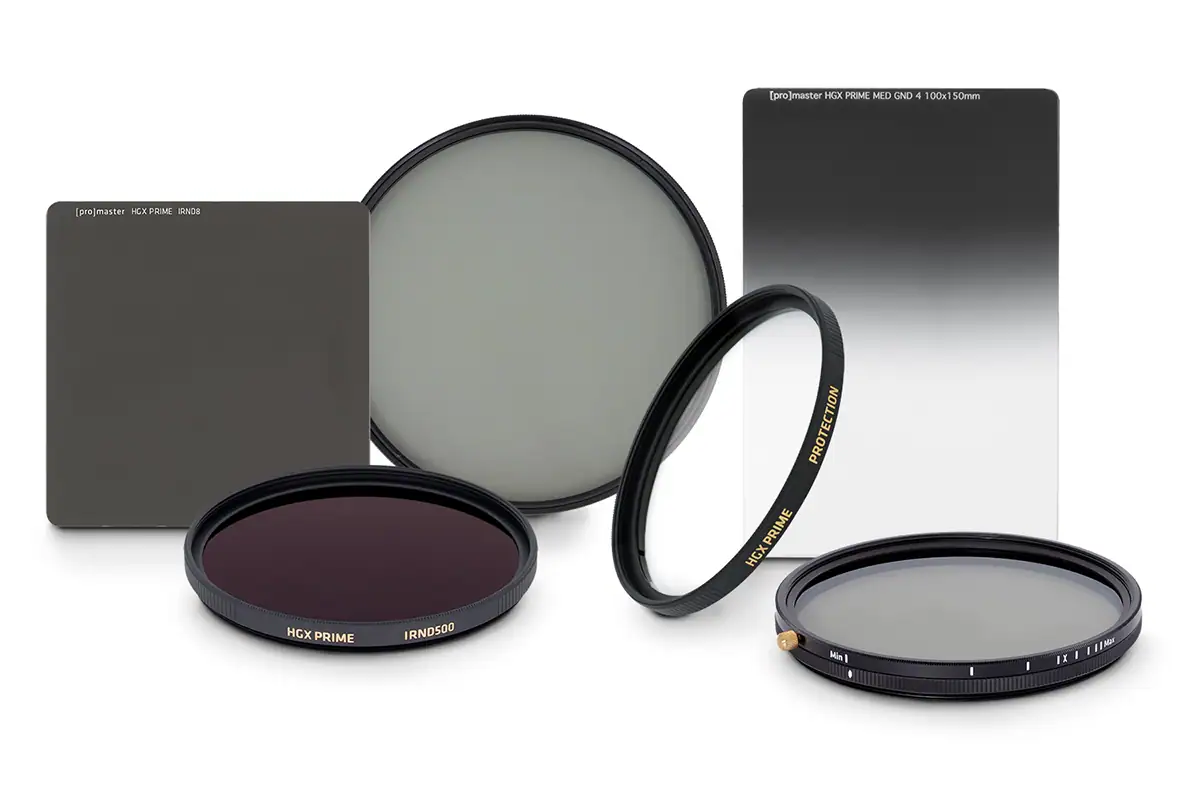
A lens filter is a flat or shaped piece of optical glass or resin that mounts to the front of a camera lens to alter exposure, color, reflections, or creative effects before light reaches the sensor. Filters generally fall into five functional groups: exposure control, polarization, graduated filters, protective filters, and specialty creative filters.
Circular filters screw directly into a lens’s front filter thread, while square and rectangular filters typically slide into a holder attached to the lens. The correct system depends on the lens’s filter diameter, the photographer’s workflow, and whether the same filters need to be shared across multiple lenses.
Neutral Density Filters
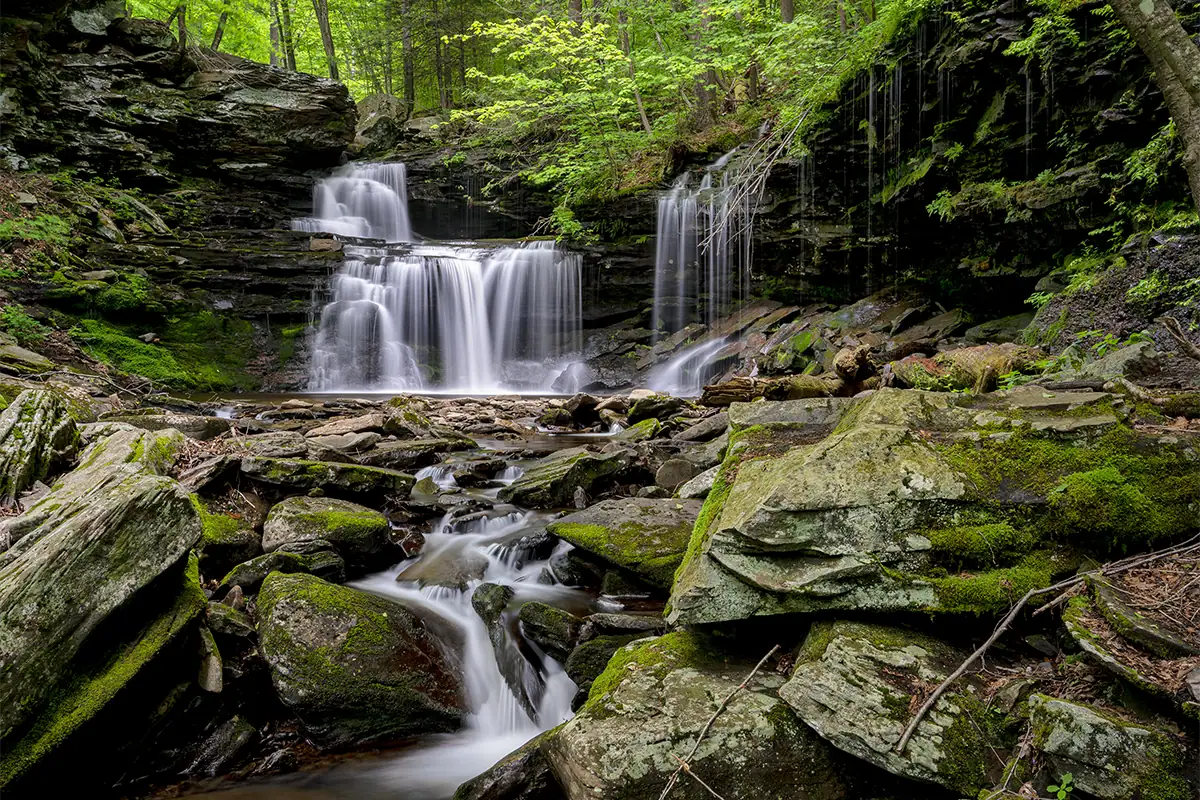
An ND filter reduces the amount of light entering the lens without significantly changing color, functioning much like sunglasses for a camera. A neutral density filter for photography is especially useful when the photographer needs exposure settings that would otherwise be impossible in bright conditions.
The three primary uses are:
- Long-exposure photography: Slower shutter speeds can smooth moving water, create cloud streaks, or blur moving subjects even during daylight.
- Shallow depth-of-field in bright light: An ND filter lets photographers use a wide aperture without overexposing the image.
- Video and cinema work: ND filters allow video shooters to maintain an appropriate shutter speed while controlling exposure outdoors.
Fixed ND filters provide a predetermined amount of light reduction. Variable ND filters allow photographers to adjust density by rotating the filter, making them convenient for changing light conditions and video. At extreme settings, however, some variable ND filters can develop uneven cross-polarization or an X-shaped pattern, so photographers should test their filters before important assignments.
For photographers specifically interested in creating smooth waterfalls and flowing-water effects, see Tamron’s Silky Water Photography: Slow Shutter Guide.
Circular Polarizer Filters
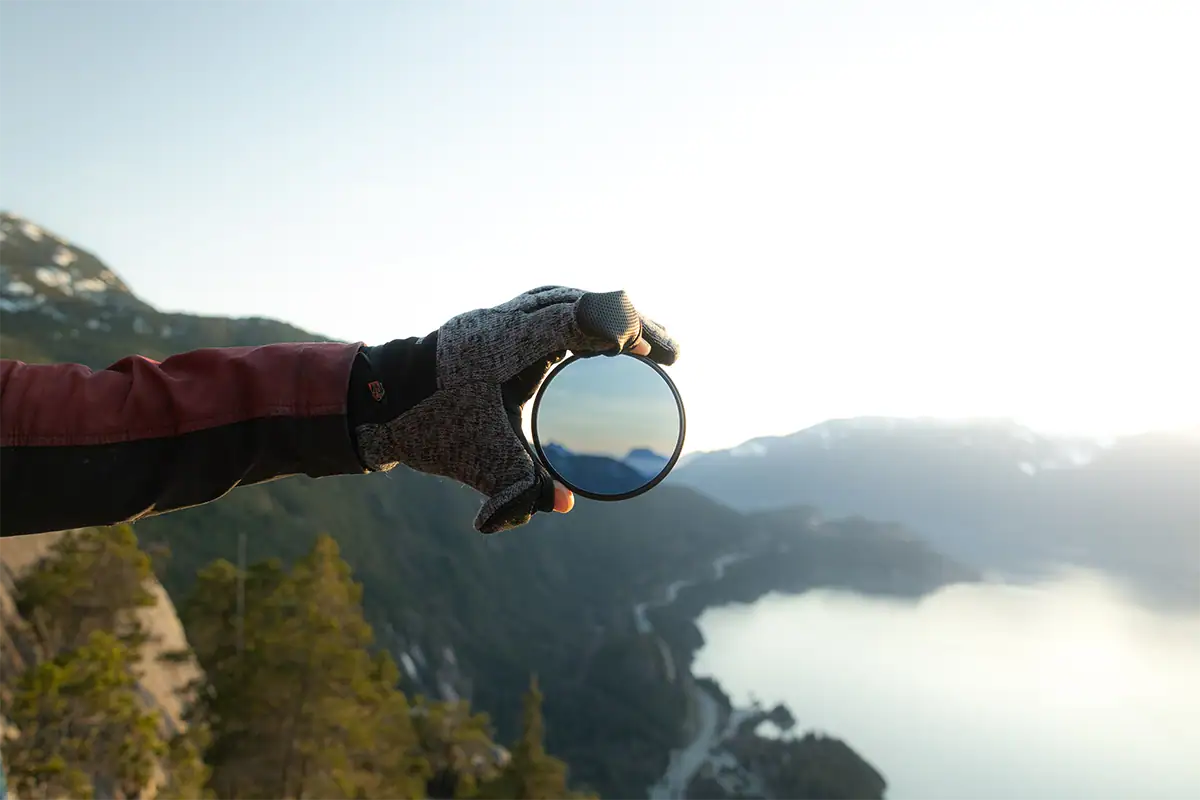
A circular polarizer, or CPL filter, reduces reflected light to control glare, deepen blue skies, and improve color saturation in many outdoor scenes. Unlike many digital adjustments, the optical effect of a circular polarizer lens filter cannot be completely recreated later because the filter changes the light before it reaches the camera sensor.
The outer ring rotates to change the degree of polarization. The strongest effect is generally seen when the camera is pointed roughly 90 degrees from the primary light source.
Photographers commonly use a CPL filter to:
- Reduce reflections from water, wet rocks, leaves, and other non-metallic surfaces.
- Increase the apparent depth and richness of blue skies.
- Improve foliage color by removing reflective glare.
- See more clearly through glass or water when reflections would otherwise obscure the subject.
A circular polarizer also reduces the amount of light reaching the sensor, commonly by approximately one to two stops. That light loss should be considered when shutter speed is important.
Photographers using specialized internal polarizing systems with certain super-telephoto equipment should also pay close attention to manufacturer guidance and weather sealing, particularly when working in humid environments.
Graduated Neutral Density Filters

A graduated neutral density filter transitions from dark neutral density at one edge to clear at the other, allowing photographers to darken a bright portion of the scene while leaving the rest largely unaffected. A graduated ND filter for landscapes is particularly useful when the brightness difference between the sky and foreground is difficult to capture in one exposure.
Three common designs address different types of horizons:
- Hard-edge GND: Features a relatively sharp transition and works well with flat horizons such as oceans and open plains.
- Soft-edge GND: Uses a gradual transition suited to mountains, trees, buildings, and irregular horizons.
- Reverse GND: Places the strongest density near the center of the filter and is especially useful when the brightest part of a sunset sits directly along the horizon.
High-quality filters from established optical manufacturers are designed to minimize unwanted color shifts. Brands such as Breakthrough Photography, for example, offer GND options intended to maintain neutral color during landscape work.
HDR blending can accomplish some similar exposure-balancing goals with multiple still images, but a physical GND filter captures the scene in a single exposure. That makes the technique particularly relevant for video, moving subjects, waves, foliage, or other situations where bracketed frames cannot be combined cleanly.
Specialty Creative Filters

Specialty creative filters produce in-camera optical effects such as starburst rays, cinematic diffusion, flare, and anamorphic-style streaks that can be difficult to reproduce with the same organic quality in post-processing.
Popular creative photography filters include:
- Star and starburst filters, which turn bright point light sources into radiating patterns.
- Diffusion and mist filters, which soften highlights and reduce digital-looking contrast for portrait and video work.
- Streak filters, which create horizontal or directional flare reminiscent of anamorphic optics.
- Prism and radiant filters, which refract light and introduce organic flare, reflections, or color effects.
Products such as the PrismFX Radiant filter are examples of filters designed specifically around intentional optical flare and distortion.
Creative filters are best tested during personal or non-critical shoots first. Small changes in light direction, aperture, focal length, and filter strength can dramatically affect the final image.
Filter Quality and Coating Considerations
Filter quality directly affects whether a filter helps preserve image quality or introduces unwanted artifacts. Well-made, multi-coated optical filters are designed to reduce internal reflections, ghosting, flare, and color shifts.
Common problems with lower-quality filters include:
- Magenta, green, or other unwanted color casts.
- X-pattern artifacts from variable ND filters at extreme settings.
- Additional flare or ghosting.
- Reduced corner sharpness.
- Vignetting caused by thick filter rings on wide-angle lenses.
Price often correlates with better optical glass, coatings, construction, and quality control, especially among established filter manufacturers. A practical approach is to invest most heavily in the filters used frequently—such as a primary CPL or ND filter—while reserving more affordable options for occasional creative experimentation.
What Are Lens Hoods?
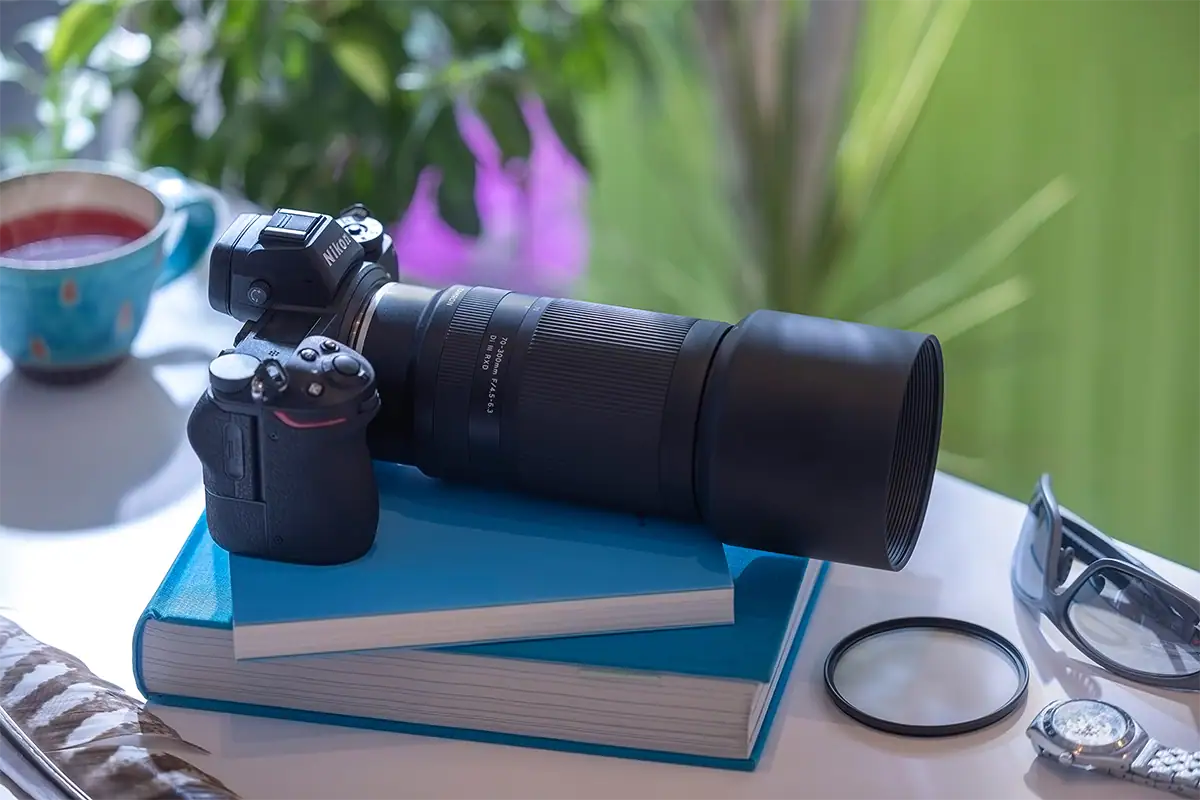
A lens hood is a shaped attachment that mounts to the front of a camera lens to block stray light, reduce lens flare, and provide physical protection for the front element. For many experienced photographers, using a hood is standard operating practice rather than an accessory reserved for special situations.
Lens hoods are frequently supplied with lenses yet remain underused. Keeping the correct hood mounted is one of the simplest ways to improve flare resistance while also adding a physical barrier between the front element and accidental impacts.
Petal vs. Cylindrical Lens Hoods
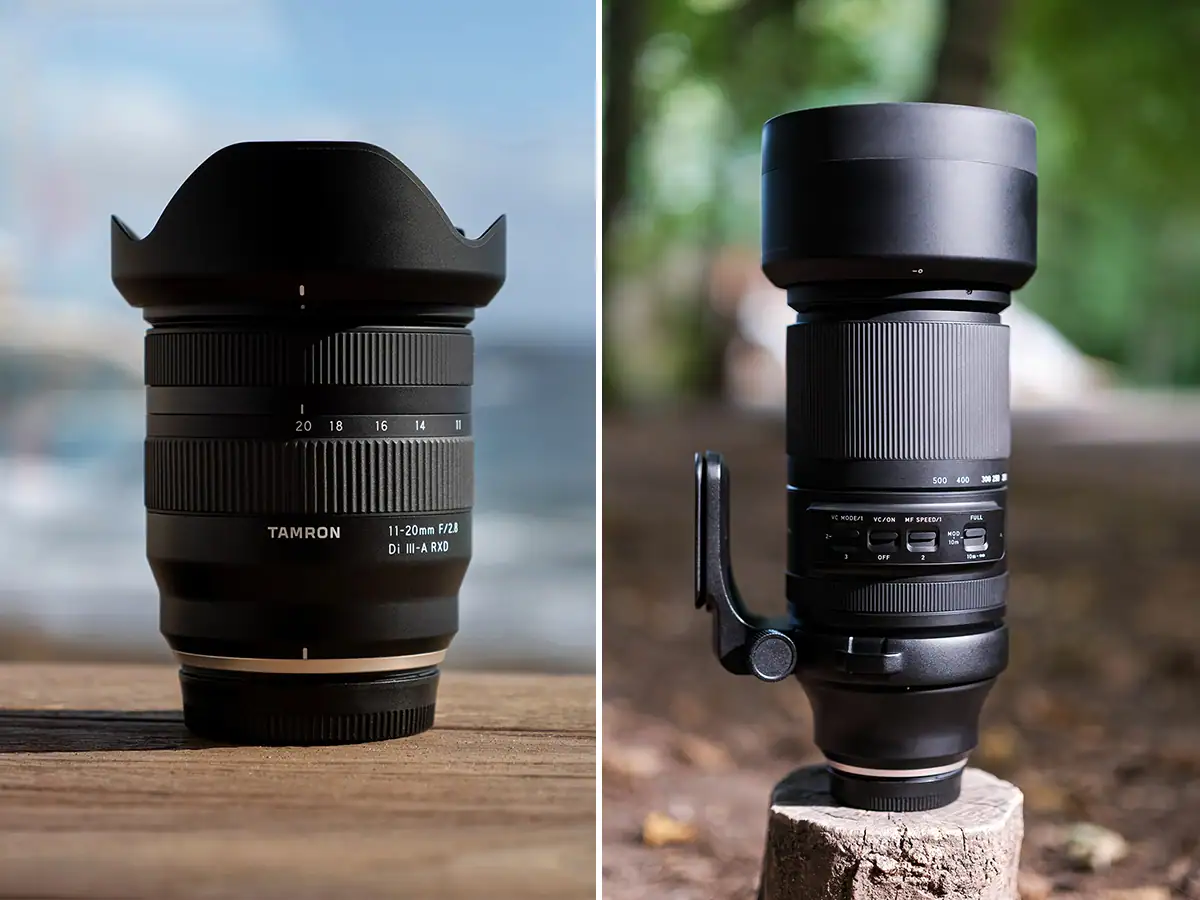
Petal, or tulip, hoods have notched edges shaped around the rectangular image area produced by the camera. The design provides aggressive shading where possible while preventing the hood from intruding into the corners of a wide-angle or zoom image.
Because the lens is circular but the final image is rectangular, the hood can extend farther in some areas than others. A petal hood must therefore be aligned correctly. Mounting it in the wrong orientation can cause visible vignetting.
Cylindrical hoods are common on telephoto and certain prime lenses. Their narrower fields of view allow a deeper, uninterrupted hood barrel that blocks more off-axis light.
Rubber collapsible hoods are another option. They pack compactly and can be especially helpful when photographing through windows because the rubber can be placed against the glass to block reflections.
When to Use and When to Remove a Lens Hood
Keep a lens hood attached by default. It has no inherent image-quality penalty and provides continuous flare control plus an additional layer of impact protection.
Remove the hood when:
- Using direct on-camera flash at close distances if the hood creates a shadow.
- Using a filter holder or other accessory that physically conflicts with the hood.
- Intentionally introducing lens flare as part of the composition.
Many photographers reverse-mount a hood for storage. Remember that a reversed hood may block easy access to zoom, focus, or control rings, so return it to its shooting position before using the lens.
What Is a Camera Teleconverter?
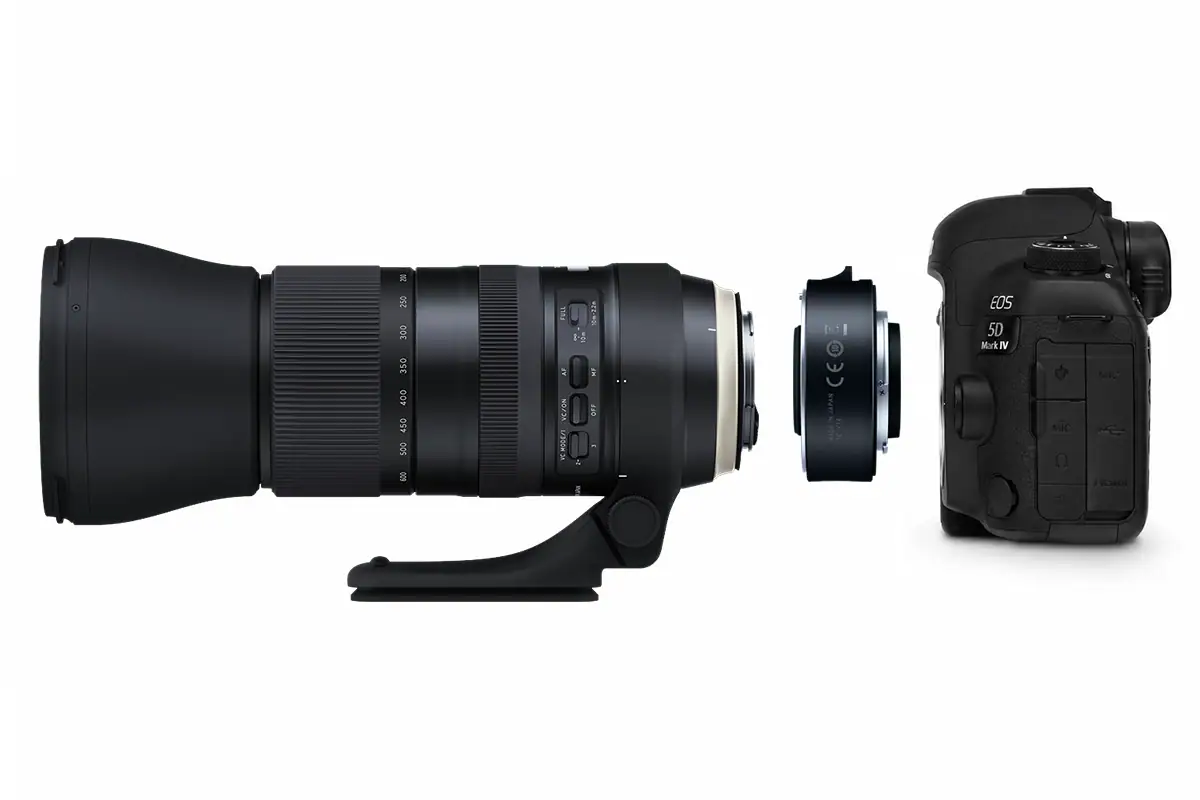
A teleconverter is a compact optical accessory that mounts between a camera body and compatible lens to multiply focal length—commonly by 1.4x or 2x—at the cost of light transmission and some image quality. Teleconverters can provide significantly more reach without requiring photographers to carry another large super-telephoto lens.
A teleconverter should not be confused with a mount adapter. A teleconverter optically magnifies the image and changes effective focal length, while a mount adapter is designed primarily to let a lens work with a different camera mount or flange configuration.
What Does a Teleconverter Do for a Camera?
A 1.4x teleconverter increases focal length by 40% and typically costs one stop of light. A 2x teleconverter doubles focal length and costs two stops.
For example, a 400mm F2.8 lens paired with a 2x teleconverter behaves as an 800mm F5.6 combination in terms of focal length and maximum aperture. That additional reach can be particularly valuable for wildlife, sports, and other subjects that cannot be approached closely.
Teleconverter Compatibility Considerations
Not all camera lens teleconverters work with all lenses. Compatibility varies according to lens design, mount, available rear-element clearance, camera system, firmware, and manufacturer support.
Always verify teleconverter and lens compatibility through the manufacturer’s current compatibility information before buying or assembling a combination.
Mirrorless photographers should also distinguish teleconverters from DSLR-to-mirrorless mount adapters. Adapted lenses may experience limitations involving autofocus tracking, continuous shooting, stabilization, or certain specialty functions depending on the body, lens, and adapter combination.
Testing the complete setup before an important wildlife, sports, or travel assignment is the safest way to understand its real-world performance.
What are Extension Tubes for Cameras?
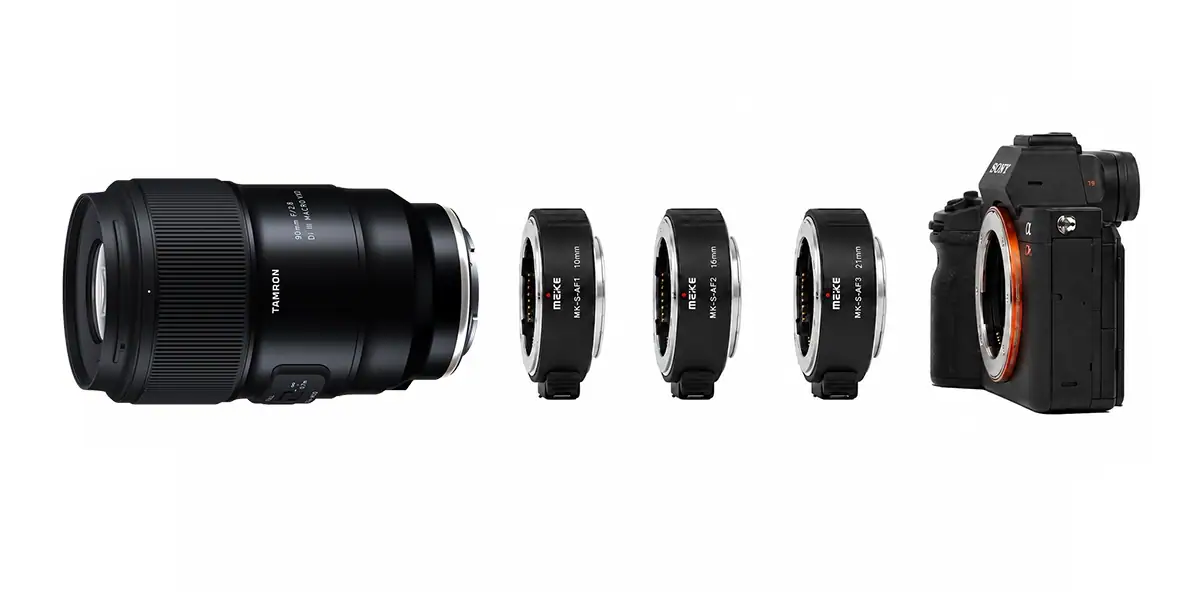
An extension tube is a hollow, lens-less cylinder that fits between the camera body and a lens to reduce minimum focusing distance, enabling closer focus and greater magnification for macro and close-up photography. Unlike a teleconverter, an extension tube contains no optical magnifying elements.
Moving the lens farther from the sensor changes its focusing range. The tradeoff is that infinity focus is lost while the tube is installed.
Extension rings such as 10mm and 16mm Kenko DG or the Meiko extension tube sets illustrate the concept: different tube lengths produce different amounts of extension and can also be stacked when greater close-focus capability is required.
What Do Extension Tubes Do for Cameras?
Extension tubes for macro photography increase magnification by moving the lens farther from the camera sensor, reducing minimum focusing distance and allowing the lens to focus much closer than it normally can.
Stacking extension tubes increases total extension and can further increase magnification, but three practical tradeoffs become increasingly important:
- Light loss becomes greater as extension increases.
- Infinity focus is unavailable while the tube is attached.
- Depth of field becomes extremely shallow at higher magnifications.
That razor-thin depth of field can make careful focusing, adequate lighting, and camera stability particularly important when applying macro photography tips, settings, and techniques.
Actual magnification varies by lens design and focusing distance, so the table should be treated as a relative comparison rather than a universal magnification specification.
Camera Lens Protection Accessories
Lens protection accessories—including caps, protective filters, and cleaning tools—help safeguard optical equipment from physical damage and contamination that can affect image quality and shorten equipment life. Replacing damaged optical components can be considerably more expensive than maintaining a basic lens-protection kit.
The three priorities are straightforward: cover the lens when it is not being used, protect it appropriately when shooting in demanding environments, and clean optical surfaces using tools designed for photographic equipment.
Camera Lens Caps and Rear Caps
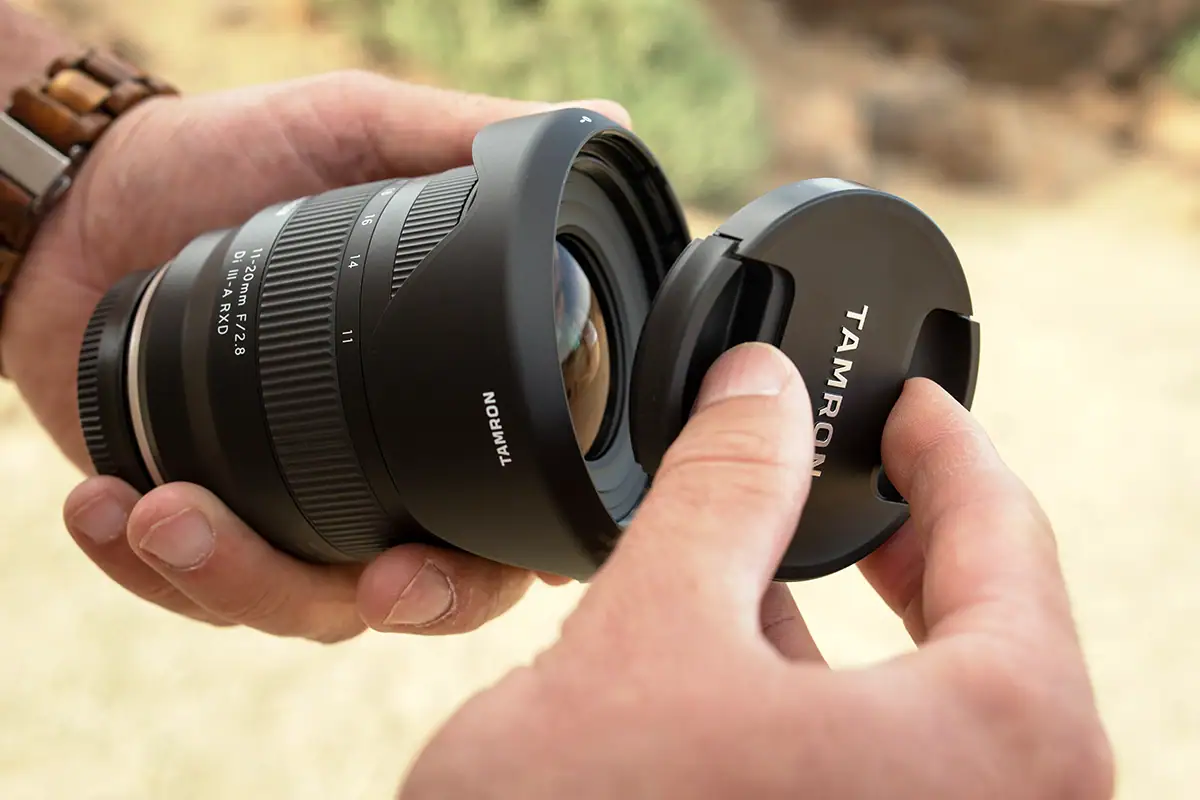
Front lens caps protect the front element from fingerprints, scratches, dust, and accidental contact while the lens is not being used. Rear caps protect the rear optical area and mount contacts while helping keep contamination from entering the lens barrel during storage.
Both are inexpensive compared with the lens they protect, so carrying spare caps can be worthwhile for photographers who travel or work frequently in the field.
Rear caps are especially important whenever a lens is removed from the camera and stored in a bag. Even inside a padded pouch, both caps should remain attached.
Replacement caps are also available for Tamron lenses when original caps are lost or damaged.
Camera Lens Protective UV and Clear Filters
The debate over a UV filter for camera lens protection comes down to a straightforward tradeoff. Any additional piece of glass can potentially introduce flare, ghosting, reflections, or subtle optical degradation. A high-quality multi-coated protective filter, however, can provide a replaceable barrier between the front element and harsh environmental conditions.
The case for a protective filter includes:
- Protection from blowing sand, salt spray, fingerprints, and moisture.
- A sacrificial surface that is less expensive to replace than a front optical element.
- Minimal visible degradation when using high-quality, well-coated filters under normal conditions.
The case against one includes:
- Every added optical surface creates another opportunity for reflections.
- Modern lens coatings and front elements are designed for regular photographic use.
- A lens hood provides useful impact protection without placing additional glass in the optical path.
A practical compromise is to use a high-quality multi-coated UV or clear filter in harsher conditions—such as beaches, dusty environments, rain, or salt spray—and rely primarily on the lens hood during routine photography.
Camera Lens Cleaning and Maintenance Tools
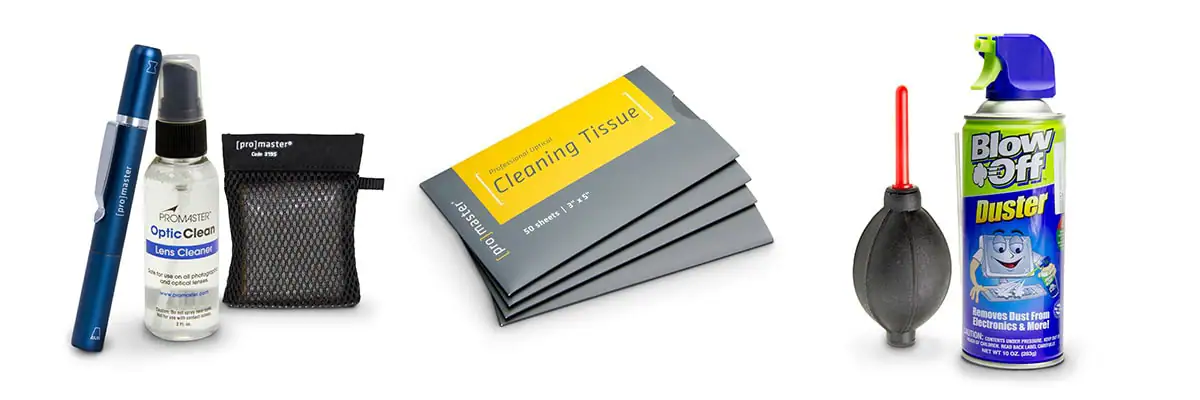
A complete set of lens cleaning tools and maintenance supplies should include a rocket blower, lens pen or suitable optical brush, clean microfiber cloth, optical cleaning solution, and disposable lens tissues for field use.
Use this cleaning sequence:
- Use a rocket blower to remove loose dust or abrasive particles without touching the glass.
- Use a lens brush or appropriate lens pen to remove particles that remain.
- Apply a small amount of optical cleaning solution to the microfiber cloth—never directly onto the lens.
- Wipe gently from the center toward the outside of the optical surface.
- Inspect the glass before replacing the cap.
Avoid household glass cleaners, paper towels, facial tissues, shirts, or other general-purpose materials that can leave residue or damage optical coatings.
Camera Bags, Lens Pouches, and Straps
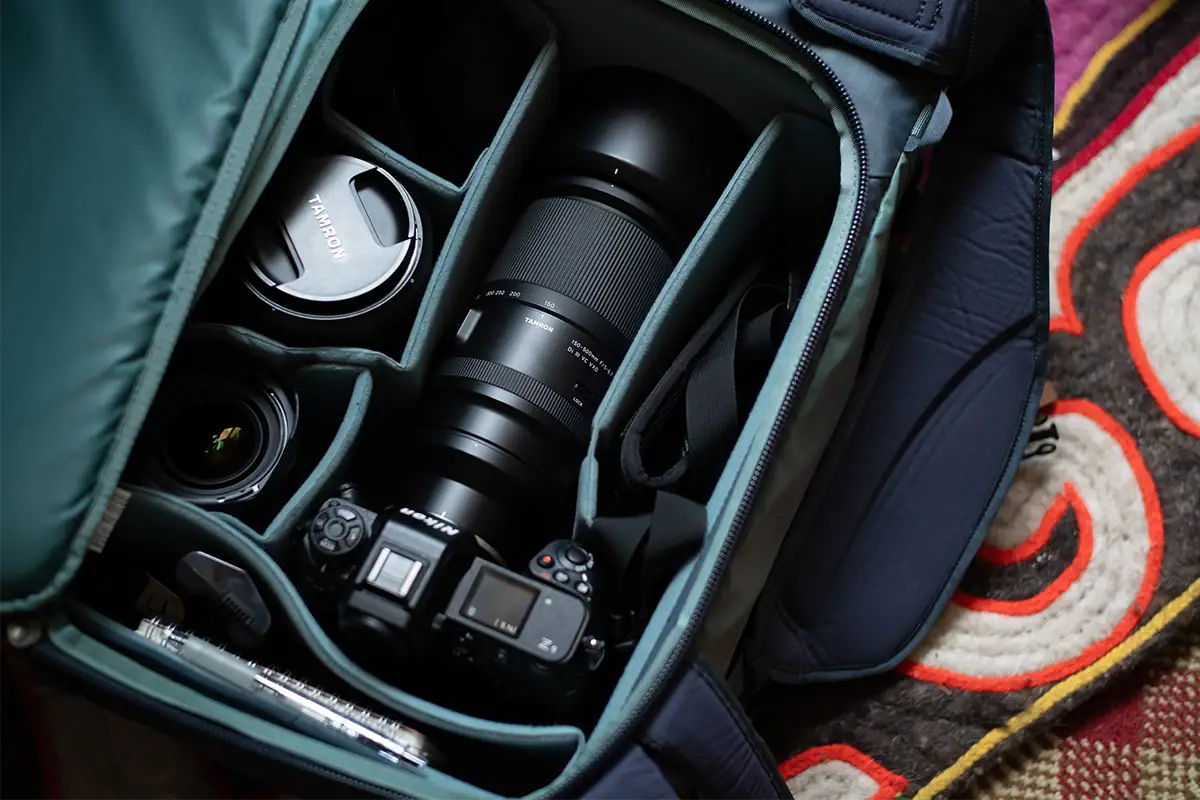
Camera bags, lens pouches, and straps form the carrying system that protects a lens kit in transit and keeps it accessible in the field. These accessories belong in a lens-focused guide because they exist specifically to transport, protect, and support lenses during real photographic use.
Choose a carrying system according to three questions: how much equipment you carry, how far you need to carry it, and how quickly you need to access or change lenses.
Lens Pouches and Wraps
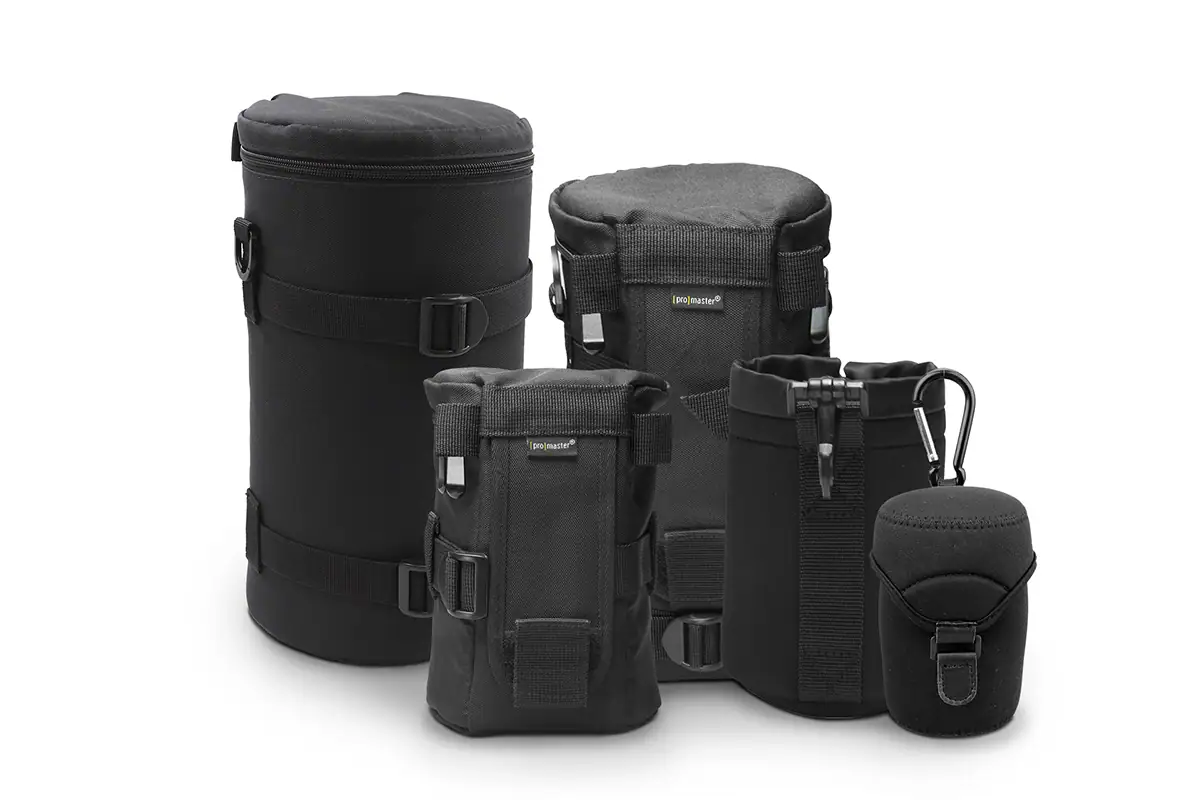
A camera lens pouch is a padded or semi-rigid case designed to protect a single lens from impact, dust, and moisture while it is not attached to a camera. Neoprene wraps provide a more flexible alternative and pack especially flat for travel.
When choosing a pouch, check:
- Interior dimensions with the lens hood reversed.
- Closure style, including drawstring, zipper, or hook-and-loop.
- Belt-loop, clip, or attachment options for field access.
Regardless of the pouch design, store the lens with both its front and rear caps installed.
Camera Bags and Backpacks
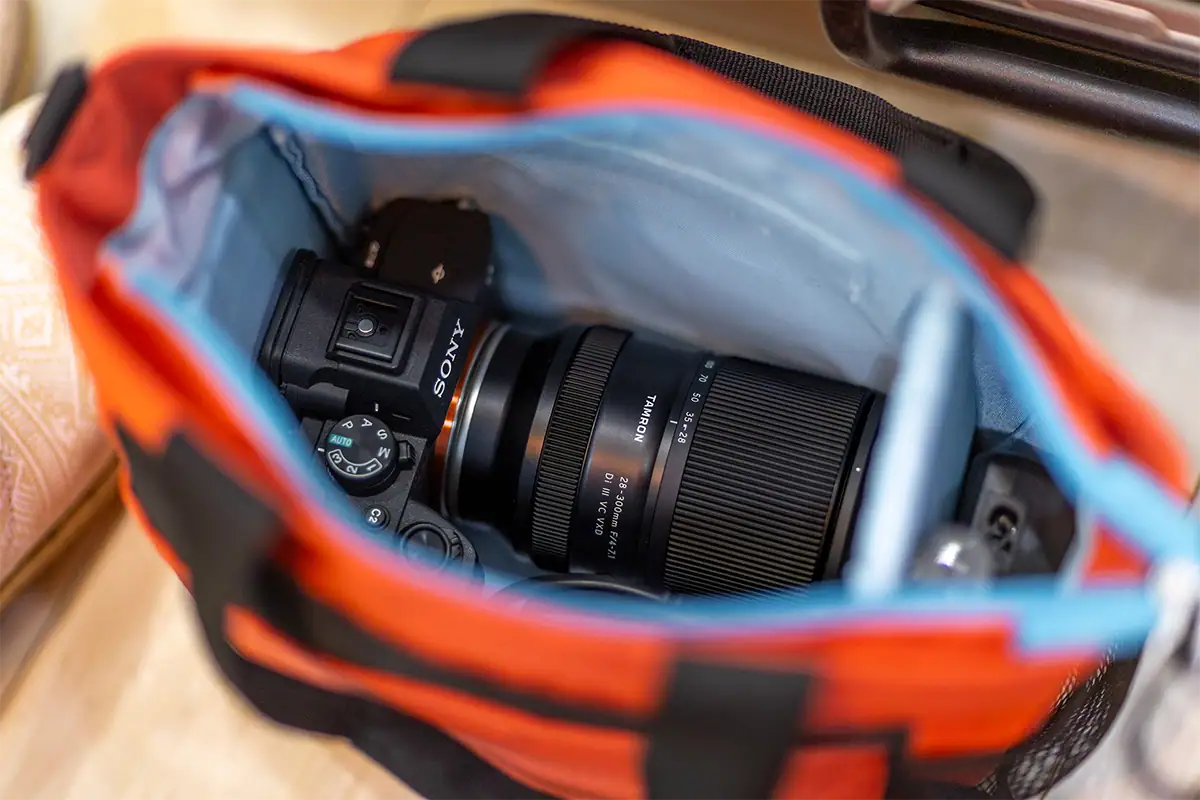
The right camera bag for lenses depends on both kit size and how far the equipment needs to travel. Shoulder bags provide rapid access during shorter assignments. Backpacks spread weight across both shoulders for hikes and travel, while roller cases are particularly useful for moving heavier multi-lens kits through airports, studios, venues, and other smooth environments.
Customizable padded dividers are among the most valuable bag features because they let the interior change as the photographer’s lens kit changes.
Outdoor photographers should also consider weather-resistant materials, covered zippers, and a dedicated rain cover.
Camera Straps and Harnesses
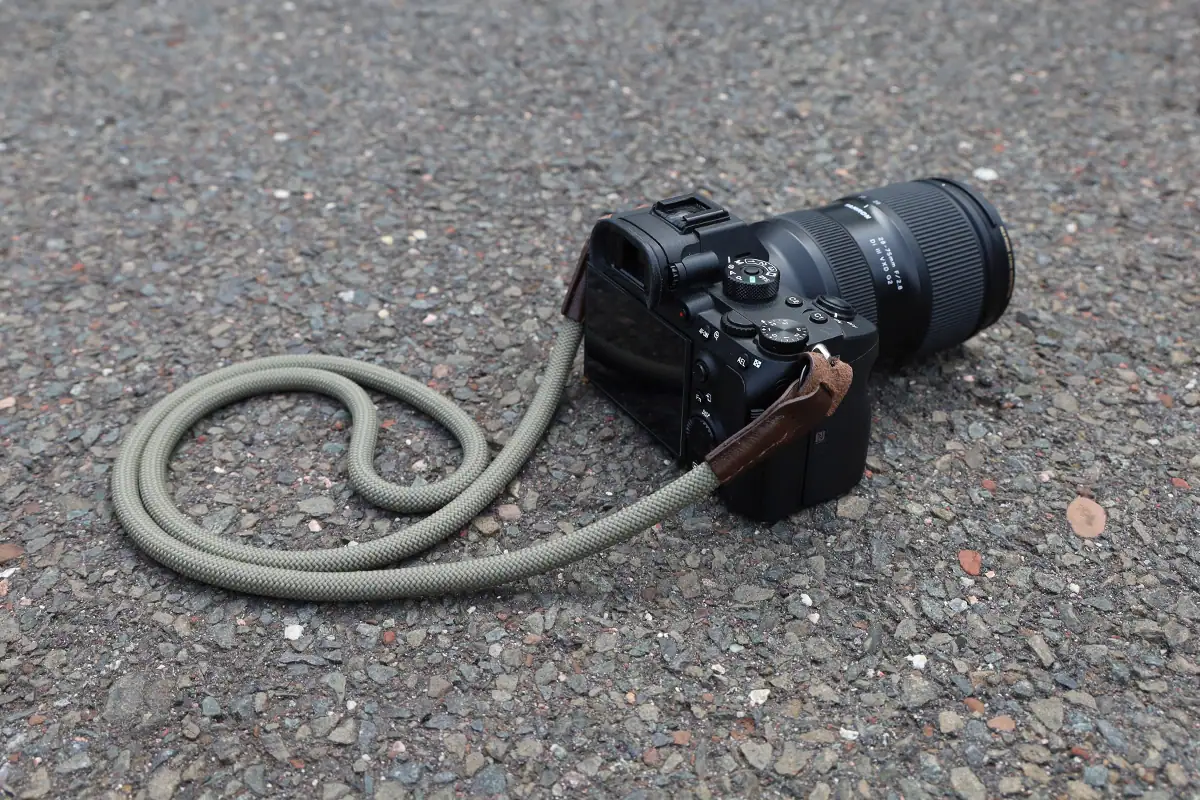
A standard neck strap can become uncomfortable when a heavier telephoto lens is attached. Sling straps transfer the load to one shoulder and allow the camera to rest near the hip, while dual harness systems distribute two cameras across the shoulders for long event and wedding assignments.
Four common options are:
- Neck strap: Simple everyday carrying for lighter kits.
- Sling strap: Faster access and improved comfort with larger camera/lens combinations.
- Wrist strap: Useful for compact setups and short periods of handheld work.
- Dual harness: Supports two camera bodies for event, wedding, and professional coverage.
With heavier telephoto lenses equipped with a tripod collar, connect the carrying system to the lens collar or an approved lens support point when appropriate rather than placing the entire suspended load on the camera mount.
Other Camera Accessories Worth Knowing
Beyond accessories that attach directly to a lens, a working photography kit also relies on support, capture, lighting, planning, and storage tools. These essential photography accessories do not necessarily alter the lens itself, but they often determine whether photographers can use their lenses effectively in demanding situations.
For photographers building camera accessories for beginners, these categories are worth understanding even if they are not all immediate purchases.
Tripods and Gimbals
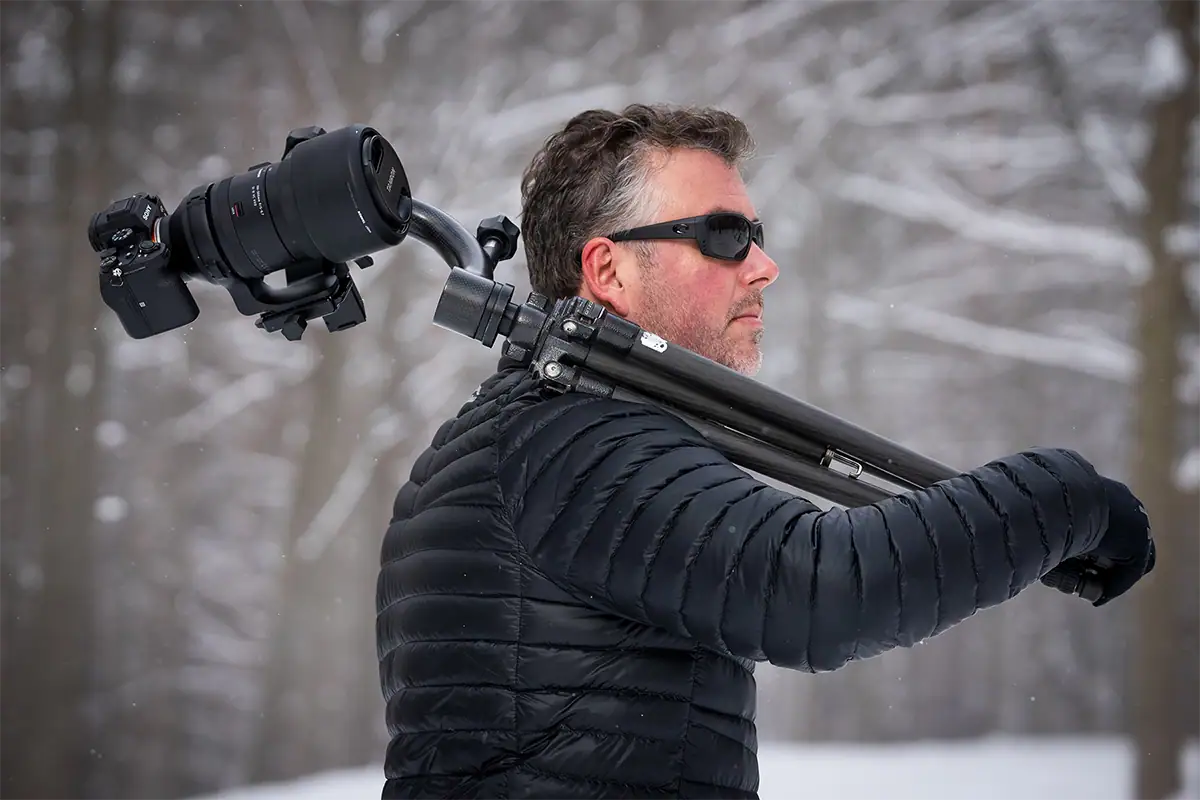
Tripods stabilize the camera and lens when shutter speeds become too slow for dependable handheld photography or when precise framing needs to remain fixed. They are particularly valuable for long exposures, macro photography, astrophotography, landscape work, and controlled video.
Choose a tripod with a load rating comfortably above the combined weight of the camera, lens, head, and accessories. Leg material, collapsed size, maximum height, and head type also matter.
Ball heads provide fast all-purpose positioning. Gimbal heads are better suited to heavy super-telephoto wildlife and sports setups because they balance the lens around its center of gravity, letting the photographer move a large lens smoothly without supporting its full weight by hand.
Remote Shutter Releases
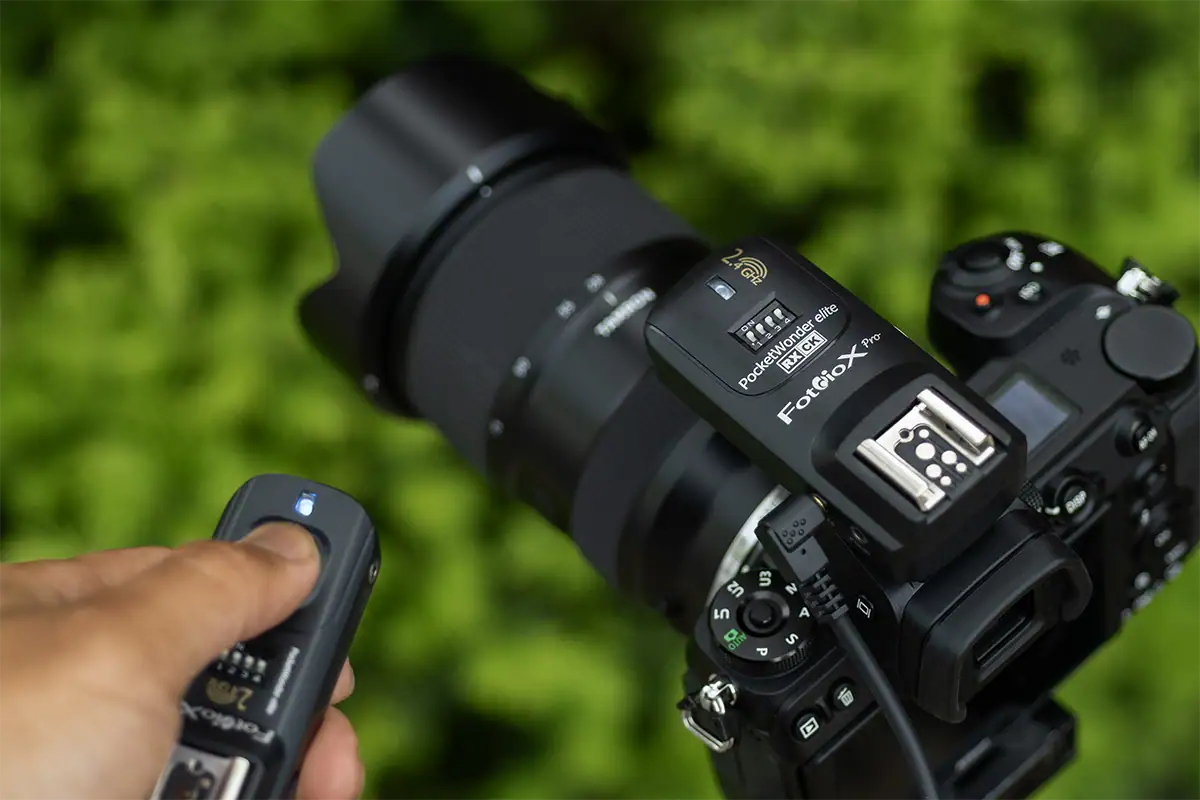
A remote shutter release triggers the camera without requiring the photographer to press the physical shutter button. Options include wired cable releases, wireless remotes, and camera-control apps.
They are particularly useful for long exposures where touching the camera could introduce vibration, macro photography at high magnification, bulb exposures longer than the camera’s standard shutter-time limit, and self-portraits or group photographs.
Many current cameras also support remote control through a manufacturer’s mobile app over Wi-Fi or Bluetooth. For some photographers, that capability eliminates the need to carry a separate remote release.
Reflectors and Diffusers

Reflectors and diffusers shape available or artificial light rather than changing the optical properties of a lens. A collapsible 5-in-1 reflector is a common starting point because a single tool can provide white, silver, gold, black, and translucent surfaces.
Reflectors can redirect light into shadow areas during portrait, macro, food, and product photography. Diffusion material softens direct sunlight or another hard light source before it reaches the subject.
Look for a size that can comfortably illuminate the subjects you normally photograph while remaining manageable enough to transport and position.
External Hard Drives and Storage
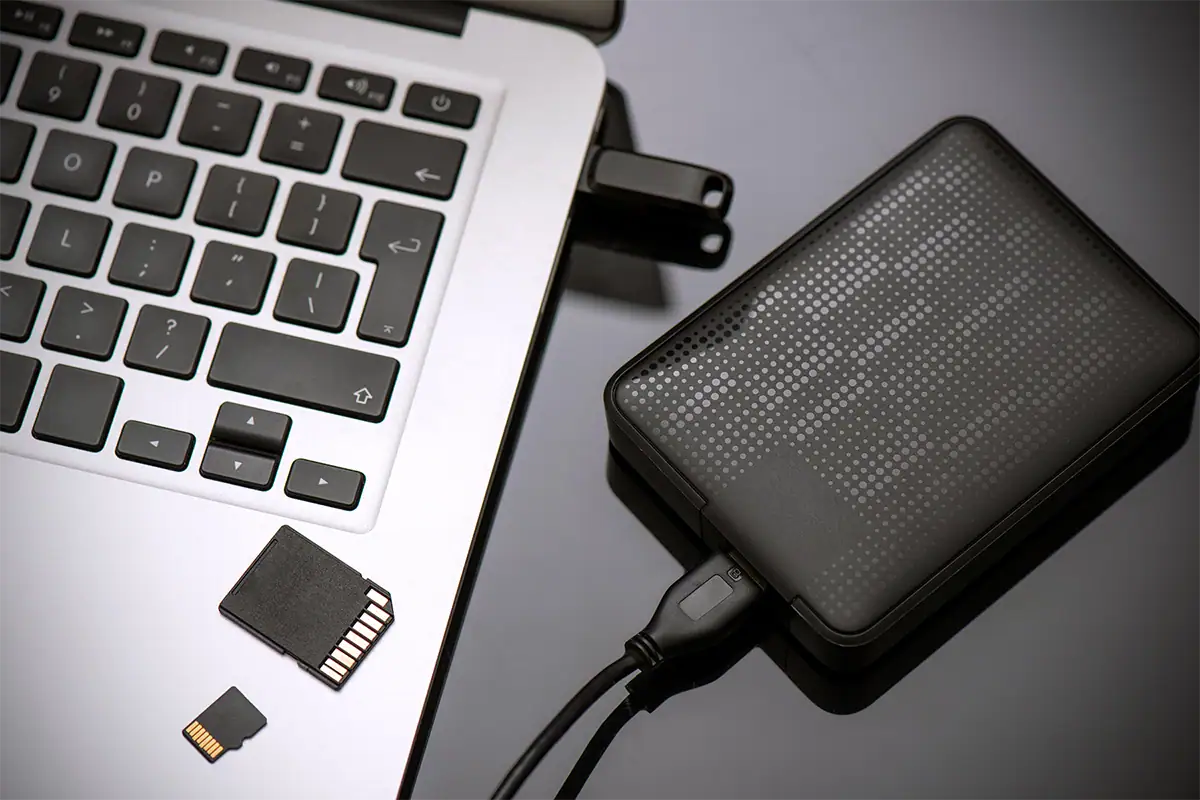
Storage becomes part of the photography workflow as soon as images leave the memory card. A useful framework is the 3-2-1 backup principle: maintain three copies of important data, keep them on at least two types of storage, and maintain one copy away from the primary working location.
Portable SSDs offer fast transfer speeds, compact dimensions, and no exposed spinning mechanism. Traditional hard drives typically provide greater capacity per dollar but require more careful physical handling.
Whenever practical, complete and verify a card-to-drive or card-to-computer backup before formatting memory cards for the next assignment.
Creator Kits
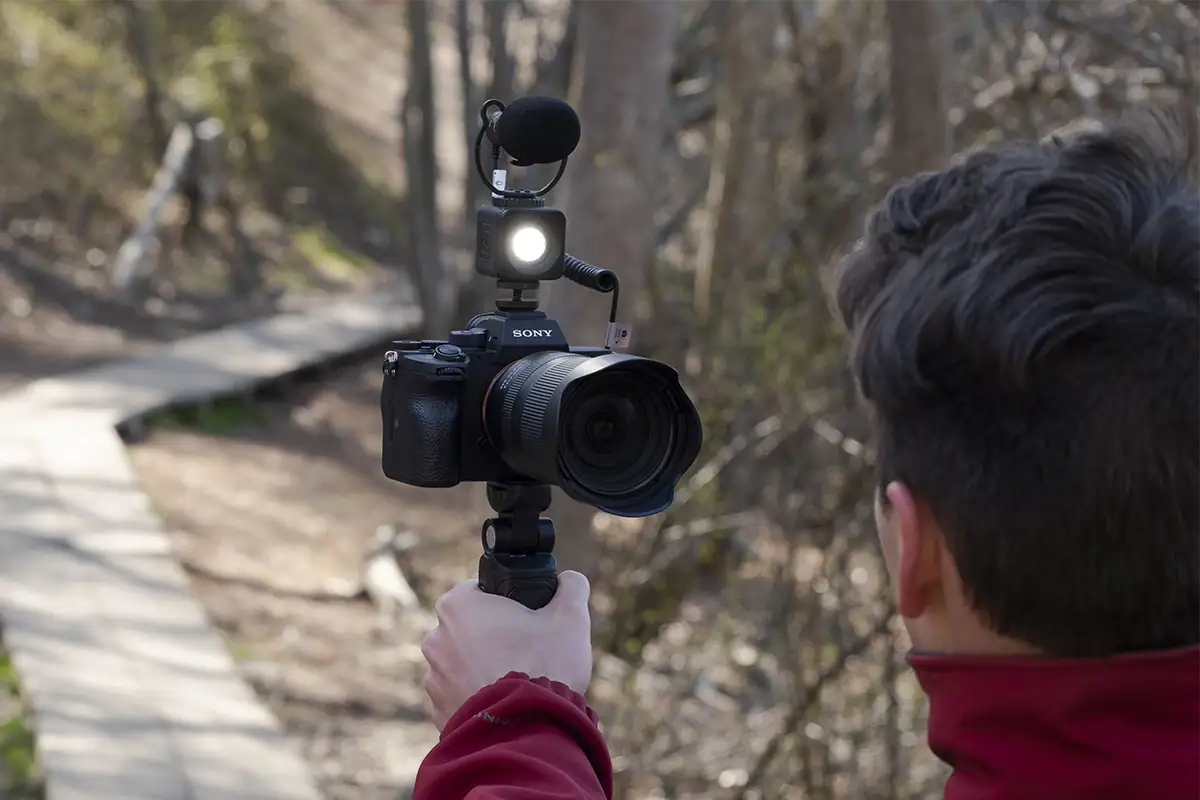
Creator kits bundle several video-oriented accessories—commonly a microphone, compact LED light, and small tripod or grip—into one package.
They are particularly useful for photographers beginning to add interviews, social video, behind-the-scenes content, product demonstrations, or travel video to an existing still-photography workflow.
The primary advantage is convenience: compatible components are purchased together rather than researched individually. The tradeoff is that bundled components may not always equal the quality or specialization available from individually selected microphones, lights, and support gear.
Night Sky Apps

Night sky planning apps help photographers predict conditions before arriving at a location. Depending on the app, they can show Milky Way position, moon phase and direction, sunrise and sunset, golden and blue hour timing, and light-pollution information for a given location and date.
This planning step can make astrophotography with a fast wide-angle lens far more repeatable. Instead of hoping that the Milky Way, moon, foreground, and darkness align, photographers can evaluate the geometry and timing before leaving home.
Look for an app that combines astronomical information with map-based planning and offline access when shooting in remote locations.
Underwater Housings
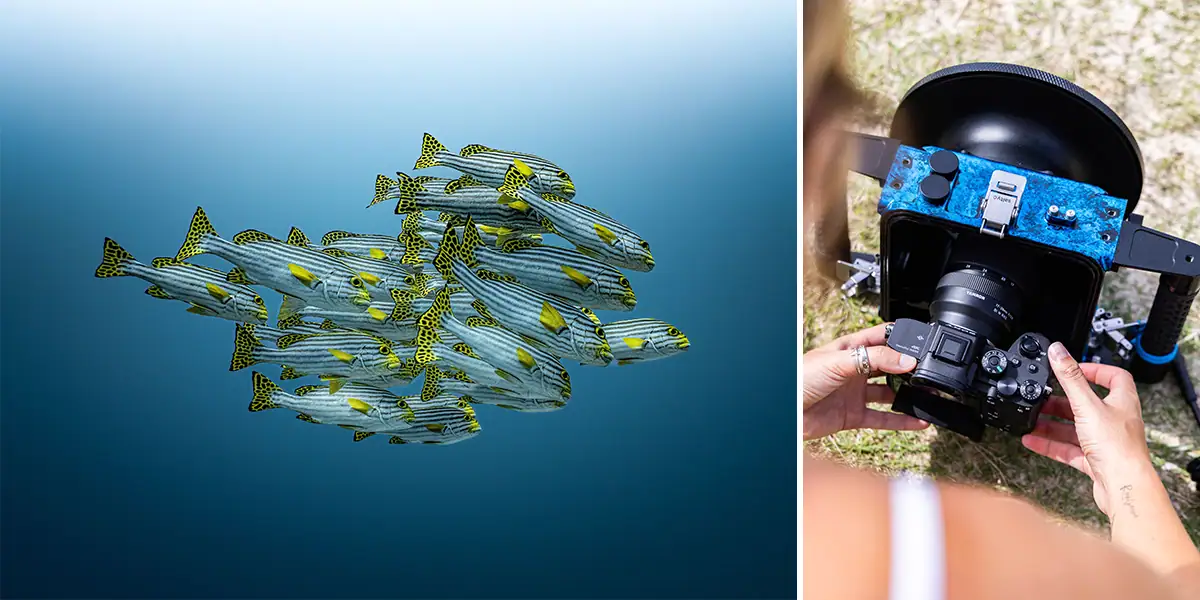
An underwater housing is a sealed enclosure that allows a camera and compatible lens to operate underwater while protecting the electronics and optical system from water intrusion.
The housing must match the specific camera body, and the lens requires an appropriate port. Wide-angle, standard, and macro lenses may require different port designs or extension components.
Check the housing’s depth rating and follow the manufacturer’s maintenance instructions carefully. O-rings should be inspected, cleaned, and lubricated as specified before diving because even a small hair, grain of sand, or damaged seal can compromise the system.
This table is a starting point rather than a universal shopping list. A wildlife photographer who works from a vehicle, for example, may prioritize support differently from someone hiking long distances with the same focal length.
Managing Filter Sizes with Step-Up Rings
A step-up ring is a thin metal adapter that lets a larger-diameter filter attach to a lens with a smaller filter thread. Step-up rings for camera filters make it possible to share one high-quality filter collection across multiple lenses.
For example, a photographer with lenses using 52mm, 62mm, and 77mm filter threads can purchase a 77mm CPL and ND set, then use 52-to-77mm and 62-to-77mm step-up rings on the smaller lenses.
This can substantially reduce the number of filters that need to be purchased and carried.
The opposite approach—using a smaller filter on a lens with a larger thread through a step-down ring—is generally undesirable because the smaller opening can intrude into the lens’s field of view and cause vignetting.
Organizing and Protecting Your Accessories
Filters should not be allowed to move loosely against one another inside a camera bag. A padded filter wallet or case with individual compartments reduces the risk of scratches while also making filters easier to identify quickly.
The MindShift Filter Nest is one example of a storage system designed to carry different filter formats together.
Teleconverters and extension tubes should travel with protective caps on both sides whenever possible and be stored in dedicated compartments or soft pouches.
Labeling step-up rings by size can also save time in the field. Finally, use a well-padded camera bag with adjustable dividers so the entire kit remains separated during transport.
Choosing the Right Camera Lens Accessories for Your Photography
Camera lens accessories are most valuable when they solve specific photographic problems. Filters give photographers control over exposure, reflections, and optical effects. Lens hoods reduce flare while protecting the lens. Teleconverters extend focal reach, extension tubes open new close-up possibilities, and lens caps, cleaning tools, bags, and support systems protect both equipment and workflow.
Rather than building an accessory collection all at once, start with the gear that applies to the subjects you already photograph. Add specialized accessories when a recurring limitation—too much light, not enough reach, excessive glare, insufficient close focus, or difficult equipment handling—shows you exactly what the next purchase needs to accomplish.
Where to Buy Tamron Lenses
Learn more about Tamron lenses at authorized Tamron dealer near you or shop directly at the official TAMRON Store.
Frequently Asked Questions
What are the essential lens accessories every photographer should have?
The most essential lens accessories are a lens hood for flare control and physical protection, a circular polarizer for managing reflections and color, lens caps for safe storage, and a basic cleaning kit with a rocket blower, lens pen or optical brush, and microfiber cloth. ND filters are also valuable for photographers who frequently need exposure control in bright conditions.
Do lens filters affect image quality?
High-quality, multi-coated filters are designed to minimize image-quality loss. Lower-quality or poorly coated filters can introduce color shifts, additional flare, ghosting, vignetting, or reduced sharpness, particularly with demanding wide-angle lenses and strong light sources.
When should I use a lens hood?
Use a lens hood whenever practical. It blocks stray light that can reduce contrast or create flare and also provides physical protection around the front of the lens. Remove it when it conflicts with another accessory, creates a shadow with direct on-camera flash, or when intentional flare is part of the photograph.
How do teleconverters affect autofocus and sharpness?
A 1.4x teleconverter typically reduces maximum aperture by one stop, while a 2x teleconverter reduces it by two stops. The loss of light can affect autofocus performance, particularly in dim conditions. Teleconverters also reduce image quality to varying degrees, with 2x converters generally having a greater effect than 1.4x models.
Can I use filters on lenses without filter threads?
Some lenses without conventional front filter threads can accept filters through dedicated holders, rear filter systems, adapter rings, or manufacturer-specific solutions. Compatibility depends on the individual lens, so photographers should verify the approved filter system for that model before purchasing accessories.
What camera accessories do beginners actually need first?
Beginners should prioritize extra memory cards, lens protection such as a hood or appropriate protective filter, a padded camera bag, spare batteries, and a tripod when their photography requires additional stability. A circular polarizer and basic cleaning kit are useful next additions, while specialized equipment such as teleconverters, extension tubes, and graduated filters can be added as specific photographic interests develop.
Which camera lens accessories should I buy first?
Start with accessories that solve common problems across multiple photography styles: a lens hood, a circular polarizer, front and rear caps, basic lens cleaning tools, and a secure camera bag. Add ND filters, teleconverters, extension tubes, or other specialized accessories once your preferred subjects and shooting conditions make the need clear.
Are expensive camera lens filters worth it?
Frequently used filters are worth buying at a quality level that preserves the performance of the lens. Multi-coated optical glass, neutral color transmission, low-profile rings, and consistent manufacturing become especially important with CPL and ND filters that remain in the optical path during important photographs or video.
Do I need a different filter for every camera lens?
Not necessarily. If several lenses use different filter-thread diameters, you can buy filters sized for the largest compatible lens and use step-up rings on lenses with smaller threads. This can reduce cost and make the filter kit easier to manage.
Is a teleconverter better than cropping a photo?
A teleconverter optically increases focal length before the image reaches the sensor, while cropping enlarges a smaller portion of the captured image afterward. Which produces the better result depends on the lens, teleconverter, camera resolution, focusing performance, available light, and final output requirements.
Are extension tubes worth using instead of a macro lens?
Extension tubes are an affordable way to experiment with close-up photography because they reduce a lens’s minimum focusing distance without adding optical glass. A dedicated macro lens typically provides a more complete solution for photographers who need predictable magnification, working distance, and regular close-up performance.
About the Author
 Stacie Errera is Vice President of Marketing and Communications for Tamron Americas, where she has been with Tamron for more than 36 years. She is also a photography educator who teaches new camera users how to better understand their cameras and photography basics. She leads weekend photography workshops for women. Read Stacie’s full bio >>