Instant Savings
 Support
 Find a Dealer
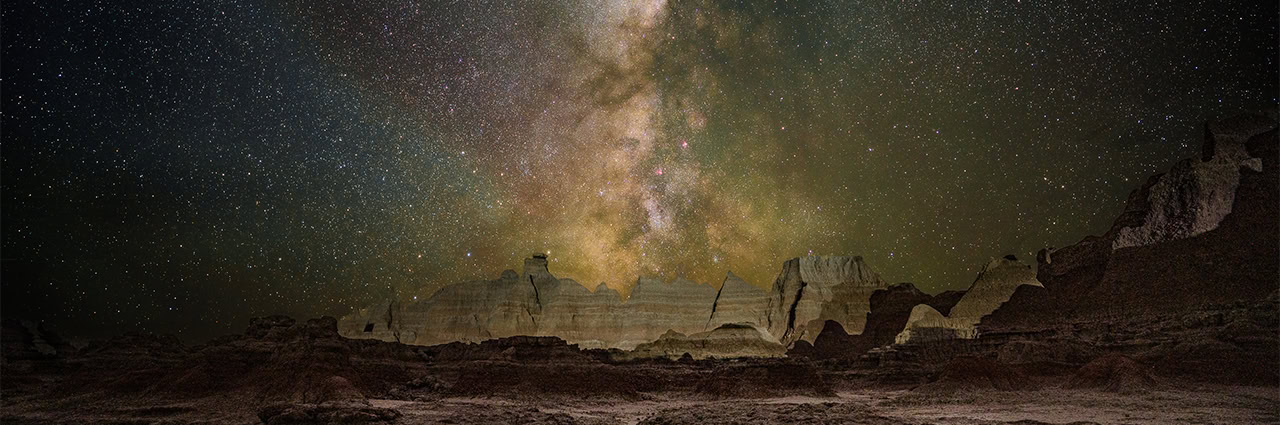
Astrophotography is the practice of photographing the night sky — stars, the Milky Way, the moon, and deep sky objects — using a camera, a fast lens, a stable tripod, and a dark sky. Most photographers can start with gear they already own, especially for moon, star field, and Milky Way photography.
By Stacie Errera, Photography by credited Tamron photographers. Graphics by Tamron Americas.
The beauty of astrophotography is that it can grow with you. Anyone can photograph the moon tonight with a telephoto lens and basic settings. The Milky Way takes more planning, darker skies, and careful focusing. Deep sky photography becomes more technical, often involving tracking mounts, stacking, and specialized processing.
This guide walks through the full progression, from the basic gear and settings you need to begin to more advanced subjects like star trails, aurora, galaxies, and nebulae.
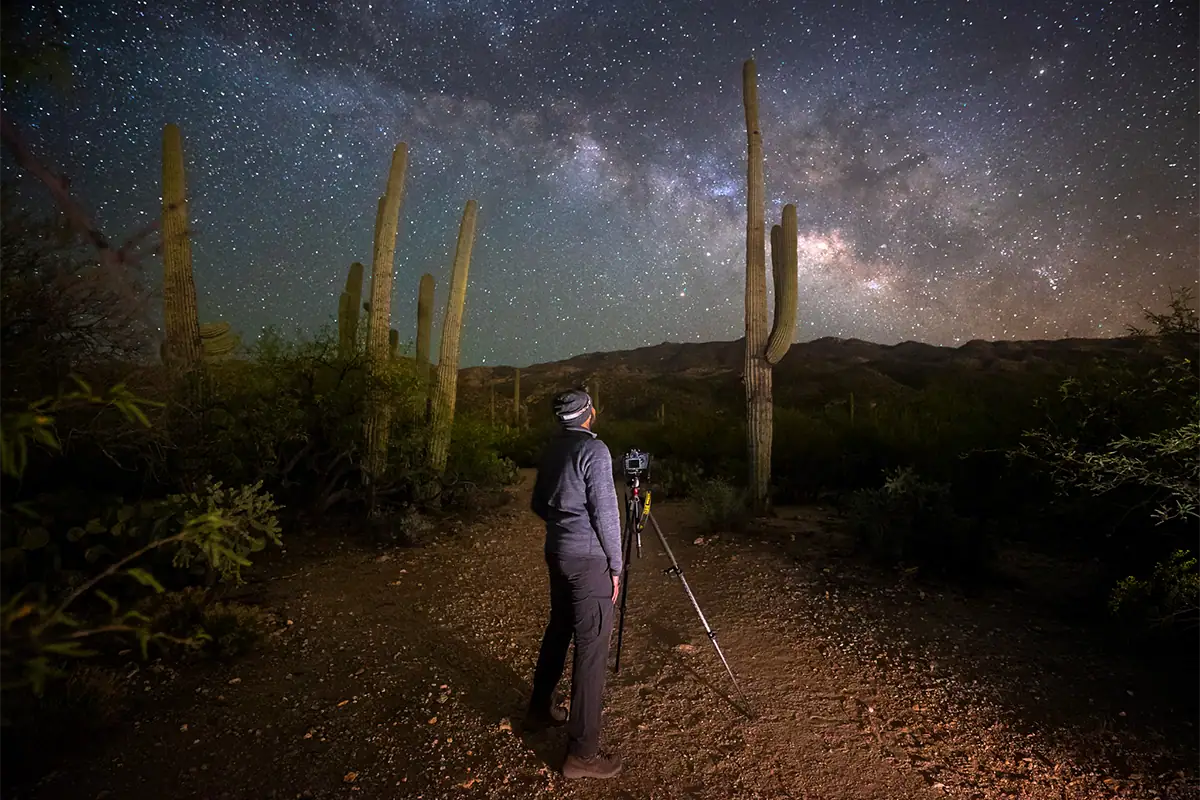
Table of Contents
- What Is Astrophotography?
- What Gear Do You Need for Astrophotography?
- How to Focus and Set Up Your Camera for Night Sky Photography
- The Best Camera Settings for Astrophotography
- How to Plan an Astrophotography Shoot
- Types of Astrophotography: What Do You Want to Shoot?
- Common Astrophotography Mistakes and How to Fix Them
- How to Edit Astrophotography Images
- Next Steps: Going Deeper Into Night Sky Photography
What Is Astrophotography?
Astrophotography is the art of capturing images of the night sky, including stars, star clusters, the Milky Way, the moon, planets, nebulae, and galaxies, using a camera and lens rather than, or in addition to, a telescope. It ranges from simple wide-field photos to highly technical deep-sky imaging.
One of the most common misconceptions about astrophotography is that it requires expensive, specialized equipment. For wide-field night sky photography, that is not true. A DSLR or mirrorless camera, a fast wide-angle lens, and a sturdy tripod are enough to begin photographing stars, constellations, and the Milky Way.
From there, the genre expands in stages. Moon photography is the easiest place to begin because the subject is bright and easy to find. Milky Way photography requires darker skies and better timing. Star trails introduce longer exposure techniques. Deep sky photography opens the door to galaxies, nebulae, tracking mounts, and stacked exposures.
What Gear Do You Need for Astrophotography?
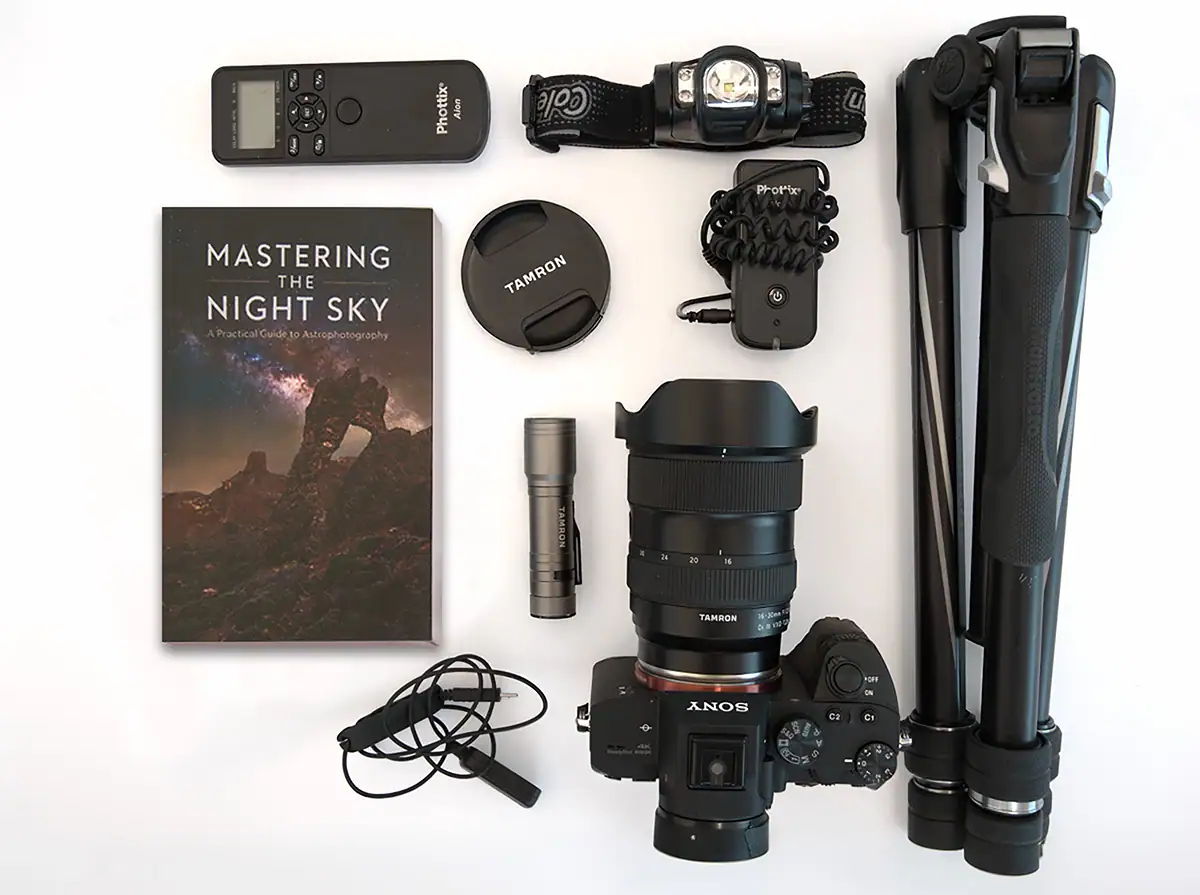
The essential astrophotography kit is a camera with manual exposure controls, a fast lens, and a sturdy tripod. For wide-field night sky photography, a lens with an aperture of f/2.8 or wider is ideal. Star trackers, filters, and remote releases can improve results, but they are not required to start.
Camera: DSLR or Mirrorless, Full-Frame or APS-C
Any DSLR or mirrorless camera with manual mode can be used for astrophotography. Full-frame sensors offer advantages in low-light performance and dynamic range, but modern APS-C cameras can produce excellent night sky images. The most important features are manual exposure, long shutter speeds, RAW capture, and reliable live view focusing.
If you already own a camera, start with it before upgrading. Many beginner frustrations come from focus, shutter speed, light pollution, or planning rather than camera limitations. After a few nights outside, you will understand whether your current gear is truly holding you back.
For more general low-light shooting guidance, see these low light photography tips.
Lenses: Fast and Wide for Most Night Sky Work
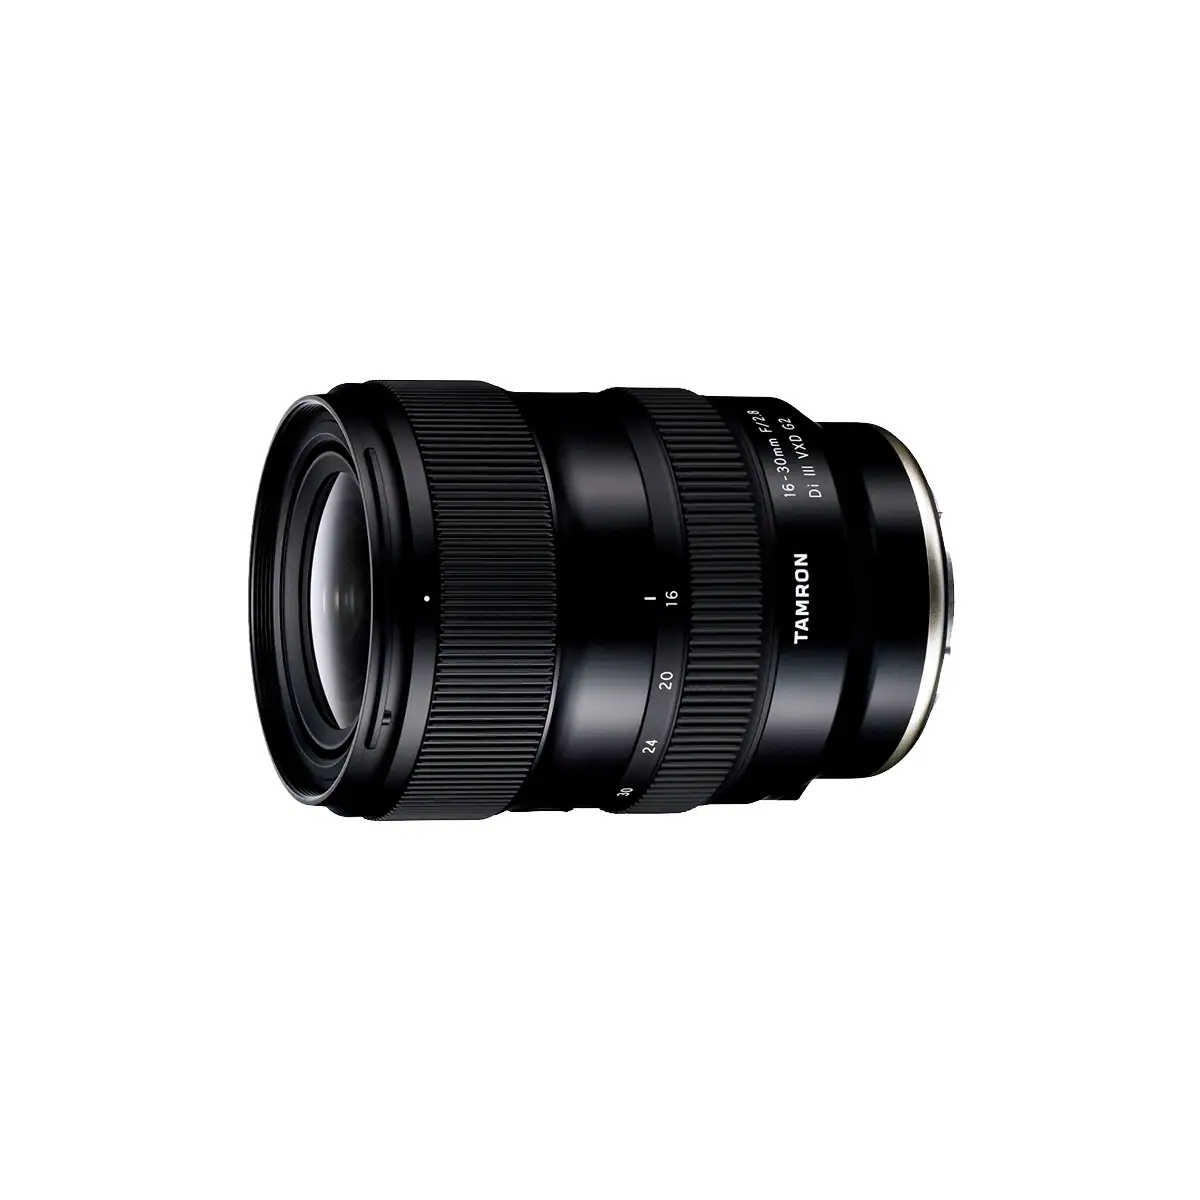
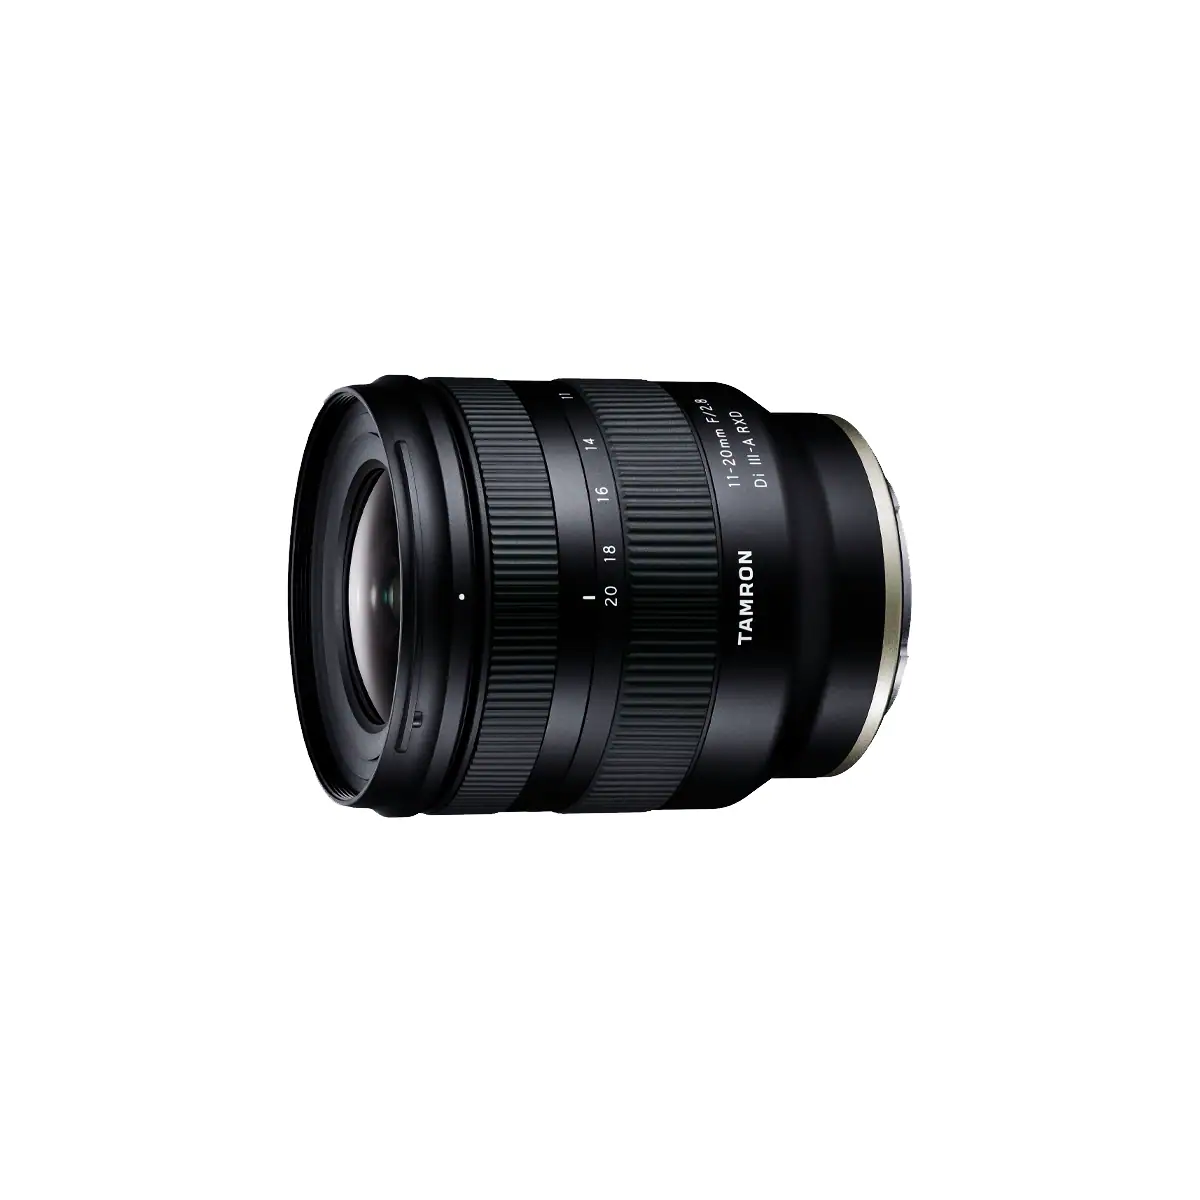
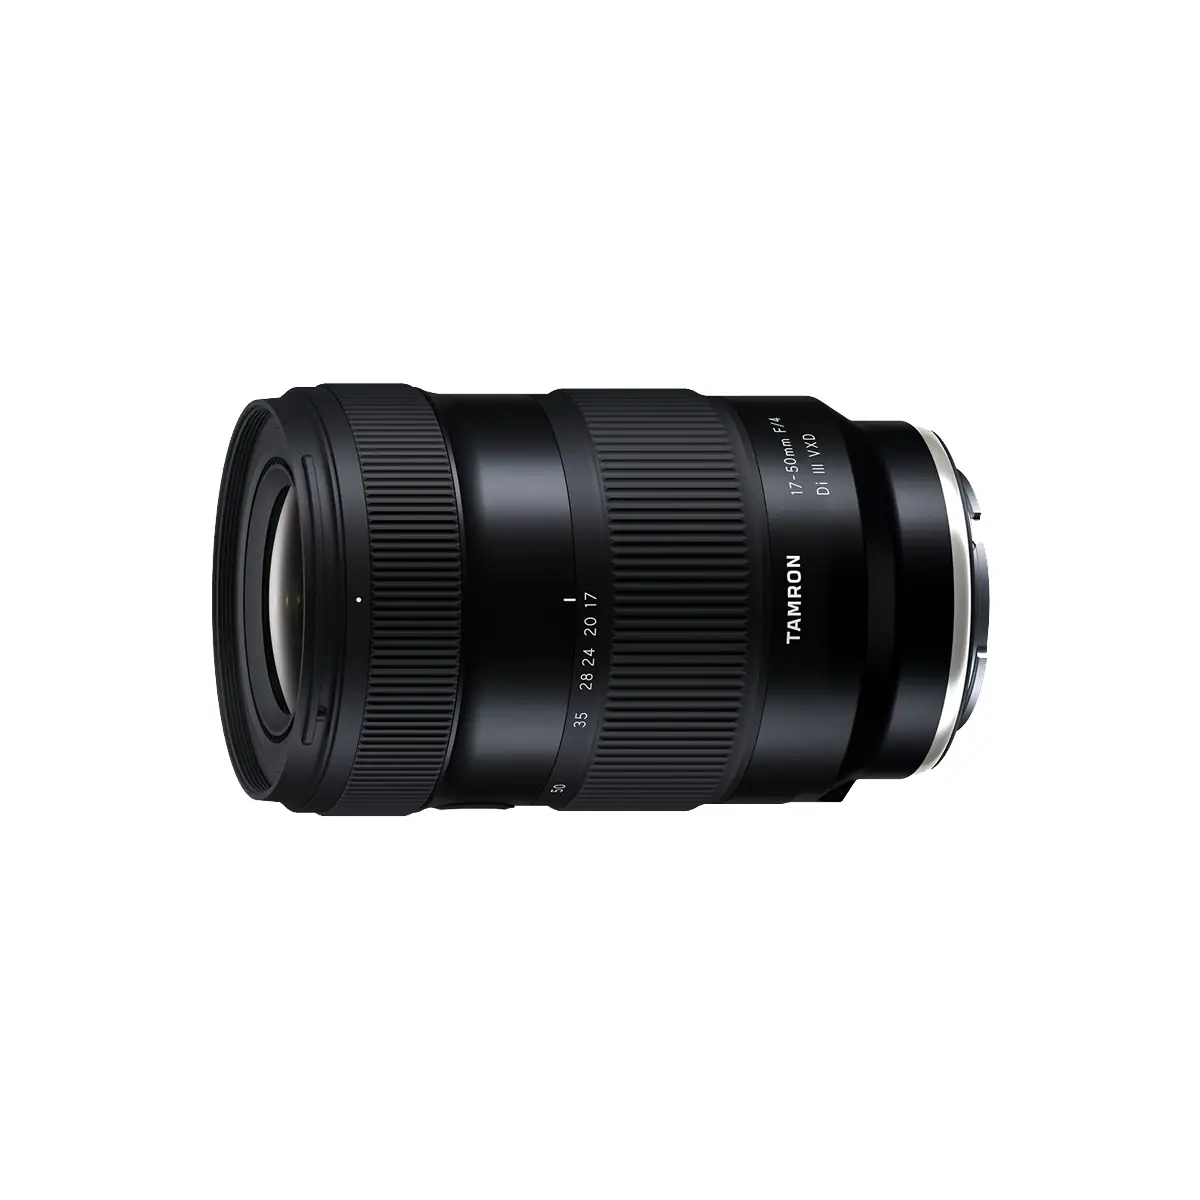
For Milky Way photography, star fields, and wide-angle night sky images, use a lens with a maximum aperture of f/2.8 or wider and a focal length in the 14-35mm range, full-frame equivalent. A wide aperture gathers more light, while a short focal length allows longer exposures before stars begin to trail.
For moon and planetary photography, the ideal lens changes. A telephoto lens in the 150-500mm range reveals lunar craters, surface texture, and planetary discs that a wide-angle lens renders as tiny points. Many photographers eventually build a two-lens astrophotography kit: a fast wide-angle lens for Milky Way work and a telephoto lens for the moon.
For a deeper breakdown, see our full guide to the best lens for astrophotography and this wide angle lens guide for photography.
Tripod and Remote Shutter Release
A stable tripod is essential for astrophotography because even the slightest movement during a long exposure can turn sharp stars into soft streaks. A remote shutter release, or your camera’s 2-second self-timer, helps eliminate vibration caused by pressing the shutter button at the start of the exposure.
For basic wide-field shots, any reasonably sturdy tripod can work. If you later add a star tracker, use longer lenses, or shoot in windy conditions, tripod strength and head stability become more important. Start with what you have, then upgrade based on real field experience.
Star Trackers: The Upgrade That Opens New Doors
A star tracker is a motorized mount that rotates your camera at the same rate as the Earth’s rotation, keeping stars stationary during longer exposures. Without a tracker, shutter speed is limited by the 500 Rule. With one, you can shoot longer exposures, use lower ISOs, and capture fainter celestial detail.
A star tracker is not required for casual Milky Way images, moon photography, or star trails. It becomes useful when you want sharper stars at longer focal lengths, cleaner stacked exposures, or access to faint deep sky subjects such as galaxies and nebulae.
How to Focus and Set Up Your Camera for Night Sky Photography
Manual focus is required for astrophotography because autofocus usually fails in near-total darkness. The goal is infinity focus, but the infinity mark on a lens is rarely exact. Use live view, magnify a bright star, and adjust focus manually until the star appears as small and sharp as possible.
Finding Infinity Focus in the Dark
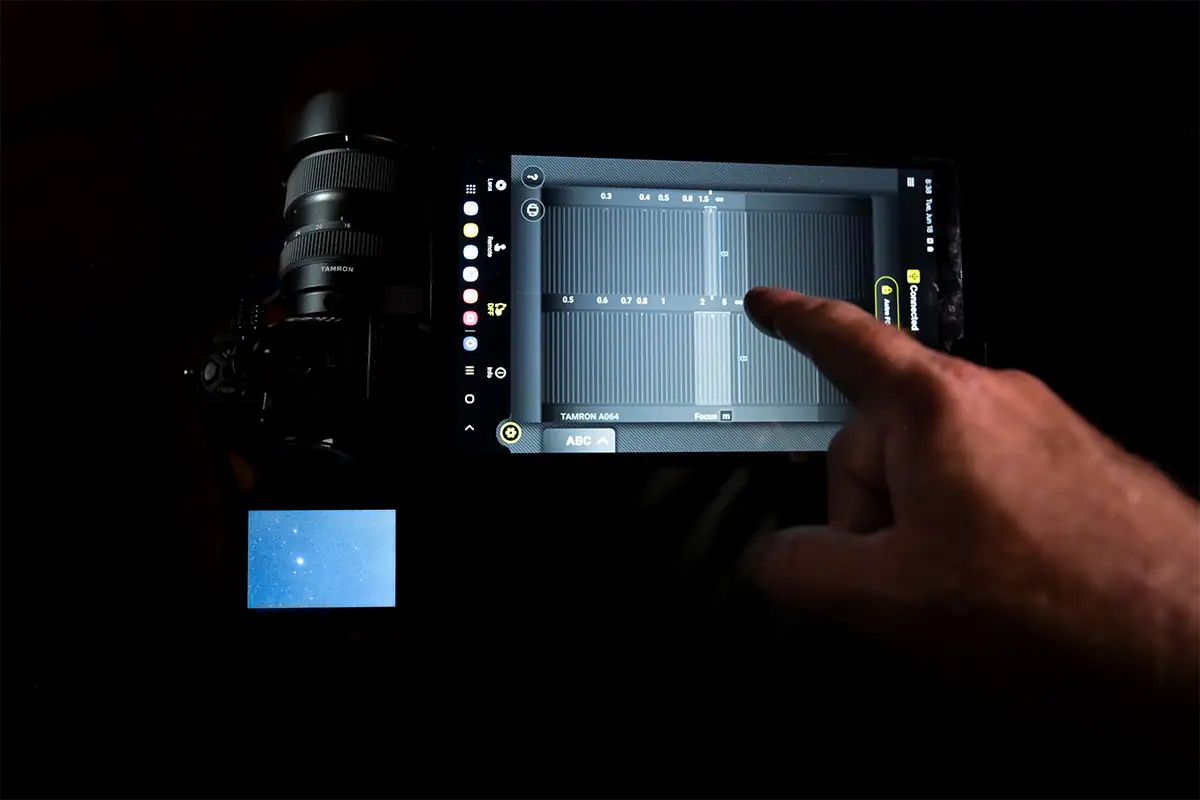
Before your shoot, autofocus on a distant object at least 100 meters away in daylight, switch to manual focus, and tape the focus ring so it cannot shift. On location, confirm focus by magnifying a bright star in live view.
If your lens supports the TAMRON Lens Utility™, Tamron’s Astro Focus Lock feature can help solve this exact challenge by making it easier to hold the correct focus point for night sky photography. Learn more in the Tamron Astro Focus Lock guide.
Shooting in RAW and Setting White Balance
Always shoot in RAW for astrophotography because RAW files preserve the dynamic range and color data needed for serious night sky editing. RAW gives you more flexibility to recover stars, reduce noise, adjust white balance, and refine the color of the sky without permanently damaging image quality.
Set white balance around 3,500K-4,000K for a natural night sky, or leave it on Auto and adjust later if shooting RAW. Avoid making the sky too blue with Tungsten or too warm with Daylight. A good in-camera white balance saves time, but RAW gives you room to correct it.
The Best Camera Settings for Astrophotography
The baseline astrophotography settings for wide-field night sky work are aperture at your lens’s widest setting, usually f/1.8 to f/2.8, ISO 1600-3200, shutter speed calculated with the 500 Rule, and manual focus set to infinity. These settings are a reliable starting point for stars and the Milky Way.
For a full review of the best settings for a wide range of night skies shooting, see the Baseline Setup Camera Settings for Every Astrophotography Shooting Scenario guide.
Aperture: Go as Wide as Your Lens Allows
For astrophotography, use the widest aperture your lens offers, typically f/1.8, f/2, or f/2.8. The night sky is extremely dim, and every stop of aperture captures more light. If your lens shows soft corners or coma at maximum aperture, stop down slightly for sharper stars near the frame edges. According to Photography Life’s guide on coma aberration, coma is most visible at wide apertures and causes stars toward the edges of the frame to appear comet-shaped rather than as sharp points. Stopping down to f/2.0 or f/2.8 can dramatically reduce it, though this also increases exposure time.
Aperture controls how much light reaches the sensor. Wider apertures are especially important for Milky Way photography because they allow you to capture more light before star movement becomes visible. For a deeper explanation, read what is aperture in photography.
ISO: Balance Light Collection Against Noise
ISO 1600-3200 is the standard starting range for astrophotography. Higher ISO settings brighten faint stars and the Milky Way, but they also amplify noise. According to Cambridge in Colour’s tutorial on digital camera image noise, higher ISO speeds amplify the image signal to simulate greater sensitivity, but this amplification also increases noise, producing random speckles that degrade fine detail. Modern full-frame cameras may handle ISO 6400 well, while APS-C cameras often show more grain at the same setting.
Test your camera at ISO 800, 1600, 3200, and 6400 on your first night out. This helps you understand your camera’s noise performance instead of relying on generic settings. For more detail, see what is ISO in photography.
Shutter Speed: The 500 Rule
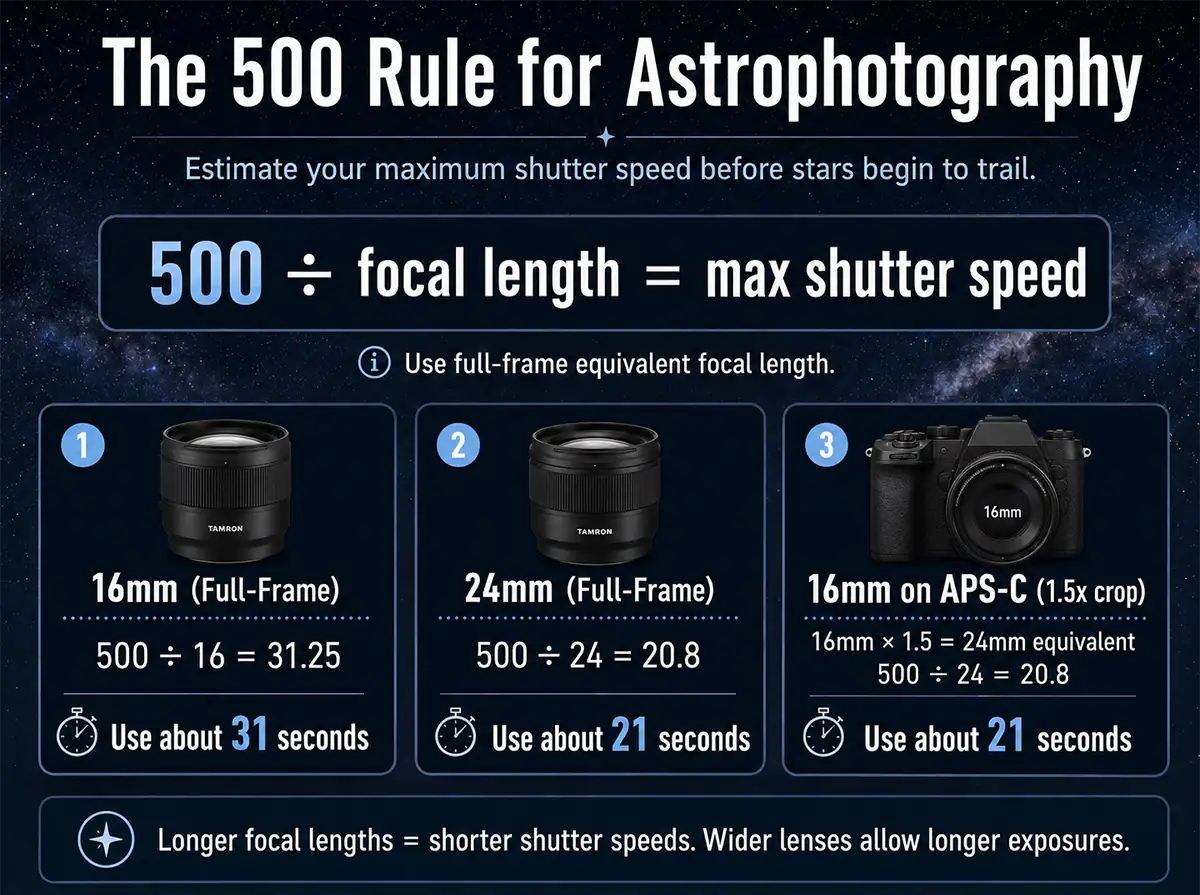
Without a star tracker, your maximum shutter speed before stars begin to trail is calculated with the 500 Rule: divide 500 by your lens’s full-frame equivalent focal length. A 24mm lens allows about 20 seconds. A 14mm lens allows about 35 seconds before visible trailing begins.
For example: 500 ÷ 24 = approximately 20 seconds. With a 14mm lens on an APS-C camera, apply the crop factor first. A 14mm APS-C lens behaves like roughly 21mm full-frame equivalent, so 500 ÷ 21 = approximately 24 seconds. According to Photography Life’s guide on the 500 rule vs. NPF rule, beyond roughly 30 seconds even an ultra-wide lens will show noticeable star blur due to Earth’s rotation, and high-megapixel cameras may require stricter limits than the standard formula suggests.
If you want star trails instead of sharp star points, ignore the 500 Rule and use much longer exposure times or stacked sequences. For more background, see what is shutter speed and our long exposure photography guide.
Moon Photography Settings
The moon is much brighter than stars or the Milky Way, so it requires very different settings. For a full moon, start at ISO 100, f/8, and 1/125s. The Looney f/11 rule suggests f/11, ISO 100, and a shutter speed equal to the ISO value.
A crescent moon usually needs a longer exposure than a full moon. A telephoto lens of 200mm or longer reveals more lunar detail, while 500mm or longer begins to show craters clearly. For a full guide, read how to photograph the moon.
How to Plan an Astrophotography Shoot
Successful astrophotography is 50% planning and 50% execution. The three most important variables are light pollution, moon phase, and weather. Find a dark sky location, shoot near a new moon for Milky Way work, and choose a clear night with low humidity for the best results.
Finding Dark Skies: Light Pollution Maps
Light pollution is the biggest environmental obstacle in astrophotography. Urban and suburban skies wash out stars, reduce contrast, and make the Milky Way difficult or impossible to see. Use a light pollution map before choosing a location and look for Bortle Class 4 or darker skies whenever possible.
Even a 30-60 minute drive away from a city can make a dramatic difference. Tools such as Light Pollution Map and Dark Site Finder can help you locate darker areas, evaluate sky quality, and plan safer, more productive night photography locations.
Moon Phase and Milky Way Timing
For Milky Way photography, shoot within five days of a new moon when the moon is below the horizon or too thin to brighten the sky significantly. A full moon can wash out the galactic core and reduce visible stars, making timing one of the most important planning decisions.
In the Northern Hemisphere, the Milky Way galactic core is most visible from roughly April through October, with peak visibility in June and July. Moon photography and star trails can be photographed year-round, but Milky Way images require more careful seasonal planning.
Apps and Tools for Night Sky Planning
Three planning tools cover most astrophotography needs: PhotoPills, Stellarium, and Clear Outside or Clear Dark Sky. PhotoPills helps predict Milky Way position, moonrise, moonset, and exposure limits. Stellarium shows the night sky from any location. Astronomy weather tools forecast clouds, humidity, and sky transparency.
Use these tools together. First, choose a dark location. Next, check the moon phase and Milky Way position. Finally, confirm cloud cover and visibility before committing to the trip. Planning cannot guarantee perfect conditions, but it dramatically improves your odds.
Types of Astrophotography: What Do You Want to Shoot?
Astrophotography divides into four main categories by subject and technique: wide-field nightscapes, star trails, moon and planetary photography, and deep sky imaging. Each requires different gear, planning, and skill. Start with the subject that excites you most, because the core skills build across categories.
Wide-Field Nightscapes and the Milky Way
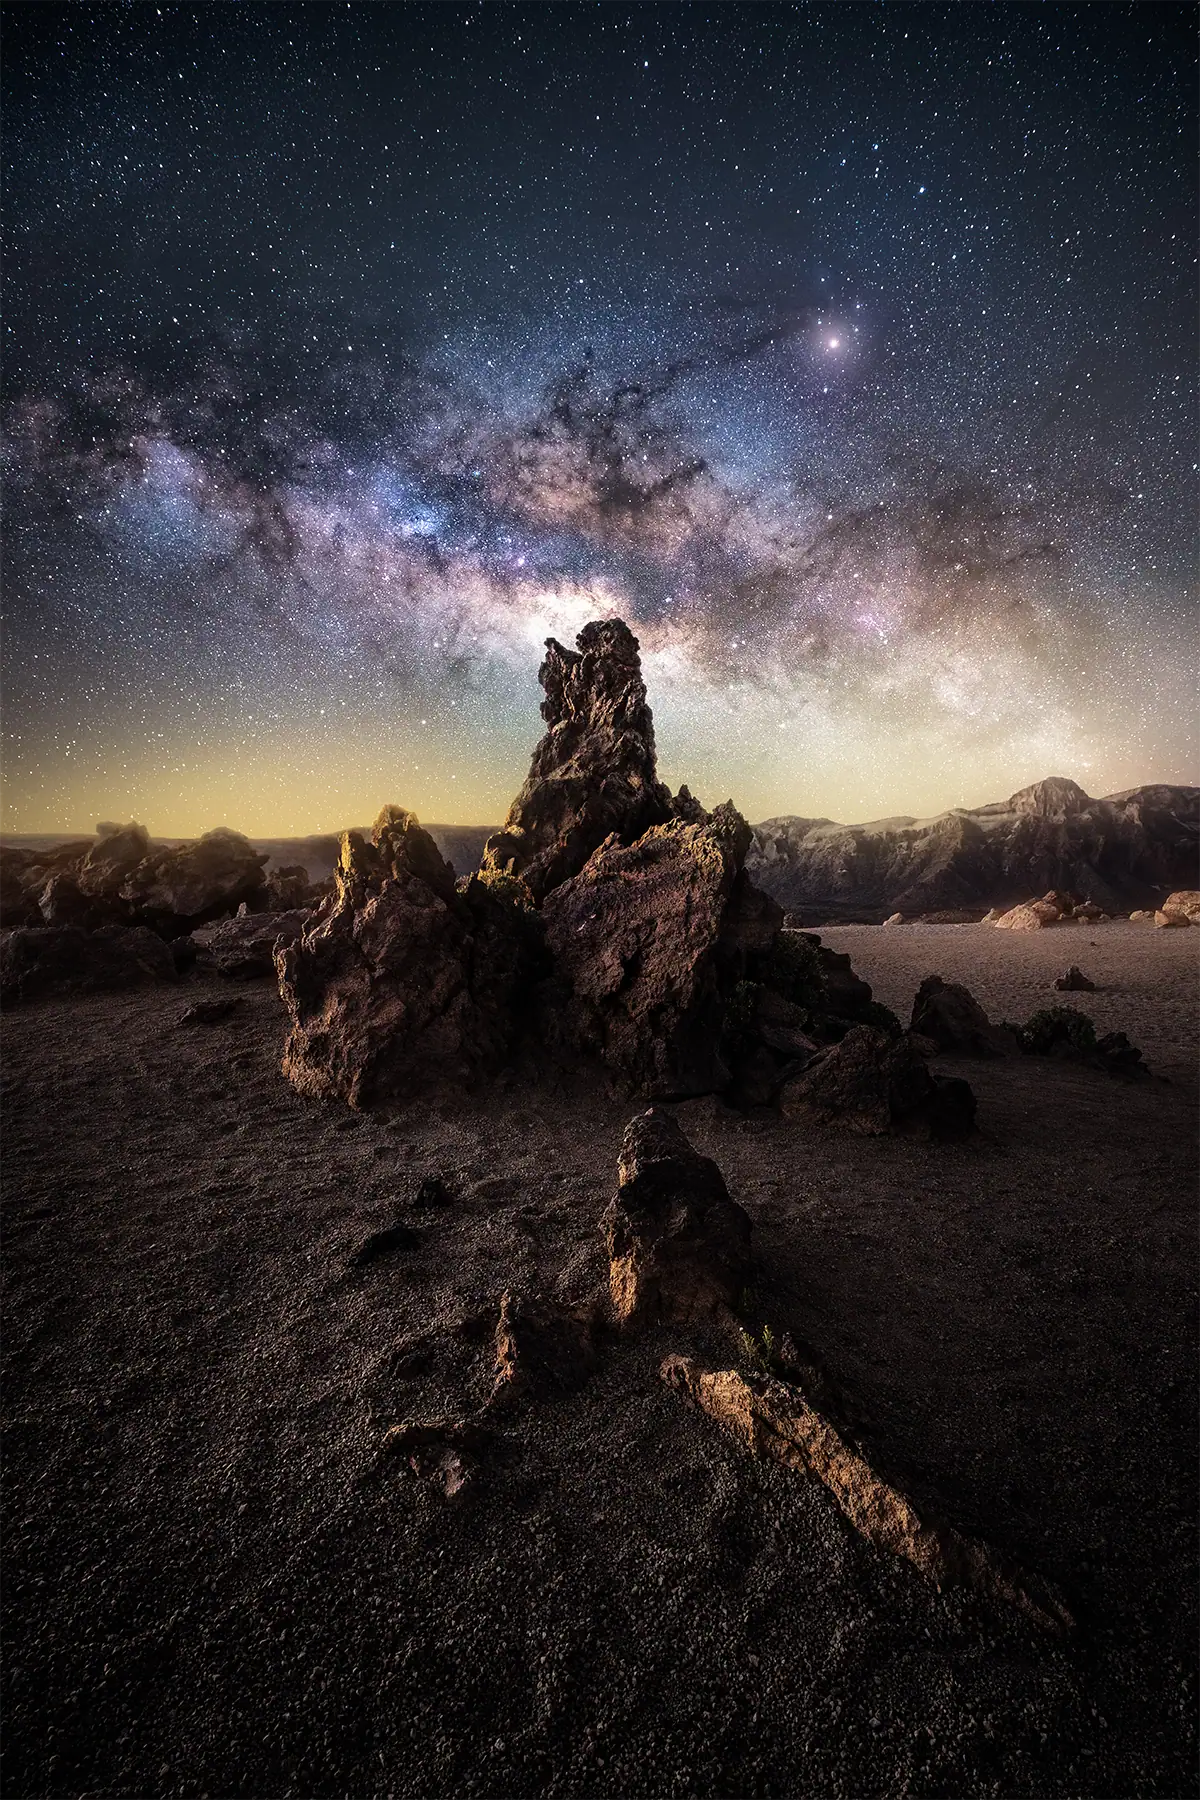
Wide-field nightscapes combine the night sky with a foreground landscape and are the most accessible entry point for many photographers. A fast wide-angle lens, tripod, dark sky, and new moon window are enough to begin. The best images balance stars, landscape, composition, and timing.
A night sky image without a strong foreground can feel empty. Look for a mountain, tree line, building, rock formation, road, or body of water to anchor the frame. For more help getting started, see our beginner’s guide to night sky photography, how to shoot the Milky Way, and best lens for astrophotography.
Star Trails
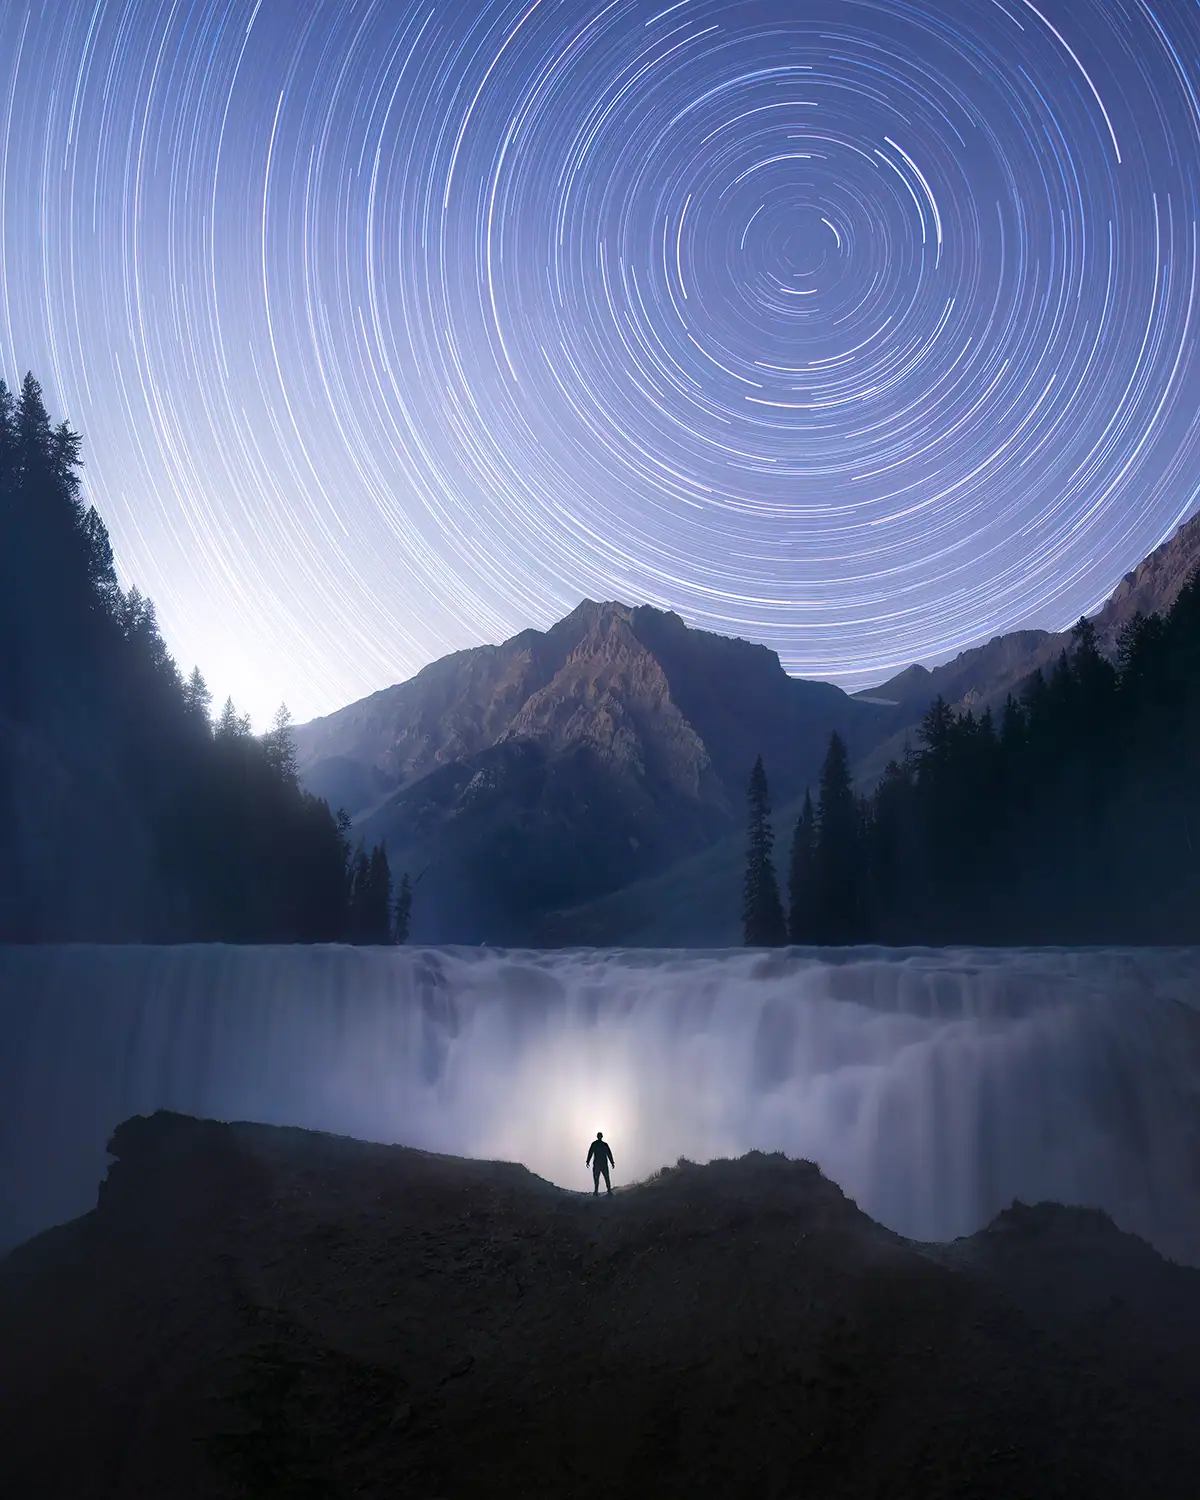
Star trail photography uses the Earth’s rotation as a creative tool, recording stars as arcs across the sky. For circular trails, point the camera toward Polaris in the Northern Hemisphere. For diagonal arcs, face east or west. This technique emphasizes motion rather than freezing stars as points.
Modern star trail photography often uses stacking. Shoot repeated 4–6 minute exposures for 1-3 hours, then combine them in software such as Startrails.de or Sequator. This avoids sensor heat and hot pixels from a single very long exposure. For more, see our long exposure photography guide and common mistakes in long exposure photography.
Moon Photography
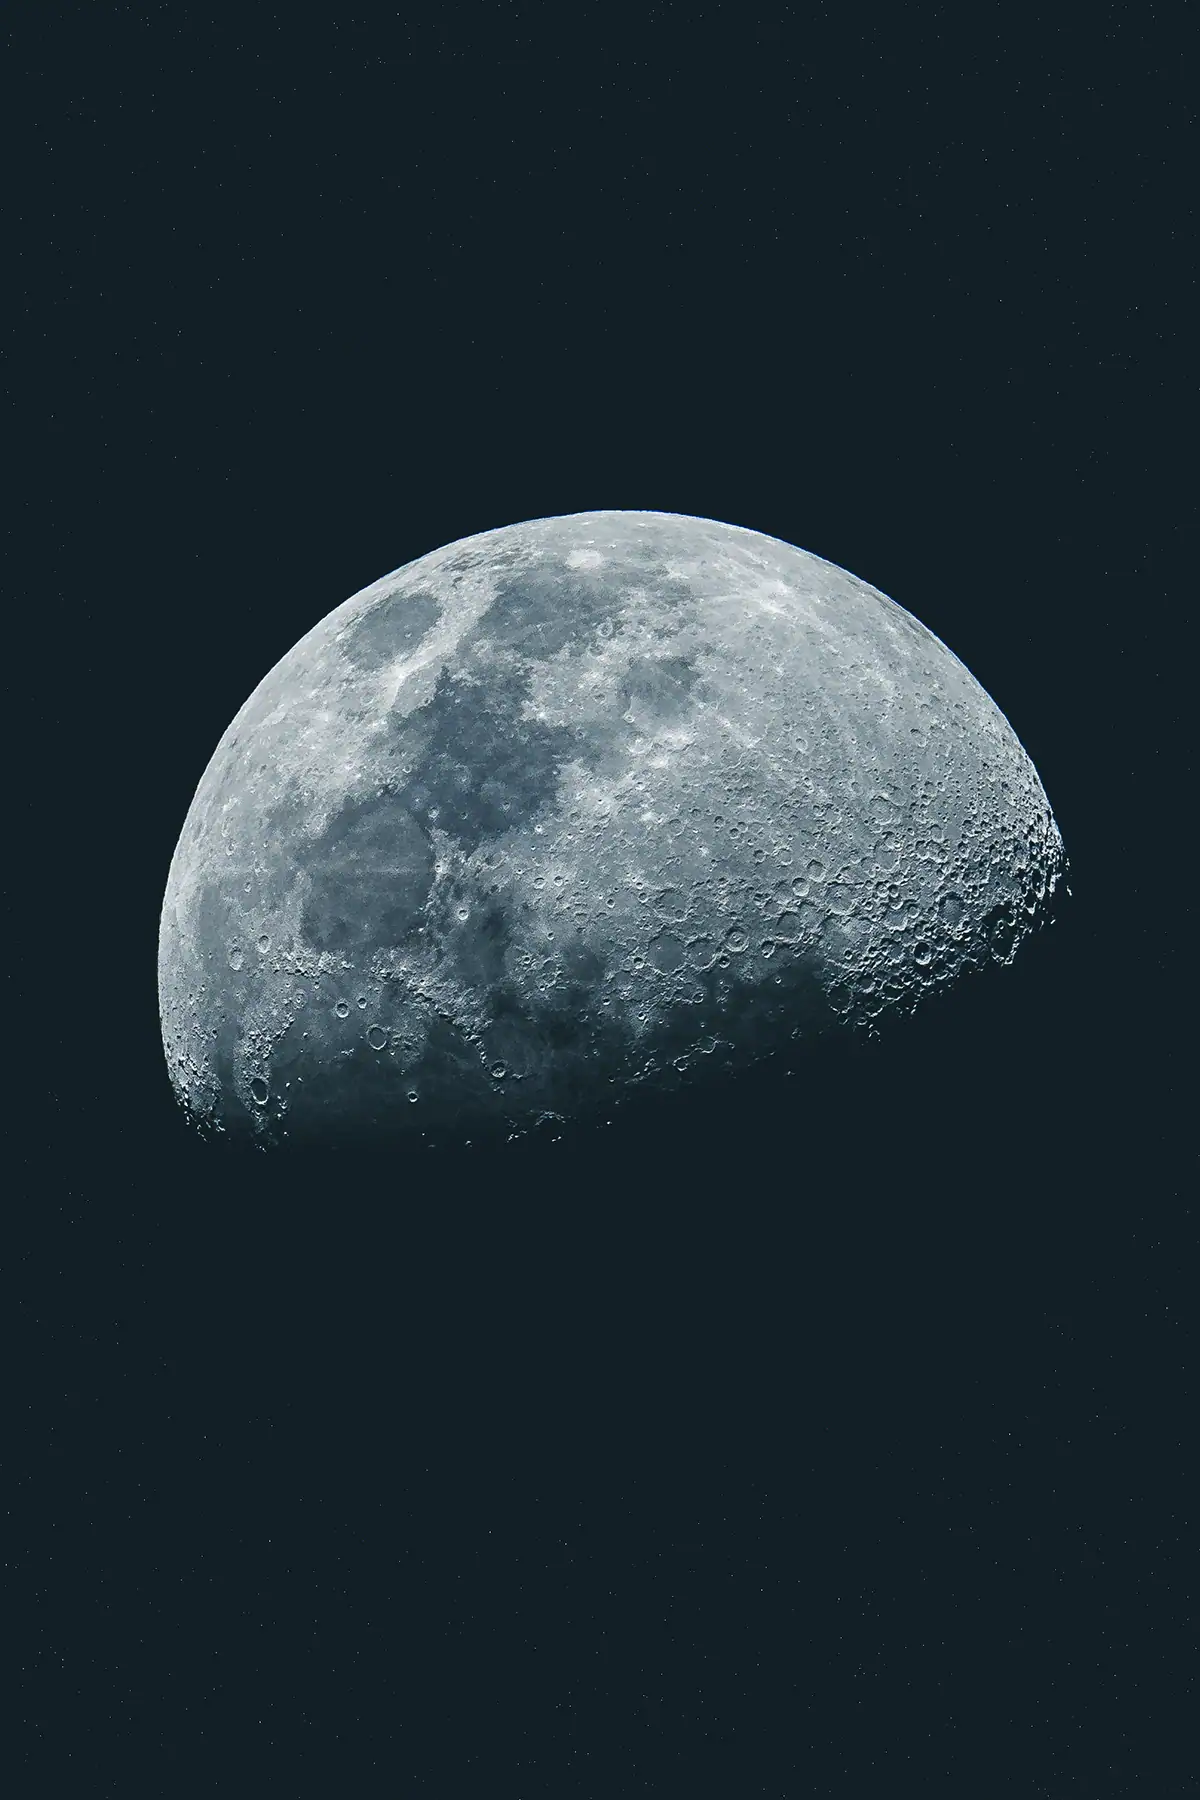
The moon is the ideal first astrophotography subject because it is bright, easy to find, and forgiving of minor technique errors. A telephoto lens in the 200-500mm range reveals craters and surface detail, while crescent and gibbous phases show dramatic shadows along the terminator line.
A full moon provides the most light, but it can look flatter because sunlight hits the lunar surface more directly. Crescent and gibbous phases often show better texture. For more detailed settings and lens recommendations, read how to photograph the moon.
Deep Sky Photography: Galaxies and Nebulae
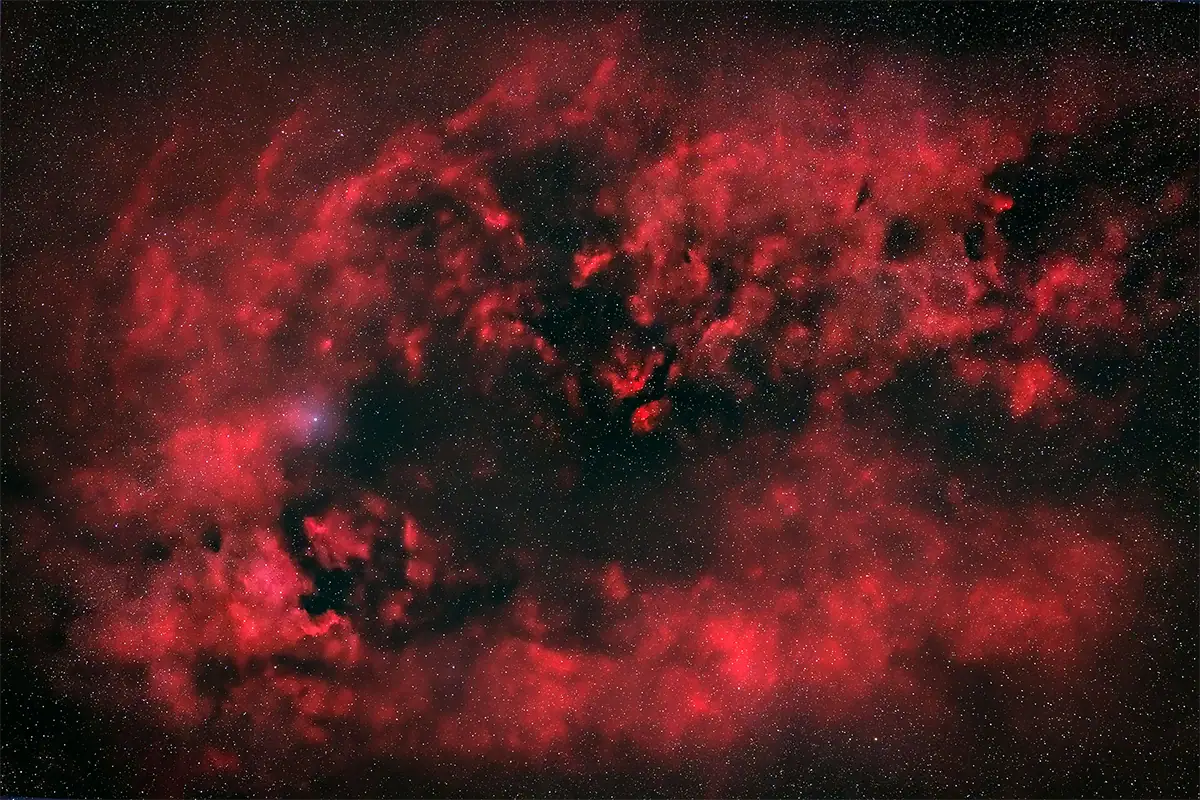
Deep sky photography captures distant galaxies, nebulae, and star clusters, and it is the most technically demanding form of astrophotography. It usually requires a star tracker or equatorial mount, longer focal lengths, multiple stacked exposures, and dedicated processing software to reveal faint celestial structures.
The Andromeda Galaxy is one of the more approachable deep sky subjects and can be photographed with a basic setup under good conditions. Most nebulae and distant galaxies require tracking and hours of accumulated exposure. For an unexpected approach to night sky shooting, explore astrophotography with a macro lens.
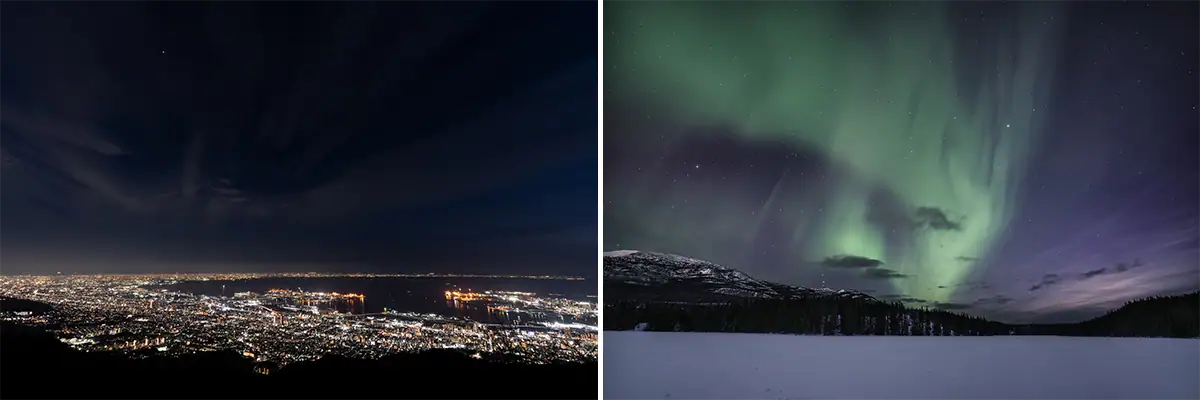
Northern Lights (Aurora Borealis) Photography
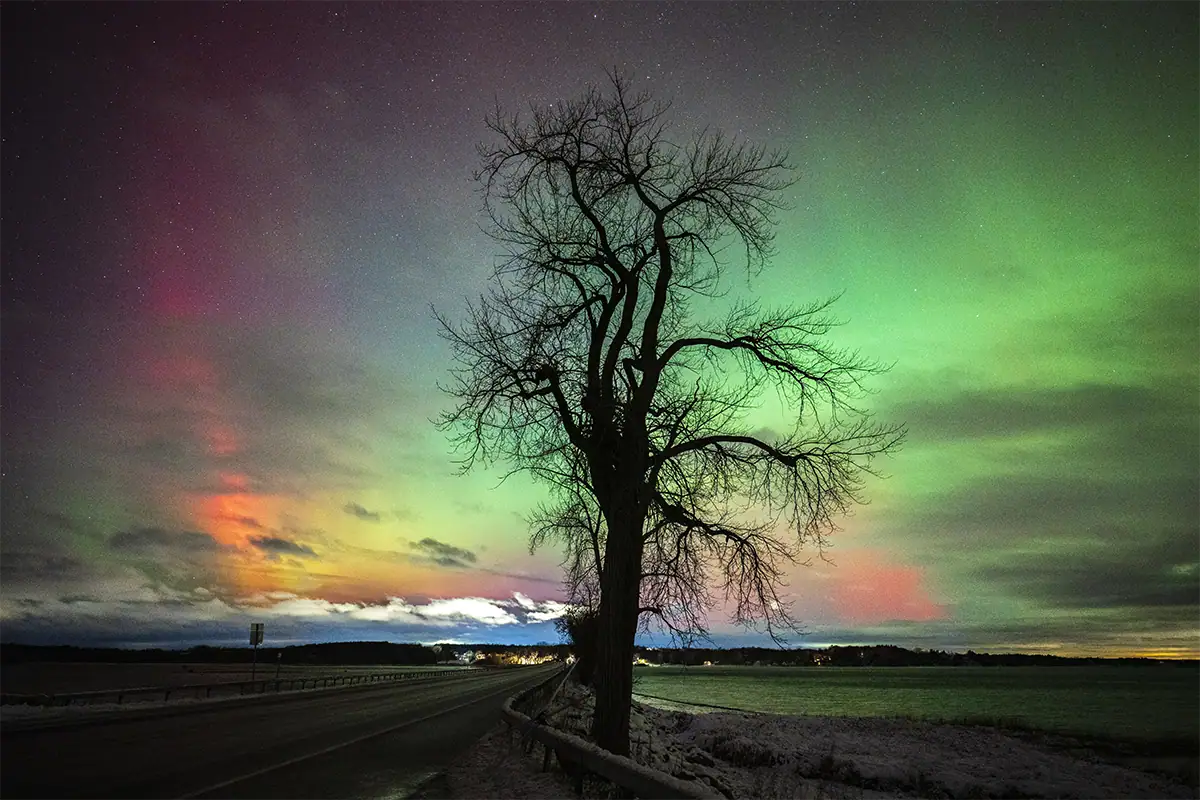
Aurora photography sits between astrophotography and landscape photography. Settings are similar to Milky Way work: wide aperture, ISO 800-3200, and shutter speeds around 5-15 seconds. Faster shutter speeds help freeze rapidly moving aurora curtains, while longer speeds create smoother, softer motion.
Forecasting is the most important variable. Check NOAA’s Space Weather Prediction Center or apps such as SpaceWeatherLive for Kp index forecasts. Kp 3+ can produce visible aurora at high latitudes, while Kp 5+ may be visible farther south.
Tamron Image Master Ian Plant notes: “Pay attention to space weather as well. We’re entering the solar maximum right now, which is the time during a 10-year cycle of peak solar activity, which means plenty of chances to incorporate the aurora into your landscape photos.”
For more, read how to photograph the northern lights.
How to Edit Astrophotography Images
Astrophotography editing in Lightroom or Adobe Camera Raw follows a consistent workflow: set white balance first, lift shadows carefully, reduce noise, add contrast, and use clarity or texture sparingly to define stars. The goal is a clean, natural night sky, not an over-processed image with exaggerated color and sharpening.
Basic Lightroom Workflow for Night Sky Images
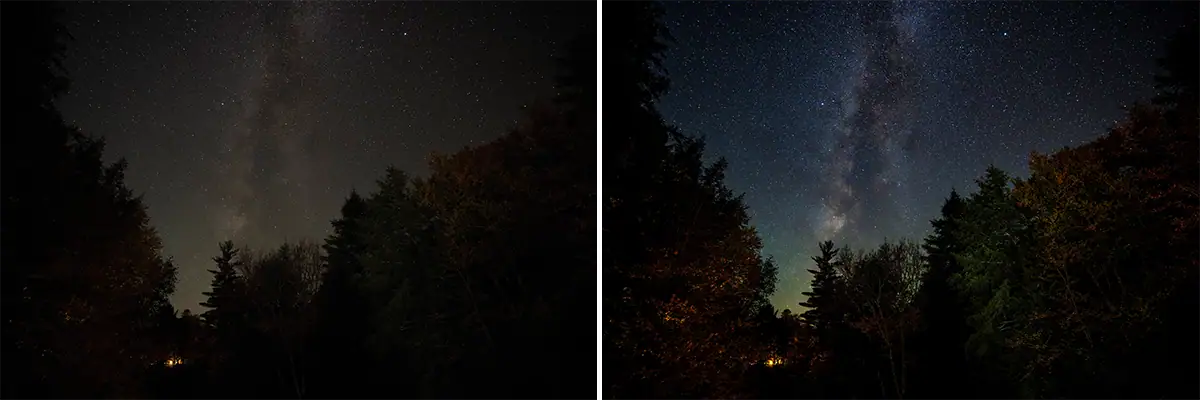
Start by adjusting white balance until the sky looks natural, often around 3,500K-4,500K. Then lift Shadows slightly, reduce Highlights if needed, add +10-20 Texture and Clarity, reduce Luminance Noise around 30-50 for ISO 3200 images, and add a gentle S-curve for contrast.
Less is more. Heavy saturation, extreme sharpening, and excessive clarity can make night sky images look artificial. Strong astrophotography editing balances visibility with atmosphere. For a deeper look at creative post-processing decisions, see how to master mood with lighting and shadows.
Image Stacking for Noise Reduction
Image stacking combines multiple exposures of the same scene to reduce random noise and improve detail. A typical wide-field session uses repeated 4-6 minute exposures over 1-3 hours, then combines them in software to average out noise while preserving star detail. The stars appear in each frame, but random noise changes from image to image. Software averages the frames together, improving the signal-to-noise ratio without requiring a higher ISO.
Stacking is one of the main techniques experienced astrophotographers use to produce cleaner night sky images. Free tools such as Sequator for Windows or Starry Landscape Stacker for Mac can automate much of the process for wide-field astrophotography.