Instant Savings
 Support
 Find a Dealer
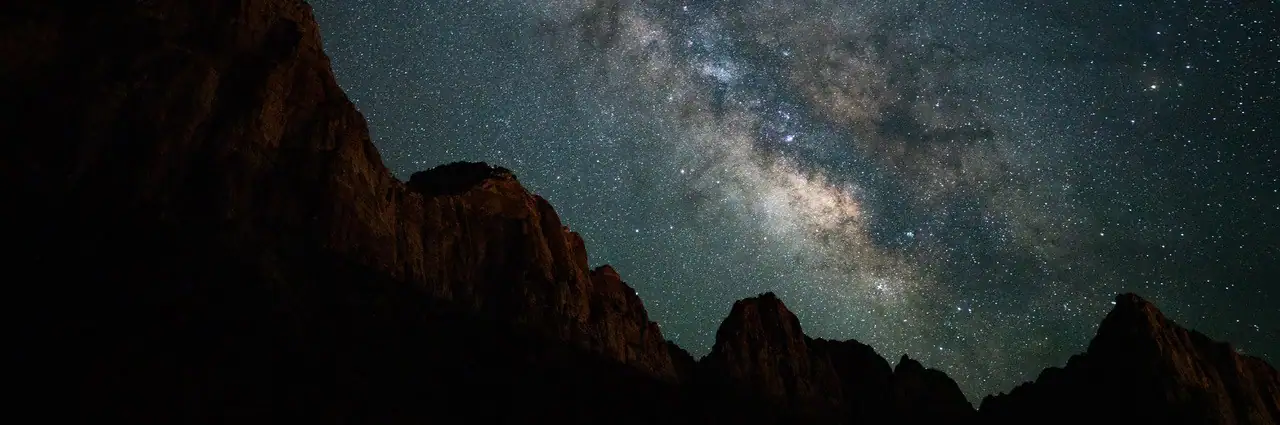
The best astrophotography settings for most night sky subjects are your lens’s widest aperture, usually F1.8-F2.8, ISO 1600-3200, a shutter speed calculated with the 500 Rule, manual focus set to infinity, and RAW file capture. These baseline astrophotography camera settings work for stars, Milky Way images, and wide-field night sky photography.
By Stacie Errera, Photography by credited Tamron photographers. Graphics by Tamron Americas (AI-Generated)
Camera settings for astrophotography change depending on what you are photographing. For a broader introduction to astrophotography including gear, planning, and technique, see our complete astrophotography guide. The Milky Way needs dark skies and short enough exposures to keep stars sharp. Star trails need long sequences and stacking. The moon needs much faster shutter speeds. Aurora requires shorter exposures to freeze movement. Deep sky photography benefits from tracking, stacking, and longer total exposure time.

This guide gives you a practical starting point for each major astrophotography scenario so you can adjust quickly in the field.
Table of Contents
- Baseline Astrophotography Settings
- Camera Settings for Milky Way Photography
- Camera Settings for Star Trail Photography
- Camera Settings for Moon Photography
- Camera Settings for Aurora Photography
- Camera Settings for Deep Sky and Tracked Exposures
- How to Focus for Astrophotography
- How to Adjust Settings in the Field
- Final Astrophotography Settings Checklist
Baseline Astrophotography Settings
Baseline astrophotography settings are F1.8-F2.8, ISO 1600-3200, shutter speed based on the 500 Rule, manual focus to infinity, and RAW capture. These settings create a strong starting exposure for wide-field stars and night sky scenes, especially when shooting from a dark location with a stable tripod.
Start with manual mode. Open your aperture as wide as your lens allows, choose ISO 3200 as a first test, and calculate shutter speed using the 500 Rule: 500 divided by your full-frame equivalent focal length. For example, 500 ÷ 24mm = about 20 seconds. According to Photography Life’s guide on the 500 rule vs. NPF rule, beyond roughly 30 seconds even an ultra-wide lens will show noticeable star blur due to Earth’s rotation, and high-megapixel cameras may require stricter limits than the standard formula suggests.
Shoot in RAW so you have more control over white balance, exposure recovery, shadows, and noise reduction in editing. For more background on the individual exposure settings, see Tamron’s guides to:
Camera Settings for Milky Way Photography
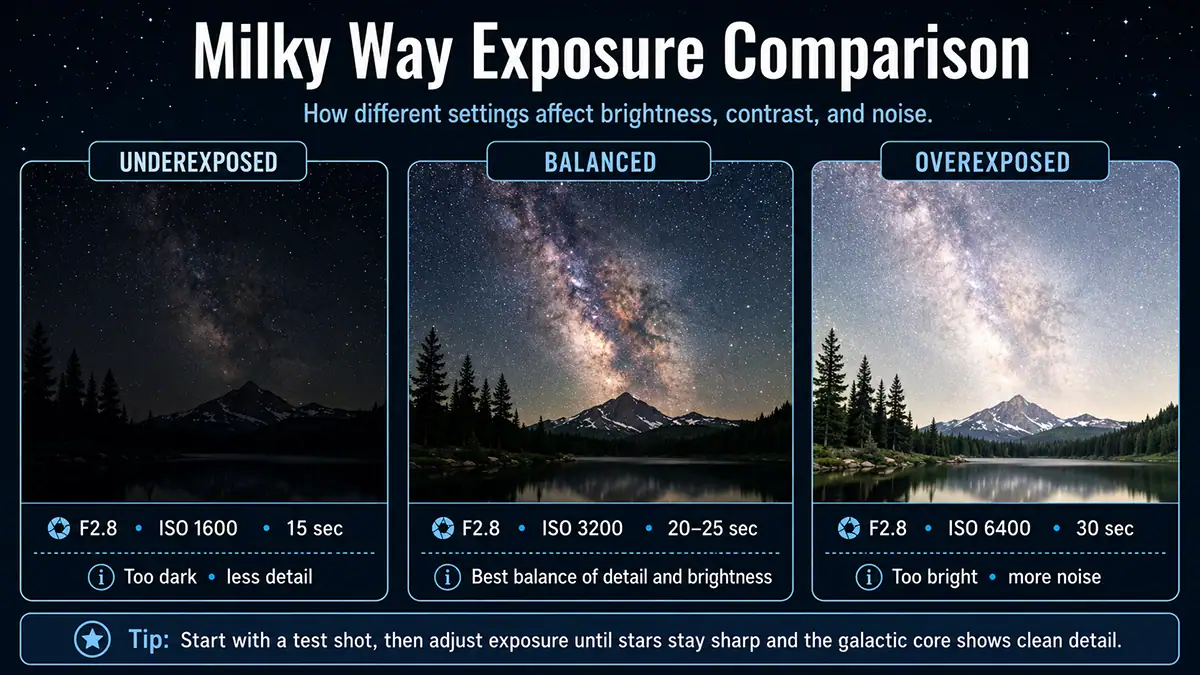
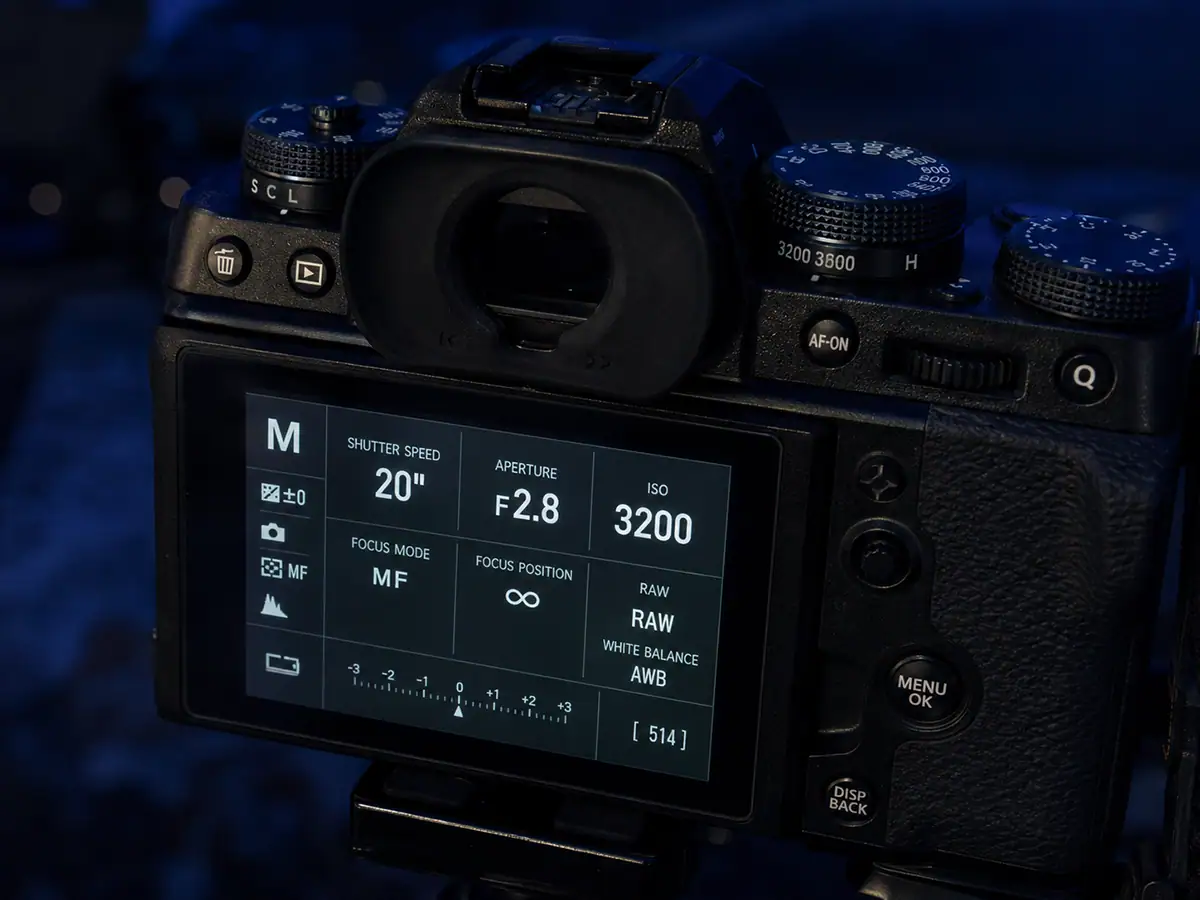
Camera settings for Milky Way photography usually start at F2.8, ISO 3200, and 20-25 seconds with a wide-angle lens. Use manual focus, shoot RAW, and plan for a dark sky location near the new moon. The galactic core needs both clean exposure and low light pollution.
A wide-angle lens in the 12–20mm range helps capture more sky and allows longer shutter speeds before stars begin to trail. Use the 500 Rule as a guide, then zoom in on your test image to check whether stars are still round.
For a full dedicated guide, see Milky Way Photography: How to Plan, Shoot, and Edit the Galactic Core. For lens guidance, see Best Lens for Astrophotography.
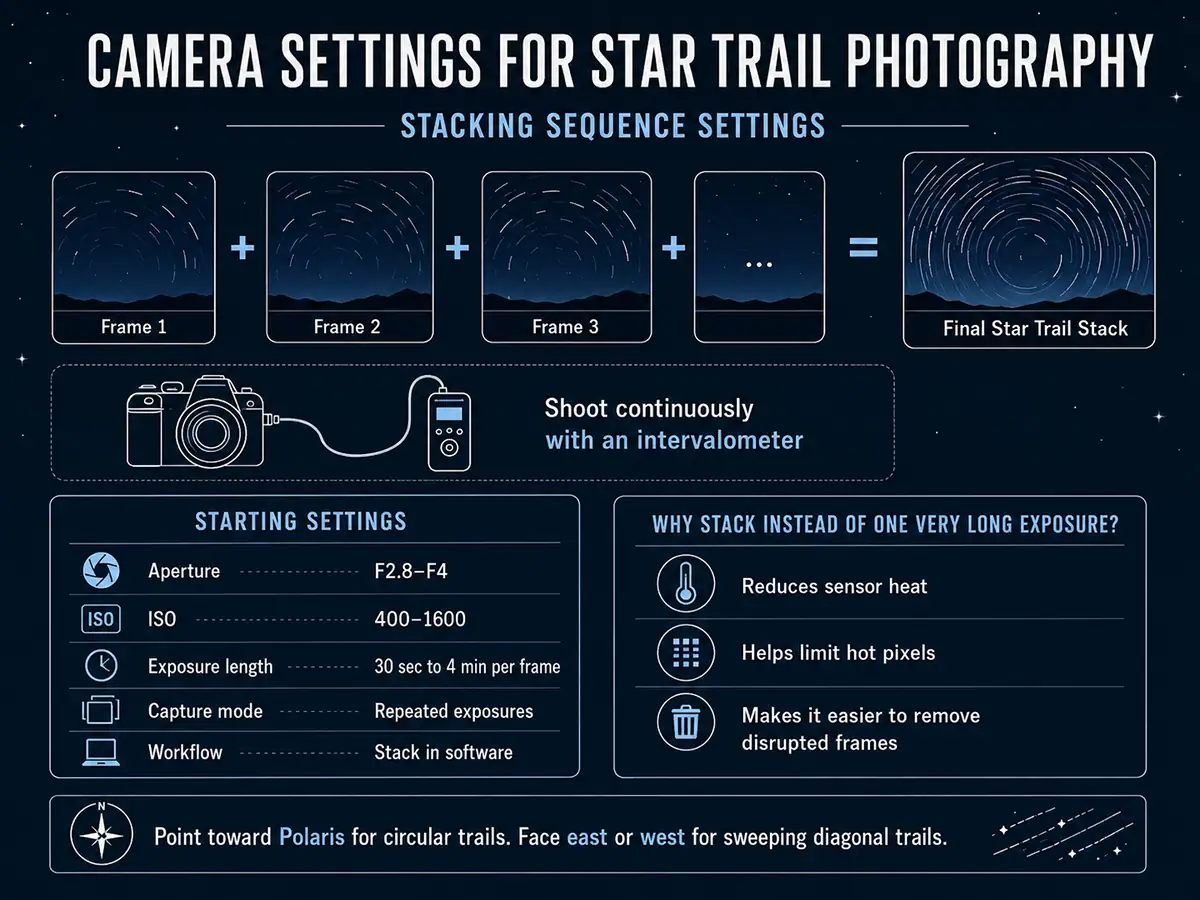
Camera Settings for Star Trail Photography
Camera Settings for Moon Photography
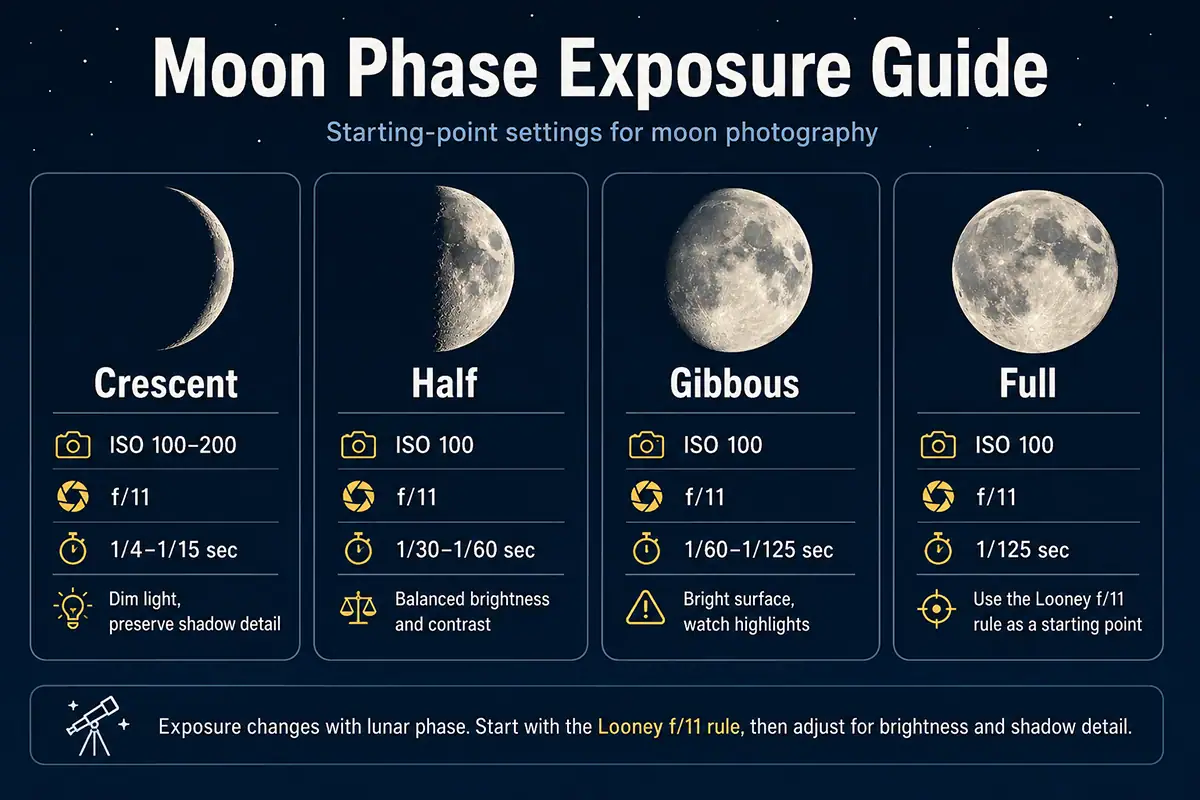
Camera settings for moon photography are very different from Milky Way settings because the moon is bright. For a full moon, start around ISO 100, F8, and 1/125 second. The Looney f/11 rule suggests F11, ISO 100, and a shutter speed near 1/100 second as a simple baseline.
A telephoto lens is important because the moon appears small with a wide-angle lens. Lenses in the 200–500mm range reveal surface detail, and longer focal lengths show more craters and texture. Exposure also changes by phase: crescent and gibbous moons often need different settings than a full moon.
For a complete guide, read How to Photograph the Moon.
Camera Settings for Aurora Photography
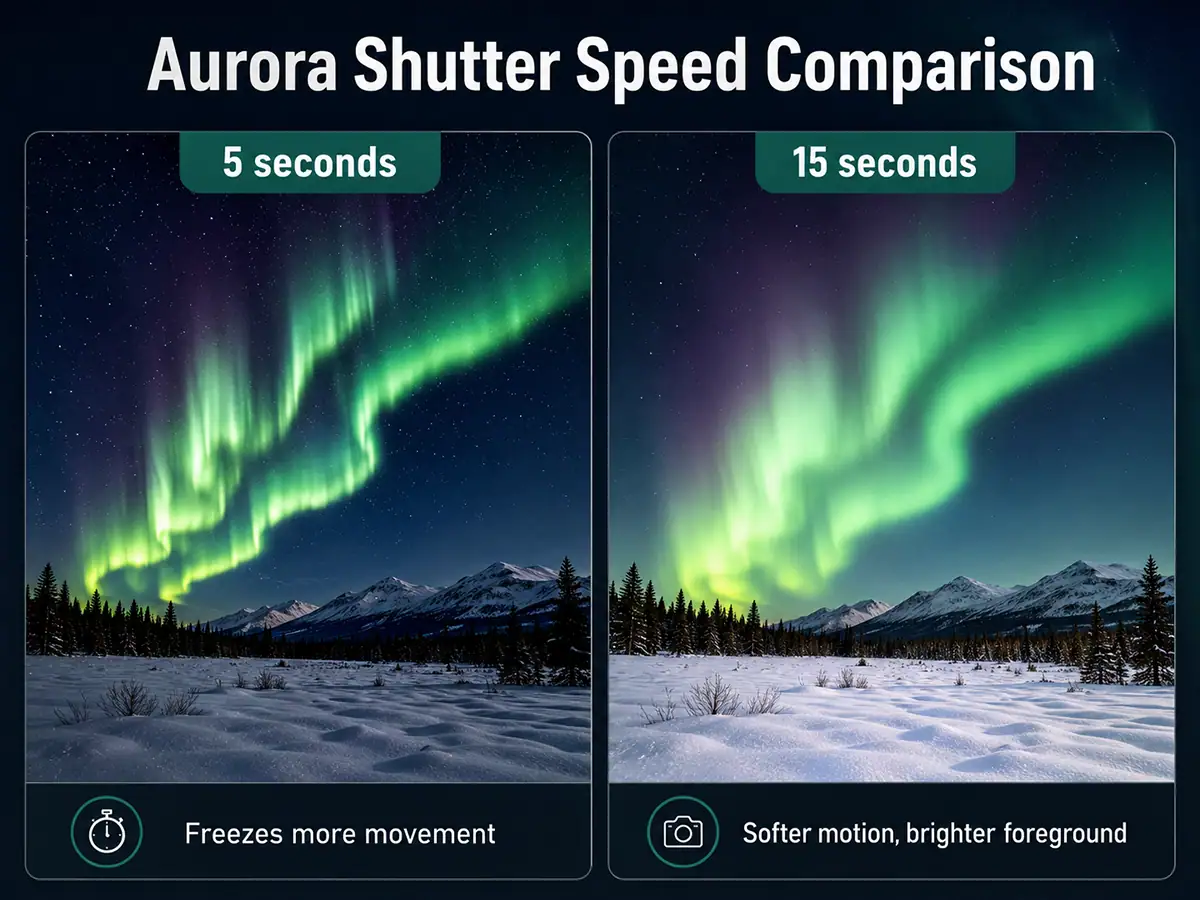
Camera settings for aurora photography start around F2.8, ISO 800–3200, and a shutter speed of 5–15 seconds. Use faster shutter speeds for active aurora curtains and slightly longer exposures for slower, softer movement. Manual focus and RAW capture are still essential.
Aurora changes quickly, so review your images often. If the aurora looks blurred or smeared, shorten the shutter speed. If the image is too dark, raise ISO or open the aperture. If highlights in the aurora are clipping, reduce ISO or shorten exposure.
Camera Settings for Deep Sky and Tracked Exposures
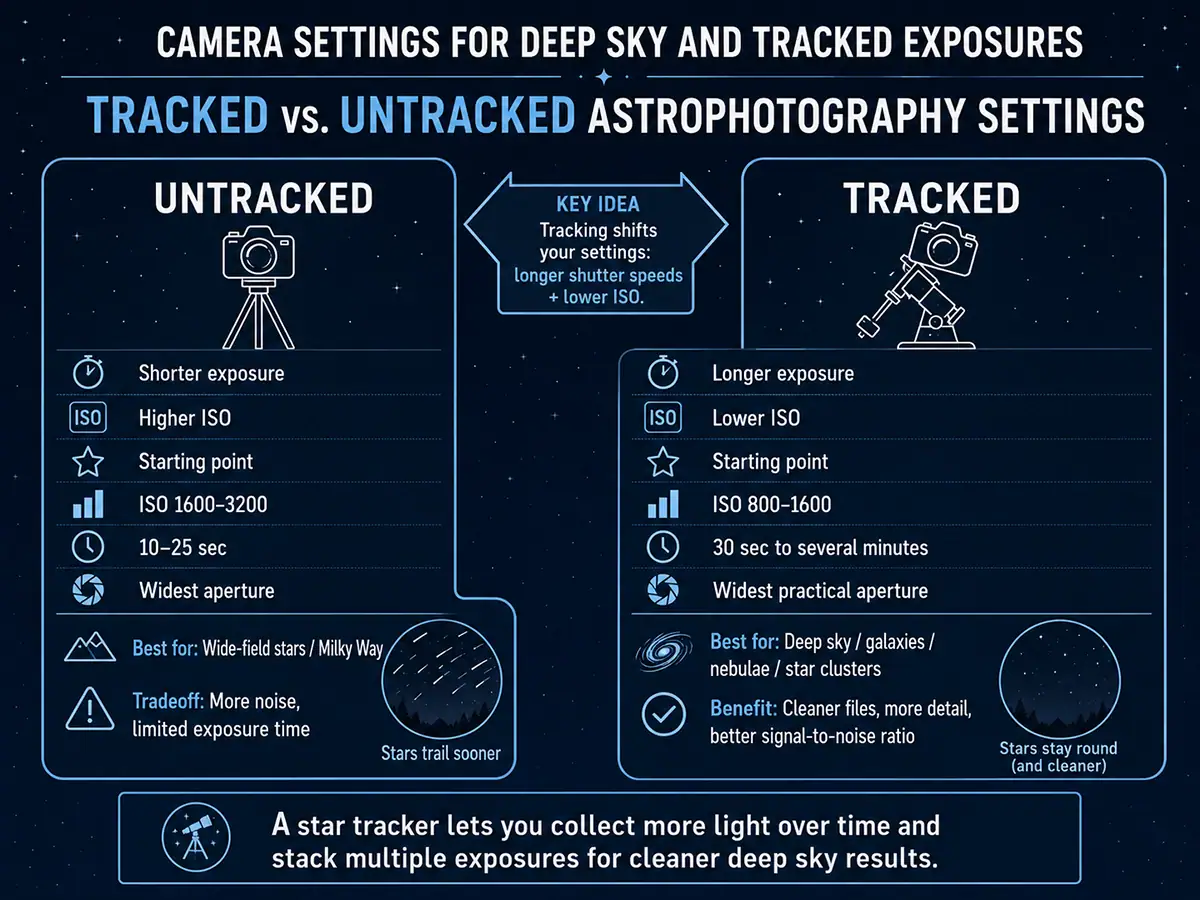
Camera settings for deep sky photography usually involve a star tracker, lower ISO, longer exposures, and image stacking. A starting point might be ISO 800–1600 with exposures from 30 seconds to several minutes, depending on your tracker, focal length, sky brightness, and target.
Tracking changes the exposure strategy. Instead of pushing ISO high for a single short exposure, you can collect more light over time with multiple longer exposures and stack them later. According to Cambridge in Colour’s tutorial on digital camera image noise, higher ISO speeds amplify the image signal but also increase noise, producing random speckles that degrade fine detail. Stacking longer exposures at lower ISO improves signal-to-noise ratio and helps reveal faint galaxies, nebulae, and star clusters.
Deep sky work is more technical than wide-field astrophotography, so begin with simple tracked exposures before adding advanced calibration frames or dedicated astronomy software.
How to Focus for Astrophotography
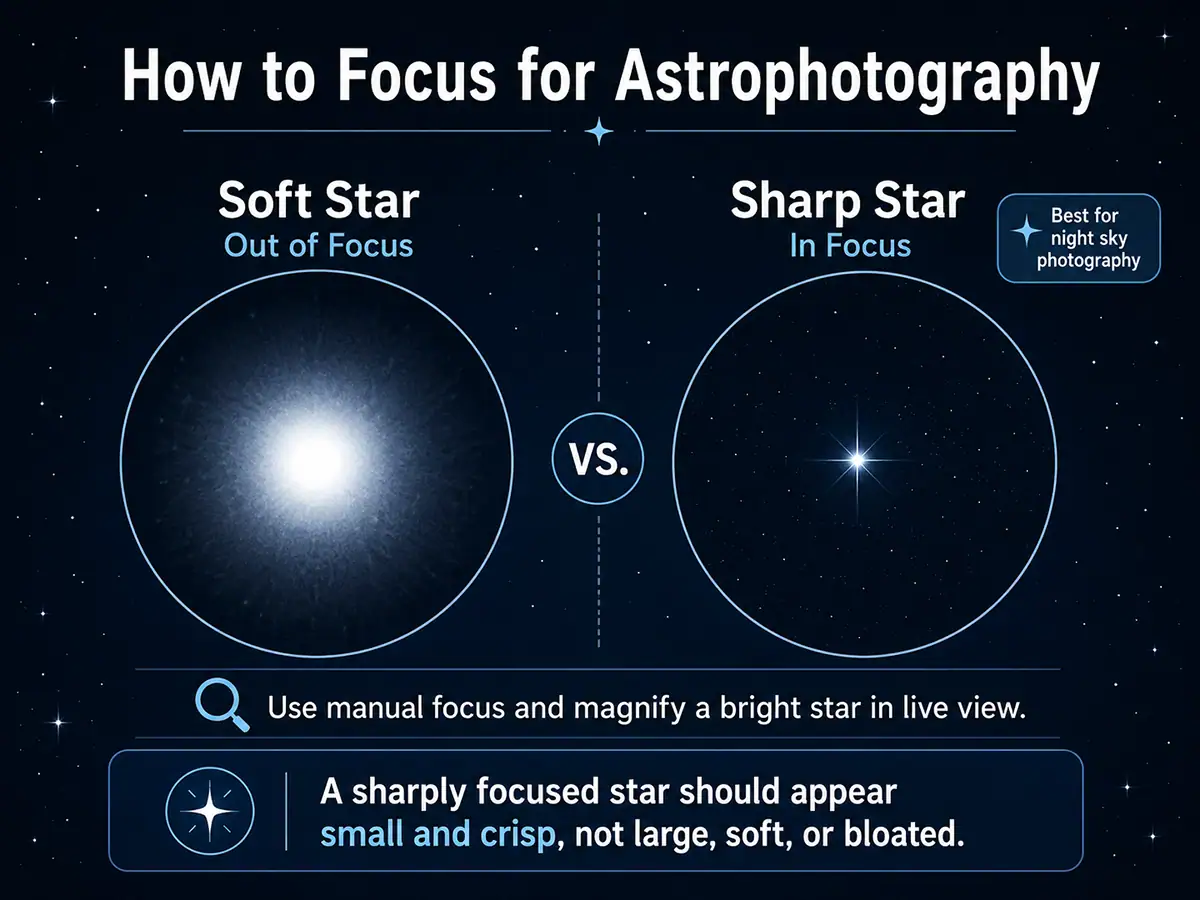
For astrophotography, use manual focus and magnify a bright star in live view until it appears as small and sharp as possible. Autofocus usually struggles in dark conditions, and the infinity mark on a lens is not always perfectly accurate for sharp stars.
Once focus is set, avoid touching the focus ring. If your lens supports the TAMRON Lens Utility™, then using the Astro Focus Lock feature will help keep your focus point stable for night sky work. Learn more in the Astro Focus Lock Guide.
How to Adjust Settings in the Field
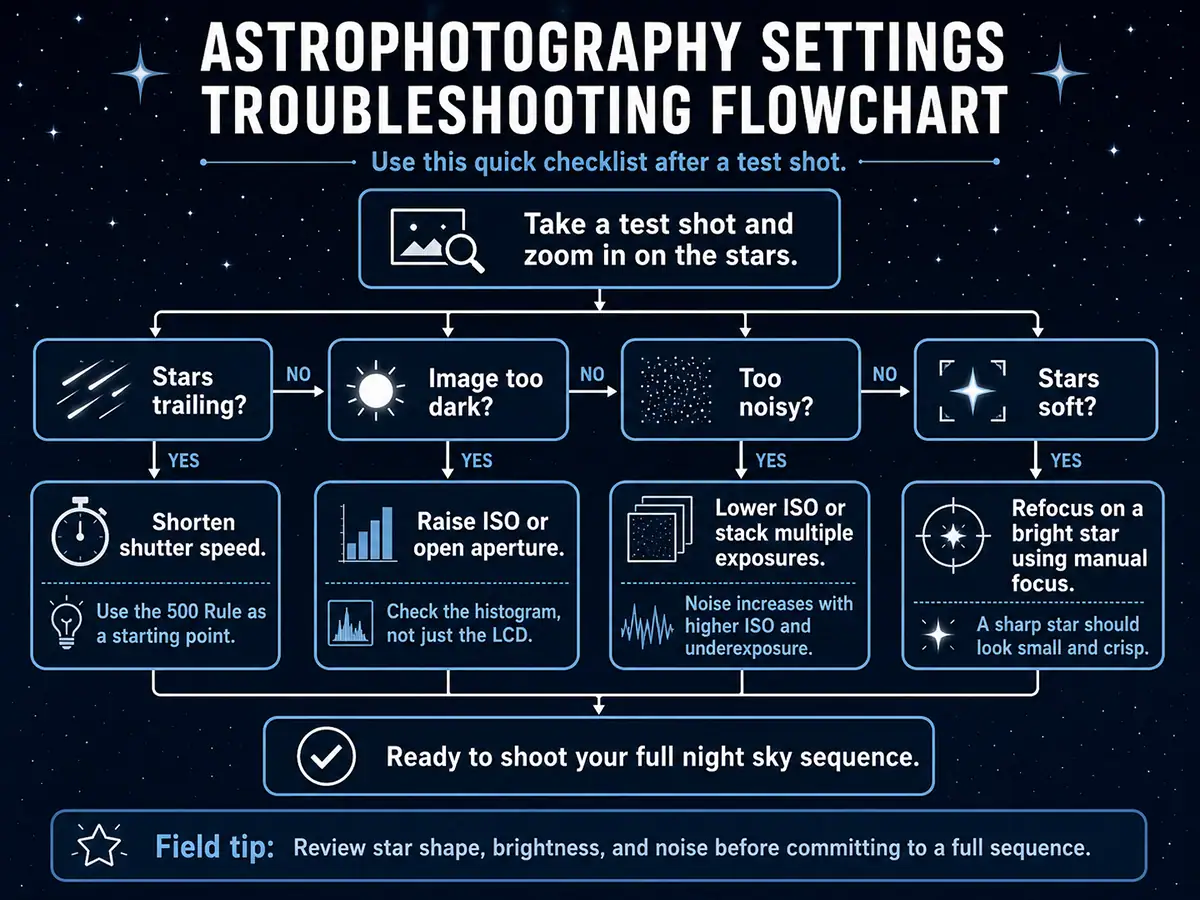
To adjust astrophotography settings in the field, take a test shot, zoom in on the stars, and check three things: star shape, exposure brightness, and noise. If stars are trailing, shorten shutter speed. If the image is too dark, raise ISO or open aperture. If noise is too strong, lower ISO or stack multiple exposures.
Do not rely only on the camera’s rear LCD brightness. Use the histogram when possible and review the image at high magnification. Small mistakes in focus or shutter speed are easier to fix before you shoot a full sequence.