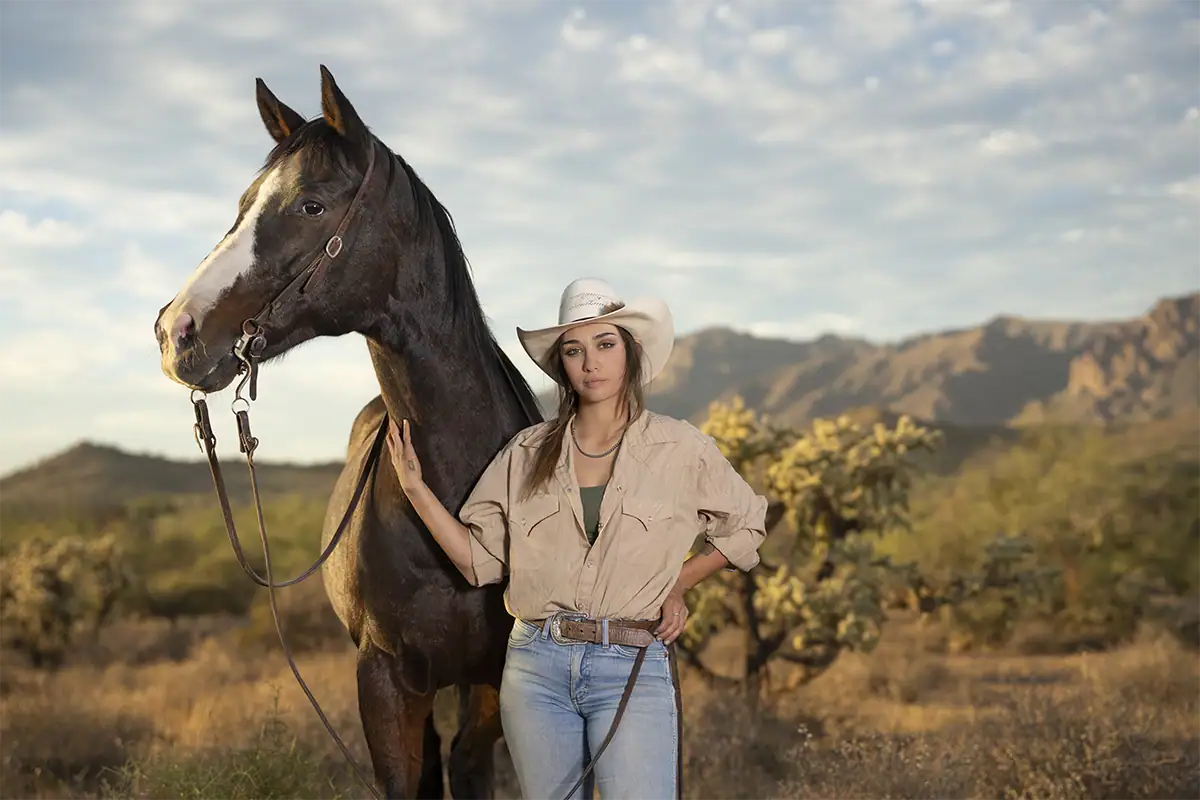
Portrait photography is the practice of photographing a person in a way that highlights their identity, personality, or story. It uses controlled elements like lighting, pose, composition, and lens choice to shape how the subject appears and feels in the final image.
This guide explains what portrait photography is, the main types of portraits, the best camera settings and lenses to use, and a step-by-step workflow for taking high-quality portrait photos. It is designed as a beginner-friendly resource that also introduces key technical decisions used by professional photographers.
Table of Contents
- What Is Portrait Photography?
- What Are The Types of Portrait Photography?
- What Are The Best Camera Settings for Portraits?
- What Is the Best Type of Lens for Portrait Photography?
- Best Tamron Lenses for Portrait Photography
- How to Light for Portrait Photography?
- Composition Tips for Portrait Photography
- Building Rapport and Directing Your Subject
- How to Take Great Portrait Photos
What Is Portrait Photography?

Portrait photography is a genre dedicated to capturing a subject’s identity, personality, or story through intentional use of light, pose, composition, and context. It covers formal studio headshots to candid street captures, unified by the human subject as the primary visual and emotional anchor.
At its core, portrait photography is about more than showing what a person looks like. A strong portrait reveals something about who the subject is, how they want to be seen, or what the moment feels like. That is why successful portrait photography depends on both technical choices and interpersonal skill.
Lens choice, aperture, lighting, and camera position all affect how a face is rendered in a portrait. Just as important, the photographer must build trust, guide expression, and help the subject feel comfortable enough to appear natural in front of the camera. That idea is reflected in Edward Steichen’s well-known observation: “A portrait is not made in the camera but on either side of it.”
What Are The Types of Portrait Photography?
The main types of portrait photography are traditional, environmental, lifestyle, headshots, and candid portraits. Each type differs in how much control the photographer has and how much context is included around the subject.
The five primary styles include:
- Traditional portraits use controlled lighting and formal posing, usually in a studio
- Environmental portraits include meaningful surroundings that tell the subject’s story
- Lifestyle portraits capture natural, lightly directed moments in real settings
- Headshots focus tightly on the face for professional or branding use
- Candid portraits capture unposed, spontaneous moments
These categories help photographers choose the right lens, lighting setup, and level of direction based on the intended outcome.
The main types of portrait photography differ in how controlled the setup is and how much of the surroundings are included in the frame. Understanding these categories helps photographers choose the right lens, lighting approach, and shooting style for the result they want.
Traditional Portrait Photography

Traditional portraits are formally posed photographs, typically shot in a studio with controlled lighting and a plain or minimal backdrop. The subject faces the camera directly, with emphasis on expression, clothing, and composure. Common applications include professional headshot sessions, graduation photos, and corporate branding.
Traditional portrait photography is the baseline style many people picture first. It relies on controlled posing and intentional lighting setups, often using a key light, fill light, reflector, or softbox arrangement to flatter facial features and maintain consistency across a full session.
Because the environment is simplified, the viewer’s attention stays on the subject’s expression and presentation. This makes traditional portraiture especially useful for professional applications where polish, clarity, and repeatability matter most.
Environmental Portrait Photography
Environmental portraits include a subject plus meaningful surroundings, such as a workshop, kitchen, office, or outdoor location that provides context about who the subject is and what they do. Wider focal lengths and deeper depth of field keep environmental details legible alongside the subject.
In environmental portrait photography, the setting is part of the story. The background is not just decorative. It helps explain the subject’s identity, profession, interests, or mood.
This style often works well with a versatile standard zoom or moderate wide-to-normal focal lengths that include enough of the scene without overpowering the person. A lens that covers environmental framing and tighter compositions in one setup is especially useful here.
For more on this style, see Tamron’s guide to environmental portraits.
Lifestyle Portrait Photography
Lifestyle portraiture captures natural, real-world moments with minimal posing. While scenes may be loosely directed, the goal is an unscripted, authentic look. It is widely used in brand campaigns, family photography, back to school photography, and social media content where relatability and genuine emotion drive engagement.
Lifestyle portraits sit between formal portraiture and candid photography. The photographer may guide the subject toward flattering light, suggest movement, or prompt interaction, but the final image should still feel easy and believable.
Natural light, familiar settings, and flexible zoom lenses often work well for lifestyle sessions because they allow the photographer to react quickly while maintaining a relaxed atmosphere.
Headshot Photography

Headshots are tightly framed portraits, typically from the chest or shoulders up, used for professional, acting, or corporate purposes. The face is the sole visual focus. Sharp eye focus is non-negotiable because it anchors every strong headshot and determines whether the image communicates authority and presence.
Headshot photography is all about clarity, connection, and precision. The face must be rendered in a flattering way, which is why short telephoto focal lengths are so often recommended. They create a comfortable working distance and produce more natural-looking facial proportions than wide-angle lenses used too close to the subject.
This is where portrait-focused focal lengths really matter. A lens around 85mm on full-frame is a classic headshot choice because it offers flattering compression and clean background separation without forcing the photographer too far away from the subject.
Candid Portrait Photography
Candid portraits capture unplanned, authentic moments rather than posed shots. They thrive on observation, patience, and often a longer focal length that lets the photographer maintain distance without intruding. Subjects engaged in natural activities, such as adjusting, laughing, or moving, reduce self-consciousness and produce genuine expression.
Candid portrait photography rewards anticipation more than direction. Instead of constructing every detail, the photographer watches for expressions, gestures, and interactions that reveal personality naturally.
Longer focal lengths are often useful because they allow the subject to stay immersed in the moment. Smaller, less intimidating gear can also help preserve a natural feeling during intimate sessions.
For more on this approach, see Tamron’s article on capturing candid moments.
What Are The Best Camera Settings for Portraits?

The best camera settings for portrait photography are a wide aperture (f/1.4 to f/2.8), a fast enough shutter speed to avoid motion blur, low ISO for clean image quality, and autofocus locked on the subject’s eye. These settings balance sharpness, background blur, and skin tone accuracy.
A simple way to apply these settings is shown below:
Full-frame cameras are often preferred for portraits because they offer strong image quality, low-light performance, and greater control over depth of field. APS-C mirrorless cameras are also excellent portrait tools, especially for photographers who want lighter, more affordable gear without sacrificing capability.
Always shoot RAW when possible so you have more flexibility when adjusting exposure, skin tone, white balance, and highlight detail in post-processing.
Pro Tip: If your subject is moving, raise your shutter speed beyond the minimum recommendation to help keep the eyes and expression sharp.
Related reading:
- What is aperture in photography?
- What is shutter speed?
- What is ISO in photography?
- APS-C vs full-frame camera comparison
- RAW image format vs JPEG benefits
What Is the Best Type of Lens for Portrait Photography?
The best type of lens for portrait photography is a short telephoto lens, typically in the 85mm to 135mm range, because it produces flattering facial proportions and strong background blur. The right lens depends on whether you want tight headshots, environmental context, or flexible framing.
Portrait lens selection comes down to three key factors:
- Facial rendering: Longer focal lengths reduce distortion and create natural proportions
- Background blur (bokeh): Wider apertures help separate the subject from the background
- Framing flexibility: Zoom lenses allow faster composition changes during a session
For most photographers:
- Use 85mm-135mm for headshots and tight portraits
- Use 50mm for natural, everyday portraits
- Use 35mm for environmental storytelling
This focal length strategy is widely recommended across professional photography education platforms because it balances realism, subject isolation, and working distance.
For a deeper lens-specific resource, see Tamron’s article on choosing the best wide aperture lens for portrait photography.
Why 85mm to 135mm Is Most Recommended For Portrait Photography

The 85mm to 135mm range is widely recommended for portrait photography because it delivers:
- Flattering facial compression
- A comfortable working distance between photographer and subject
- Smooth bokeh that separates the subject cleanly from the background.
This focal length range avoids the facial distortion that can happen when wider lenses are used too close to the subject. It also makes headshots and tighter portraits look more natural by gently compressing facial features and simplifying the background.
Fast lenses in this range are especially valued for their pleasing bokeh, which is aesthetic quality of the out-of-focus areas in an image. In portraits, smooth bokeh helps reduce distractions and gives the photo a more polished, dimensional look.
Other Useful Focal Lengths for Portraits
A 50mm lens on full-frame delivers a natural perspective that works well for environmental and three-quarter-length portraits. A telephoto zoom is the portrait workhorse for events and outdoor sessions because it allows flexible reframing without changing lenses. Beginners usually benefit most from starting with one versatile zoom before adding specialized lenses.
Not every portrait needs to be made at 85mm or longer. A 35mm view can be helpful for environmental portraits and groups. A 50mm perspective is versatile for lifestyle work and half-body portraits. A telephoto zoom becomes especially useful when your subject is moving, the shooting distance changes often, or you want multiple framing options during one session.
Quick-Reference Focal Length Guide
Best Tamron Lenses for Portrait Photography

The best Tamron lens for portrait photography depends on whether you want flattering compression, environmental flexibility, all-day shooting comfort, or close-up detail. The lenses below map naturally to different portrait styles and skill levels.
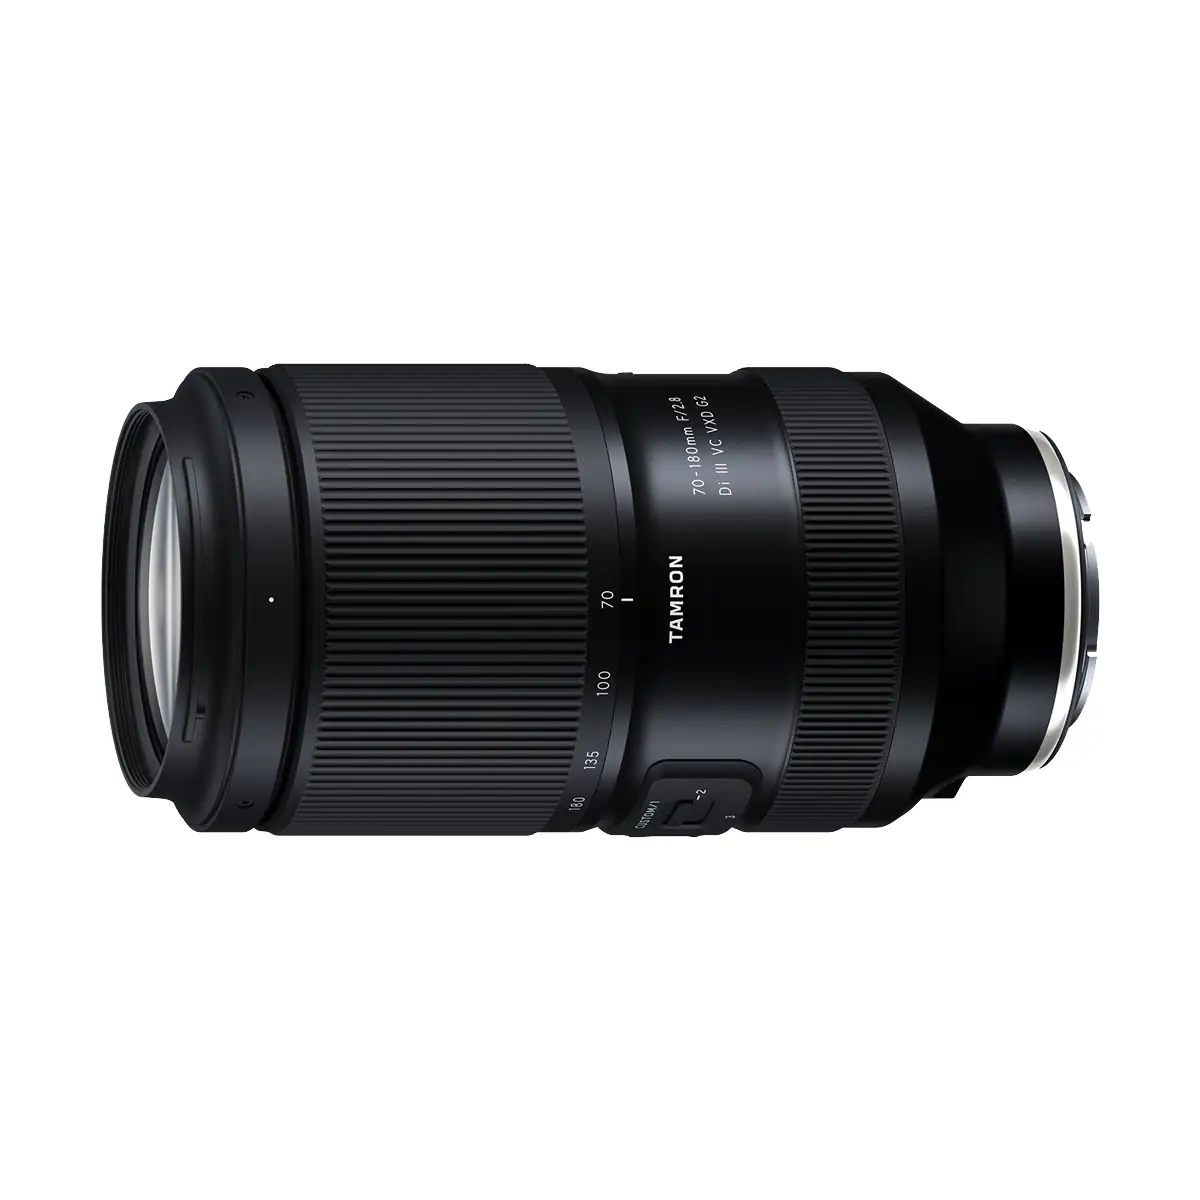
Tamron 70-180mm F2.8: The Lightweight Alternative to Traditional 70-200mm Portrait Zooms
For photographers who want the classic versatility of a 70-200mm portrait zoom but in a lighter, more compact format, the Tamron 70-180mm F2.8 Di III VC VXD G2 is a strong choice. It covers the focal lengths portrait photographers use most often for flattering compression, subject isolation, and event-style reframing, while reducing the size and weight burden that can make long sessions tiring.
That matters during portrait photography because comfort affects consistency. A compact telephoto zoom is easier to handhold for longer periods, easier to carry on location, and less fatiguing during extended portrait sessions, outdoor shoots, and events. It gives photographers the polished look associated with the 70-200mm class while offering a more comfortable shooting experience.
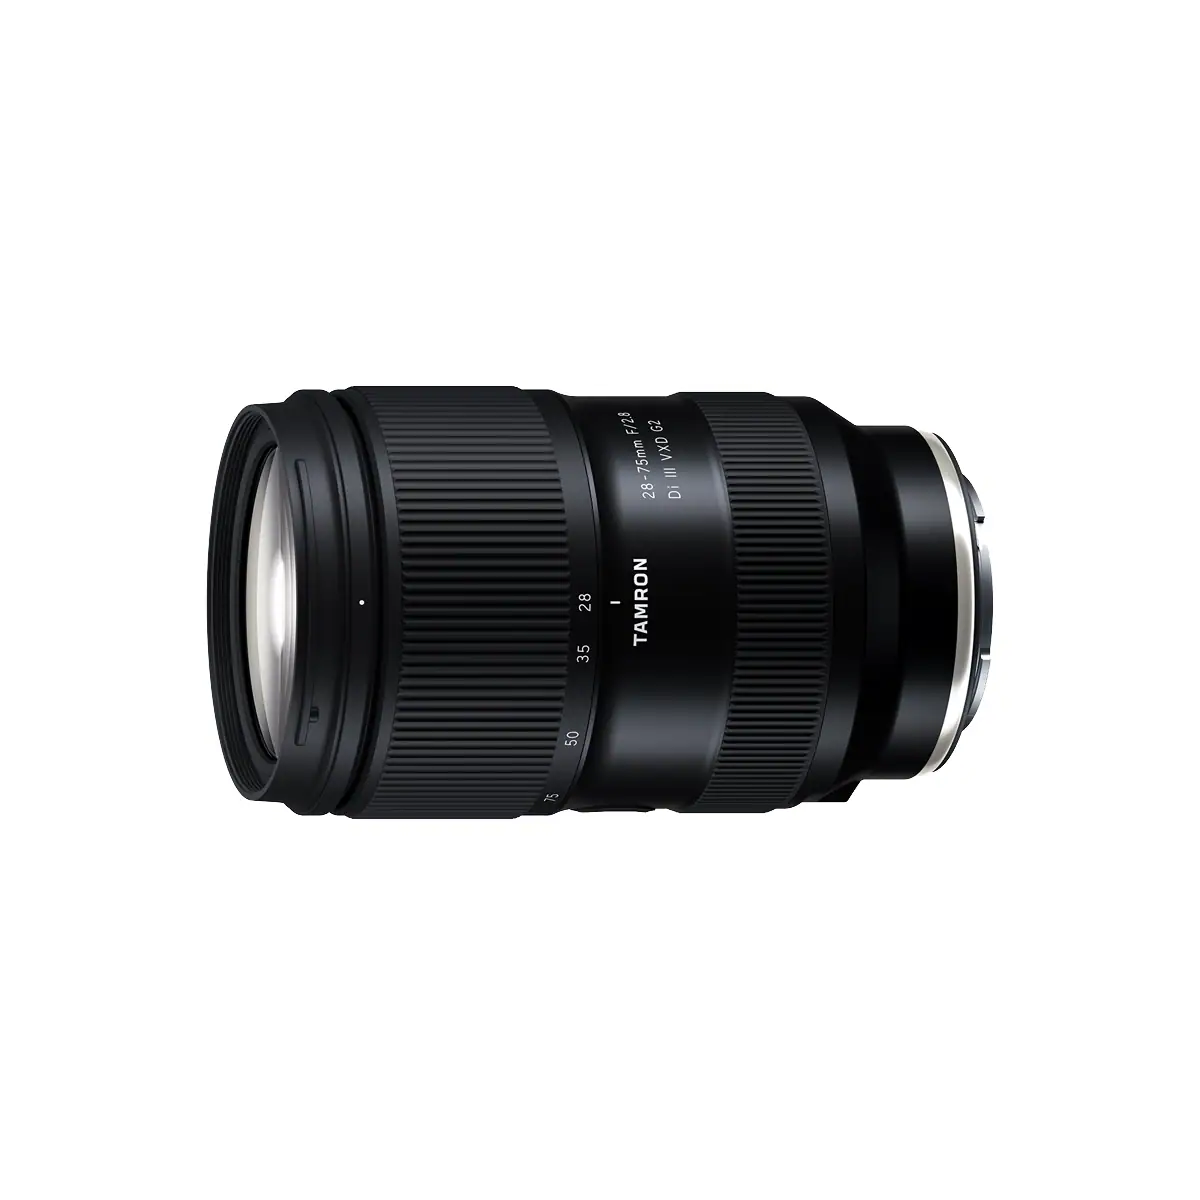
Tamron 28-75mm F2.8: Versatile for Environmental and Lifestyle Portraits
The Tamron 28-75mm F2.8 Di III VXD G2 is one of the most versatile starting points for portrait photography because it covers wider environmental compositions, natural-looking midrange portraits, and tighter framing without requiring a lens change. It is especially useful for lifestyle sessions, family portraits, and content creation where the pace is fast and the framing needs vary often.
This focal range also makes it well suited to photographers who are still refining their preferred portrait style and want one lens that can do a lot well.
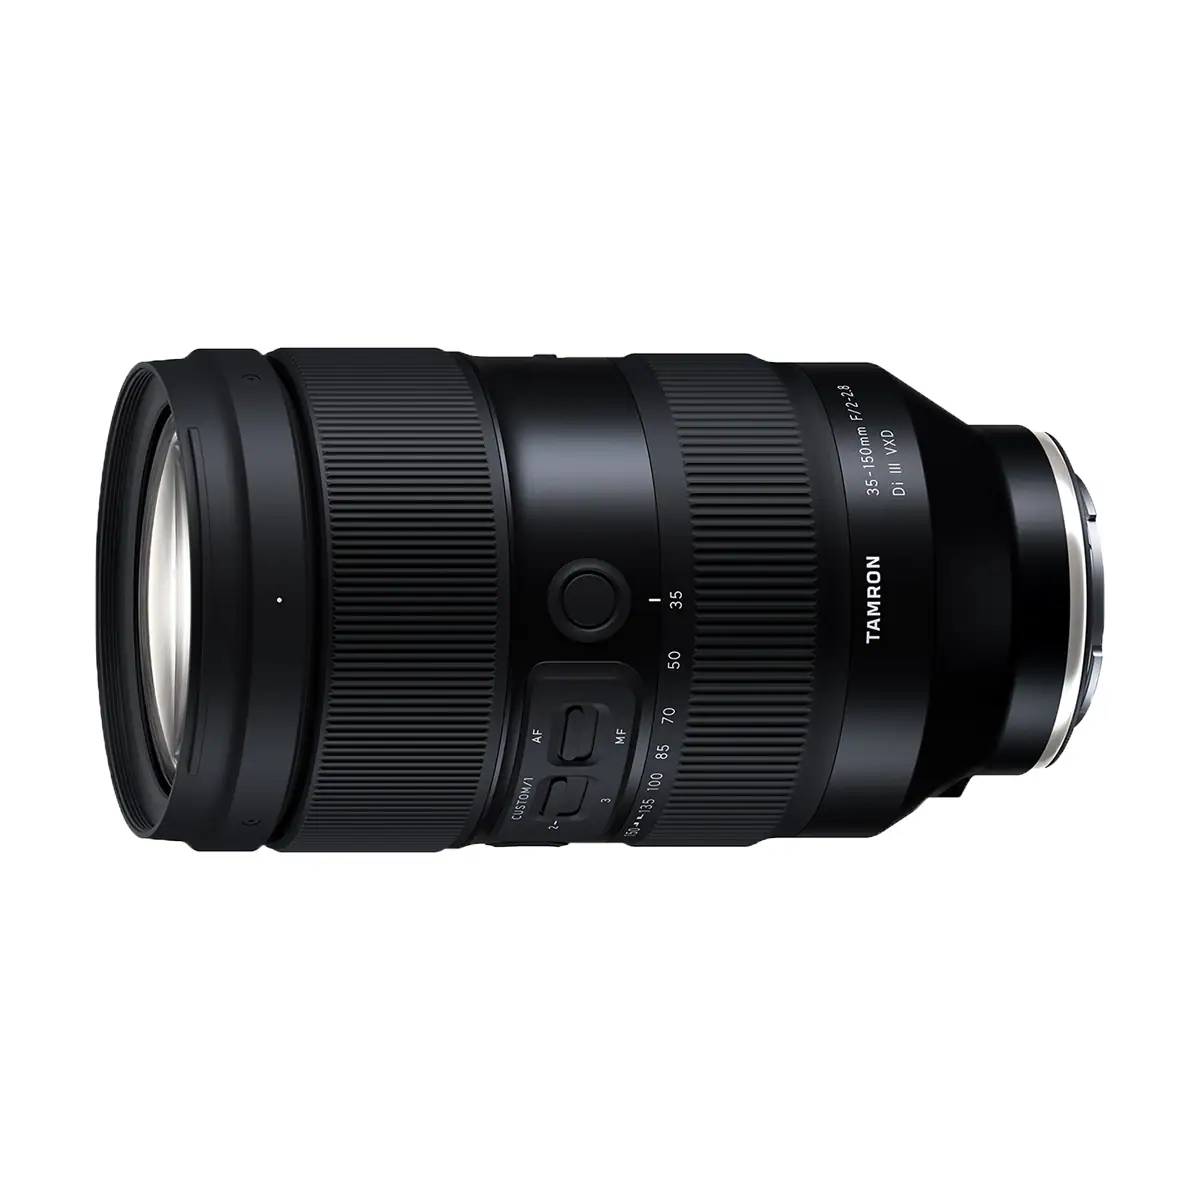
Tamron 35-150mm: Wide-to-Telephoto Flexibility in One Super-Fast Lens
The Tamron 35-150mm F/2-2.8 Di III VXD is ideal for photographers who want a single lens that can move from storytelling environmental portraits to compressed, flattering close-ups. At the wide end, it can include context and location. At the long end, it reaches into classic portrait territory with excellent subject separation.
This makes it especially valuable for travel portraiture, events, outdoor sessions, and photographers who want to work quickly without constantly switching lenses and require enhanced performance in low light situations.
Tamron 35-100mm F2.8 Di III VXD (Model A078): Compact Portrait Range
The Tamron 35-100mm F/2.8 Di III VXD offers a practical range for photographers who want a compact zoom that moves from natural-looking portraits into short-telephoto framing. It is useful for lifestyle portraits, tighter half-body work, and headshots where flexibility matters but a smaller footprint is still a priority.
Because the range begins at 35mm, it can also handle contextual framing more easily than a dedicated telephoto lens.
Tamron 17-70mm F2.8: A Strong APS-C Portrait Option
For APS-C users, the Tamron 17-70mm F/2.8 Di III VC RXD is a smart portrait lens because it balances day-to-day versatility with a constant F2.8 aperture. It can handle environmental portraits, lifestyle work, and tighter framing in one lens, making it a practical choice for photographers who want a lightweight setup without giving up creative control over background blur.
It is especially appealing for newer portrait photographers using APS-C mirrorless systems who want one lens that supports both portrait sessions and general photography.
Tamron 90mm: Classic Portrait and Detail Perspective
The Tamron 90mm F/2.8 Di III VXD is a natural fit for portrait photographers who want flattering compression and a refined short telephoto perspective. A focal length around 90mm works beautifully for headshots, beauty portraits, and close-up details where facial rendering needs to feel natural and polished.
It also opens creative opportunities for storytelling detail shots, such as eyes, hands, jewelry, textures, and other portrait elements that add variety to a session gallery.
Tamron offers portrait-ready lenses across all major mirrorless systems. Whether you shoot with a Sony, Nikon, Canon, or Fujifilm camera, there is a Tamron lens built for the way you create portraits, from fast zooms with beautiful background separation to versatile focal ranges that help you capture everything from environmental portraits to tight headshots.
Tamron Lenses For Your Camera Mount
Explore portrait lens recommendations by camera system:
- Best Sony E Mount Lenses for Portrait Photography
- Best Nikon Z Mount Lenses for Portrait Photography
- Best Fujifilm X Mount Lenses for Portrait Photography
How to Light for Portrait Photography?
The best lighting for portrait photography is soft, directional light that highlights facial features without creating harsh shadows. Beginners can achieve this using natural light during golden hour or open shade, while controlled setups often use a single softbox or diffused flash.
- Golden hour produces warm, soft illumination that flatters skin and creates an inviting mood.
- Open shade is another strong option because it avoids the harsh overhead shadows that midday sun can create under the eyes and nose.
- Indoors or in more controlled situations, a single softbox or a speedlight with a diffuser is enough to create strong portraits.
- Reflectors can bounce light back into the shadow side of the face, while flash helps solve situations where natural light is limited or inconsistent.
Pro Tip: A practical way to evaluate light is to have your subject slowly turn in a circle while you watch how highlights and shadows move across the face. This quickly reveals the most flattering angle before you begin posing in earnest.
Common Portrait Lighting Patterns
For black-and-white portraits, lighting becomes even more important because color is removed from the equation. Strong direction, texture, contrast, and tonal separation help create mood and visual impact.
Related reading:
- Photographing portraits in early morning light
- How to master mood with lighting and shadows in photography
- How to create dramatic lighting effects
- Portrait photography lighting with character
Composition Tips for Portrait Photography

Strong portrait composition improves visual balance, directs attention to the subject’s face, and reinforces the story of the image. The most effective techniques are simple, repeatable framing strategies.
Key composition techniques include:
- Rule of thirds: Position the subject about one-third into the frame and try placing the eyes near the top-third line. This creates balance while giving the portrait a more natural visual flow than centering every shot.
- Rule of space: Leave open space in front of where the subject is looking. This gives the portrait room to breathe and makes the frame feel more intentional and less cramped.
- Triangular composition: Arrange body position, arms, and negative space so the subject forms a subtle triangle. This often creates a more stable and visually pleasing portrait structure.
- Fill the frame: Tight crops can make portraits feel more immersive and emotionally direct. Do not be afraid to break centering rules when a closer crop strengthens expression.
- Use angles intentionally: Eye-level is the safest and most neutral angle. Slightly above eye level is often flattering. Shooting from below adds drama. Overhead angles can feel more editorial and stylized.
- Capture detail shots: Portrait sessions become richer when you include close-ups of eyes, hands, jewelry, clothing texture, or meaningful objects. A long lens or macro lens can help create these storytelling images.
These techniques work because they guide the viewer’s eye toward the most important element in a portrait: the subject’s expression.
Pro Tip: Before pressing the shutter, check the edges of the frame for distractions like bright objects, poles, or clutter that can pull attention away from the subject’s face.
For more on framing techniques, see Tamron’s photo composition beginner’s guide.
Building Rapport and Directing Your Subject
Great portraits require more than technical skill. They require the photographer’s ability to make the subject feel comfortable, seen, and guided throughout the session. Calm direction and specific positive feedback almost always lead to better expressions than vague instructions.
- Explain the session plan at the start. Let your subject know what to expect so they feel more relaxed and less uncertain.
- Start with easy poses and simple movements. Beginning with something familiar, such as walking, turning, or adjusting clothing, helps the subject settle in naturally.
- Use specific feedback instead of broad praise. Say things like, “That expression is great, hold that,” or “Turn your chin slightly left,” rather than “Do something natural.”
- Prioritize in the right order. Focus on the client’s needs first, the strongest deliverables second, and experimental ideas after that. When subjects feel that the session is working for them, they tend to give more trust and energy back.
- Keep the subject doing something. Walking, fixing hair, interacting with a space, or handling an object
- Use gear that feels less intimidating when possible. Compact camera bodies and smaller lenses can help subjects feel more comfortable during intimate shoots, which can improve the experience for both photographer and subject.
Building trust and giving clear direction are essential parts of portrait photography because they help create natural expressions and stronger final images.
Pro Tip: If your subject feels stiff, give them a small action like walking, turning, adjusting a jacket, or looking off-camera for a moment to create more natural body language.
How to Take Great Portrait Photos

Taking great portrait photos follows a practical eight-step workflow: plan the session, choose the right lens and aperture, test the light, guide the subject, compose with intention, capture variety, review during the shoot, and refine the final images in post.
Beginners improve faster when portrait photography feels repeatable instead of mysterious. Use the following sequence as a checklist for your next few sessions so the process becomes more consistent from shoot to shoot.
Step 1: Planning Your Shoot
Successful portrait sessions begin with three planning decisions: 1) purpose, 2) mood, and 3) location.
- Purpose: Decide whether the session is for a headshot, lifestyle portrait, environmental portrait, or something more editorial.
- Mood: Then define the mood, such as warm and relaxed, polished and professional, or dramatic and cinematic.
- Location: Finally, choose a location that supports that vision instead of competing with it.
A little preparation makes the session smoother and gives the subject more confidence before the camera ever comes out.
Pre-shoot checklist:
- Scout the location for light quality and background options
- Confirm wardrobe with the subject
- Charge batteries and format memory cards
- Pack backup gear
- Prepare a mood board or reference images to share in advance
Step 2: Choosing the Right Lens and Aperture
Select your lens and aperture before the shoot based on the portrait style and the amount of background separation you want.
- Tighter portraits or headshots usually benefit from a short telephoto focal length.
- Environmental portraits need something wider to include the setting.
Lens choice should support the story, not just the crop.
Aperture matters just as much. Shooting at f/1.4 or f/2 can create very strong bokeh, but depth of field becomes extremely thin. That can leave one eye sharp and the other slightly soft if your subject turns even a little. For many portraits, f/2.8 to f/4 is a safer balance because it still produces attractive blur while keeping both eyes more reliably sharp.
Constant F2.8 zooms such as the Tamron 28-75mm F2.8, 35-100mm F2.8, 17-70mm F2.8, and 70-180mm F2.8 are especially useful because they allow consistent background blur while you reframe.
Step 3: Testing and Shaping Light
Before you fully start shooting, evaluate the light on the subject’s face. One of the simplest tests is to have the subject turn slowly in a circle while you watch how the highlights, shadows, and catch lights move. This reveals the most flattering direction of light very quickly.
If you are outside, look first for open shade or soft directional light rather than placing the subject in harsh direct sun. If the face needs more brightness, add a reflector for subtle fill. If you are using flash, set it up and test with a stand-in before the subject steps into place. The goal is to remove technical friction once the real interaction begins.
Step 4: Guiding Your Subject and Posing

The first few minutes of a portrait session should focus on comfort and momentum. Start with conversation. Explain what you are doing and demonstrate poses when needed rather than only describing them. People often respond better when they can mirror a movement instead of trying to interpret abstract direction.
Begin with full-length standing poses because they are less intense than jumping straight into a close-up. Once the subject relaxes, move gradually toward tighter compositions. Use small adjustments because tiny changes often create major improvements.
Try prompts such as:
- “Shift your weight to your back foot”
- “Drop your shoulders”
- “Turn your chin slightly left”
These micro-adjustments refine posture without making the subject feel over-managed.
Step 5: Composing the Frame and Experimenting with Angles
- Use the rule of thirds and rule of space as your starting defaults, then deliberately vary the frame once you have a safe version
- Fill the frame for impact
- Shoot through foreground elements for depth
- Tilt the camera slightly when you want more dynamic diagonals
Angle matters too:
- Eye level is the most neutral and dependable place to begin.
- Slightly above eye level can be flattering, especially for close portraits.
- A lower angle adds presence and drama.
- Overhead framing can feel more editorial.
As you experiment, keep one technical rule in mind: always confirm that the eyes remain in the sharpest part of the frame before pressing the shutter.
Step 6: Capturing a Variety of Shots
A strong portrait session does not stop at one crop or one pose. Build a complete set of images by working through a simple shot list for each setup.
Capture:
- A full-length portrait
- A three-quarter portrait
- A close headshot
- Then at least one or two detail shots
That variety gives the final gallery more storytelling range and makes the session more useful for both personal and professional needs.
It also helps to shoot both horizontal and vertical versions of each setup. Different crops serve different uses, from website banners to profile images to print layouts. Detail shots made with a long lens or macro lens can add texture and narrative, especially when they focus on eyes, hands, accessories, or clothing details.
Step 7: Reviewing and Adjusting During the Shoot
Reviewing images during a portrait session is a smart tool, not a bad habit. Pause periodically and zoom in to 100 percent on the eyes to confirm sharpness. Then check exposure and scan the frame for distractions near the edges. This keeps small problems from repeating across an entire set.
Showing the subject a few strong frames during the session can also improve the shoot. It builds confidence and helps people relax when they realize the images are already working. At the same time, be willing to move on. If a pose, location, or setup is not working after several frames, change something instead of forcing it.
Step 8: Post-Processing Overview
Post-processing improves a portrait, but it does not replace strong capture technique.
- Start in Lightroom or similar software for global adjustments such as white balance, exposure, contrast, skin tone refinement, and subtle vignetting.
- Then move to Photoshop or another retouching tool only when you need more detailed edits.
Keep retouching natural unless the creative goal clearly calls for something more stylized. Portrait editing often works best when it supports the person instead of overpowering them. Black-and-white conversion can also be effective when you want to emphasize mood, texture, and timelessness. Over time, developing a consistent preset or editing style can help unify your portfolio.
Combining Technique and Human Connection

The best portrait photography happens when technical control and human connection work together. Camera settings, focal length, lighting, and composition all matter, but they only become meaningful when they support expression, comfort, and story.
For beginners, the best approach is to keep things simple. Start with one lens, one willing subject, and soft natural light. Learn how focal length changes the look of a face. Learn how light shapes mood. Learn how calm, specific direction changes expression. Then build from there.
For your next step, explore Tamron’s Portrait 9-1-1 as a quick troubleshooting guide for your next session, Portraits with a Punch for next-level creative techniques for advancing photographers, and Senior Portrait Tips if you are planning a specific session type.
As you continue to grow as a portrait photographer, organizations like WPPI and PPA can help you build your skills, expand your network, and keep learning from the broader professional community.
Where to Buy Tamron Lenses
Learn more about Tamron lenses at an authorized Tamron dealer near you or shop directly at the official TAMRON Store.
Frequently Asked Questions
What aperture settings are best for portrait photography?
For most portraits, an aperture between f/1.4 and f/2.8 provides strong subject separation and attractive background blur, while f/4 to f/5.6 works better for group portraits or situations where you want both eyes and more of the subject to remain sharply in focus.
How can I make my subject feel comfortable during a portrait session?
Start by explaining the session plan, give specific and encouraging direction, and let subjects engage in natural activities or familiar movements. People usually relax faster when they know what to expect and have something simple to do instead of standing stiffly in front of the camera.
What lighting setups work well for flattering portraits?
Golden hour light and open shade are two of the most accessible and flattering natural-light options for portraits. Indoors, a single softbox or a speedlight with a diffuser creates a simple controlled setup that can produce soft, polished light across the subject’s face.
How do I choose the right lens for different portrait styles?
An 85mm or 90mm lens is ideal for headshots and beauty portraits, a 50mm works well for environmental and lifestyle portraits, and a 70-180mm zoom gives you flexible framing for outdoor sessions and events without needing to change lenses constantly.
What are some simple composition tips to improve portraits?
Place your subject’s eyes near the top-third line of the frame, leave open space in front of where they are looking, and experiment with filling the frame or shooting from slightly above eye level. These simple changes can make portraits feel more balanced and more flattering.
What is portrait photography in simple terms?
Portrait photography is the practice of photographing a person in a way that highlights their identity, personality, mood, or story. It can be formal or casual, but the person remains the main subject and emotional focus of the image.
What is a good lens for portrait photography?
A good portrait lens depends on the style of portrait you want to make, but 85mm to 135mm is widely recommended for flattering facial rendering. Versatile zooms such as 28-75mm or 70-180mm are also excellent starting points because they cover multiple portrait styles.
What is the best focal length for portrait photography?
The most recommended focal length range for portrait photography is 85mm to 135mm because it creates flattering compression, comfortable working distance, and attractive background blur. Wider focal lengths like 35mm and 50mm are also useful for environmental and lifestyle portraits.
What camera settings should I use for portrait photography?
A strong starting point for portraits is an aperture between f/1.4 and f/2.8, shutter speed at least as fast as 1 over the focal length, low ISO, and single-point autofocus placed on the nearest eye. These settings help balance blur, sharpness, and clean image quality.
How do beginners take better portrait photos?
Beginners take better portrait photos by simplifying the process: use one lens, work in soft natural light, focus on the eyes, give clear direction, and compose carefully. Repeating the same basic workflow builds confidence much faster than changing everything every session.