Instant Savings
 Rebate Claims
 Support
 Find a Dealer
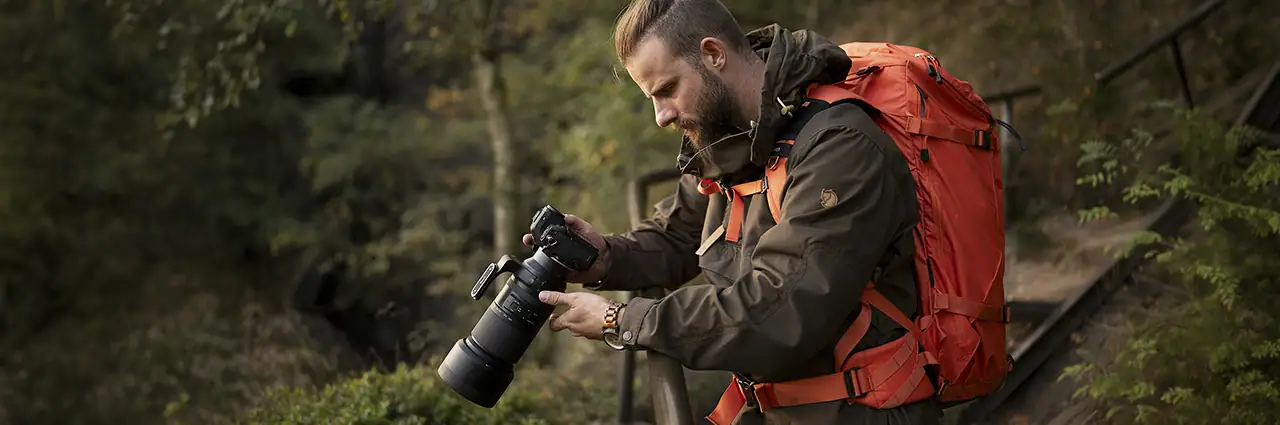
Improving as a photographer does not depend on owning the newest camera or the most expensive equipment. It comes from understanding how camera settings, light, composition, and thoughtful practice work together to create stronger images. Whether you are struggling with inconsistent exposures, missed focus, distracting backgrounds, or photographs that do not match your original vision, the practical techniques in this guide will help you identify problems, make more intentional decisions, and steadily improve your photography skills.
From Camera Settings to Composition, Light, and Gear, Here’s the Complete Guide to Improving Your Photography Skills
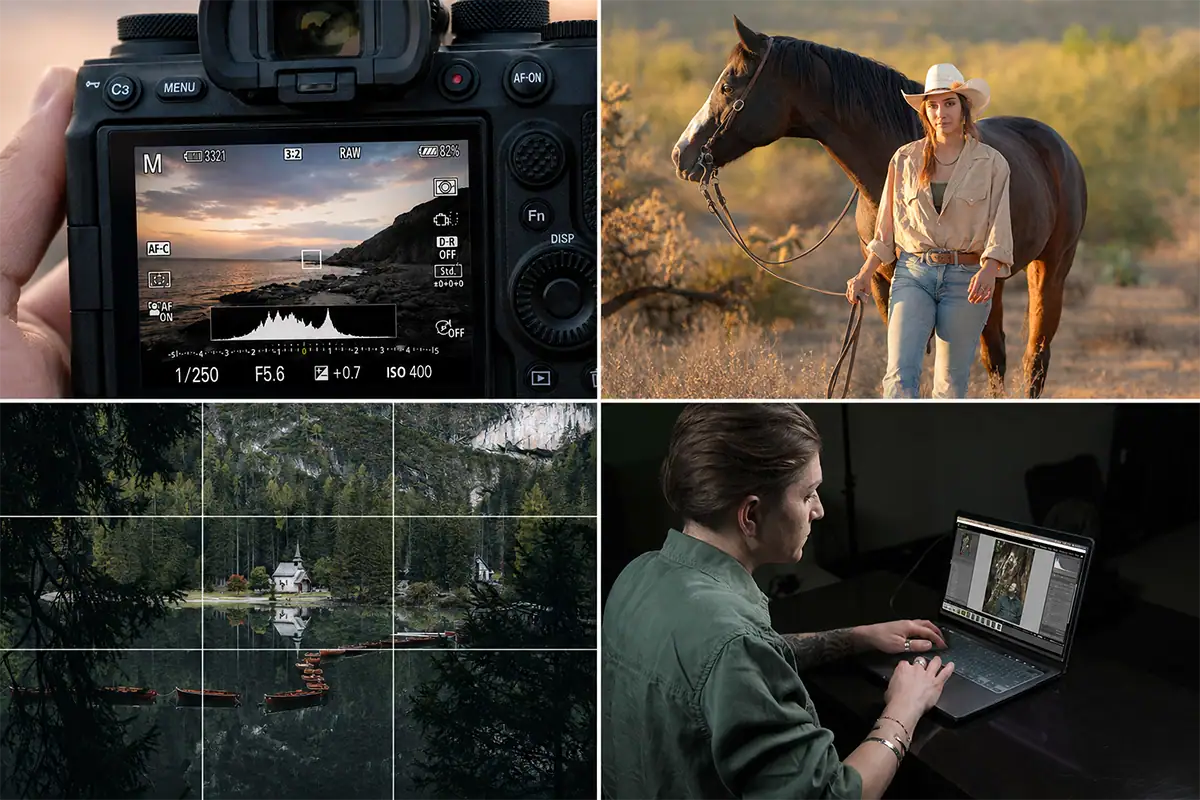
Getting better at photography requires mastering three fundamentals: camera settings, light, and composition. Deliberate practice with intentional weekly goals accelerates improvement faster than gear upgrades. This guide covers every core skill—from the exposure triangle to post-processing—giving you a complete framework for measurable improvement.
Flat exposures, missed focus, harsh light, and cluttered frames are not signs that you need a new camera. They are common shooting problems that improve as you learn how your settings, surroundings, and creative decisions work together. Use the camera you already have; gear matters less than practice and learning the fundamentals. The photography tips for beginners in this guide will help you improve photography skills one manageable step at a time.
Table of Contents
- From Camera Settings to Composition, Light, and Gear, Here’s the Complete Guide to Improving Your Photography Skills
- How Do I Master Core Camera Settings?
- How Do I Use and Shape Light Effectively?
- How Do I Develop Strong Composition Techniques?
- How Do I Build a Deliberate Practice Routine?
- How Do I Edit Photos Efficiently?
- How Do I Choose the Right Photography Gear and Accessories?
- Frequently Asked Questions
How Do I Master Core Camera Settings?
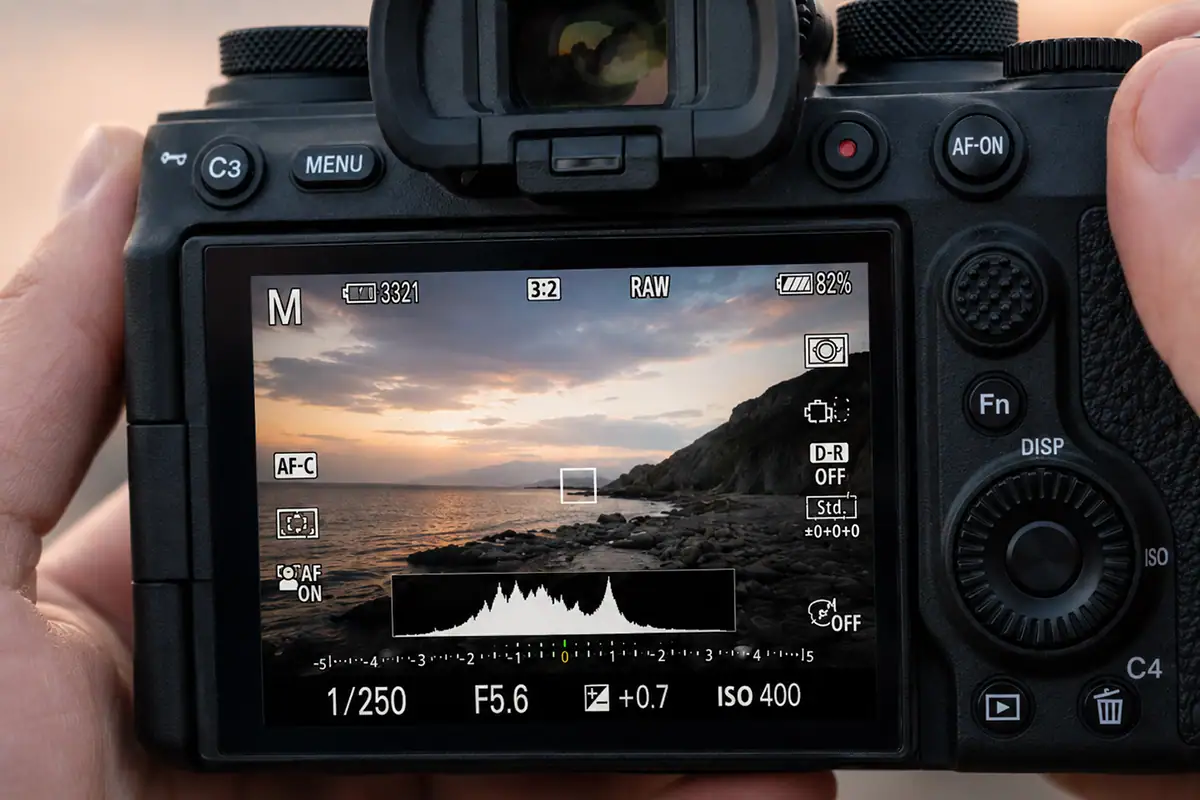
Mastering three camera settings—aperture, shutter speed, and ISO—gives photographers control over exposure in nearly any situation. Understanding these fundamentals matters more than camera brand or price. Photographers who learn the exposure triangle first generally produce better images than those who upgrade gear without developing foundational knowledge.
The exposure triangle describes the relationship between aperture, shutter speed, and ISO. This section covers what those settings control and how to practice them. Later sections explain how to combine that knowledge with light, composition, deliberate practice, and editing. Use the camera you already have; learning how it responds is more valuable than replacing it before you understand its controls.
What Is the Exposure Triangle: Aperture, Shutter Speed, and ISO?
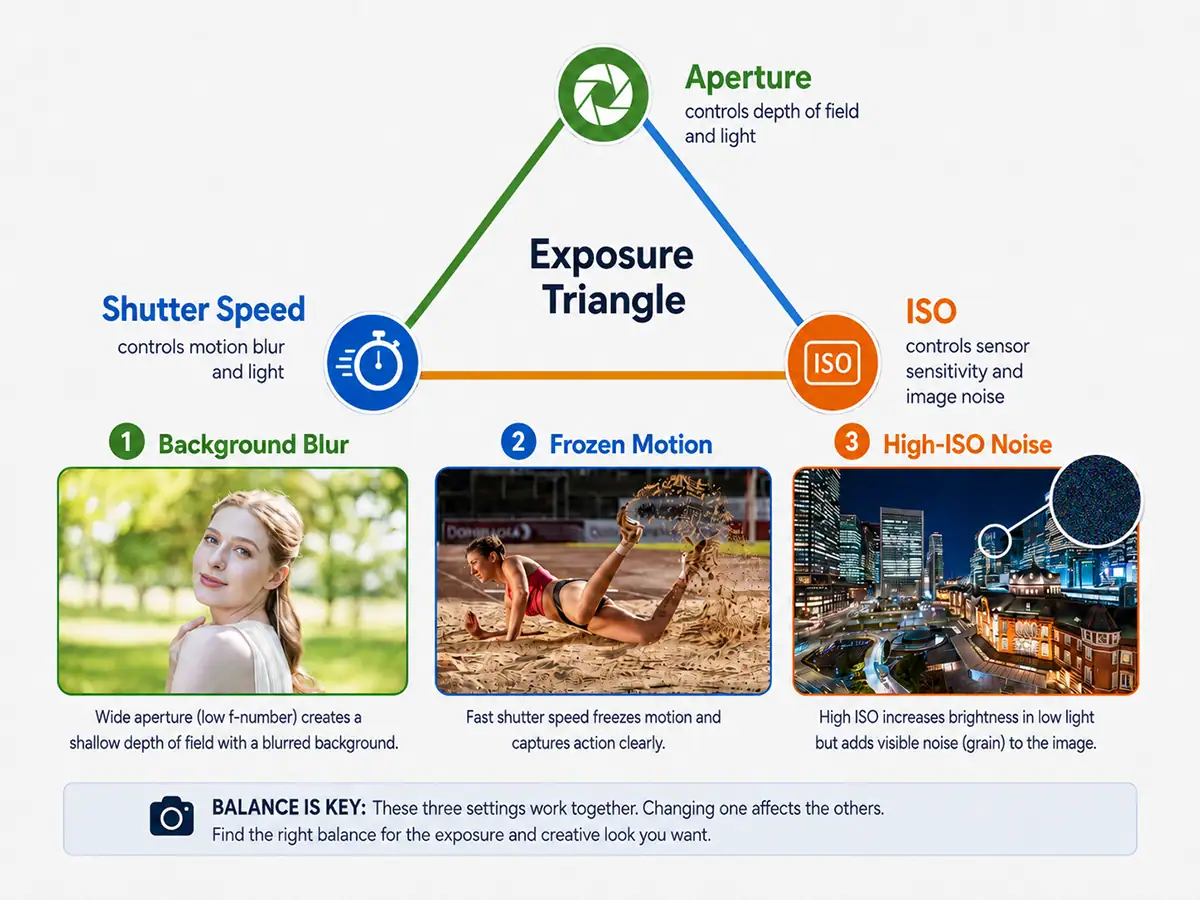
Aperture, shutter speed, and ISO form the exposure triangle—the three camera settings that together determine how bright or dark an image appears and how it looks creatively. Aperture controls depth of field, shutter speed controls motion, and ISO controls light sensitivity. Adjusting one often requires compensating with another to maintain the desired exposure.
Aperture is the adjustable opening inside the lens that controls how much light reaches the camera sensor and how much of the scene appears acceptably sharp. A wide aperture with a small f-number, such as f/1.8, can blur the background, while a narrow aperture with a large f-number keeps more of the scene in focus.
For a deeper explanation, see What Is Aperture in Photography?.
Shutter speed is the length of time the camera sensor is exposed to light. Fast shutter speeds, such as 1/2000 second, can freeze a moving subject. Slow shutter speeds allow motion to blur and can create effects such as smooth waterfalls, light trails, or intentional movement within the frame.
Learn more in What Is Shutter Speed?.
ISO controls how strongly the camera responds to the light it records. A low ISO generally produces a cleaner image with less visible noise. A higher ISO brightens the image when light is limited, but it may introduce grain, reduce fine detail, or affect color quality.
See What Is ISO in Photography? for additional examples.
These three controls work together. If you increase the shutter speed to freeze motion, you may need to open the aperture or raise ISO to compensate for the reduced light. If you narrow the aperture to increase depth of field, you may need a slower shutter speed, a higher ISO, or both.
For landscapes, a narrow aperture helps keep the foreground and background sharp. Settings around f/8 to f/11 often provide a strong balance of sharpness and depth of field, while f/16 or f/22 may be useful when greater depth is required. Be aware that the smallest apertures can introduce diffraction, which may slightly reduce fine detail.
Learning this foundational theory gives you the knowledge needed to choose camera settings for better photos instead of relying on the camera to make every decision.
Use Practice Priority Modes Before Full Manual
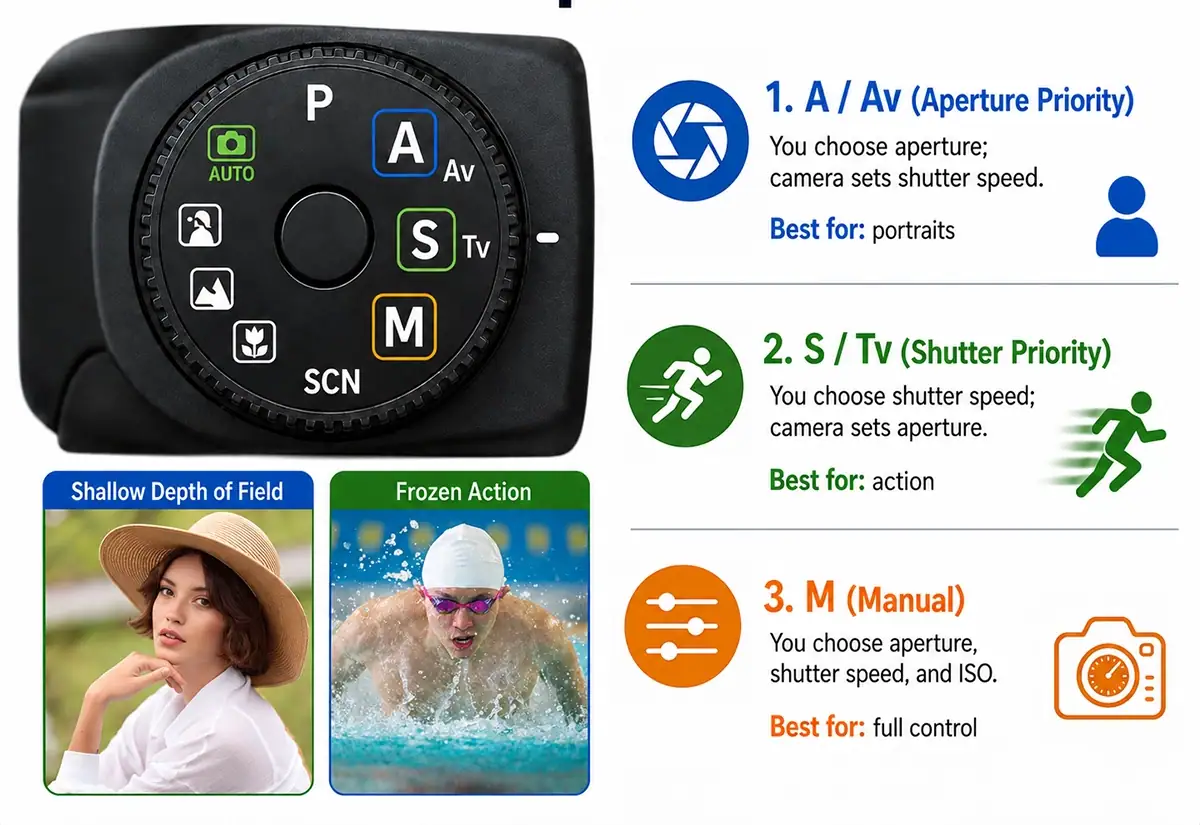
Aperture Priority and Shutter Priority modes let photographers control one exposure variable while the camera manages another. Practicing these semi-automatic modes builds confidence with each setting individually before combining them in full Manual mode. For many photographers, Manual begins to feel intuitive after several weeks of consistent priority-mode practice.
Aperture Priority, identified as A or Av, allows you to select the aperture while the camera chooses an appropriate shutter speed. It is an effective learning bridge for portraits, landscapes, food photography, and other situations where depth of field is an important creative decision.
Shutter Priority, identified as S or Tv, allows you to choose the shutter speed while the camera adjusts the aperture. It is especially useful when photographing sports, wildlife, children, vehicles, flowing water, or any subject whose movement affects the final image.
Use this two-step progression to practice camera settings for better photos:
- Start with Aperture Priority. Photograph portraits and landscapes while changing the aperture between images. Observe how the background, foreground, and available light change as you move from a wide aperture to a narrow one.
- Switch to Shutter Priority. Photograph a moving subject at several shutter speeds. Compare how a fast shutter freezes movement and how a slower shutter allows intentional blur.
Enable the histogram on your camera so you can evaluate exposure while shooting. If your mirrorless camera offers zebra warnings, use them to identify areas that may be overexposed. A large spike at the far-right edge of the histogram may indicate clipped highlights, while a large spike at the far-left edge may indicate blocked shadows.
Once you understand what each setting contributes, moving into Manual mode becomes much less intimidating. Instead of guessing at three unfamiliar controls, you will be combining two skills you have already practiced separately.
How Do I Use and Shape Light Effectively?
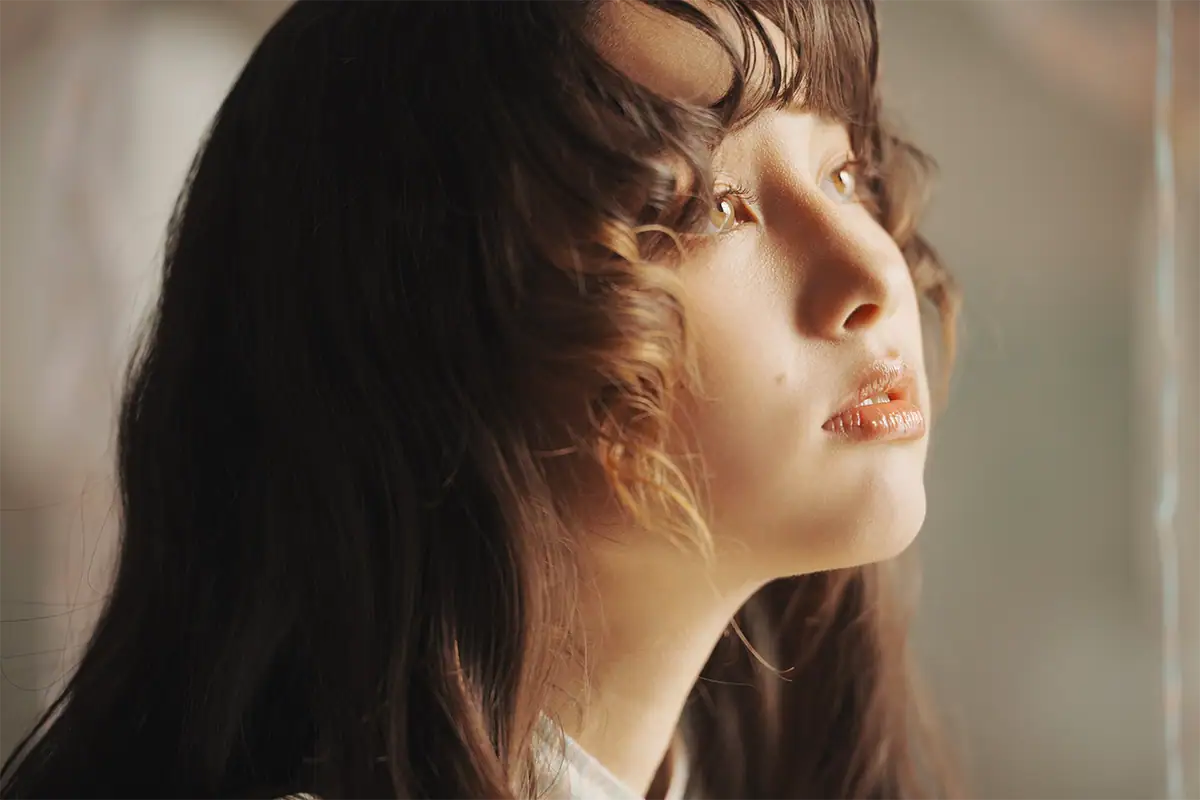
Light is the single most important factor in photography—more than camera brand, lens quality, or resolution. Photographers who learn to find and shape light can produce compelling images in almost any situation. Natural light, artificial light, and exposure balance across the frame each require distinct techniques.
Photography fundamentally records reflected light, so learning to control light means learning to control the image. One of the most useful photography tips for beginners is to observe the direction, color, intensity, and softness of the light before choosing camera settings or raising the camera to your eye.
The following techniques cover natural light, artificial lighting, and balancing exposure between a subject and the background.
Use Natural Light: Golden Hour and Open Shade
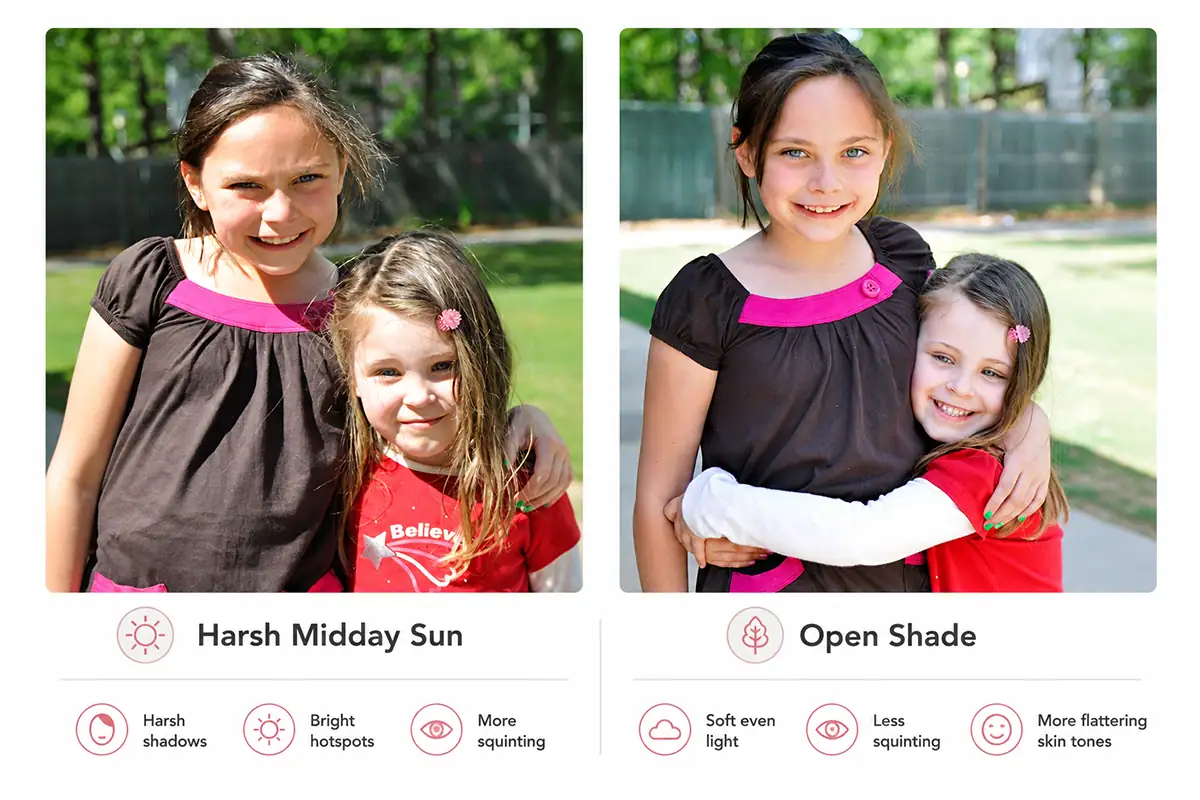
Golden hour is the period approximately 30 to 60 minutes after sunrise and before sunset when the sun is low in the sky. It produces warm, directional light that flatters skin tones, deepens shadows, and creates rich color contrast without the hard overhead illumination common at midday.
Chase beautiful light whenever your schedule allows. Shooting early or late in the day can immediately improve outdoor portraits, landscapes, architecture, travel images, and family photographs without requiring any additional equipment.
During the middle of the day, move your subject into open shade beneath a tree canopy, building overhang, porch, or other structure. Open shade blocks direct sunlight while allowing soft ambient light to illuminate the subject. This reduces squinting, bright facial hotspots, and deep shadows around the eyes.
For additional outdoor guidance, read Golden Hour Photography Tips and Landscape and Weather Photography Quick Tips.
- Golden hour: Warm, low-angle light shortly after sunrise or before sunset that creates soft highlights, long shadows, and rich color.
- Blue hour: Cool, even light before sunrise or after sunset that works well for cityscapes, architecture, landscapes, and atmospheric portraits.
- Overcast light: Soft, diffused illumination created by cloud cover, reducing harsh shadows and helping preserve color and detail.
- Open shade: Indirect daylight beneath an overhang, tree, doorway, or structure that produces flattering, even light.
- Backlight: Light coming from behind the subject, creating rim light, silhouettes, glowing hair, or translucent effects.
- Side light: Light striking the subject from one side, adding dimension, texture, contrast, and a stronger sense of shape.
Control Artificial Lighting and Reflectors
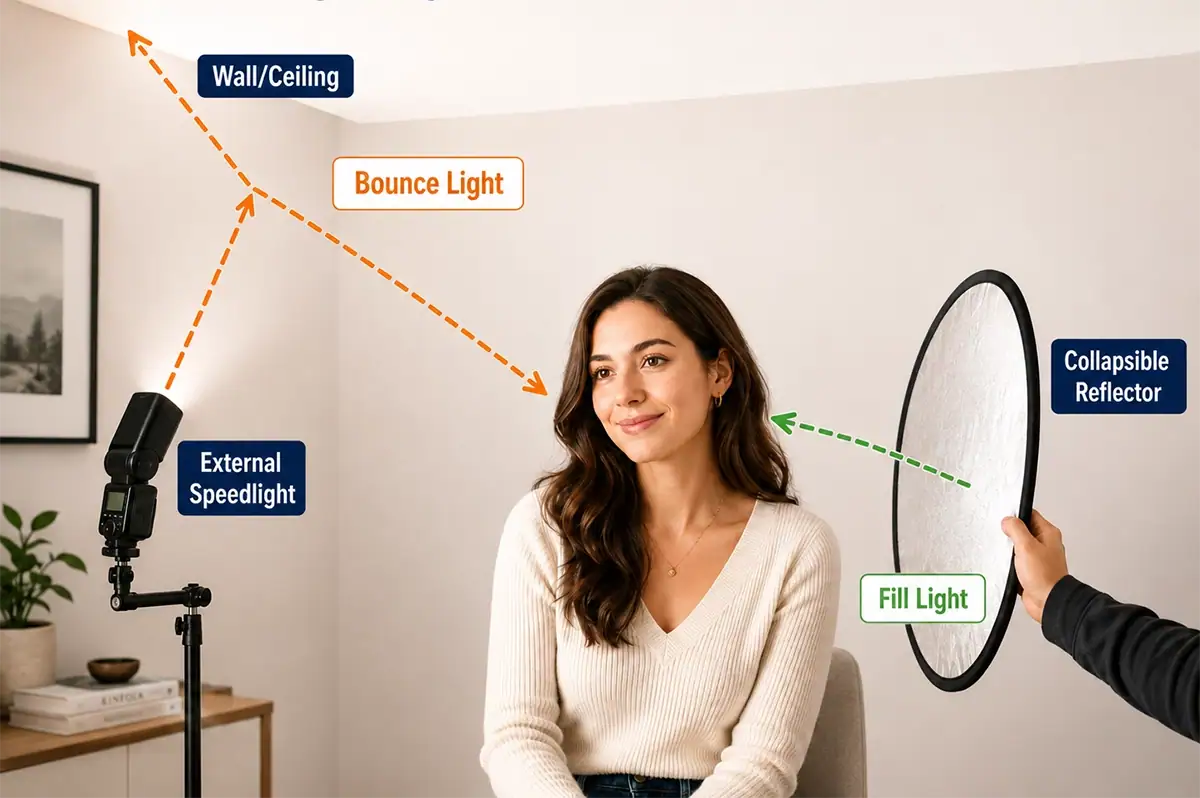
Controlling artificial light starts with avoiding the built-in camera flash, which can cause red-eye, harsh shadows, flat illumination, and distracting reflections. A basic external speedlight and an affordable collapsible reflector or diffuser kit give photographers much greater control over light quality without requiring a large studio investment.
An external flash can be aimed toward a ceiling or wall so the light reaches the subject indirectly. This technique, called bounce flash, spreads the light across a larger area and creates a softer result than pointing the flash directly at the subject.
A reflector does not create light. It redirects light that is already present. Positioning a white or silver reflector opposite a window or light source can brighten shadows on one side of a person’s face. This is particularly helpful for portraits in which the light direction is attractive but the contrast is too strong.
You do not need an expensive modifier to practice. A white foam board, poster board, sheet, or light-colored wall can reflect enough illumination to make a visible difference.
Learn how to use these tools in Using Reflectors and Diffusers.
Balance Exposure Between Subject and Background
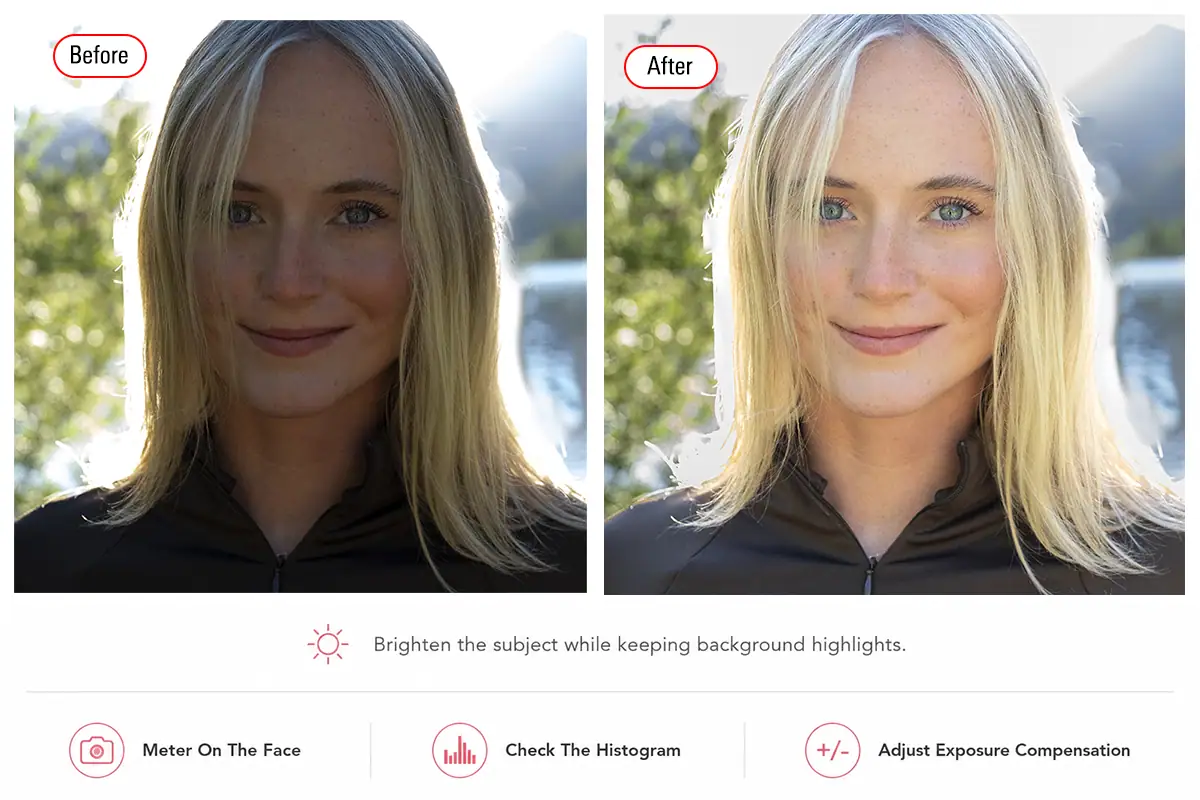
When a subject appears too dark against a bright background, the camera’s metering system may be averaging the entire scene instead of prioritizing the subject. Using spot metering on the subject’s face and adjusting exposure compensation corrects this quickly. A histogram check helps confirm that important highlights have not been clipped.
Exposure compensation, marked with a plus-and-minus symbol, is often the fastest correction when shooting in Aperture Priority or Shutter Priority. Positive compensation brightens the exposure, while negative compensation darkens it.
Spot metering measures a small area of the frame. Center-weighted metering prioritizes the central area while still considering the surroundings. Either can be useful when your subject is much brighter or darker than the background.
Use this three-step workflow:
- Meter on the subject. Switch to spot metering and place the metering point on the subject’s face or the most important element. If necessary, lock the exposure before recomposing.
- Check the histogram. Look for a large spike at the far-right edge, which can indicate clipped highlights, or the far-left edge, which can indicate crushed shadows. Also enable highlight warnings or zebras when available.
- Adjust and balance. Apply positive or negative exposure compensation. If the subject remains too dark, introduce a reflector or subtle fill flash to bring the foreground and background into better balance.
For more ways to control contrast and atmosphere, see How to Master Mood With Lighting and Shadows in Photography.
How Do I Develop Strong Composition Techniques?
Strong composition transforms technically correct photographs into images that hold a viewer’s attention. The rule of thirds, leading lines, and deliberate angle choices are learnable techniques—not innate talents—that any photographer can apply immediately by enabling the grid overlay on the camera display.
Photography composition techniques become more intuitive through repetition. Move around your subject, change your height, examine the background, and make several versions of a scene instead of assuming the first position is the best one.
Apply the Rule of Thirds and Leading Lines
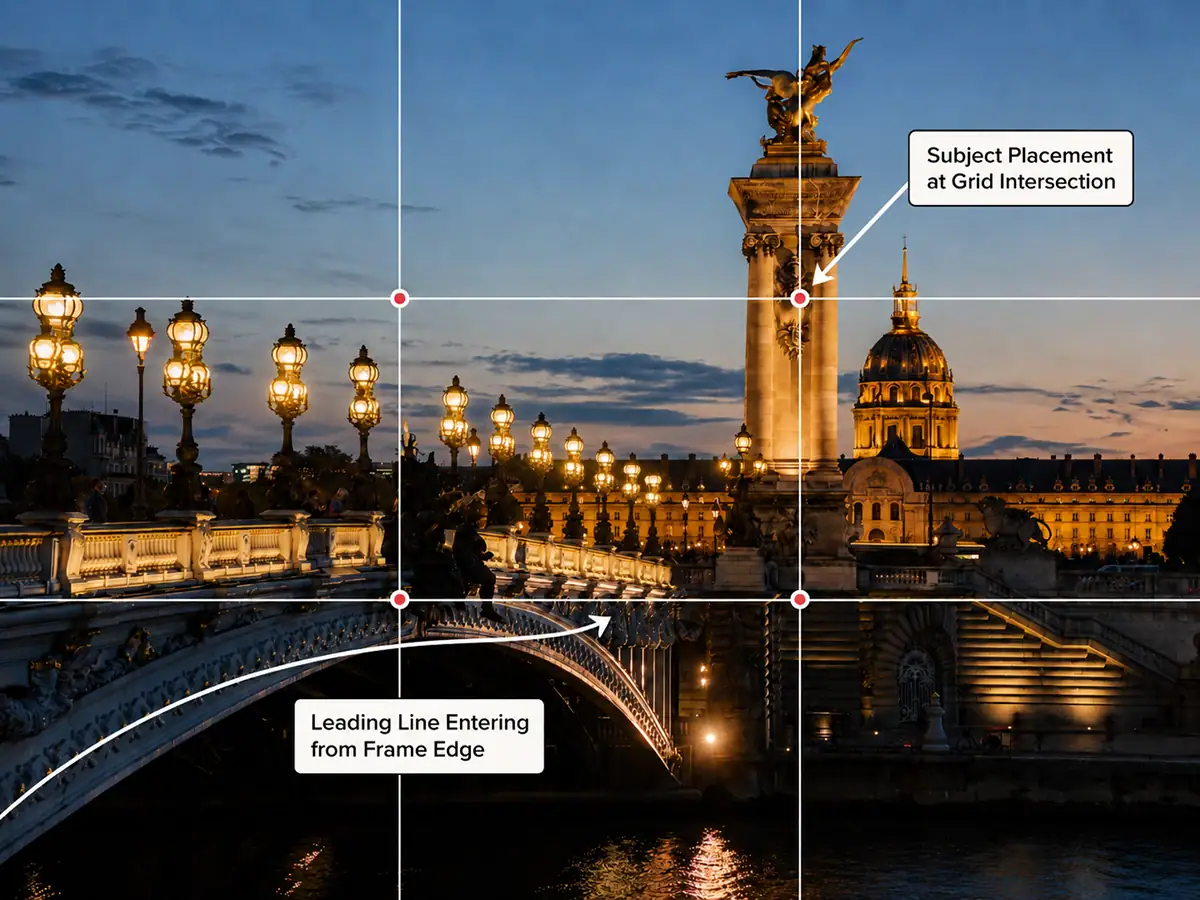
The rule of thirds divides the frame into a 3×3 grid with two horizontal and two vertical lines. Placing an important subject near one of the four intersections can create a more dynamic and balanced composition than automatically centering every element in the frame.
Enable the grid overlay on your camera or phone so you can apply the rule of thirds while shooting. For a landscape, try positioning the horizon along the upper or lower horizontal line rather than through the exact center. For a portrait, place the subject’s eyes near the upper horizontal line.
Leading lines are natural or human-made lines that guide the viewer’s eye toward the subject or through the scene. Roads, fences, rivers, railings, shadows, building edges, trails, and rows of objects can all create a visual path.
A leading line is most effective when it enters naturally from the edge or corner of the frame and moves toward the main point of interest. Before taking the photograph, follow the line with your eye and confirm that it directs attention where you want it to go.
For portraits, keep the subject’s eyes in sharp focus because they are usually the viewer’s first point of attention. A strong composition cannot fully compensate for missed focus on the eyes.
Explore more photography composition techniques for beginners and learn how to use leading lines in photography.
Experiment With Angles and Perspectives

Shooting every subject from standing eye level limits your creative range. Deliberately exploring several perspectives—such as a bird’s-eye view, low angle, 45-degree high angle, and profile—can reveal compositions that are invisible from the default position. Practicing multiple viewpoints also builds stronger framing instincts.
Try at least these four approaches:
- Bird’s-eye view: Photograph directly from above. This flattens the scene and emphasizes shapes, patterns, repetition, color, and spatial relationships. It works well for food, still life, groups of objects, streets, and graphic landscapes.
- Low angle or worm’s-eye view: Position the camera near ground level and point upward. This perspective exaggerates scale, adds drama, separates the subject from the ground, and can make ordinary objects feel more imposing.
- 45-degree high angle: Photograph from a slightly elevated position. This angle is frequently flattering for portraits and is useful for food, tabletop scenes, crafts, pets, and subjects whose upper surfaces are important.
- Profile or side angle: Photograph directly from the side. This emphasizes silhouettes, movement direction, gesture, shape, and the relationship between the subject and the environment.
Use the same subject as a practice exercise. Before moving on, photograph it from at least five positions. Step closer, move farther away, crouch, raise the camera, walk around the subject, and decide what each viewpoint communicates.
For more ideas, read How to Capture Unique Perspectives.
Remove Distractions and Keep Horizons Level
A level horizon and a clean frame edge are two of the fastest, highest-impact composition corrections a photographer can make. Enabling the grid overlay or digital level catches tilted horizons before capture. Scanning all four frame edges before pressing the shutter eliminates distractions that pull attention away from the subject.
Look around the entire viewfinder rather than concentrating only on the center. Trash cans, power lines, cropped limbs, bright hotspots, signs, partial objects, and people entering from the edge can compete with the main subject.
When possible, correct distractions during capture by changing your position, adjusting the focal length, moving closer, waiting for the background to clear, or asking the subject to shift slightly. Cropping can help later, but careful framing preserves more image area and resolution.
A tilted horizon is especially noticeable in photographs containing water, architecture, shorelines, or a clear skyline. Use the camera’s electronic level or align the horizon with a grid line before taking the photograph.
Avoid wide shots and photographs of the backs of people’s heads when those elements do not contribute to the story. Favor engaged expressions, purposeful gestures, and candid moments that reveal what the subject is doing or experiencing.
How Do I Build a Deliberate Practice Routine?
Deliberate photography practice—structured sessions with a specific skill focus rather than casual random shooting—is one of the most reliable paths to measurable improvement. Photographers who set weekly themes and isolate one technical variable per session generally improve faster than those who shoot without intention. Frequency and purpose matter more than session length.
Practice a lot and periodically take hundreds of photographs, but do not confuse volume with improvement. The purpose of deliberate photography practice is to create a feedback loop: choose a skill, test it repeatedly, evaluate the results, and apply what you learned during the next session.
This routine turns the concepts covered earlier—settings, light, and composition—into habits that can be used quickly in real shooting situations.
Set Weekly Shooting Goals and Themes

Assigning a specific theme to each weekly shooting session constrains your choices in a way that encourages creative problem-solving. Themes such as shadows, color contrast, motion blur, or storytelling with one lens give the session a clear purpose and eliminate the uncertainty of deciding what to photograph.
One dedicated 30- to 60-minute session each week can be more effective than an occasional all-day outing with no specific learning objective. Regular practice also makes it easier to remember what you learned and apply it during the next session.
Possible weekly themes include:
- Shadows and silhouettes
- Complementary colors
- Reflections
- Motion blur
- Frozen action
- Shallow depth of field
- Deep depth of field
- Natural window light
- Open-shade portraits
- Leading lines
- Negative space
- Repetition and patterns
- Storytelling with one lens
- Five angles of one subject
- A three-image visual story
Photography contests, community challenges, and themed assignments can add motivation and accountability. A deadline may encourage you to complete a project instead of waiting for perfect conditions.
Focus on One Technical Skill per Session
Isolating one technical variable per shooting session—aperture in session one, shutter speed in session two, and white balance in session three—creates a direct cause-and-effect feedback loop. It becomes easier to identify what changed and why than when several unrelated adjustments are made at once.
During an aperture session, keep the subject and composition consistent while moving through the available f-stops. During a shutter-speed session, photograph the same moving subject at several speeds. For white balance, compare Auto, Daylight, Shade, Tungsten, and a custom Kelvin setting in the same environment.
Other useful single-skill sessions include:
- Exposure compensation
- Spot metering
- Continuous autofocus
- Subject-detection autofocus
- Manual focus
- Panning
- Backlighting
- Fill flash
- Histogram evaluation
- Intentional underexposure
- Long exposures
Focused exercises with deliberate intention will usually improve your photography more effectively than casual shooting or purchasing equipment without identifying the problem you need the equipment to solve.
Use Prime Lenses to Enhance Framing Skills
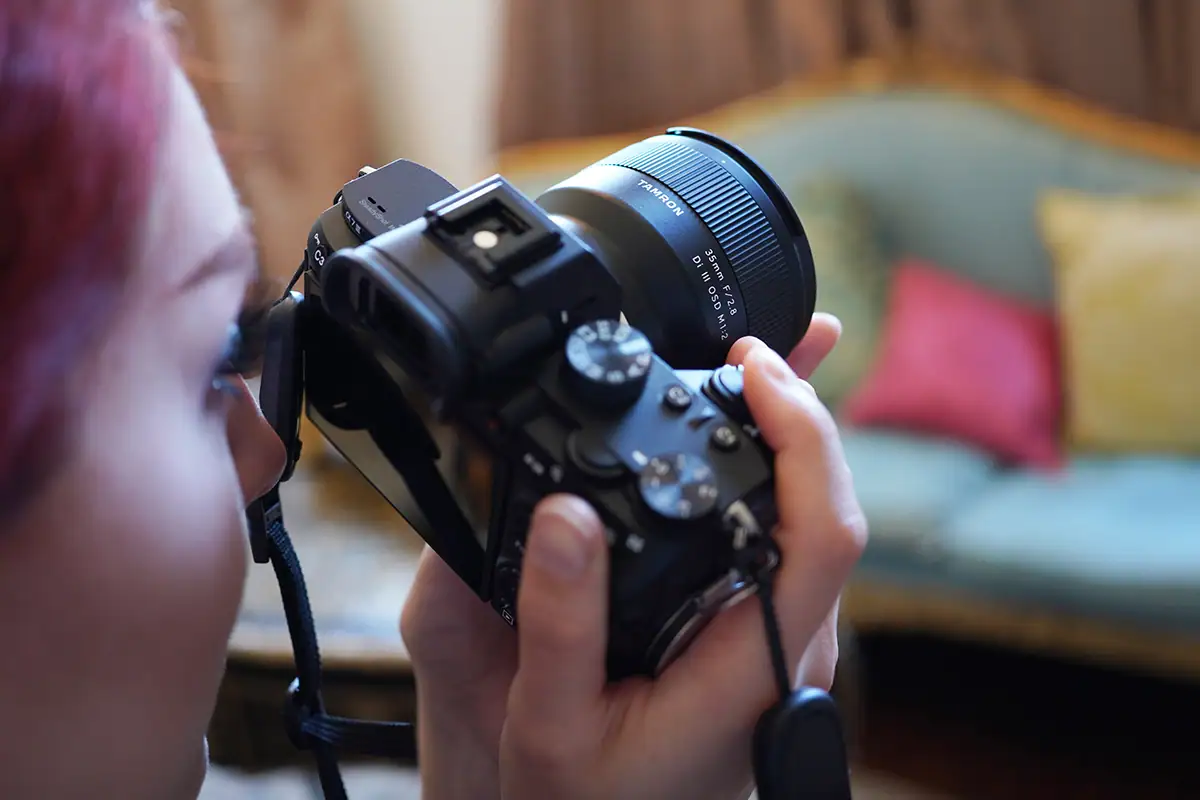
A prime lens has a fixed focal length, such as 35mm or 50mm, and cannot zoom in or out. To change the framing, the photographer must move closer, move farther away, or change position. This physical constraint encourages more active composition and builds awareness of subject distance and background relationships.
Using one focal length for an extended period helps you predict what will fit in the frame before lifting the camera. It also encourages you to examine whether moving closer changes perspective, subject emphasis, and the appearance of the background.
Try a one lens, one week challenge:
- Select one prime lens.
- Leave other lenses at home whenever practical.
- Photograph several subjects and environments.
- Move physically rather than wishing for a different focal length.
- Review which compositions worked and where the focal length felt limiting.
Tamron offers compact F2.8 prime lenses for Sony E-mount, including 20mm, 24mm, and 35mm options. The Tamron 35mm F/2.8 Di III OSD M1:2 provides a natural field of view and close-focusing capability that can work well for this deliberate photography practice exercise.
Review and Select Images for Constructive Feedback
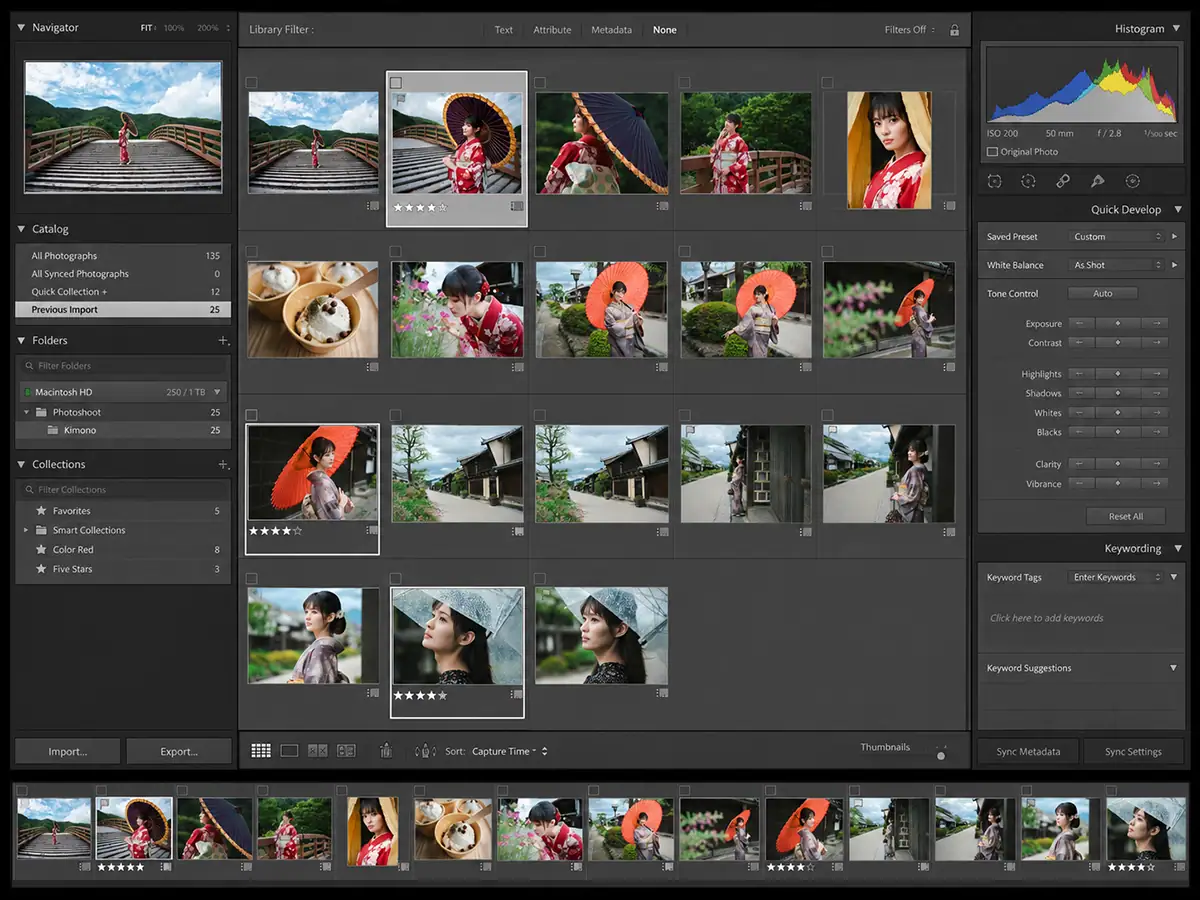
Showing three to five carefully selected images from each session—rather than sharing every photograph—forces critical self-evaluation. Photography groups, local camera clubs, and in-person critique sessions can then provide more useful external feedback because reviewers can concentrate on your strongest work and intended learning goal.
After each session:
- Remove technically unusable frames.
- Group similar compositions.
- Compare focus, light, timing, and background quality.
- Select the strongest version from each group.
- Narrow the complete session to three to five images.
- Write down one thing that worked and one thing to practice next time.
When requesting feedback, ask a specific question. “Which photograph has the strongest composition, and why?” will usually produce more actionable advice than “What do you think?”
Photography Facebook groups, online communities, workshops, and local camera clubs can provide support on shooting, editing, and professional topics. Look for groups that encourage respectful, specific critique rather than reactions based only on personal taste.
Second shooting or shadowing an experienced photographer can also accelerate learning. Observing how another photographer communicates with subjects, selects locations, handles changing light, organizes equipment, and solves problems provides practical workflow knowledge that is difficult to gain from theory alone.
How Do I Edit Photos Efficiently?
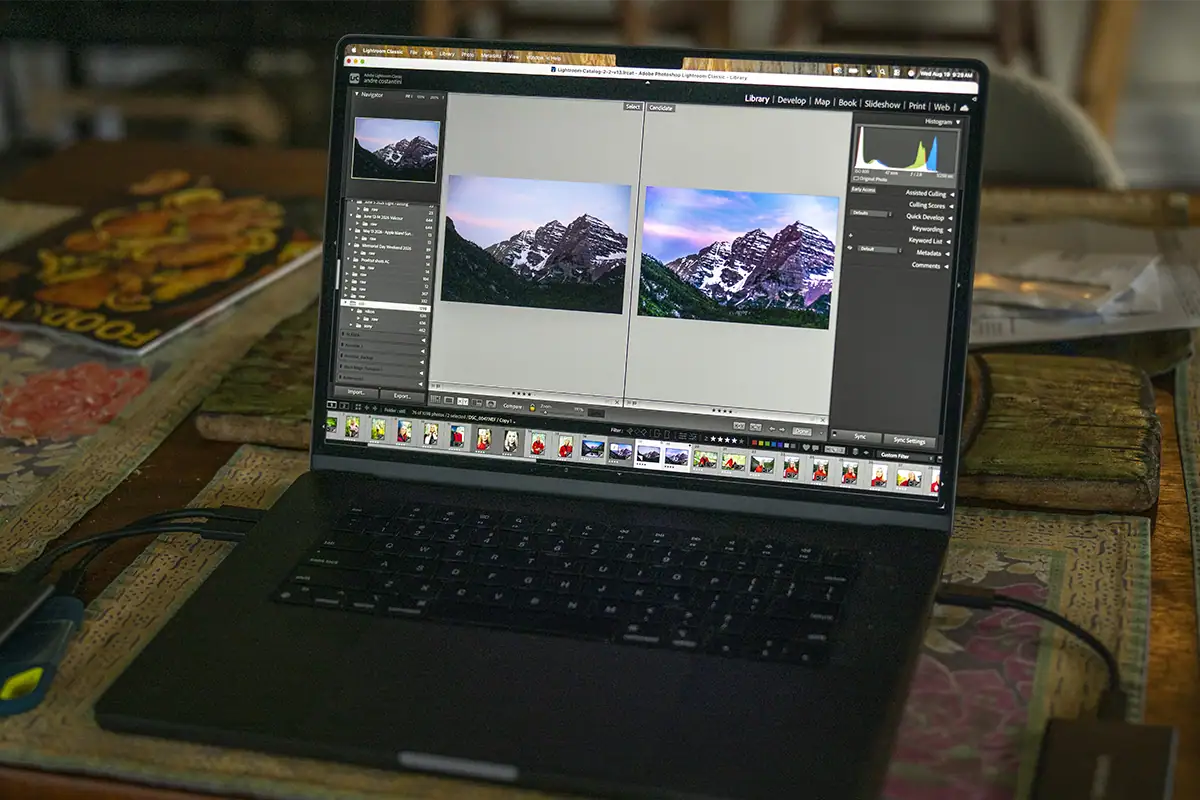
A repeatable photo editing workflow—import, cull, develop, and export—helps ensure that the quality of finished images matches the effort put into capturing them. Post-processing amplifies strong photographs and can recover minor exposure or color problems, but it cannot fully repair poor composition, severe blur, or missed focus.
Think of post-processing as the second half of the photographic process rather than a substitute for good capture. Establishing a consistent photo editing workflow before trying to master every software feature will save time and make your results more predictable.
Shoot in RAW and Use Non-Destructive Editing
A RAW file contains the minimally processed image data recorded by the camera sensor. It gives the photographer greater flexibility to adjust exposure, white balance, shadows, highlights, color, and noise during post-processing. A JPEG is processed and compressed by the camera, leaving less information available for significant corrections.
Shooting RAW is one of the highest-leverage changes a developing photographer can make to a photo editing workflow. A slightly underexposed RAW file may retain recoverable shadow detail, while a JPEG version of the same scene may show banding, compression, or reduced color flexibility after a strong adjustment.
Edit non-destructively in software such as Adobe Lightroom or Capture One so the original file remains unchanged. Programs including Lightroom, Capture One, Skylum products, and GIMP can help photographers organize images, develop RAW files, and prepare finished photographs for print, websites, or social media.
Learn more about the differences in RAW Image Format vs. JPEG.
RAW Advantages:
- Greater flexibility for recovering highlight and shadow detail
- White-balance correction after capture
- More control over noise reduction and sharpening
- Non-destructive editing that preserves the original file
- High-quality export to multiple formats and sizes
A simple workflow might look like this:
- Import and back up the files.
- Apply keywords or basic organization.
- Remove obvious rejects.
- Compare similar images and select the strongest frames.
- Correct exposure and white balance.
- Refine contrast, color, sharpening, and noise reduction.
- Crop and straighten when needed.
- Export a copy for the intended use.
Calibrate Your Monitor and Back Up Files
An uncalibrated monitor can produce edits that appear accurate on your screen but shift when viewed on another device or sent to print. A monitor-calibration tool measures the display and creates a corrective profile. The 3-2-1 backup rule protects photographs against drive failure, theft, accidental deletion, and disaster.
The 3-2-1 backup rule means maintaining three copies of your files, storing those copies on at least two different types of media, and keeping one copy offsite or in cloud storage.
Monitor and Backup Checklist:
- Calibrate the monitor with a target white point around 6500K and gamma 2.2.
- Set monitor brightness to approximately 80–100 cd/m² when preparing files for print.
- Maintain three copies of all important image files.
- Store those copies on at least two different media types or storage systems.
- Keep one copy offsite or in secure cloud storage.
- Test backups quarterly to confirm that files can be restored successfully.
Calibration helps create greater consistency between the camera, monitor, lab, and printer. It does not make every screen look identical, but it provides a reliable editing reference.
Back up files as soon as possible after a shoot. Do not assume a photograph is protected simply because it exists on a memory card, laptop, or external drive. Any single storage location can fail.
Compare Before and After Edits to Learn
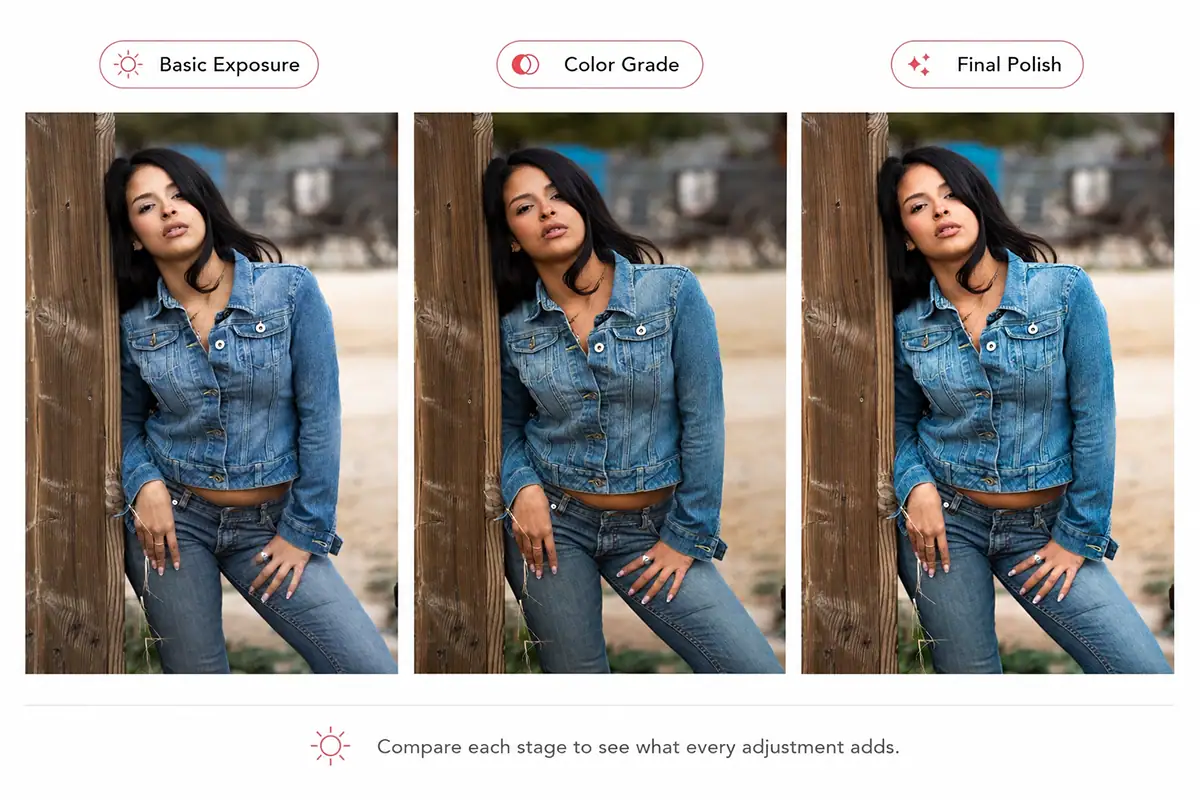
Using the before-and-after view in Lightroom, Capture One, or similar software after every editing session reveals how much each adjustment contributed to the finished photograph. Saving virtual copies at key stages creates a visual audit trail and makes the effect of each editing decision easier to understand.
Create virtual copies or snapshots after:
- Basic exposure and white-balance correction
- Initial contrast and tonal adjustments
- Color grading
- Local masking and retouching
- Sharpening and noise reduction
- Final cropping and polish
Compare each stage with the original. Ask whether the edit strengthened the subject, improved the mood, clarified the visual hierarchy, or simply made the image more dramatic.
Revisit edits from several months earlier. As your judgment improves, you may notice excessive saturation, heavy contrast, unnatural sharpening, or inconsistent color that you did not recognize at the time. This makes your progress visible and can reinforce motivation.
Editing review should be part of your deliberate weekly practice rather than a separate activity. The lessons you learn while processing a photograph should influence how you expose, frame, and light the next one.
How Do I Choose the Right Photography Gear and Accessories?
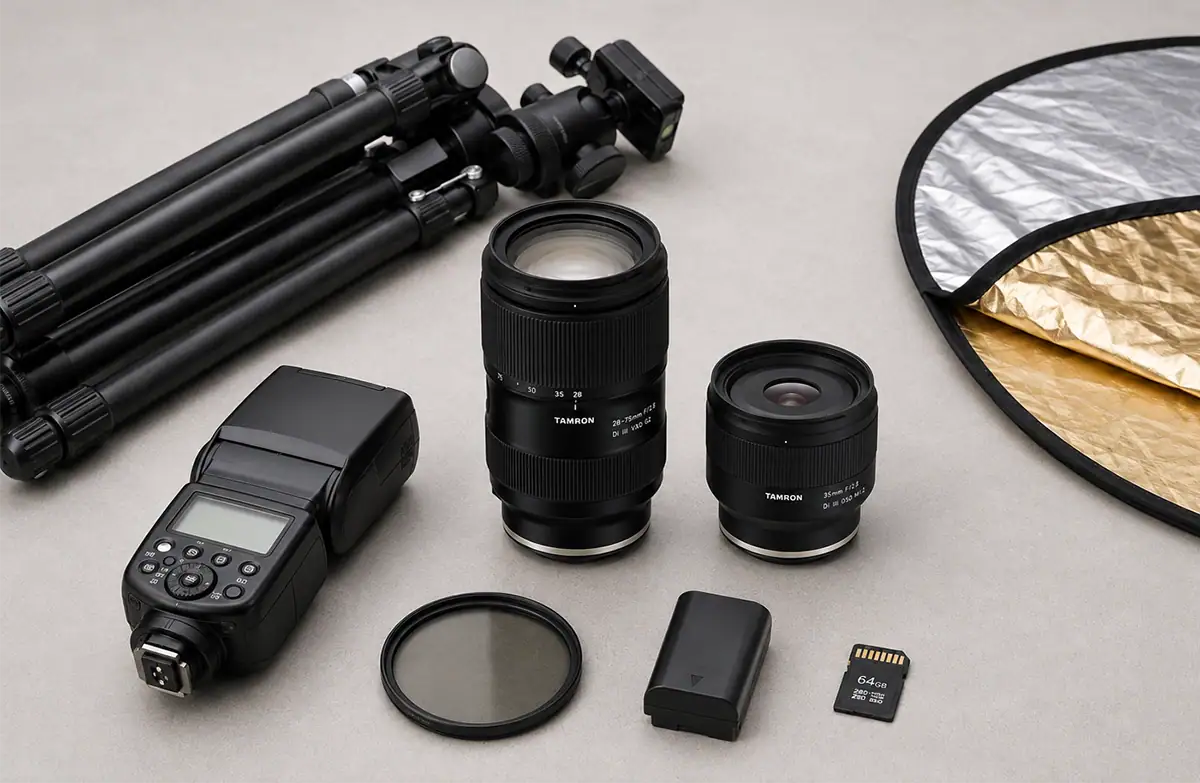
Photography gear enhances a skilled photographer’s vision—it does not replace the fundamentals of light, composition, and deliberate practice. Once core skills are established, targeted investments in versatile lenses, a tripod, and light modifiers can expand creative range without the diminishing returns that may come from repeatedly upgrading camera bodies.
The best photography gear essentials solve specific problems. Before buying anything, identify what currently prevents you from making the photograph you want. The answer may be insufficient focal-length reach, limited low-light capability, camera shake, difficult lighting, slow workflow, or inadequate protection in the field.
Choose Versatile Tamron Lenses for Creativity and Quality

The creative outcome should lead the lens choice. Broad focal-length coverage helps photographers react to changing situations, a fixed focal length encourages active framing, and an F2.8 wide-angle zoom supports low-light and environmental work. The appropriate option depends on the camera system, sensor format, and primary subject.
Tamron’s current mirrorless lineup includes lenses for Sony E, Nikon Z, Canon RF, and Fujifilm X systems, although mount availability varies by model. The lineup includes all-in-one zooms, fast-aperture zooms, primes, macro lenses, and ultra-telephoto options, with features such as compact construction, VXD or RXD autofocus, and VC stabilization available on selected lenses.
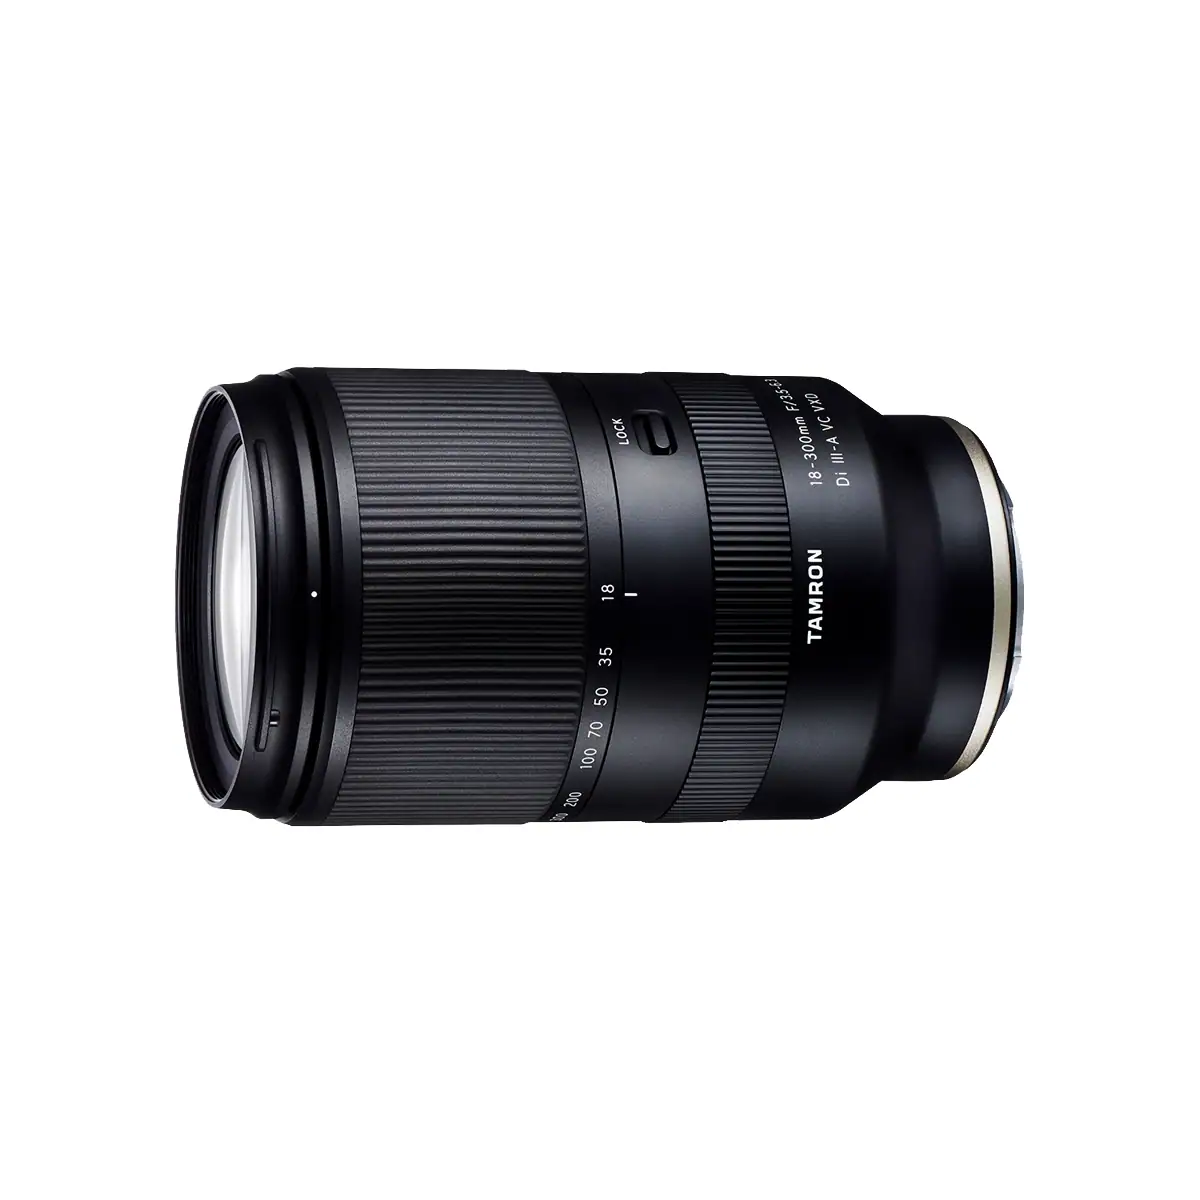
The Tamron 18-300mm F/3.5-6.3 Di III-A VC VXD covers wide-angle through ultra-telephoto perspectives for compatible APS-C systems. That versatility can help a developing family photographer practice composition and settings across many subjects while carrying one lens.
A compact prime such as the Tamron 35mm F/2.8 can be used for street scenes, environmental portraits, travel details, food, and everyday subjects. Because the focal length does not change, the photographer must become more deliberate about camera position and subject distance.
For full-frame Sony E and Nikon Z photographers, the Tamron 16-30mm F/2.8 Di III VXD G2 combines an ultra-wide focal range with a constant F2.8 aperture. It can support landscape, architecture, travel, night-sky, and environmental photography while remaining relatively compact for its class.
Before choosing a lens, confirm the mount and sensor-format compatibility for your camera. For more guidance, read the Ultimate Guide to Different Types of Camera Lenses.
Invest in Tripods, Polarizers, and Fill Lights
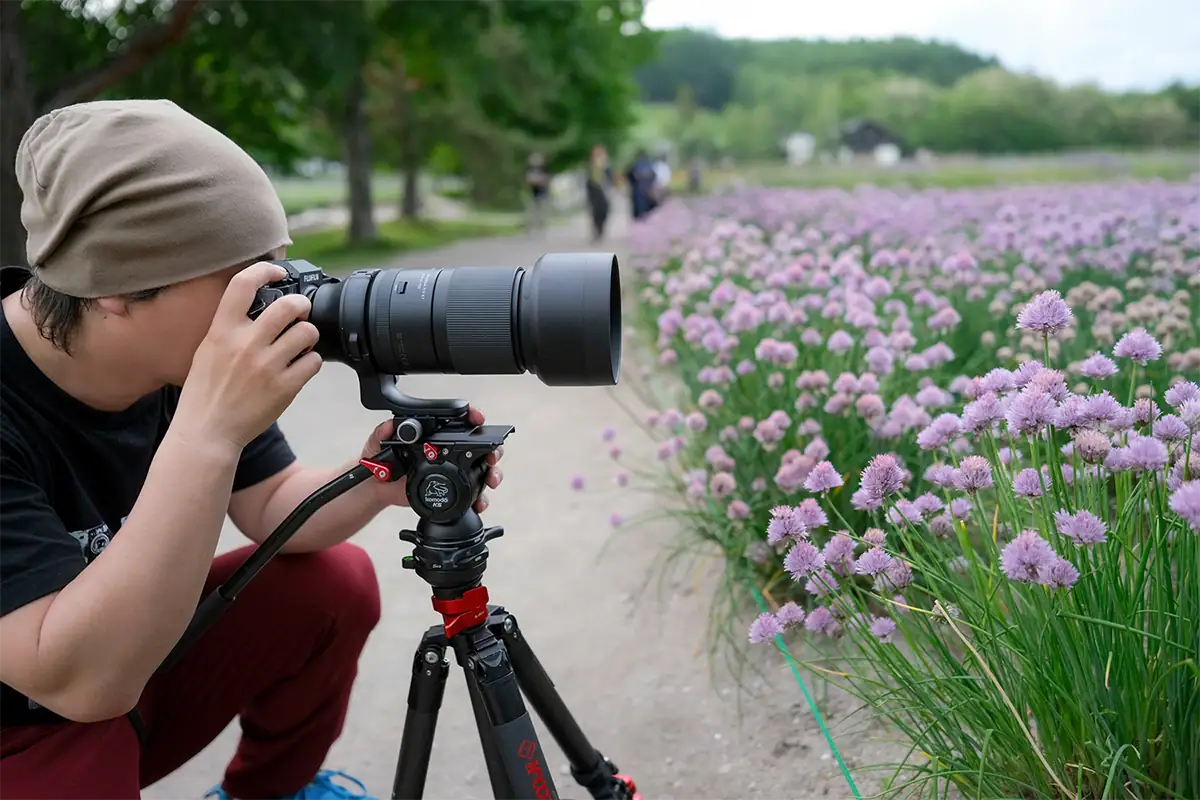
A sturdy tripod is one of the highest-impact accessory investments for improving image sharpness in low light and enabling long-exposure techniques that may be impossible handheld. A circular polarizing filter reduces glare and reflections while increasing color and sky contrast in many outdoor scenes.
A tripod lets you use a lower ISO, a narrower aperture, or a longer shutter speed without relying entirely on handheld stability. It is especially useful for landscapes, blue-hour scenes, architecture, product photography, night photography, macro work, and self-portraits.
A circular polarizer is most effective when photographing at an angle to a reflective surface. Rotate the front ring while looking through the viewfinder to observe the effect. The filter may reduce reflections on water, glass, leaves, and painted surfaces while deepening blue skies and improving color saturation. Learning how to use a circular polarizer will increase the quality of your outdoor images.
Tamron lenses use standard circular filter sizes, so compatible polarizers and neutral-density filters are generally easy to source. Check the filter diameter printed on the front of the lens or listed in its specifications before purchasing.
- Sturdy tripod with an adjustable ball head
- Circular polarizing filter sized for the most frequently used lens
- Collapsible 5-in-1 reflector and diffuser
- Basic external flash or speedlight
- Spare batteries and reliable memory cards
A reflector or external flash can improve portraits and indoor photography more than a minor camera-body upgrade because it allows you to change the light rather than simply recording the existing conditions.
For further information about the gear needed to help your craft, see our Camera Accessories Guide.
Explore Accessories to Expand Your Shooting Options
Beyond the core kit, lens-cleaning systems, weather-protected camera bags, and remote shutter releases expand what can be done reliably in the field. Genre-specific accessories are best chosen after you identify the subjects and shooting conditions that interest you most.
- A basic lens-cleaning kit should include a blower, clean microfiber cloths, and an appropriate optical-cleaning solution. Remove loose particles with the blower before touching the glass so grit is not dragged across the lens surface. Knowing how to clean your lens properly ensures clear image quality while helping protect the lens coatings and optical surfaces from scratches or damage.
- A weather-protected bag helps organize equipment and provides additional protection from rain, dust, sand, and impacts. Weather-resistant equipment still requires careful handling; moisture-resistant construction should not be treated as permission to submerge a camera or lens.
- A remote shutter release or camera app reduces physical contact with the camera during long exposures. It is useful for landscapes, night photography, macro work, product images, time-lapse sequences, and group photographs that include the photographer.
For video, lenses with quiet autofocus motors, stable focus transitions, and VC stabilization can help produce smoother results. Learn more in Tamron Lenses for Videography and Filmmaking. Tamron’s current video-oriented lens guidance highlights VXD and RXD autofocus, stabilization on selected lenses, and customization features on compatible products.
Being self-taught means having access to a large online photography community. YouTube tutorials, online classes, manufacturer education, camera clubs, and photography organizations can break down camera settings and editing into digestible, real-world demonstrations.
Once you identify a genre you enjoy, continue developing specialized techniques through Tamron’s resources on street photography, macro photography, and photojournalism.
Read the Camera Accessories Guide.
Keep Improving Your Photography One Skill at a Time
Improving your photography skills is an ongoing process built through observation, experimentation, and consistent practice. By learning how camera settings, light, composition, editing, and purposeful gear choices work together, you can solve common shooting problems and create images that more closely match your creative vision. Focus on one skill at a time, review your results honestly, and give yourself opportunities to practice regularly. As your technical decisions become more instinctive, you will have greater freedom to concentrate on timing, storytelling, and the moments that make each photograph meaningful.
Where to Buy Tamron Lenses
Learn more about Tamron lenses at an authorized Tamron dealer near you or shop directly at the official TAMRON Store.
Frequently Asked Questions
How Can I Develop Better Photography Skills?
The most effective way to develop better photography skills is to practice regularly with a specific skill focus during each session, master the exposure triangle, and study how light and composition affect image quality. Setting weekly goals and seeking critique from a photography community can accelerate improvement more effectively than gear upgrades alone.
What Are the Most Important Skills Every Photographer Needs?
Every photographer benefits from mastering the exposure triangle—aperture, shutter speed, and ISO—understanding how light quality and direction affect an image, applying composition techniques such as the rule of thirds, and developing a consistent post-processing workflow. Attention to detail while framing and a habit of critical self-review are also essential for consistent results.
What Is the Exposure Triangle and Why Is It Important?
The exposure triangle describes the relationship between aperture, shutter speed, and ISO—the three camera settings that together control how bright or dark an image appears and how it looks creatively. Understanding this relationship gives photographers control over depth of field, motion rendering, and image noise in changing lighting conditions.
How Long Does It Take to Become Good at Photography?
Many photographers can understand basic exposure controls and begin producing more consistent images within several weeks of regular, focused practice. Developing a distinctive creative eye and producing reliably strong work across varied subjects and conditions can take months or years. Consistent weekly sessions with specific skill goals can shorten the learning process compared with casual, unfocused shooting.
What Practical Steps Can I Take to Improve Right Now?
Set a weekly shooting theme, practice one technical skill per session, and photograph during golden hour or in open shade when possible. Critically review every session, select only three to five of the strongest images, and seek structured feedback from a photography community. Shooting in RAW and learning a non-destructive editing workflow can further accelerate your progress.