 Instant Savings
 Support
 Find a Dealer
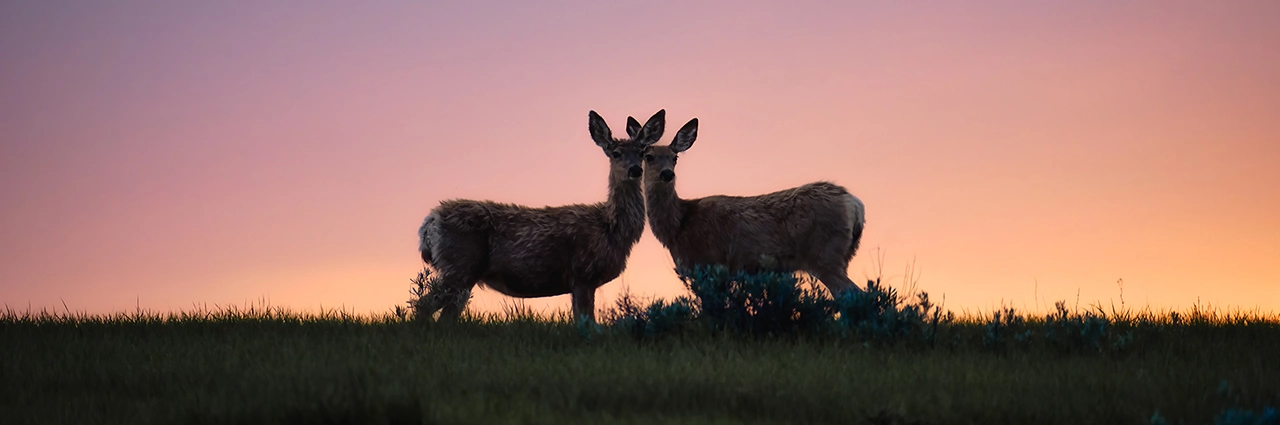
Grasslands National Park photography offers a rare opportunity to capture the raw beauty of Canada’s untouched prairie landscapes. From wide-open skies and rolling grasslands to bison herds and rattlesnakes, this park is a dream destination for both landscape and wildlife photographers. In this guide, I’ll share my tips, gear recommendations, and personal experience photographing this stunning national treasure.
By Guest Contributor Seth Macey
What You’ll Learn in This Blog Post:
- Why Grasslands National Park is a must-visit destination for nature and wildlife photographers.
- What to pack and how to prepare for a backcountry camping trip in the Canadian prairies.
- Photo tips for capturing dynamic wildlife and the stunning badlands landscape.
- The best lens for wildlife photography, plus essential accessories for the trip.
- Techniques to improve your shots and make the most of different light conditions.
My Vision for Photographing Grasslands National Park
When I planned my backcountry camping trip to Grasslands National Park in Saskatchewan, Canada, my goal was to curate a visual narrative that captured the vast, minimalist beauty of the Canadian prairies while showcasing the intricate connection between the diverse wildlife and their unique habitat.
- Two Distinct Sections to Explore: There are two sections to this national park, the west block and east block, both of which offer a variety of environments and wildlife to explore.
- A Haven for Rare Wildlife and Native Grasses: With over 70 species of wild grass swaying in the wind and nearly 30 “at risk” animal species thriving across the plains and within the dramatic badlands landscape, the park feels like a glimpse into a prehistoric land.
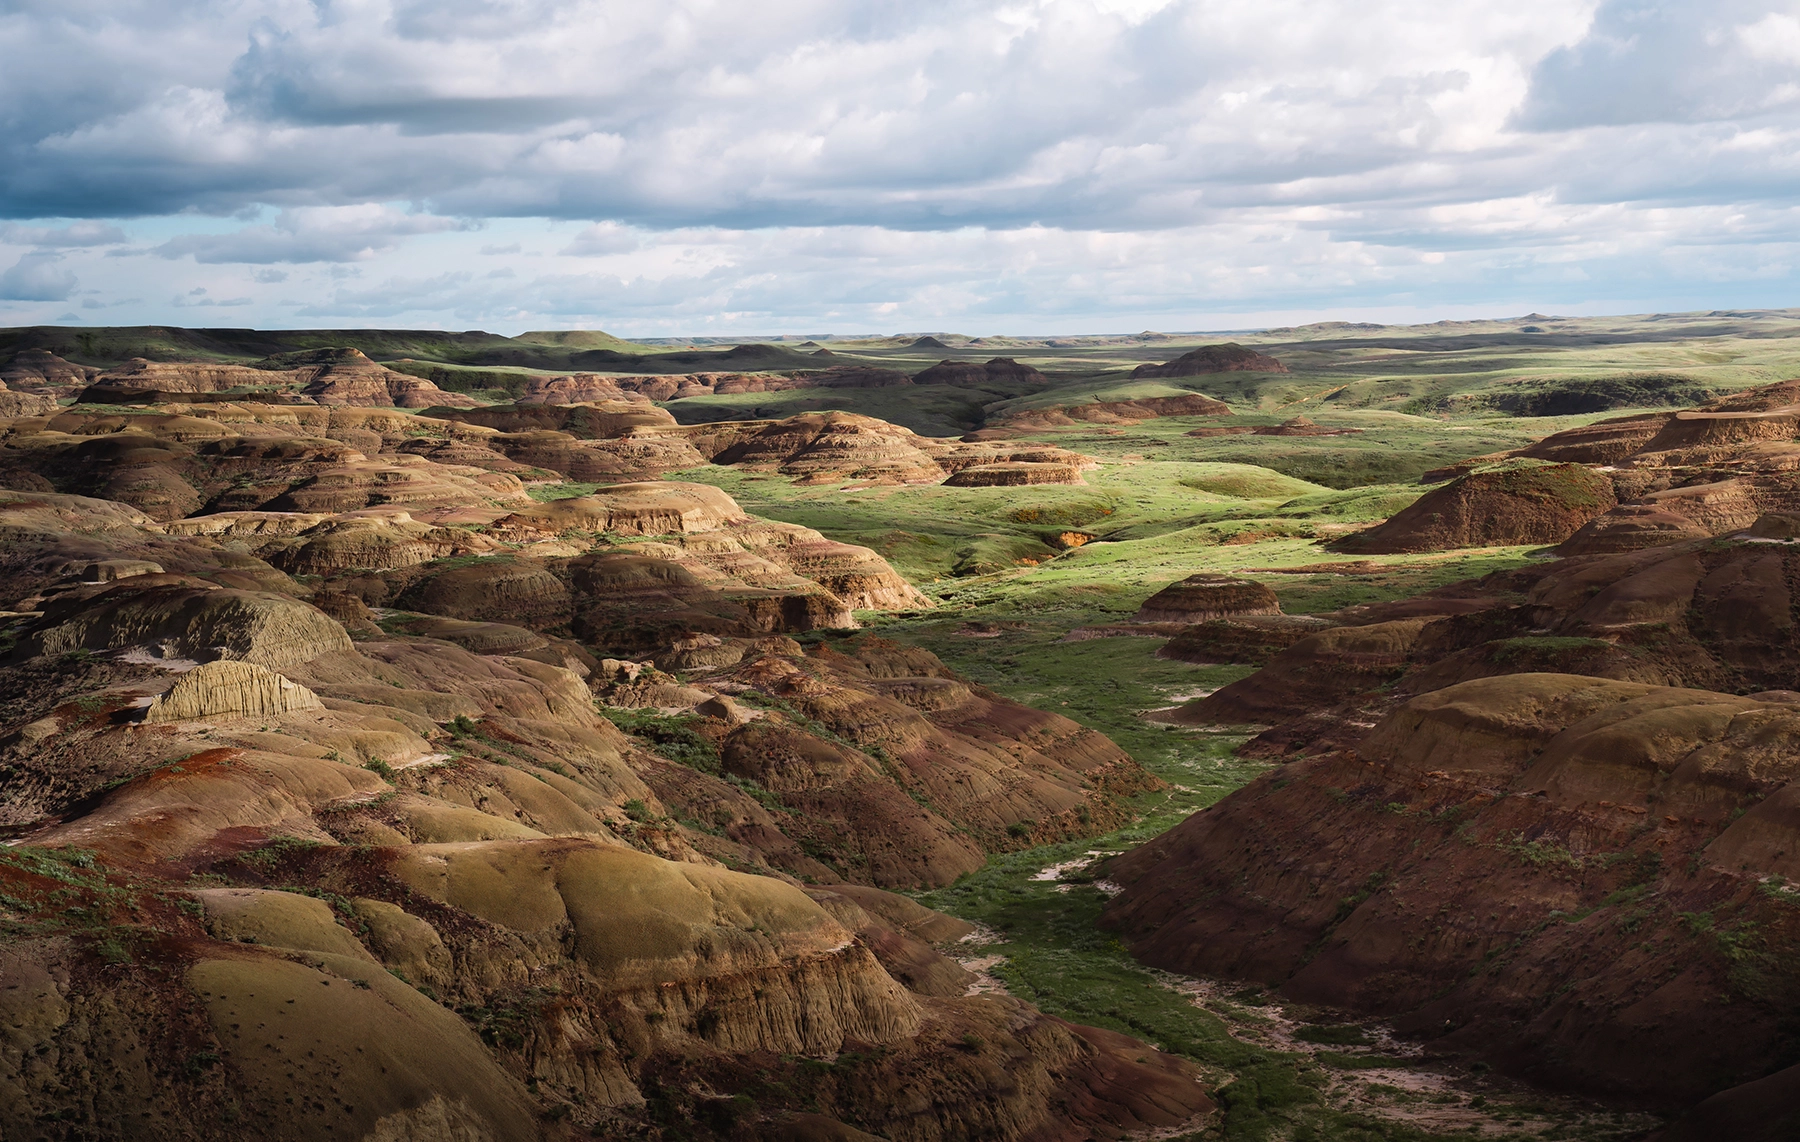
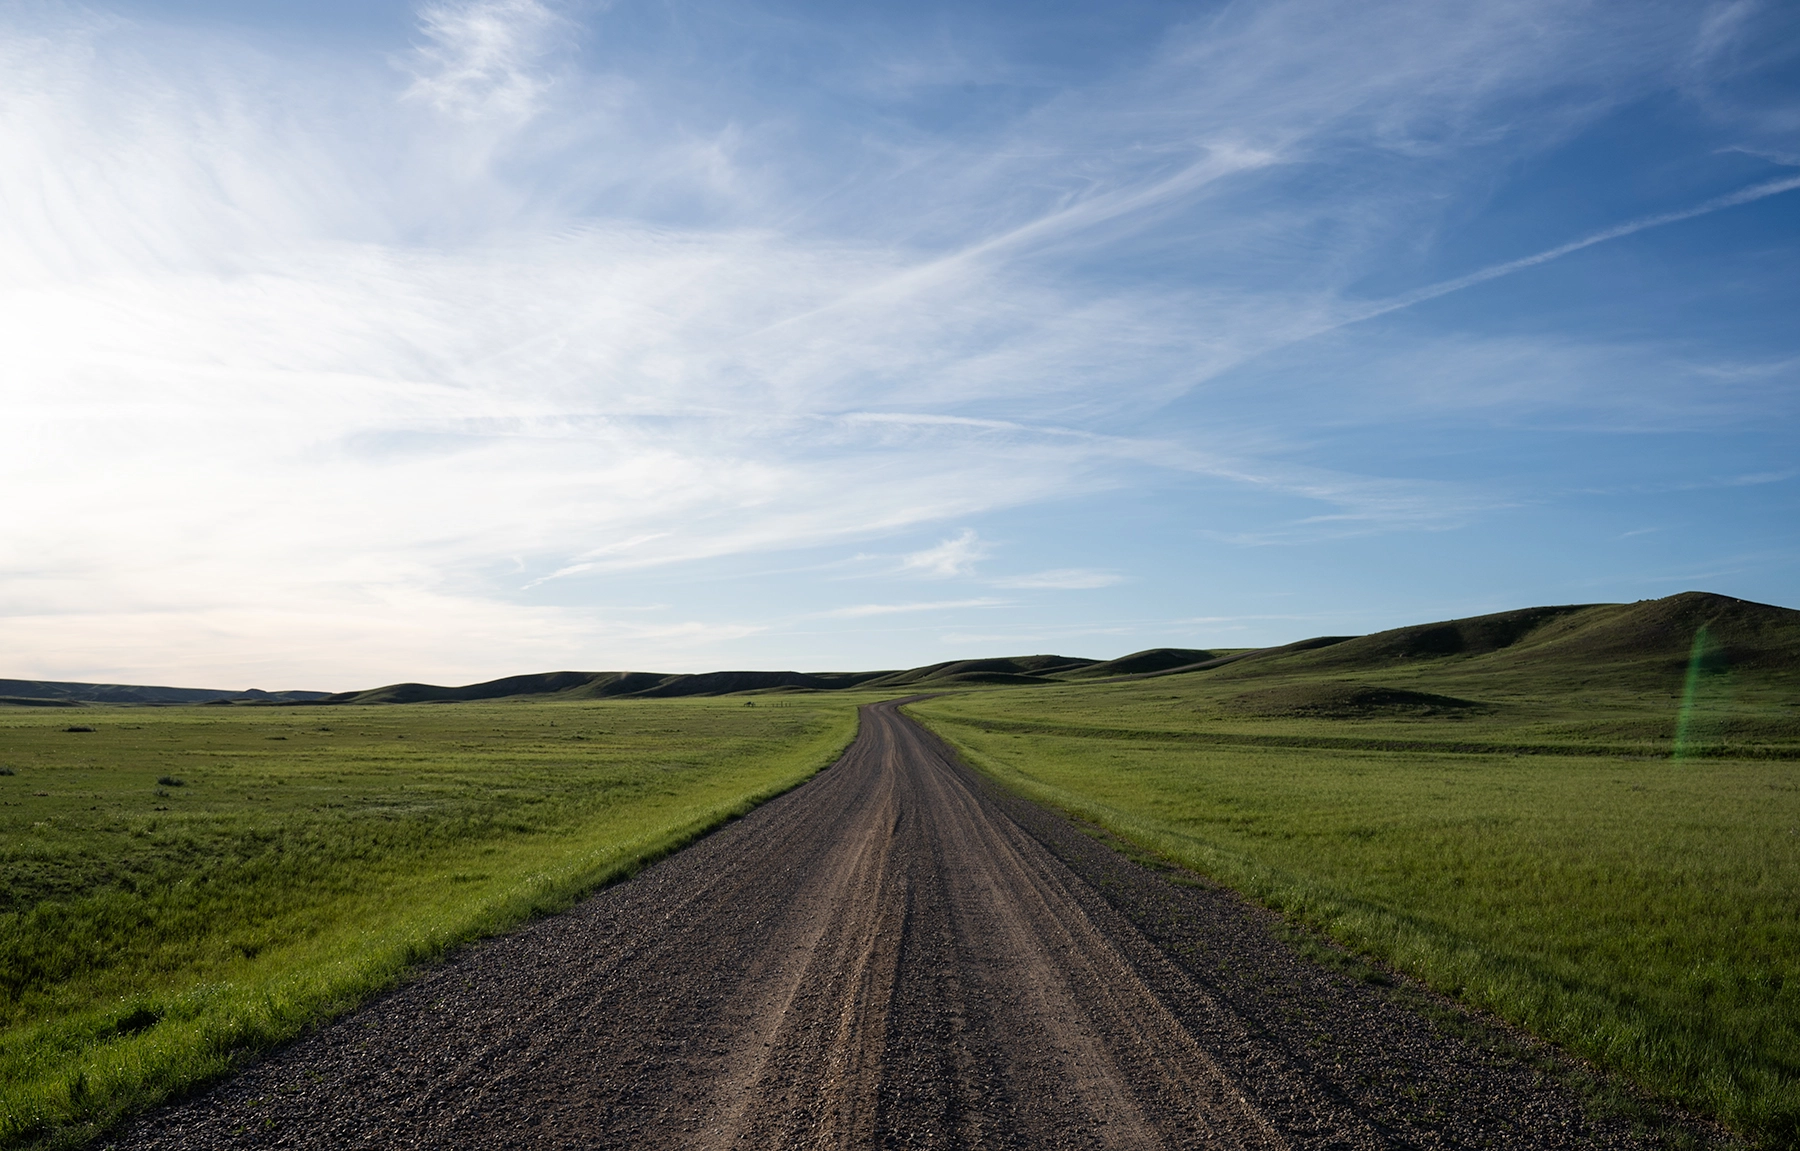
- A Landscape of Contrast and Beauty: It’s not just the diverse wildlife that makes Grasslands National Park captivating. The park’s rugged badlands landscape, sun-drenched grasslands, and seemingly infinite, open horizons create a stunning yet challenging canvas for photographers.
- Mastering Minimalism in Photography: Photographing the vast, minimalist spaces of Grasslands National Park requires a different approach than shooting dramatic terrains like the Rockies. Here, the subtle interplay of light, shadow, texture, and seemingly nothingness becomes your subject.
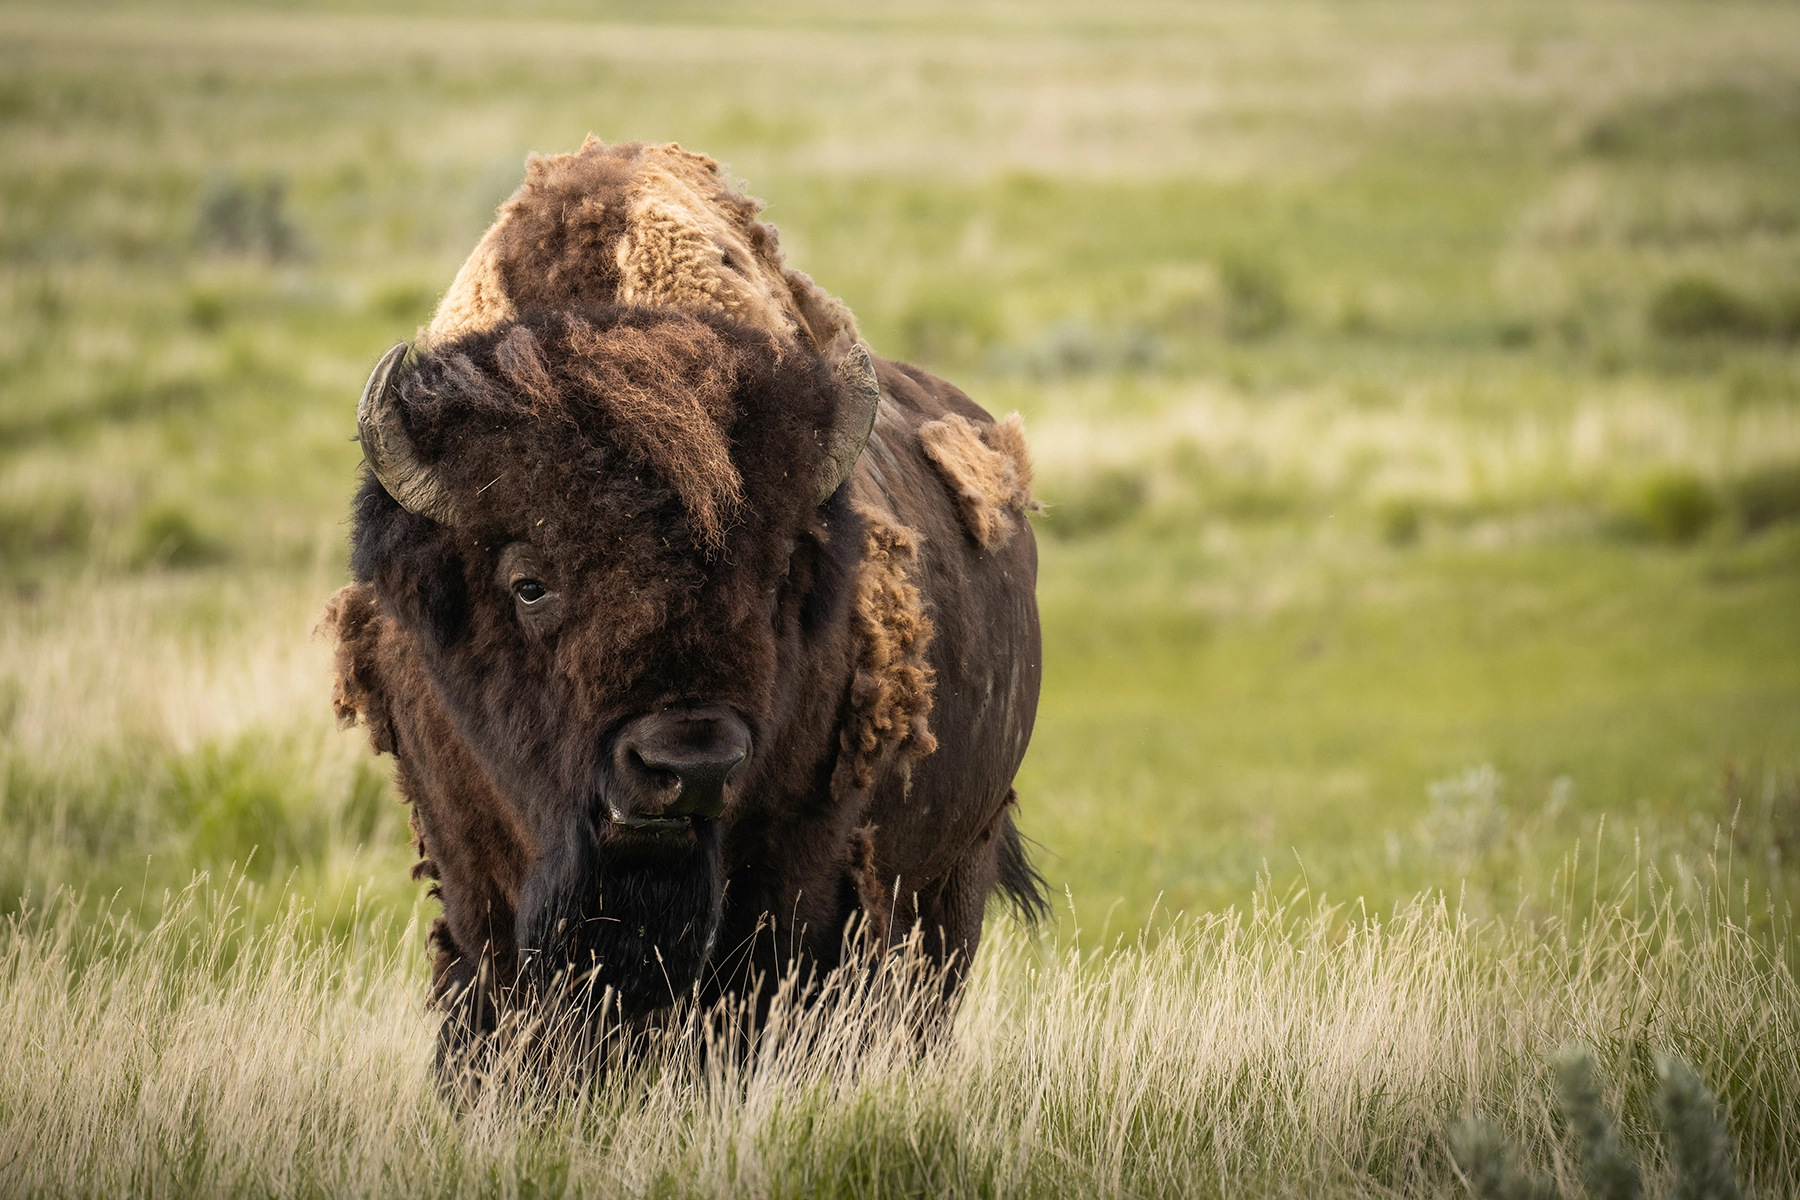
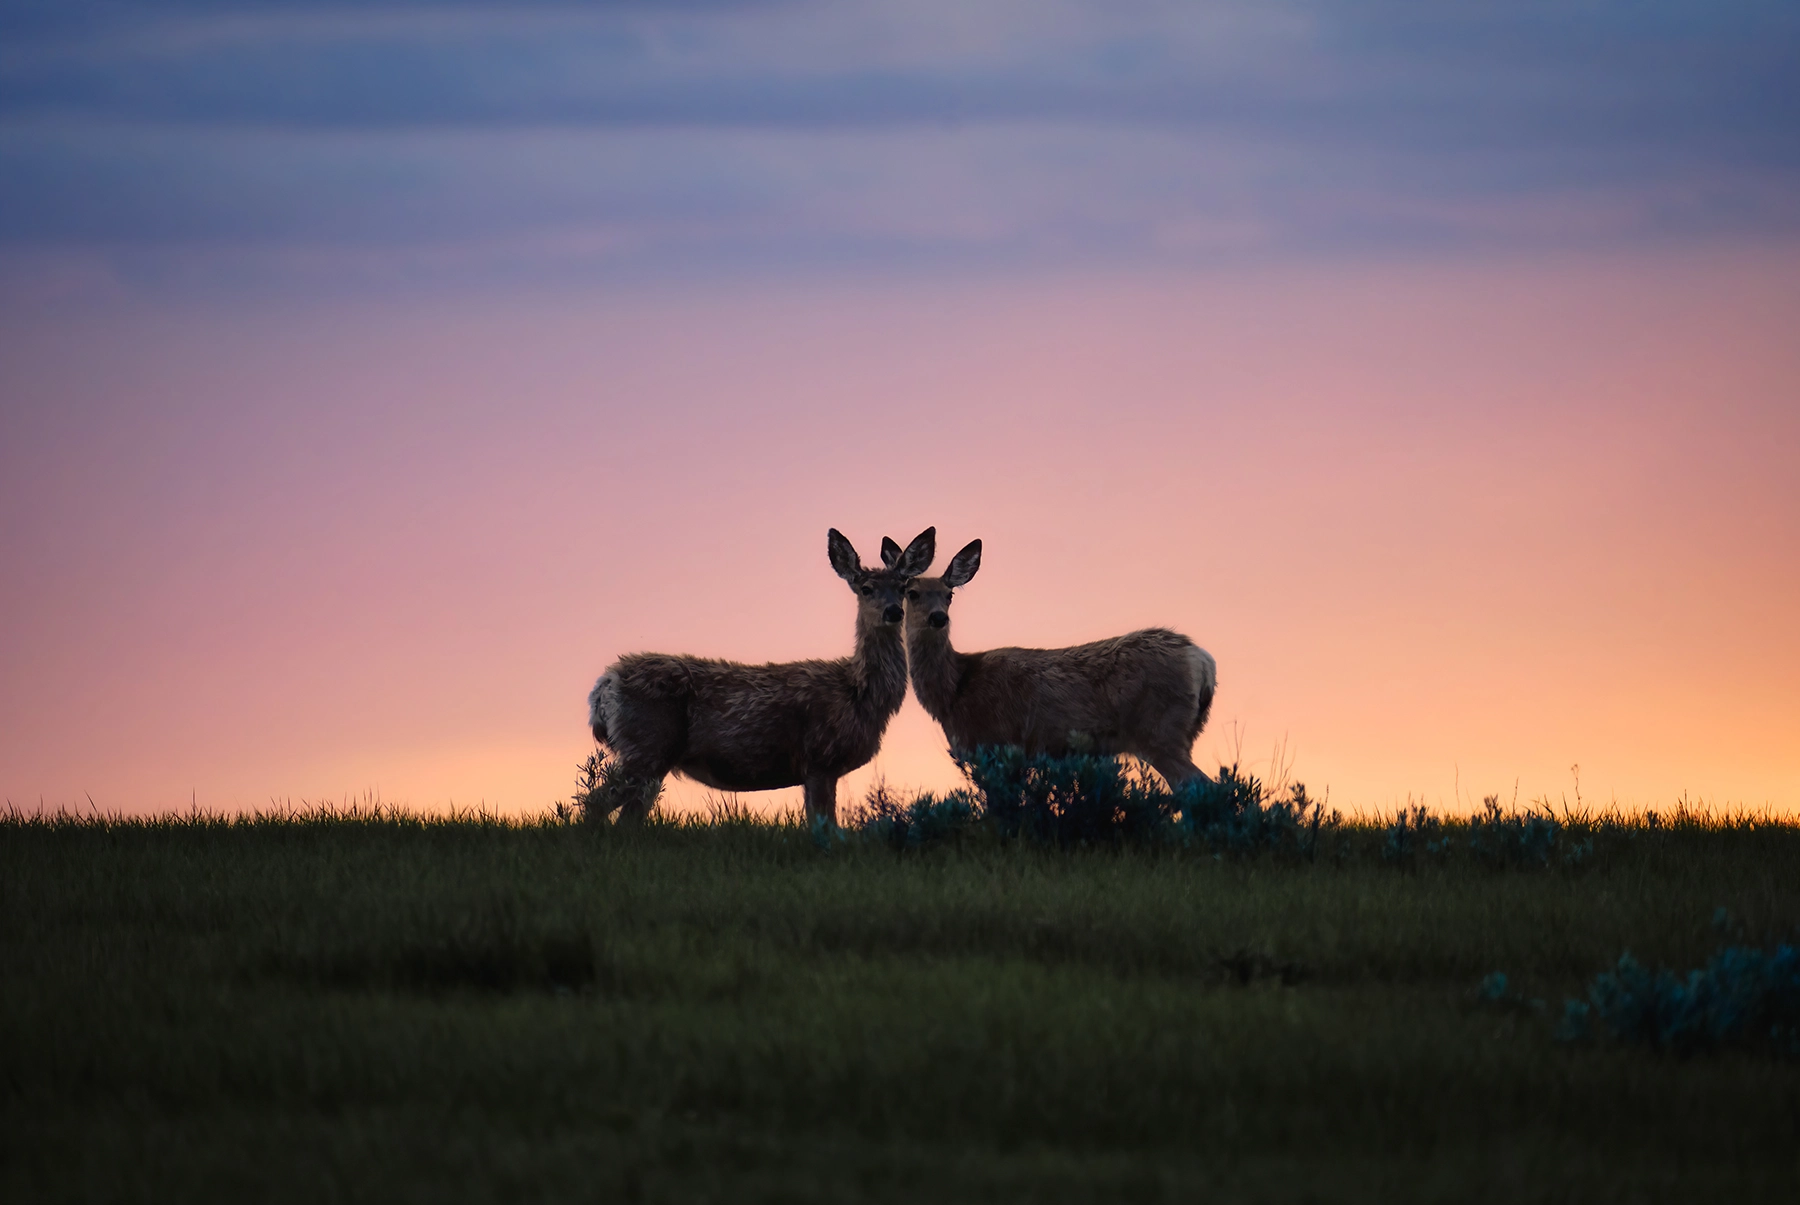
Add to that the majestic bison, deer, venomous prairie rattlesnakes, and chattering prairie dogs, and this park transforms into a playground for wildlife photographers, offering endless opportunities to test your creativity and skill. Spending 5-7 days here isn’t just recommended, it’s essential to truly immerse yourself in this unique wilderness.
Now, let’s dig into how you can prepare for and make the most of your visit to this breathtaking national park.
Preparing for a Backcountry Camping Trip
Backcountry camping in the Canadian prairies is thrilling, but preparation is essential for a safe and enjoyable trip. Careful planning is needed to handle Grasslands National Park’s unpredictable weather and rugged terrain.
One of the biggest challenges of backcountry camping is managing the weight of your gear. You need to carry as little as possible while still packing everything you need to survive. Adding photography equipment increases the weight of your backpack, which can be extra challenging on long hikes or steep terrain.
To prepare for this, focus on building your aerobic fitness and strength before your trip. Building your fitness before the trip will make hiking with gear much easier. The better your fitness, the more enjoyable your adventure will be.
It’s tempting to bring every piece of camera gear you own, but overpacking can be your biggest mistake. Every ounce adds up when you’re hiking long distances. Focus on the essentials: two lenses, a lightweight tripod, and enough batteries and memory cards. Leave the rest at home. You’ll thank yourself when you’re not lugging unnecessary weight across the Canadian prairies.
1. Essential Gear for the Trip
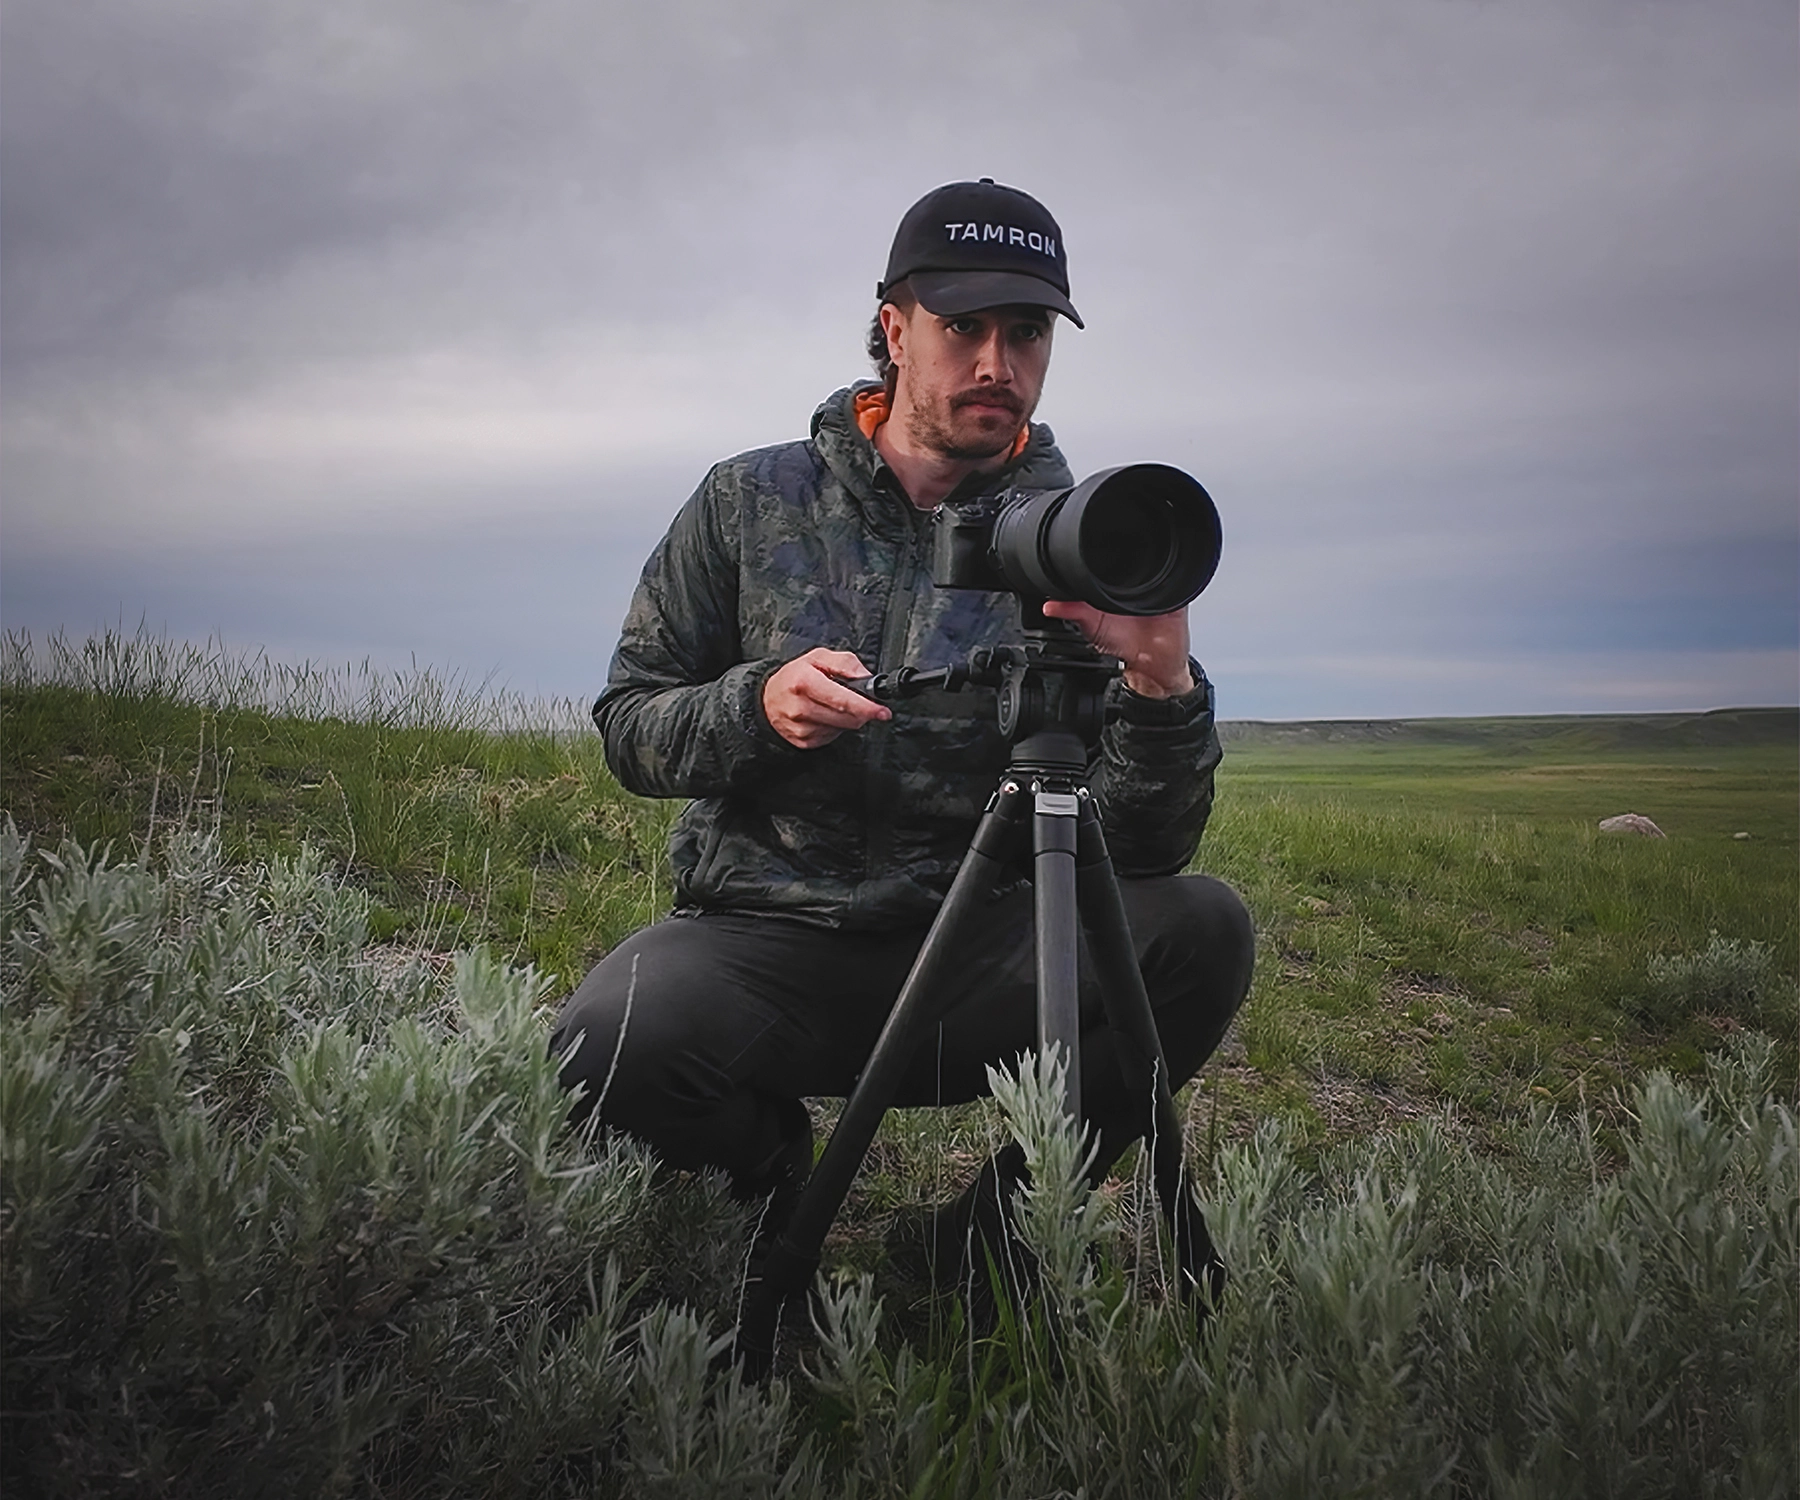
- Lenses: For this adventure, I trusted the Tamron 150-500mm lens for my Sony E-Mount full-frame mirrorless camera. It was my go-to tool for documenting everything from close-up shots of animal behavior to compressed perspectives of sprawling landscapes. Alongside the Tamron 150-500mm wildlife lens, I also packed the Tamron 28-75mm G2 lens, which proved fantastic for photographing Grasslands National Park’s expansive vistas on day hikes.
- Other Gear Essentials: I packed multiple camera batteries, plenty of SD cards, and a solar charger to keep everything powered in the backcountry where there is no electricity. I made sure to have a lightweight carbon fiber tripod and a fluid gimbal head for filming during the trip.
- Camping Gear: I packed lightweight gear like a waterproof tent, sleeping bag, Jetboil stove, MREs, and a 3L hydration bladder to fill at the trailhead, as the rivers are too salty to drink.
- Clothing: Layers are key. I packed breathable base layers, an insulated jacket for cool mornings, rain gear, and snake gaiters for peace of mind in the tall grass where rattlesnakes might be present. I made sure to bring comfy shoes for my campsites and supportive hiking boots when walking.
- Navigation and Safety: A Garmin inReach Mini GPS satellite phone was invaluable for checking in with family and in case of emergencies in this cell-service-free zone. I also carried a trail map and compass to stay oriented in areas with minimal signage.
I made sure to have the best camera gear for Grasslands National Park adventure. With the right gear, you can immerse yourself in the park’s quiet beauty and experience the joy of disconnecting from the rest of the world. Your phone won’t work, so embrace the chance to unplug and soak in what’s in front of you!
2. Safety and Permits
Before embarking on my backcountry camping trip, I secured the necessary overnight camping permits and familiarized myself with leave no trace principles to help protect the fragile ecosystem. Safety was a top priority, as Grasslands National Park is home to poisonous prairie rattlesnakes and unpredictable bison.
Bison
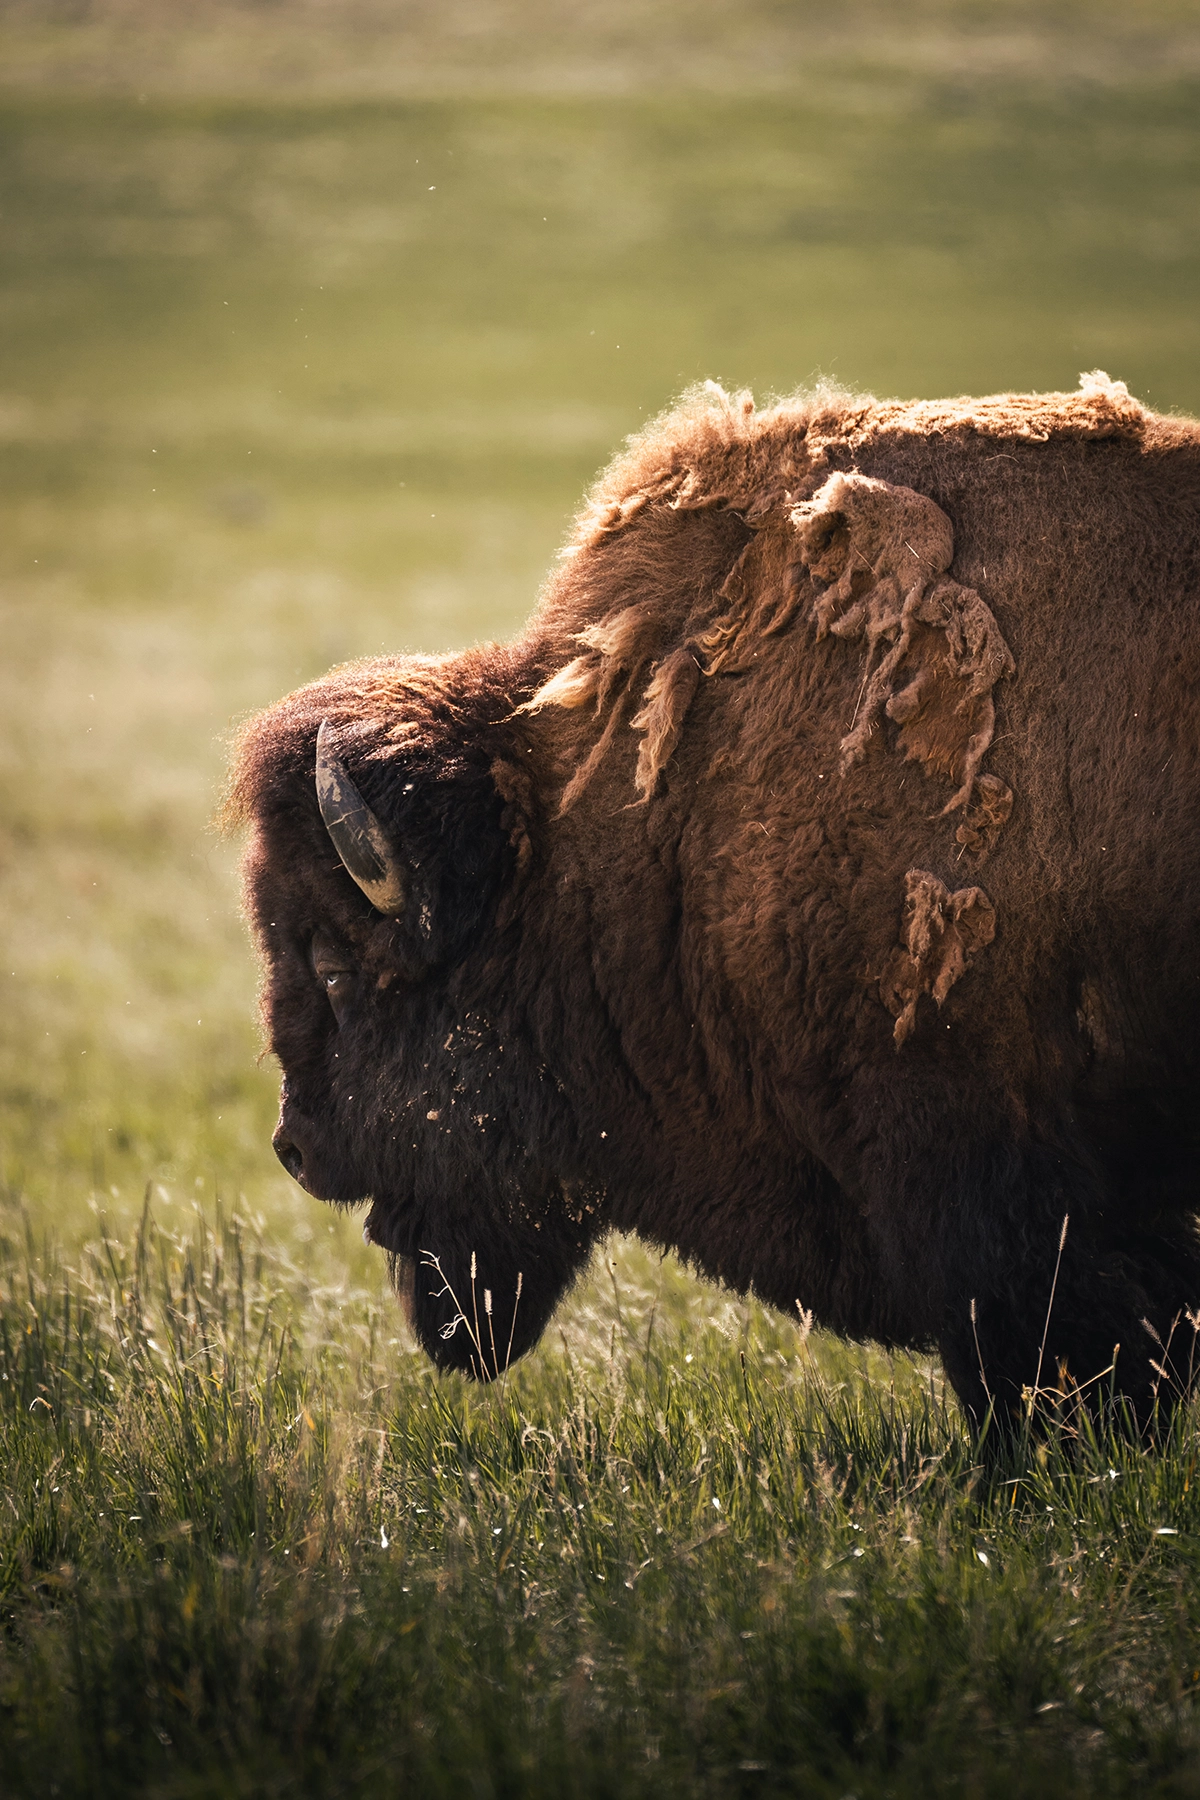
When it comes to roaming bison, distance is key. If your proximity causes a bison to stop its normal behavior, like grazing, grooming, or moving naturally, you’re probably too close.
A good rule of thumb is to hold your arm straight out with your thumb sideways and one eye closed. If your thumb can cover the entire animal, you’re at a safe distance. When in doubt, stay at least 100 meters away, to ensure safety for both you and the bison (Parks Canada).
I observed many solitary bison grazing rather than gathering in herds. A park ranger explained that during calving season, females and mature males move to safer areas to protect newborn calves, leaving younger and older males to roam alone until the herd reunites after calving.
Rattlesnakes
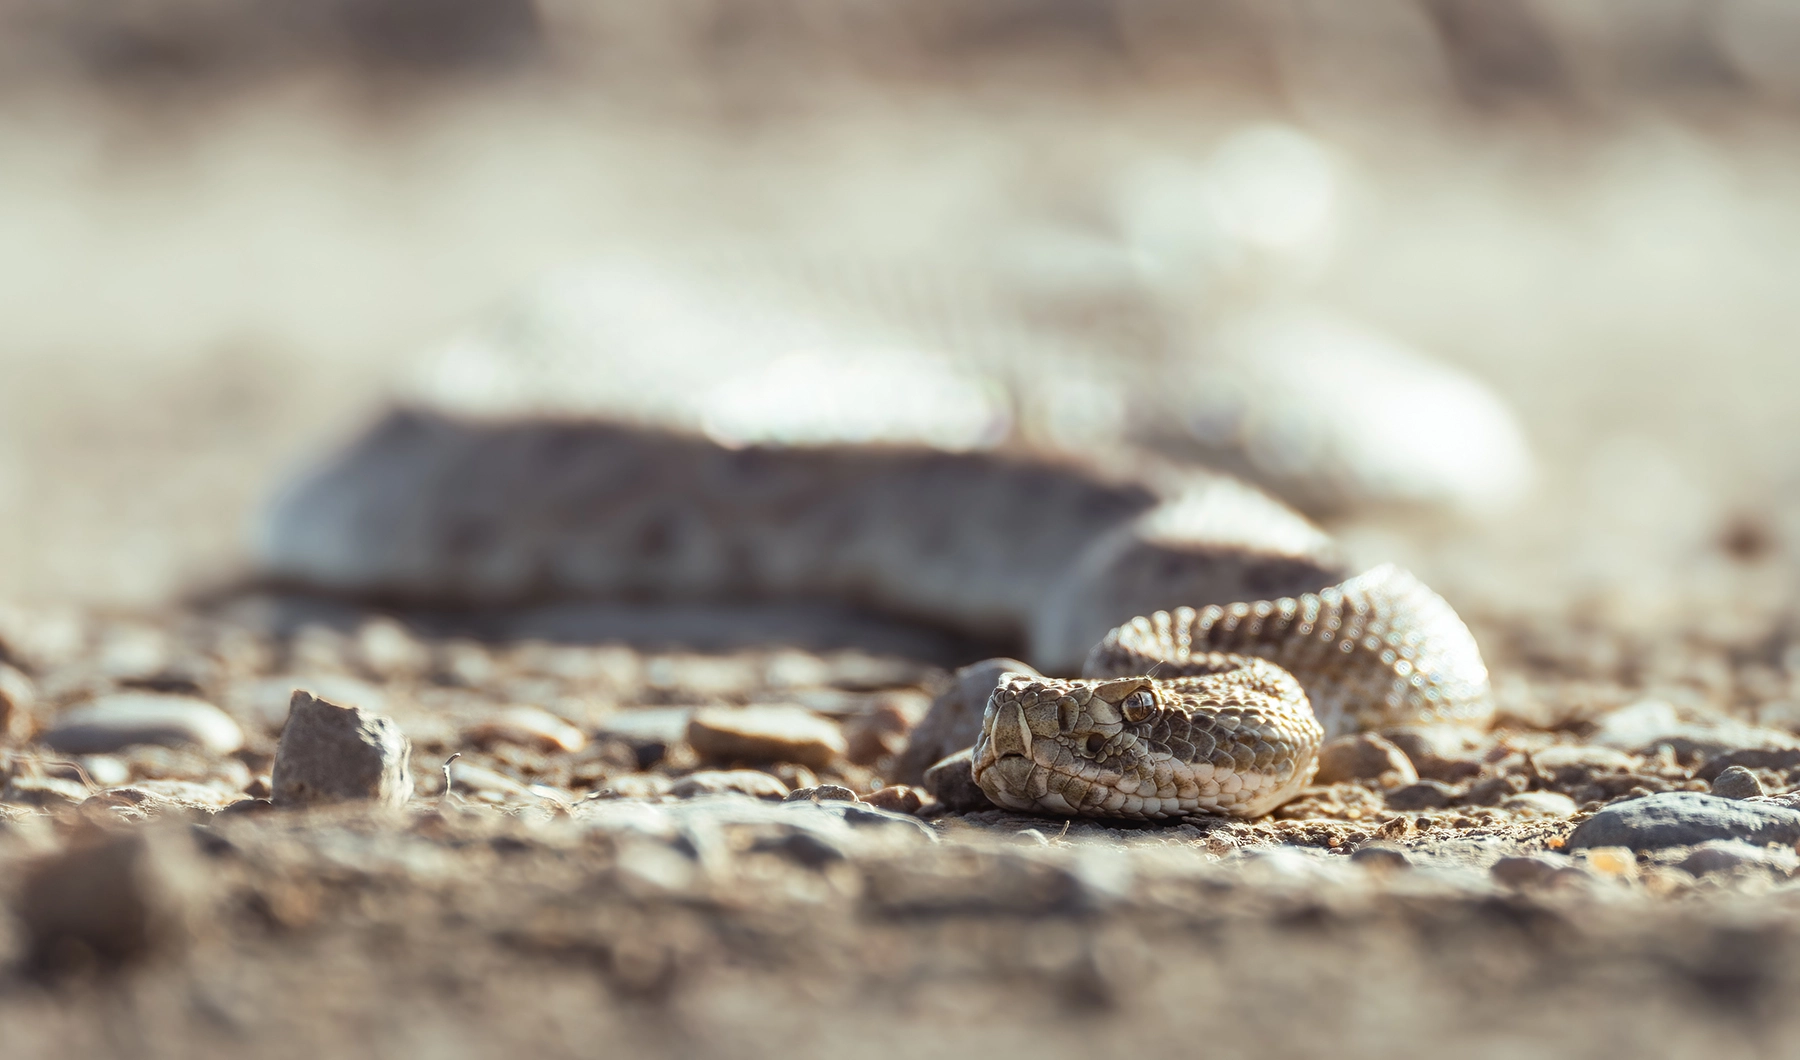
For prairie rattlesnakes, always watch where you step, especially in tall grass. Most bites only occur when snakes have been stepped on. Wearing snake gaiters when walking through tall grass is a smart precaution, and if you hear a rattle, stop immediately and locate the snake before moving away slowly. Never try to approach it.
One of the most unforgettable moments of my trip was spotting a rattlesnake sunbathing in the middle of a dirt road. She was so well-camouflaged that I almost didn’t see her, and I realized how easily she could be hit by a passing car.
After photographing her from a safe distance, I gently rolled small rocks toward her to get her to slither off the road so she wouldn’t get hit. Her rattle went up immediately, and my heart was racing, but it worked. Watching her disappear into the grass was a moment I’ll never forget!
I used my telephoto lens to get tight shots of rattlesnakes. There are a lot of snakes in the west block, so avoid this block and stay in the east block if you have a phobia.
You can receive information about Parks Canada passes and overnight camping permits for Grasslands National Park here.
Tips for Photographing the Canadian Prairies
The vast, untamed beauty of the Canadian prairies breeds creative photography. During my time in Grasslands National Park, I discovered a few strategies for capturing dynamic wildlife and scenic landscapes.
TIP 1. Be Prepared to Shoot All Day
Wildlife doesn’t stick to a schedule, so I kept my camera close all day to capture moments in varying lighting conditions, including midday. In my opinion, you can’t afford to be too selective with shooting golden hour exclusively when you are on a trip for a limited amount of time.
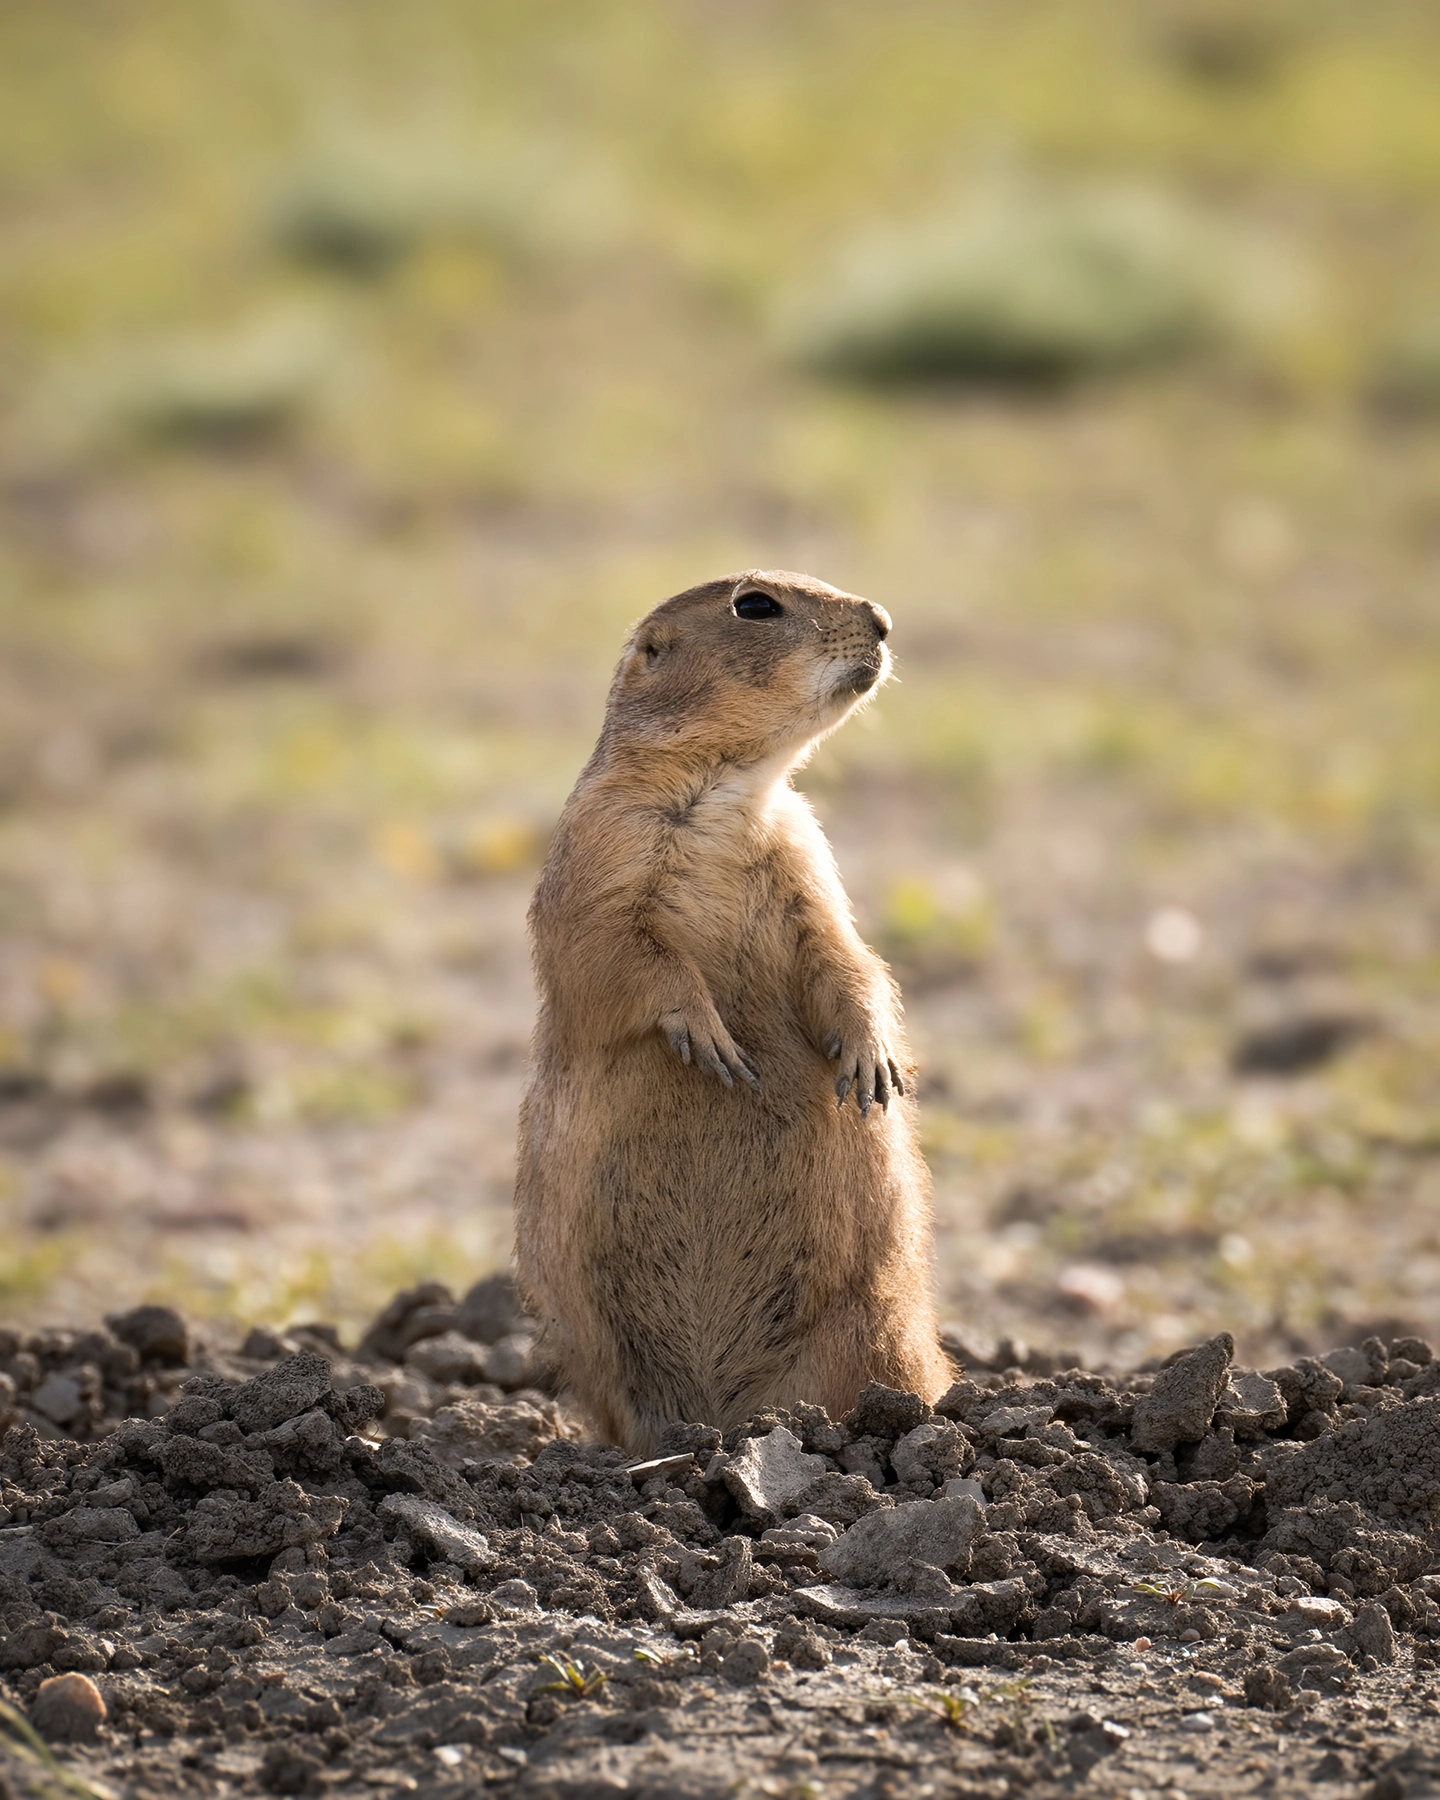
Midday opportunities, like photographing a rattlesnake sunbathing on a rock, or filming prairie dogs peeping out of their burrows, were abundant. The prairie dogs were endlessly entertaining, darting from burrow to burrow and yipping to one another like tiny sentinels. They stood on their hind legs, scanning the horizon before diving into their tunnels, which was a joy to watch.
- The Art of Quick Wildlife Photography: Capturing these moments required patience and quick reflexes, as the prairie dogs’ movements were unpredictable and fast. This is where understanding your camera settings and being ready to shoot at a moment’s notice became essential. Consider a high shutter speed!
- Optimizing Shutter Speed for Sharp Shots: To capture sharp wildlife shots when handheld, I like to use a shutter speed at least equal to your focal length (e.g. 1/500 sec for 500mm). For fast-moving animals, 1/1000 sec or more is ideal. Tamron’s VC technology helps stabilize shots, especially in challenging conditions.
- The Hidden Dangers Prairie Dogs Face: Prairie dogs might look playful and carefree, but their lives are full of danger. Predators like rattlesnakes hunt them, even sneaking into their burrows at night.
- How Rattlesnakes Hunt in the Dark: Rattlesnakes have specialized heat-sensing pits on their faces that detect infrared radiation, allowing them to locate warm-blooded prey even in darkness (Nature 2019). Watching the prairie dogs constantly scan their surroundings made me realize how tough life is for them, even when they seem playful during the day.
- Shooting in Harsh Light and Preserving Detail: In midday light, I always prefer to shoot slightly underexposed. Modern editing software makes it much easier to bring out shadows than to recover blown-out highlights. I focus on properly exposing the sky or the highlights, which works well for me during the brightest parts of the day. My Tamron 150-500mm lens and the 28-75mm lens handled bright light beautifully, minimizing washed-out highlights even in harsh sunlight.
TIP 2. Using my Tamron 150-500mm: Stabilize on the Go with VC Settings
When hiking or observing wildlife from the car, staying prepared for fleeting wildlife encounters is crucial. I kept my camera in hand at all times with the Tamron 150-500mm lens attached.
- Always Be Ready to Shoot: Wildlife moments can pass in the blink of an eye, and having your camera stashed away in your bag could mean missing a once-in-a-lifetime shot. I went a step further by keeping the camera “on” and the lens cap off whenever I sensed an opportunity might arise. Sometimes, you only have a few seconds to capture the moment.
- Stabilizing Shots in Windy Conditions: The 150-500mm’s Vibration Compensation (VC) modes were a game-changer for stabilizing my shots in various situations where I didn’t have time to set up a tripod. I used VC Mode 1 for photographing bison in the windy grasslands, ensuring sharp images despite the gusts.
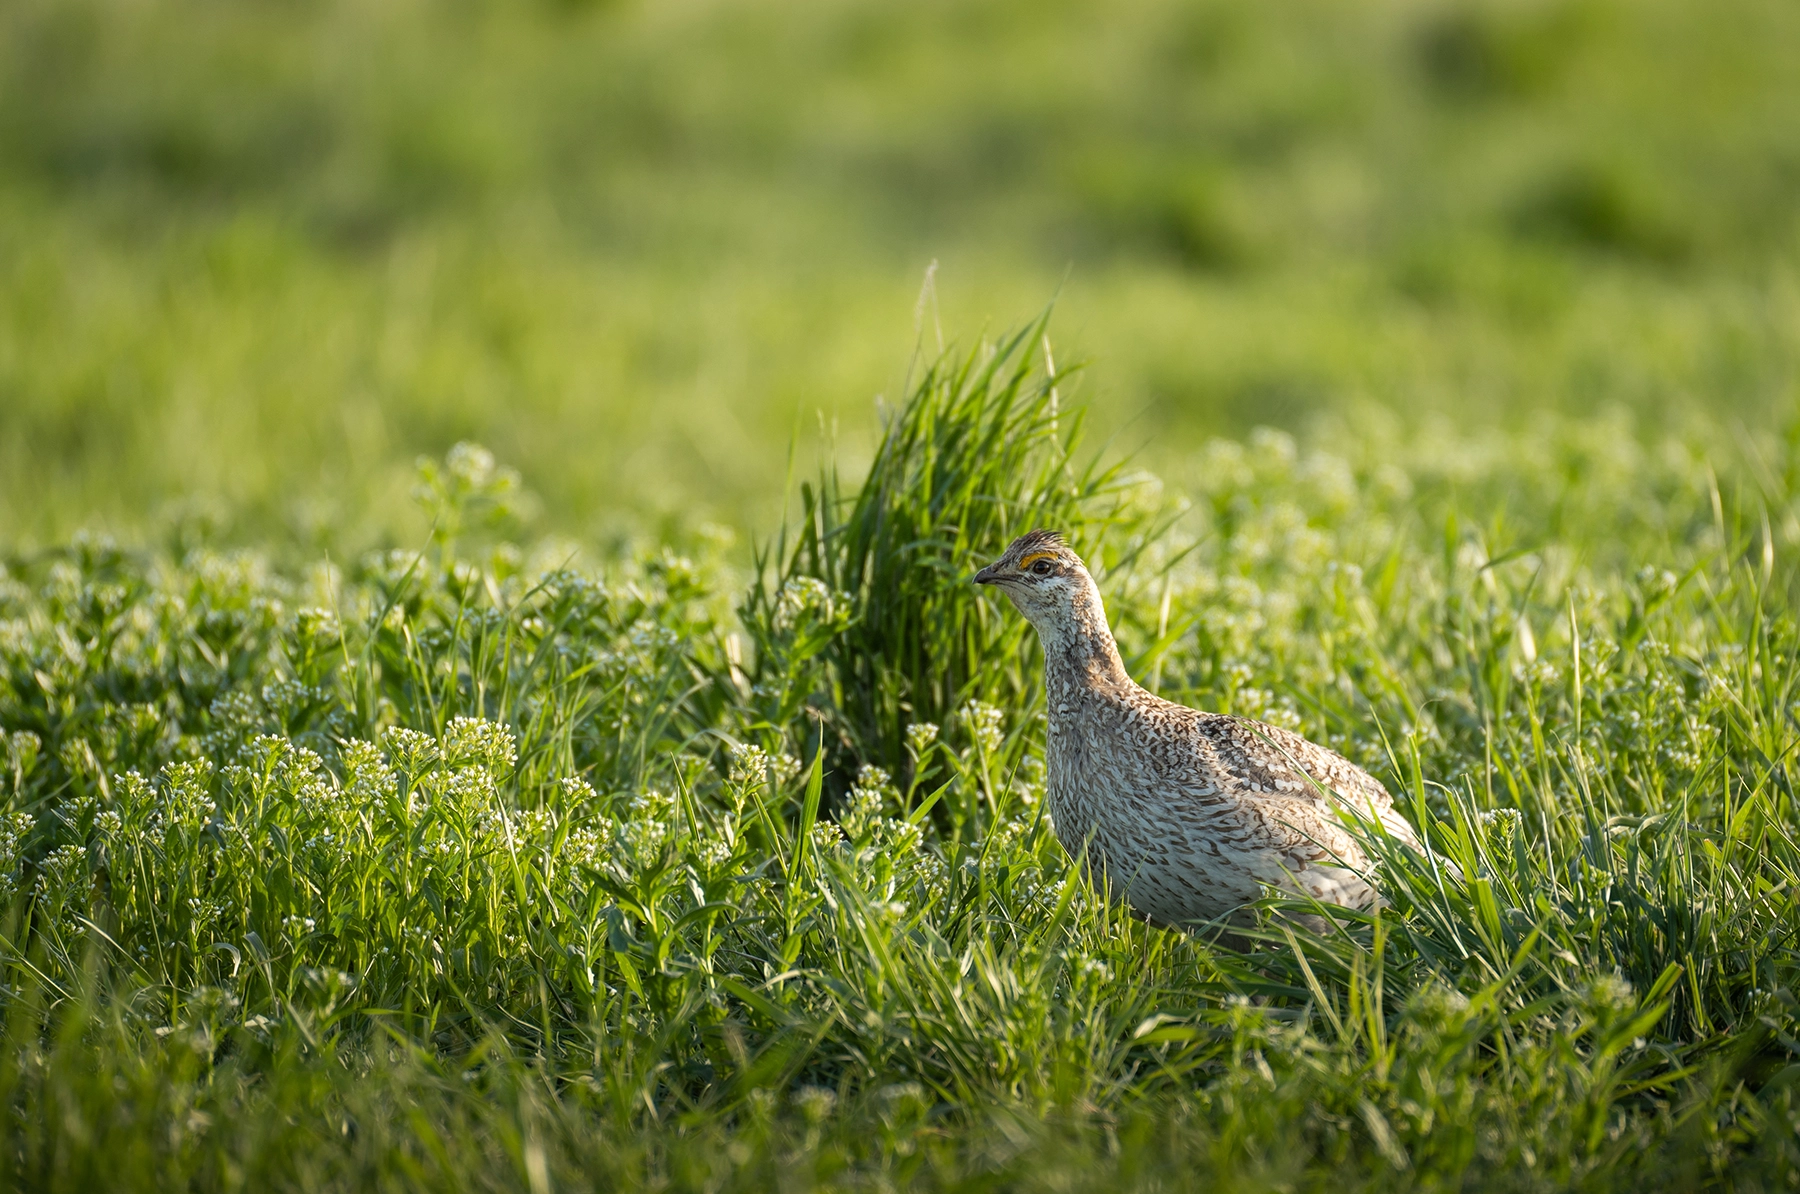
- Tracking Motion with Precision: For tracking motion, like sage grouse darting through the brush, I switched to VC Mode 2, which is ideal for horizontal panning. With the right techniques and settings, you’re always ready to snap that perfect shot, no matter how fleeting the moment.
TIP 3. Swap for a Mid-Range Lens for Landscapes
While the 150-500mm lens excelled at wildlife photography, I reached for the 28-75mm G2 lens to capture Grasslands National Park’s vast horizons and intricate earth formations. Whether I wanted dreamy mid-range perspectives or sweeping landscapes, having this lens made the experience far more versatile.
Minimalist landscapes are most impactful when there’s a balance between land and sky. Look for ways to create depth, compression, symmetry, or leading lines in your composition, even when there aren’t many elements in the frame. Simplicity can be powerful when done right.
TIP 4. Learn Animal Behavior to Anticipate Shots
Understanding animal behavior is one of the most valuable skills a wildlife photographer can develop. By observing patterns, like when prairie dogs emerge from their burrows or how pronghorns run across a plain, you can anticipate moments and position yourself for the perfect shot. This approach is far more effective than chasing animals, which often leads to missed opportunities and unnecessary stress for the wildlife.
Memories of Grasslands National Park
Every moment in Grasslands National Park felt surreal, from the playful antics of black-tailed prairie dogs to the powerful presence of bison grazing in the distance. I’ll never forget hitting the trail in the early mornings or lounging by the fire after a long day with my sleeping bag keeping me warm under the star-studded sky. Waking to the sound of coyotes reminded me how wild and alive this place is.
Following Leave No Trace principles helps preserve the Canadian prairies for future adventurers. The Tamron 150-500mm and 28-75mm lenses helped me capture unforgettable images of this experience.
If you’re dreaming of a backcountry camping trip filled with unforgettable photography opportunities, Grasslands National Park offers it all. Equip yourself with the right gear, and you’ll leave with stories (and images) you’ll cherish forever.
Until next time, keep your camera ready and your curiosity alive!
About the Author

Seth Macey is a wildlife and landscape photographer based in Ontario, Canada. Seth spends most of his time behind the lens immersed in nature, learning the land, researching, and tracking animal subjects. He is also the co-host of the Photographer Mindset Podcast sharing ways in which listeners can build their mental fortitude, develop out of the box thinking strategies, and work efficiently towards their own versions of success in photography.
Instagram: @sethmacey
Website: https://www.sethmaceyphotography.com/