By Jenn Gidman
Images by Mike Moats
Mike Moats has plied his photographic craft with some of the smallest subjects that exist. “More and more photographers are discovering the benefits of macro photography,” he says. “This genre is growing and becoming a popular pastime, partly because it’s easy to explore local parks and even one’s own backyard to enjoy the fun, unique experience that macro photography provides.”
As a macro photographer, Mike appreciates the ability to create personalized art. “Every image on my website is an original,” he says. “These subjects were present for only a brief moment in time, until the environment erased them forever—which means none of my images can be reproduced, because the subjects don’t exist anymore. Mountains, rivers, and lakes can be photographed over time by many photographers, and over and over again by the same photographer. My subjects, however, have disappeared within Mother Nature.”
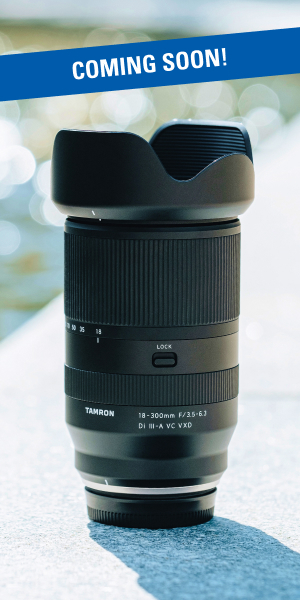
Mike has owned practically every macro lens that Tamron has made, so he was excited to get his hands on the newest incarnation: the Tamron SP 90mm F/2.8 VC USD lens. “Besides the Vibration Compensation (VC) upgrade, which is a fantastic benefit for photographers who are handholding, Tamron has also evolved from a plastic body to a metal body, so it has a really sleek look and smooth feel to it,” he says. “And, like all of the Tamron macro lenses I’ve owned, this latest 90mm offers superior optics that result in sharp, clear images.”
Read on for Mike’s macro photography tips and his own experience with the latest 90mm VC lens.
Don’t worry about traveling far for macro photography.
Macro subjects are everywhere. You can find them at the local parks, in your own yard, even inside your home. I have four great parks within 20 minutes of my house, and probably 60 percent of my images are photographed in those parks; a few of my best-selling images were shot in my backyard. Most people have flower gardens in their yard, so they can simply walk outside of their home and start taking pictures. This close convenience saves on fuel and wear on our vehicles, as well as time when we have just an hour or two available.
In the winter here in Michigan, I do most of my shooting indoors. I buy flowers from the local florist and also go online to order from websites that sell feathers, mounted butterflies, seashells, and agate slabs, all of which can be arranged into artistic compositions.
Recently, I ran across all of these old tree trunks cut down at a local park, and this stump was just lying in this graveyard of stumps. I liked the pattern and design of the wood, but the problem was, taken by itself, the stump wasn’t that compelling of an image—it needed something more interesting to make it an attractive photo. So I used a butterfly I had purchased from ButterflyUtopia.com to add a little bit of color contrast to the earth tone of the wood, as well as to add a main subject that viewers could identify with. I figured viewers would then study the tree around the butterfly and notice the patterns. All I did was find an area on the stump that wasn’t all that visually compelling, then covered it up with the butterfly.
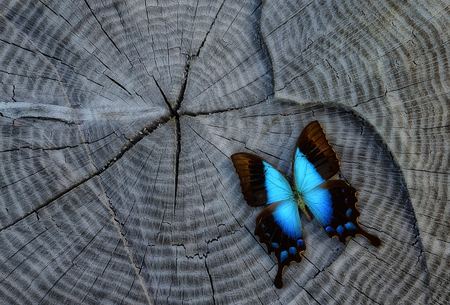
F/32, 1/13th sec., ISO 800
Consider your backgrounds.
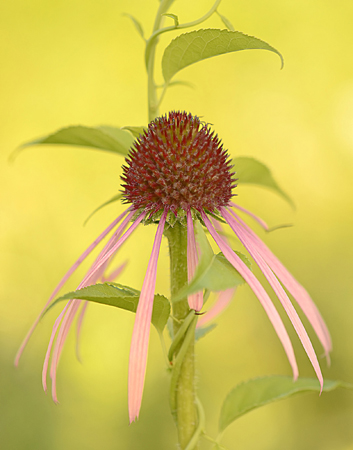
I took this image of a wildflower in the northern part of the Lower Peninsula of Michigan. It was evening in an area that was shaded—the sun had gone far enough down so the woods were blocking the sun from hitting that area. Typically that type of wildflower would be standing straight up, but for whatever reason, this one made some bends and turns, which caught my eye—I’m always looking for any type of curving, flowing lines.
The area I was shooting in was a very large, open area, so I didn’t have to worry about the background, which was mainly grass. It was so far away that I had a very easy time blurring it out. I do have printed backgrounds I create: I’ll actually go out and photograph grass and other natural subjects and blur them out of focus, then print them on matte paper. But the only time I’ll use those printed backgrounds are in botanical gardens where it’s really cluttered and congested with plants. In open fields like the one shown here, I’ll just use the existing background.

F/4.5, 1/1250th sec., ISO 800
Take pictures at any time of day.
Landscape and wildlife photographers have limited control over lighting and tend to shoot in the early morning and late evening, which offer the best light. Because of the small subjects that macro photographers work with, we have the ability to control our light by using diffusers and reflectors, so we can shoot at any time of the day. I carry a 12-inch diffuser, which I use to control harsh overhead light from hitting my subjects, and a 12-inch silver/gold reflector for bouncing light into the shaded areas of a subject. I’ll occasionally handhold a special LED box light that’s tuned for daylight to add light where needed.
In the case of the purple coneflower I show here, I was able to rely on natural light alone. What makes this subject unique is the vine that was growing up the stem and through the flower—like Jack and the Beanstalk. That twisting vine around the stem added character to the image.
F/3.3, 1/2000th sec., ISO 800
Go out at any time of year—you never know what will wander into your frame.
With the four seasons, we have an ever-changing environment month by month, sometimes day by day. I can revisit the same areas every couple of weeks and find new subjects—it’s a constant cycle as nature transitions from life to death. Depending on where you live, your seasons may vary and the environment may be totally different from the rest of the country. Learn about the subjects and life cycles of the plants and critters in your area, and make sure you’re in the field when subjects come into season.
I took a photo of a hoverfly the same evening as the curved wildflower, in the same field. The hoverfly has a body that looks like a bee, but it has the head of a fly. That this insect flew into my frame was a total surprise. I was actually photographing the flower when it showed up and just perched there on the flower, for quite a long time. I was able to get a few shots as it moved from section to section. This was the best of the bunch.
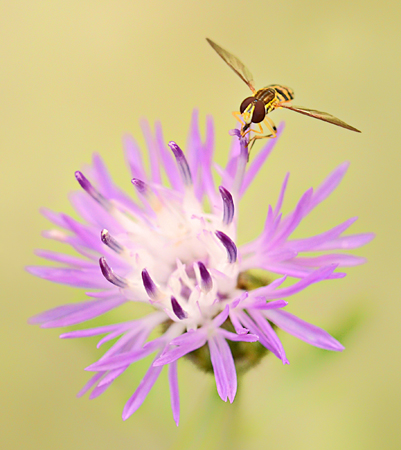
F/8, 1/125th sec., ISO 800
Play around with depth-of-field.
One of the challenges for a macro photographer is working with depth-of-field. Because we’re shooting very close to our subjects, the depth-of-field is very shallow, causing out-of-focus areas in our photos—the closer we get to the subject, the less that will be in focus. We can use this shallow depth-of field to our advantage in creating artistic compositions.
If you like soft-focus dreamlike images, for example, shoot in the lower F-stop range and use that shallow depth-of-field to produce some beautiful artwork. If you have a subject with interesting lines and textures, you can set your F-stop to the highest numbers to bring everything into focus.
I was shooting foxtail plants when I noticed one that had a tiny spiderweb woven into its circular area. I simply focused on the center part of the web and used a small F-stop (F/3.5). The viewer sees a quarter-inch or so of focus on that plane, and then the rest of it blurs out into the foreground; the background completely blurs out.
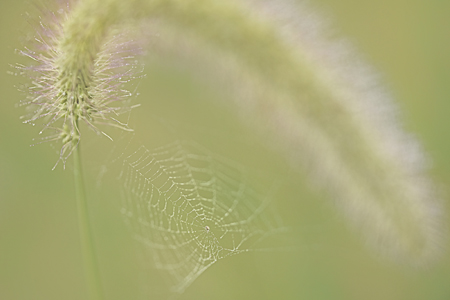
F/3.5, 1/100th sec., ISO 800
I tend to use the lower F-stop numbers when I want to create a more abstract image. I found this big, thick world geography book you see in this next image—the type of book that has contains lots of maps and words—opened it up, and folded the pages in. I then placed a light on the back side so it would shine through, which made the colors bounce around. It was kind of freaky! Again, the low F-stop I used here (2.8) helped blur out all of the words and images. I just focused on the very outside edges of the pages. It’s important for macro photographers to remember that even when the weather is bad and they can’t get outside, they can still find neat things to take pictures of around the house.

F/2.8, 1/80th, ISO 3200
To see more of Mike Moats’ work, go to www.tinylandscapes.com.
