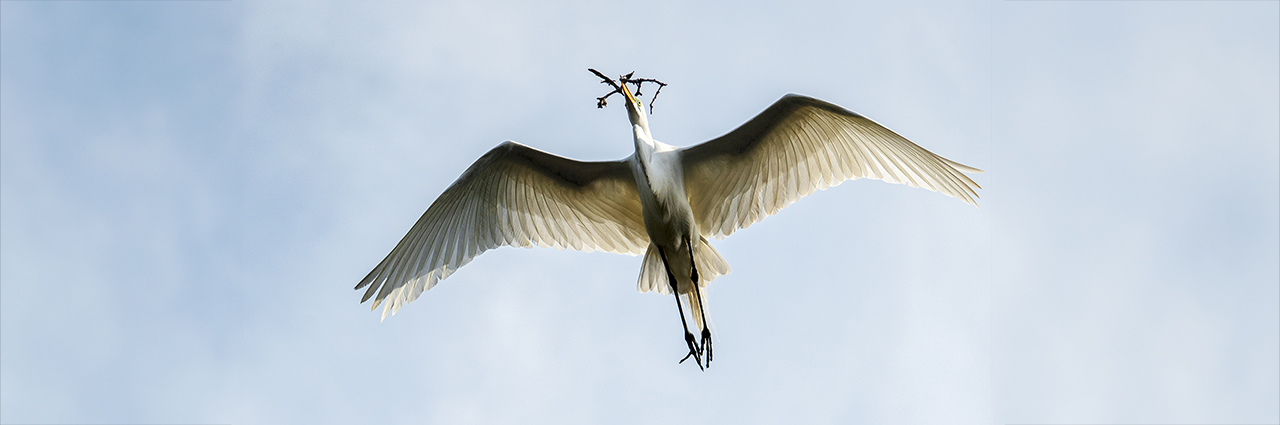
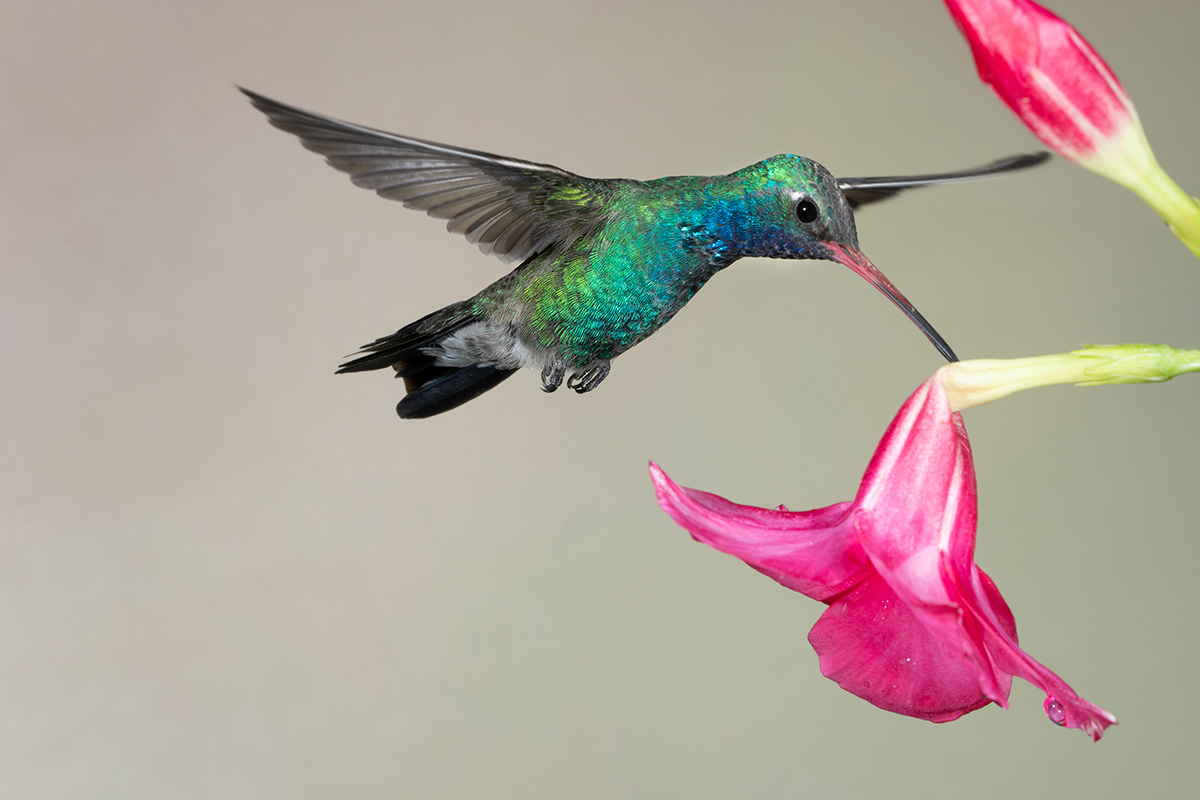
Learning how to photograph birds, especially birds in flight, is both exhilarating and challenging. Capturing their fast and fleeting movement requires skill, patience, and the right techniques. Whether you’re aiming to photograph the descent of a bird onto a lake, the rapidly beating wings of a hummingbird, or the soaring flight of a bald eagle, mastering bird photography takes practice and preparation. In this beginner’s guide to bird photography, we’ll share professional tips and tricks to help you successfully capture stunning images of birds in motion.
In this article, you will learn:
- How to photograph birds and capture them in flight
- Which camera lenses and settings are best for bird photography
- How to anticipate bird behavior for better action shots
- Techniques like panning and using Auto ISO for sharper images
- Tips to avoid overexposing bright feathers and enhance image quality
Choosing the Right Camera Lens for Bird Photography
Acquiring an ultra-telephoto camera lens is crucial for capturing birds in flight. It’s recommended to use a lens with a focal length of 400mm or more, such as Tamron’s 50-400mm or 150-500mm for mirrorless cameras, or the 150-600mm for DSLRs (you can use the manufacturer’s adapter for your mirrorless camera). If you own a crop-sensor camera, using a full-frame ultra-telephoto lens on it increases your effective telephoto range to bring your subject even closer for dynamic photographs.
Recommended Camera Lenses for Mirrorless Cameras
TAMRON 150-500mm F/5-6.7 Di III VC VXD (Model A057) for Sony E, Fujifilm X and Nikon Z mirrorless cameras. This lightweight and compact ultra-telephoto lens reaches 500mm making it a great choice for photographing birds. At just 8.4 inches in and weighing in at under 66.3 oz, the lens is easy to use with a gimbal tripod head. The 150-500 features Tamron’s VXD linear autofocus motor to ensure fast and precise autofocus, even when panning. It also features VC (Vibration Compensation) that suppresses camera shake when shooting handheld or in low-light situations. The VC compensates for panning movement when the panning mode is selected. Note, if using the lens on a tripod or with a gimbal, turn off the VC.
The lens provides high resolving power to capture the intricate details of a bird’s feathers, beak and more. This lens has weather sealing and a fluorine coating on the front element for easy cleaning and is compatible with Ø82mm filters.
TAMRON 50-400mm F/4.5-6.3 Di III VC VXD (Model A067) for Sony E and Nikon Z mirrorless cameras. This 8X ultra-telephoto zoom lens provides the perfect focal length for birds that are situated closer to you. Its standard-to-ultra-tele range lets you zoom out if larger birds fly closer to your position and zoom in as they move further away.
Tamron’s VC image stabilization mechanism helps you take steady hand-held photos as VC suppresses camera shake that often occurs when shooting in the telephoto range, when panning, and under low-light conditions. The VXD autofocus system provides accurate tracking required for fast-moving subjects. This lens has weather sealing and a fluorine coating on the front element for easy cleaning and uses Ø67mm filters.
Recommended Camera Lenses for DSLR Cameras
TAMRON SP 150-600mm F/5-6.3 Di VC USD G2 (Model A022) for Canon and Nikon DSLR cameras and with mirrorless cameras when using the manufacturer adapter. This ultra-telephoto 150-600mm lens provides superb optical performance and features a fast and precise USD (Ultrasonic Silent Drive) autofocus to capture fast motion. The 5-stop VC image stabilization has several modes, including a panning mode to follow flying birds.
This lens has weather sealing and a fluorine coating on the front element for easy cleaning and uses Ø95mm filters.
Ready for tips on how to photograph birds, particularly birds in flight?
Now that you have the right camera lens for bird photography, it’s time to focus on essential techniques. Learning how to photograph birds requires more than just great gear. You also need to understand bird behavior, perfect your camera settings, and master specific shooting methods. In the following tips, you’ll discover how to photograph birds with greater precision and freeze fast-moving action. You’ll also learn how to create stunning images that highlight your subject’s beauty, detail, and motion.
TIP 1. Know the Habits of the Birds You Are Photographing
When learning how to photograph birds, especially birds in flight, it is essential to understand their behavior patterns and unique characteristics. By studying how birds feed, recognizing the triggers that prompt them to take flight, and observing their typical flight patterns, you gain invaluable insights that help you predict their movements. As a result, you can better anticipate action moments and position yourself for the perfect shot. Moreover, dedicating time to research both birds in general and your specific subject will greatly improve your chances of capturing dynamic and compelling images of birds in flight.
TIP 2: Basic Camera Settings for Photographing Birds in Flight

When learning how to photograph birds, it’s important to start with basic camera settings and adjust them as needed based on your shooting conditions. First, use Shutter Priority mode and set your camera to a shutter speed of at least 1/2000 sec to freeze the motion of birds in flight. Next, set your autofocus mode to continuous-follow focus tracking and select center-point metering for greater accuracy. Additionally, use a high burst mode to increase your chances of capturing sharp, mid-flight shots. For best results, set your white balance to sunny conditions. If you are handholding your camera and lens, be sure to switch your image stabilization to the panning mode. However, if you are using a stabilizing device such as a gimbal or tripod, remember to turn off stabilization to prevent unwanted blur in your bird photography.
Quick Recap:
- Shutter Priority, 1/2000 sec, continuous autofocus, center-point metering.
- Use high burst mode for sharper mid-flight shots.
- Set white balance to sunny; adjust stabilization based on handholding or tripod use.
- Turn off stabilization when using a gimbal or tripod to avoid blur.
TIP 3: How to Photograph Birds Mid-Flight with High Shutter Speeds
To successfully photograph birds in flight when learning how to photograph birds, it is crucial to use a fast shutter speed of at least 1/2000 sec to freeze the action. Depending on the bird’s speed and the available lighting conditions, you should adjust your shutter speed higher or lower to maintain crisp, detailed shots. Furthermore, if your shutter speed drops below 1/1600 sec, be sure to increase your ISO to help achieve faster shutter speeds and preserve sharpness in your bird photography.
Quick Recap:
- Set shutter speed to 1/2000 sec or faster.
- Adjust based on bird speed and lighting.
- Increase ISO if speed drops below 1/1600 sec.
- Focus on sharp, detailed shots.
TIP 4: How to Photograph Birds in Flight Using the Panning Technique
To master how to photograph birds in flight, especially when using the panning technique, follow these simple steps to achieve sharp, dynamic images:
- Start tracking the bird early by moving your camera and lens smoothly along with the bird’s motion.
- Press the shutter release button halfway to activate continuous autofocus and lock onto the moving subject.
- Maintain a steady panning motion while keeping the bird centered in your frame.
- Fully press the shutter button while shooting in high burst mode to capture multiple frames.
- Continue panning after the shot to ensure a smooth follow-through and avoid abrupt movements that could cause blur.
TIP 5: Adjust the Image Brightness Using Auto ISO
Auto ISO is advantageous in fluctuating lighting conditions. Turning on Auto ISO will allow your camera to automatically adjust your camera settings to get a fast shutter speed. In this case, switch to aperture priority and set your camera to the widest open aperture. Auto ISO will select the optimal shutter speed and ISO for you to get your shot.
TIP 6: Avoid Blowing Out the Whites
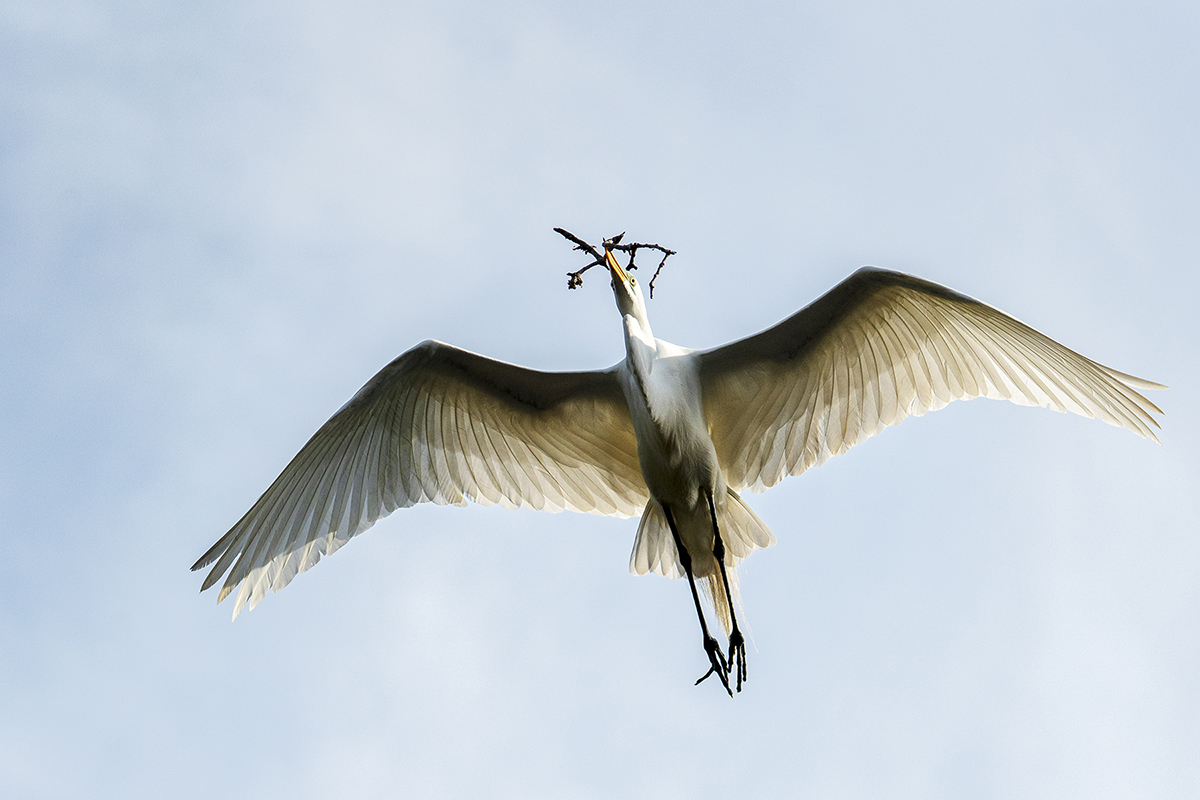
When photographing birds with contrasting colors, such as bald eagles, overexposure is a concern. Shooting on overcast days or areas with diffused sunlight will help to avoid blowing out the whites and give you a balanced exposure. When this is not possible, check your histogram often to see if you have overexposed the whites on your subject and adjust your exposure compensation as needed.
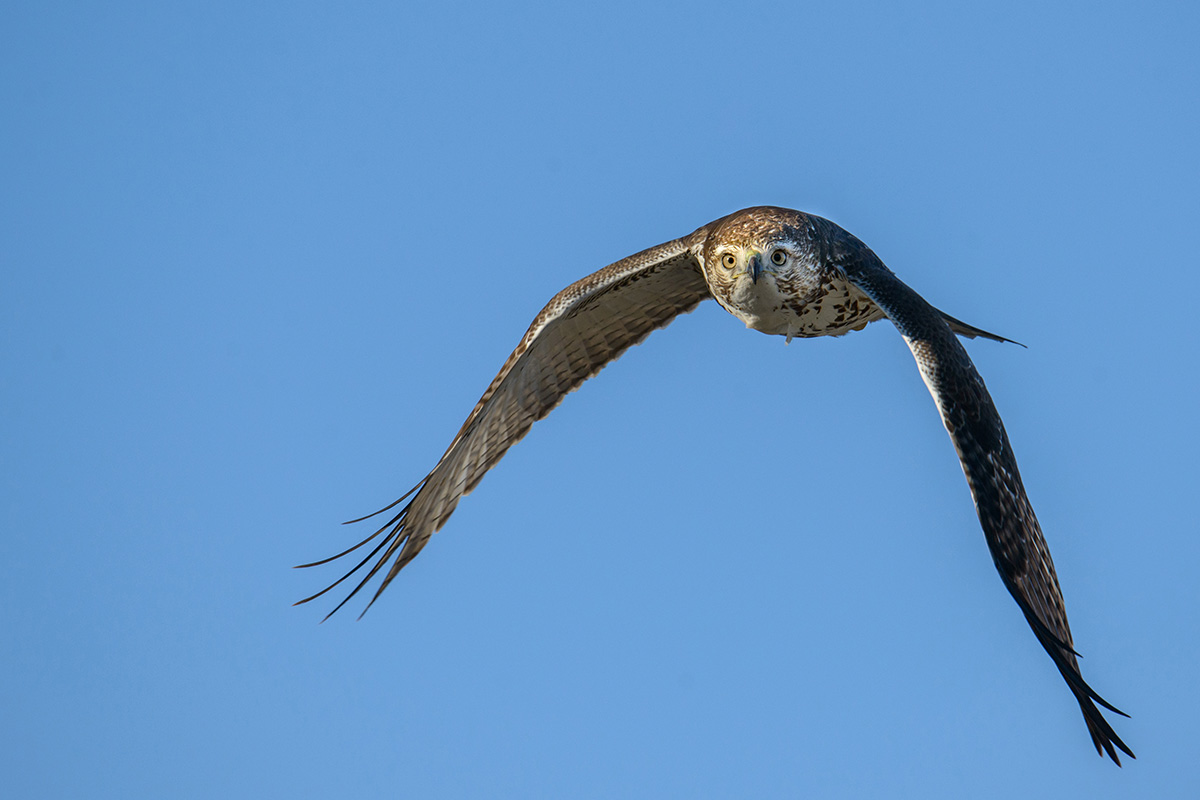
TIP 7: Frame the Shot Carefully to Showcase Full Motion
When learning how to photograph birds in flight, composition is just as important as sharpness and exposure. Always aim to frame the entire bird within the shot, making sure not to clip critical parts like the wings, tail, or beak. Leaving extra space around the bird — especially in the direction it is flying — gives your photo a sense of movement and freedom. Additionally, avoid placing the bird dead-center; instead, use the rule of thirds to create a more dynamic and natural-looking image. Thoughtful composition will elevate your bird photography and help tell a stronger visual story.
Quick Recap: Frame Your Shot for Better Composition
- Avoid cutting off wings, tails, or beaks when photographing birds in flight.
- Leave extra space in front of the bird to emphasize motion and direction.
- Use the rule of thirds instead of centering the bird for a more dynamic image.
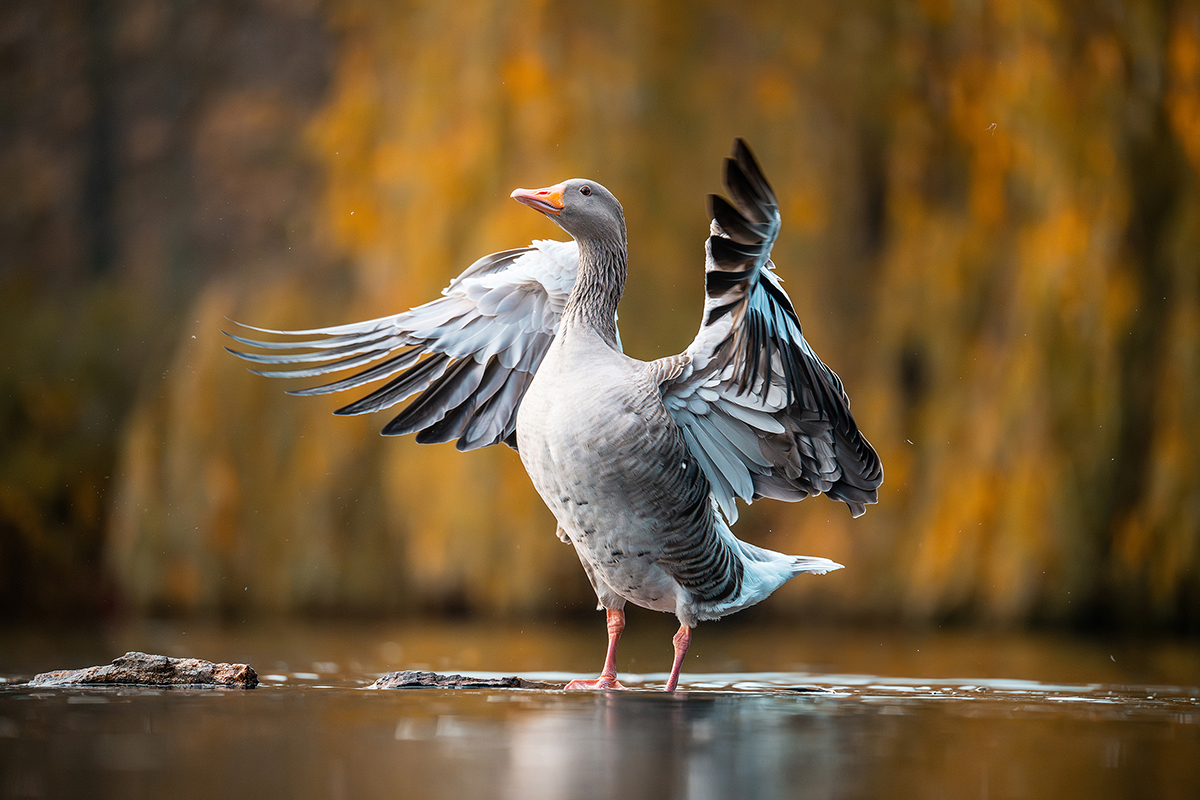
TIP 8: Practice. Practice. Practice
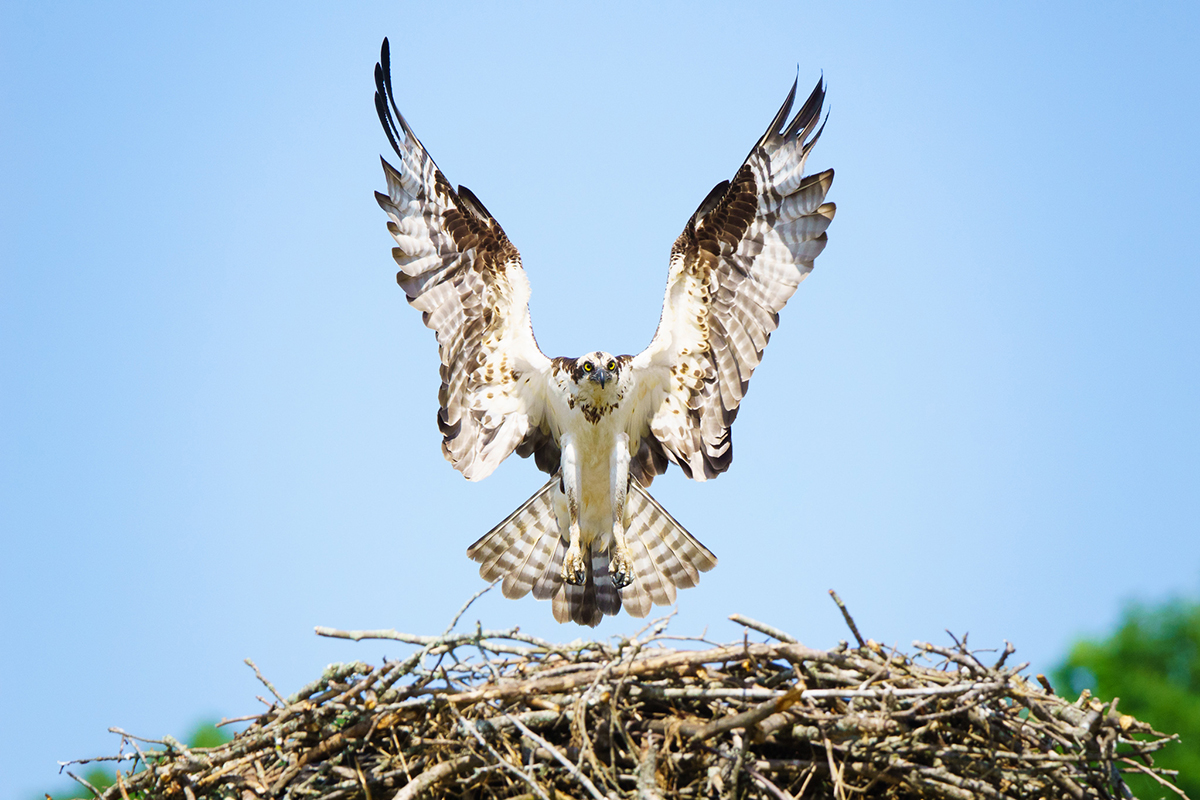
Constant practice is key when learning how to photograph birds. Wait for those decisive moments, such as when a bird’s wings are fully outstretched or backlit by the sun. Focus before the bird begins to land to capture a sharp image with wings and feet extended.
Master How to Photograph Birds and Capture Stunning Images
By applying the pro tips in this beginner’s guide on how to photograph birds, you’ll unlock your creative potential. You’ll soon capture breathtaking images of birds in flight and in their beautiful natural habitats. With the right camera settings, smart lens choices, and techniques like panning, your bird photography will soar. By studying bird behavior, you’ll anticipate magical moments and create sharp, dynamic photos that truly bring your subjects to life.
Learn about these lenses and more at an authorized Tamron dealer in your area or visit the TAMRON Store today.
More Photo Tips | Watch Videos | Learn More About Tamron Lenses | Photo Gallery