Apprendre à photographier les oiseaux, en particulier les oiseaux en vol, est à la fois exaltant et stimulant. Capturer leurs mouvements rapides et fugaces requiert du talent, de la patience et les bonnes techniques.
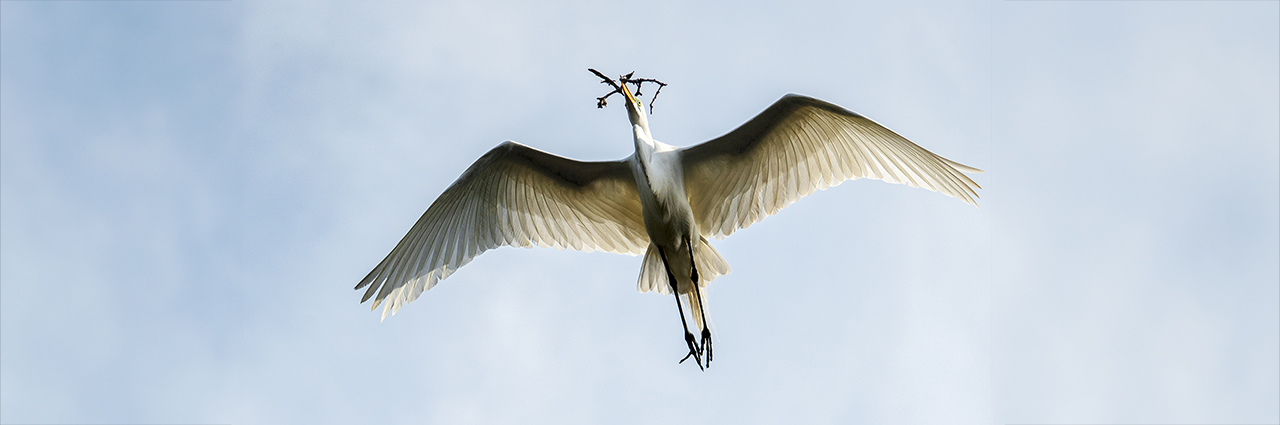
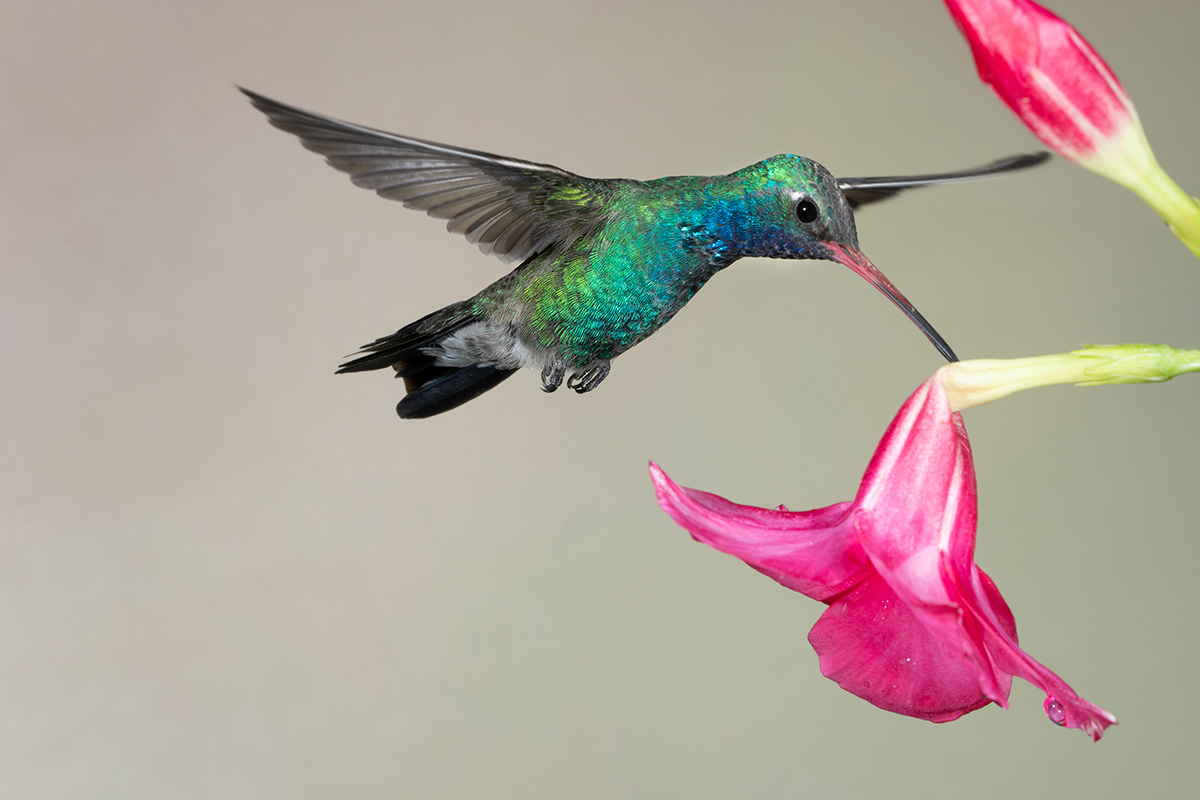
Que vous souhaitiez photographier la descente d'un oiseau sur un lac, le battement d'ailes rapide d'un colibri ou le vol plané d'un pygargue à tête blanche, la maîtrise de la photographie d'oiseaux nécessite de l'entraînement et de la préparation.
Si vous recherchez une liste plus large de techniques et d'idées, explorez nos guide des conseils pour la photographie d'oiseaux (à venir).
Dans cet article, vous apprendrez :
- Comment photographier les oiseaux en vol, étape par étape
- Quels objectifs et réglages utiliser ?
- Comment anticiper le comportement des oiseaux
- Techniques pour capturer des images nettes d'oiseaux se déplaçant rapidement
- Comment améliorer la cohérence de vos photographies d'oiseaux
Choisir le bon objectif pour la photographie d'oiseaux
L'acquisition d'un ultra-téléobjectif est essentielle pour photographier les oiseaux, en particulier lorsqu'ils sont en vol. Une longueur focale de 400 mm ou plus est recommandée, comme le 50-400 mm de Tamron ou le 150-500 mm pour les appareils photo sans miroir.
Si vous possédez un appareil photo à capteur crop, l'utilisation d'un ultra-téléobjectif plein format augmente votre portée effective, ce qui vous permet de remplir le cadre avec des sujets éloignés.
Objectifs recommandés pour les appareils photo sans miroir
- TAMRON 150-500mm F/5-6.7 Di III VC VXD (Modèle A057) pour les appareils photo sans miroir Sony E, Fujifilm X et Nikon Z offre une portée étendue, un autofocus rapide et une stabilisation, ce qui est idéal pour suivre les oiseaux en vol.
- TAMRON 50-400mm F/4.5-6.3 Di III VC VXD (Modèle A067) pour les appareils photo sans miroir Sony E et Nikon Z permet de photographier des oiseaux à des distances variables grâce à un autofocus performant.
Découvrez d'autres options de téléobjectifs dans notre rubrique Guide des objectifs pour la photographie de la faune.
Configuration de base de l'appareil photo pour la photographie d'oiseaux

Avant de se concentrer sur la technique, il est important d'établir une configuration fiable de l'appareil photo. Ces réglages de base vous aideront à capturer régulièrement des oiseaux en mouvement.
- Vitesse d'obturation : Démarrer à 1/2000 sec pour les oiseaux en vol
- Ouverture : f/5.6-f/7.1 pour l'isolation du sujet
- ISO : ISO automatique ou réglage en fonction de l'éclairage
- Mode autofocus : Suivi continu (AI Servo / AF-C)
- Mode de conduite : Rafale à grande vitesse
Ces paramètres constituent un bon point de départ pour apprendre à photographier les oiseaux dans des situations de mouvement rapide.
Comprendre le comportement des oiseaux avant de photographier
Pour apprendre à photographier les oiseaux, il est tout aussi important de comprendre leur comportement que les réglages de l'appareil photo.
Les oiseaux répètent souvent leurs mouvements : ils reviennent au même perchoir, tournent en rond avant de se poser ou décollent dans des directions prévisibles. L'observation de ces schémas vous permet d'anticiper l'action et de vous positionner efficacement.
Les différentes espèces d'oiseaux se comportent de manière prévisible en fonction de leur environnement. Les oiseaux aquatiques suivent souvent des trajectoires de vol cohérentes au-dessus des lacs et des marais, tandis que les oiseaux de proie tournent en rond avant de plonger. Les oiseaux plus petits peuvent se déplacer de façon erratique mais revenir aux mêmes perchoirs. Reconnaître ces schémas vous permet d'anticiper l'action et d'améliorer votre timing.
Cette compétence devient encore plus puissante lorsqu'elle est combinée à des techniques de suivi - pour en savoir plus, cliquez ici : comment suivre les animaux pour la photographie de la faune.
Comment photographier les oiseaux en vol : Techniques étape par étape
Photographier des oiseaux en vol nécessite une coordination entre la mise au point, la synchronisation et le mouvement de l'appareil photo. Ces étapes vous aideront à renforcer votre cohérence et à améliorer vos résultats dans des situations réelles.
Étape 1 : Verrouiller la mise au point dès le début
Commencez à suivre l'oiseau avant qu'il n'entre dans la composition idéale. Utilisez l'autofocus continu et maintenez la mise au point sur la tête ou le haut du corps de l'oiseau.
Photographier des oiseaux en vol nécessite une coordination entre la mise au point, la synchronisation et le mouvement de l'appareil photo. Ces étapes vous aideront à renforcer votre cohérence et à améliorer vos résultats dans des situations réelles.
Étape 2 : Utiliser des vitesses d'obturation rapides
Maintenez une vitesse d'obturation d'au moins 1/2000 sec pour figer le mouvement. Les oiseaux plus rapides ou les mouvements irréguliers peuvent nécessiter des vitesses encore plus élevées.
Si la vitesse d'obturation est trop faible, un flou de mouvement apparaît dans les ailes ou le corps, ce qui réduit la netteté. L'augmentation de la sensibilité ISO permet de conserver une vitesse d'obturation rapide en cas de changement de lumière.
Étape 3 : Suivre l'oiseau avec un panoramique fluide
Pour obtenir des images nettes, il est essentiel de suivre les mouvements en douceur.
- Commencer à suivre l'oiseau de bonne heure
- Adapter le mouvement de l'appareil photo à la vitesse de l'oiseau
- Centrer le sujet
- Poursuivre le mouvement après avoir appuyé sur l'obturateur
Les mouvements brusques ou les arrêts trop précoces peuvent créer un effet de flou. Un panoramique fluide permet de maintenir la mise au point et le cadrage tout au long de la prise de vue.
Étape 4 : Utiliser le mode rafale pour de meilleurs résultats
Les mouvements des oiseaux sont imprévisibles et les prises de vue isolées manquent souvent le moment idéal.
L'utilisation du mode rafale haute vitesse augmente vos chances de capturer la position parfaite de l'aile, le contact visuel ou l'interaction avec l'environnement.
Étape 5 : Se positionner pour obtenir de meilleurs angles de vue
Votre position par rapport à l'oiseau influe sur la composition et l'éclairage.
- Essayez de photographier au niveau des yeux lorsque c'est possible
- Gardez le soleil derrière vous pour un éclairage homogène
- Anticiper la direction du vol
En vous positionnant correctement, vous améliorez la qualité de l'arrière-plan, l'éclairage et l'impact global de votre image.
Gestion de l'exposition en photographie d'oiseaux
Les plumes brillantes, en particulier les surfaces blanches ou réfléchissantes, peuvent facilement être surexposées.
- Vérifiez votre histogramme
- Réduire légèrement l'exposition si les hautes lumières sont écrêtées
- Prendre des photos avec une lumière plus douce ou diffuse lorsque c'est possible
Les oiseaux à fort contraste (comme les aigles ou les mouettes) nécessitent un contrôle minutieux de l'exposition. La prise de vue en format RAW offre une plus grande souplesse pour récupérer les ombres et les lumières lors de l'édition.
Éclairage pour la photographie d'oiseaux
L'éclairage joue un rôle majeur dans la photographie d'oiseaux.
Une lumière douce en début de matinée ou en fin d'après-midi permet de révéler les détails des plumes et de réduire les ombres dures. La prise de vue avec le soleil dans le dos garantit une exposition uniforme et de meilleures couleurs.
Le contre-jour permet de créer des silhouettes spectaculaires ou de mettre en valeur les ailes translucides, tandis que le ciel couvert offre un éclairage équilibré, particulièrement utile pour les oiseaux aux plumes blanches ou brillantes.
Techniques de composition pour la photographie d'oiseaux
Une composition solide permet de transformer des images techniquement nettes en photographies convaincantes.
- Éviter de couper les ailes ou les queues
- Laisser de l'espace dans le sens du mouvement
- Utiliser la règle des tiers pour un meilleur équilibre
Construire la cohérence par la pratique

La photographie d'oiseaux nécessite de la patience et de la répétition.
Se concentrer sur la capture :
- Décollage
- Atterrissage
- Ailes complètement déployées
- Interaction avec l'environnement
Le fait de revenir régulièrement au même endroit vous permet d'apprendre le comportement des oiseaux et d'améliorer votre régularité au fil du temps.
Comment photographier efficacement les oiseaux ?
Pour photographier efficacement les oiseaux, utilisez une vitesse d'obturation rapide (1/1000 ou plus), un autofocus continu et un téléobjectif. Suivez l'oiseau de bonne heure, concentrez-vous sur les yeux et utilisez le mode rafale pour obtenir des images nettes. Placez-vous de manière à bénéficier d'une bonne lumière et d'un arrière-plan propre pour améliorer la composition et la clarté de l'image.
Les gens demandent aussi
Quel est le meilleur réglage de l'appareil photo pour la photographie d'oiseaux ?
Les meilleurs réglages de l'appareil photo pour la photographie d'oiseaux comprennent une vitesse d'obturation rapide (1/1000-1/2000 ou plus rapide), l'autofocus continu (AF-C/AI Servo) et le mode de prise de vue en rafale. Ajustez la sensibilité ISO si nécessaire pour maintenir une exposition correcte tout en conservant la netteté des mouvements.
Comment photographier les oiseaux en vol ?
Pour photographier des oiseaux en vol, utilisez l'autofocus continu, suivez le sujet très tôt et maintenez une vitesse d'obturation rapide. Un panoramique fluide et le mode rafale permettent de capturer des images nettes et une meilleure position des ailes.
Quel est le meilleur objectif pour la photographie d'oiseaux ?
Les téléobjectifs de 150 à 600 mm sont idéaux pour la photographie d'oiseaux. Une option polyvalente comme le Tamron 50-400mm F4.5-6.3 Di III Le VC VXD vous permet de capturer des oiseaux éloignés et des images plus proches de l'environnement.
Comment faire la mise au point sur les oiseaux en vol ?
Utilisez l'autofocus continu avec suivi du sujet et maintenez la zone de mise au point sur la tête ou le corps de l'oiseau. Verrouillez la mise au point rapidement et maintenez un mouvement fluide tout en suivant l'oiseau afin d'améliorer la précision.
Pourquoi mes photos d'oiseaux sont-elles floues ?
Les photos d'oiseaux sont souvent floues en raison d'une vitesse d'obturation trop lente, d'une mise au point ratée ou d'un bougé de l'appareil. L'augmentation de la vitesse d'obturation, l'utilisation de techniques de suivi appropriées et la stabilisation de l'appareil photo peuvent améliorer considérablement la netteté.
Maîtriser la photographie d'oiseaux
Apprendre à photographier les oiseaux prend du temps, mais avec les bonnes bases, vous pouvez améliorer considérablement vos résultats.
En combinant les réglages de l'appareil photo, la compréhension du comportement des oiseaux et des techniques telles que le panoramique et la prise de vue en rafale, vous serez en mesure de capturer des oiseaux en mouvement avec une plus grande confiance.
Poursuivre l'apprentissage avec :
- Conseils pour la photographie de la faune
- Conseils pour la photographie de la faune en hiver
- Conseils pour la photographie de safari
Où acheter les objectifs Tamron
Découvrez ces objectifs et bien d'autres encore lors d'un revendeur Tamron agréé dans votre région ou directement à la Magasin TAMRON aujourd'hui.
FAQ
Quel est le meilleur moment de la journée pour photographier des oiseaux ?
Le début de la matinée et la fin de l'après-midi sont les meilleurs moments pour la photographie d'oiseaux. Ces périodes offrent une lumière plus douce, un comportement plus actif de la faune et un meilleur contraste pour capturer les détails.
Avez-vous besoin d'un trépied pour photographier des oiseaux ?
Un trépied n'est pas toujours nécessaire, en particulier pour les oiseaux en vol. De nombreux photographes préfèrent la prise de vue à main levée pour des raisons de flexibilité, mais un monopode ou un trépied peut s'avérer utile lorsque l'on utilise des objectifs plus lourds ou que l'on photographie des sujets immobiles.
À quelle distance doit-on s'approcher des oiseaux pour les photographier ?
Vous devez maintenir une distance respectueuse et utiliser un téléobjectif pour remplir le cadre. S'approcher trop près peut perturber l'oiseau et modifier son comportement naturel, ce qui affecte à la fois l'éthique et la qualité de l'image.
Quel mode autofocus dois-je utiliser pour la photographie d'oiseaux ?
Utilisez l'autofocus continu (AF-C ou AI Servo) avec le suivi activé. Cela permet à l'appareil photo d'ajuster continuellement la mise au point au fur et à mesure que l'oiseau se déplace dans le cadre.
Comment photographier les oiseaux sans les déranger ?
Déplacez-vous lentement, évitez les mouvements brusques et observez le comportement avant de prendre des photos. L'utilisation de longueurs focales plus longues vous permet de capturer des images détaillées tout en gardant une distance sûre et respectueuse.