The best landscape photography settings start with aperture f/8-f/11, ISO 100-400, RAW format, and a tripod whenever light is low or maximum sharpness matters. From there, adjust shutter speed, aperture, ISO, and exposure compensation based on the scene, subject movement, light quality, and creative effect you want.
By Ken Hubbard, Photography by credited Tamron photographers. Graphics by Tamron Americas.
Table of Contents
- Baseline Landscape Photography Settings
- Camera Settings for Waterfall Photography
- Camera Settings for Mountain and Open Vista Photography
- Camera Settings for Golden Hour Landscapes
- Camera Settings for Stormy and Dramatic Sky Landscapes
- Camera Settings for Night and Astrophotography Landscapes
- Camera Settings for Foggy and Low-Contrast Landscapes
- Quick Landscape Photography Settings Reference Chart
- Final Tips for Better Landscape Photography Settings
Baseline Landscape Photography Settings
The best baseline landscape photography settings are aperture f/8-f/11, ISO 100-400, RAW file format, and a shutter speed that fits your light and subject movement. Use a tripod whenever possible so you can keep ISO low, protect image quality, and choose shutter speed creatively.
These settings work because most landscape photography depends on three goals: sharp detail, clean files, and controlled motion. Aperture controls depth of field, ISO controls image noise and sensitivity, and shutter speed controls whether motion is frozen or blurred.
For a general daylight landscape, start at f/8, ISO 100, and a shutter speed fast enough to avoid camera shake if you are handholding. If you are using a tripod, shutter speed can be slower because camera movement is no longer the limiting factor. For most lenses, f/8-f/11 is the sharpness sweet spot. According to Cambridge in Colour’s tutorial on diffraction in photography, diffraction begins limiting resolution when the width of the light’s airy disk surpasses the size of your camera’s pixels, a threshold that typically falls between f/11 and f/16 depending on your sensor resolution.
Shoot in RAW whenever possible. Landscapes often include bright skies and dark foregrounds in the same frame, and RAW files give you more room to recover highlight and shadow detail in editing. JPEG files are easier to share quickly, but RAW gives you more flexibility when light is difficult.
Use this baseline as your starting point:
To go deeper into the exposure triangle, read Tamron’s guides to what is aperture in photography, what is ISO in photography, and what is shutter speed.
For a broader foundation, start with the full landscape photography guide.
Camera Settings for Waterfall Photography
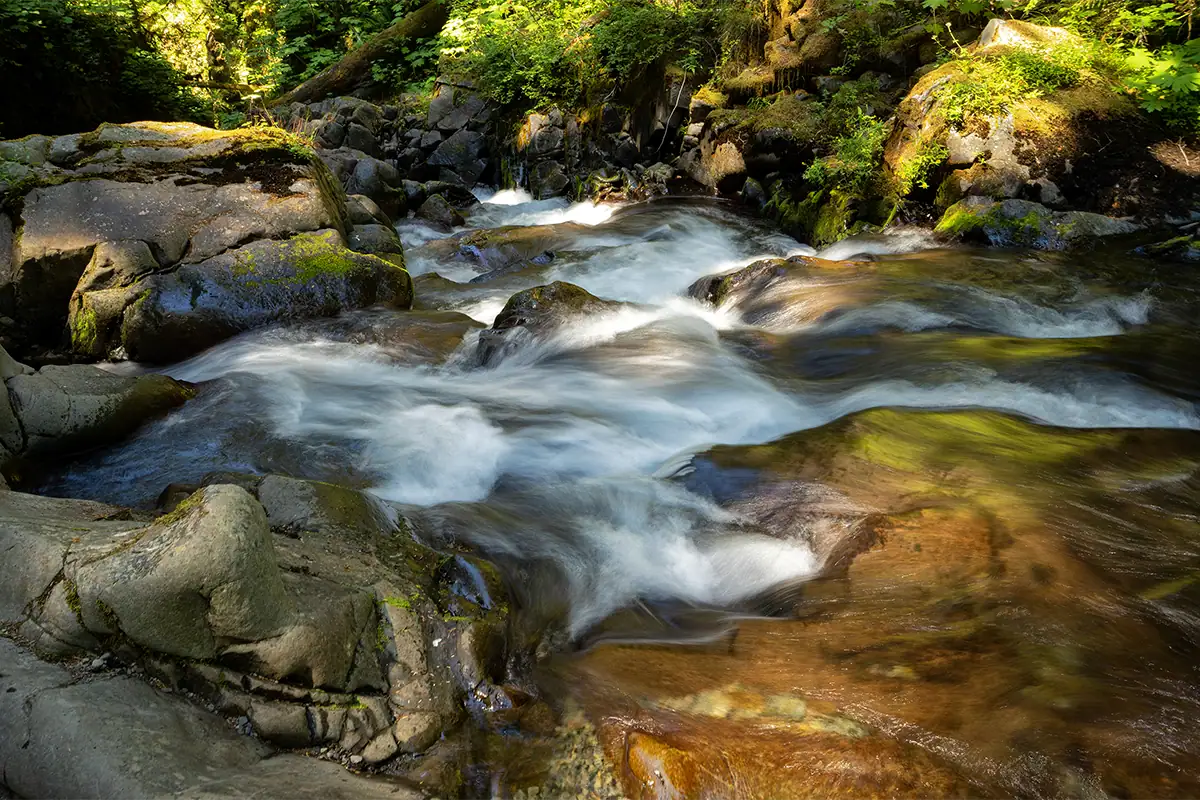
The best camera settings for waterfall photography are aperture f/8-f/16, ISO 100, and a slow shutter speed such as 1/4 sec. to several seconds, depending on how smooth you want the water to look. Use a tripod and add an ND filter when daylight is too bright.
Waterfall photography settings depend on whether you want to freeze the water or blur it. A faster shutter speed, such as 1/500 sec., freezes splashes and texture. A slower shutter speed, such as 1/4 sec. or longer, turns moving water into a softer, silky texture.
For the classic smooth waterfall look, start with ISO 100, aperture f/11, and a shutter speed around 1/4 sec. Take a test photo, review the water, and adjust from there. If the water still looks too choppy, slow the shutter. If it looks too soft or loses too much detail, speed it up.
In bright daylight, even ISO 100 and f/16 may not allow a slow enough shutter speed. That is when a neutral density filter becomes useful. An ND filter reduces the amount of light entering the lens so you can use longer exposures without overexposing the image.
Wet conditions also matter. Use a lens hood, keep a microfiber cloth nearby, and check the front element often for mist or spray. A wide-angle zoom can help include foreground rocks and surrounding forest, while a short telephoto can isolate details in the falls.
For more technique-specific help, read Tamron’s guides to silky water photography with slow shutter speed and long exposure photography guide.
Recommended starting point:
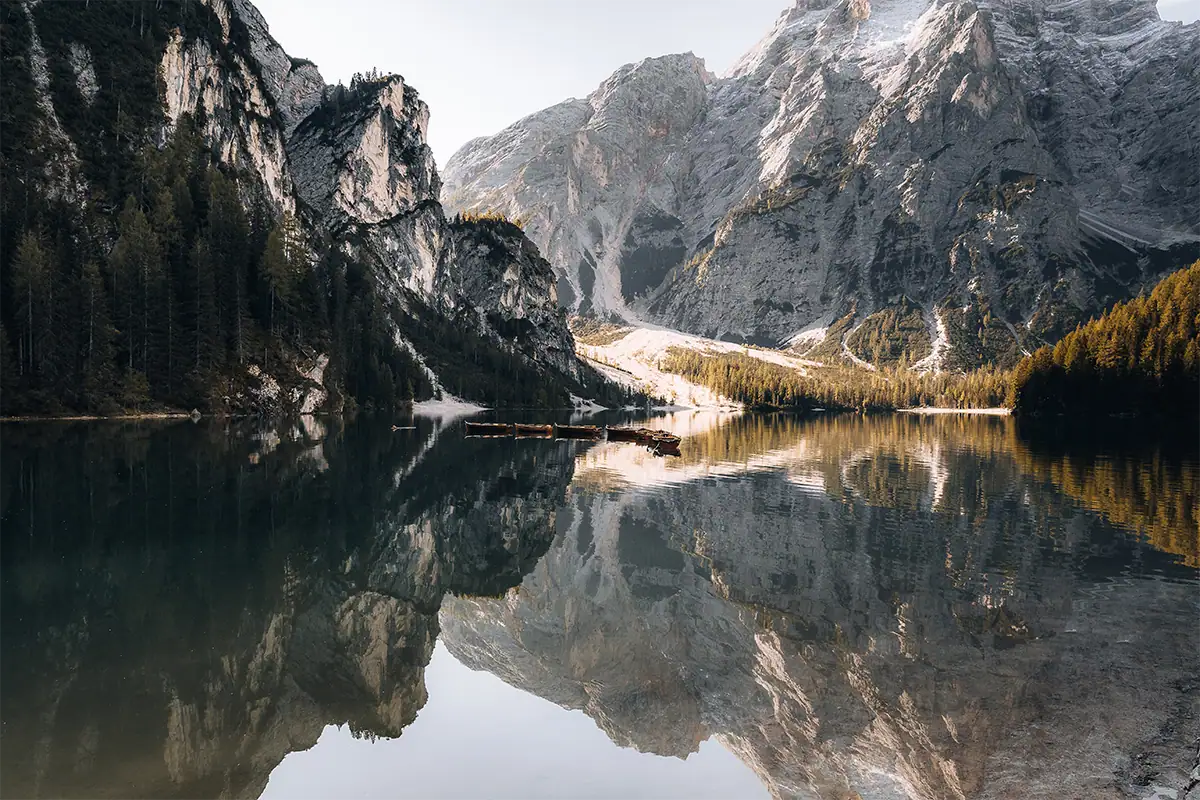
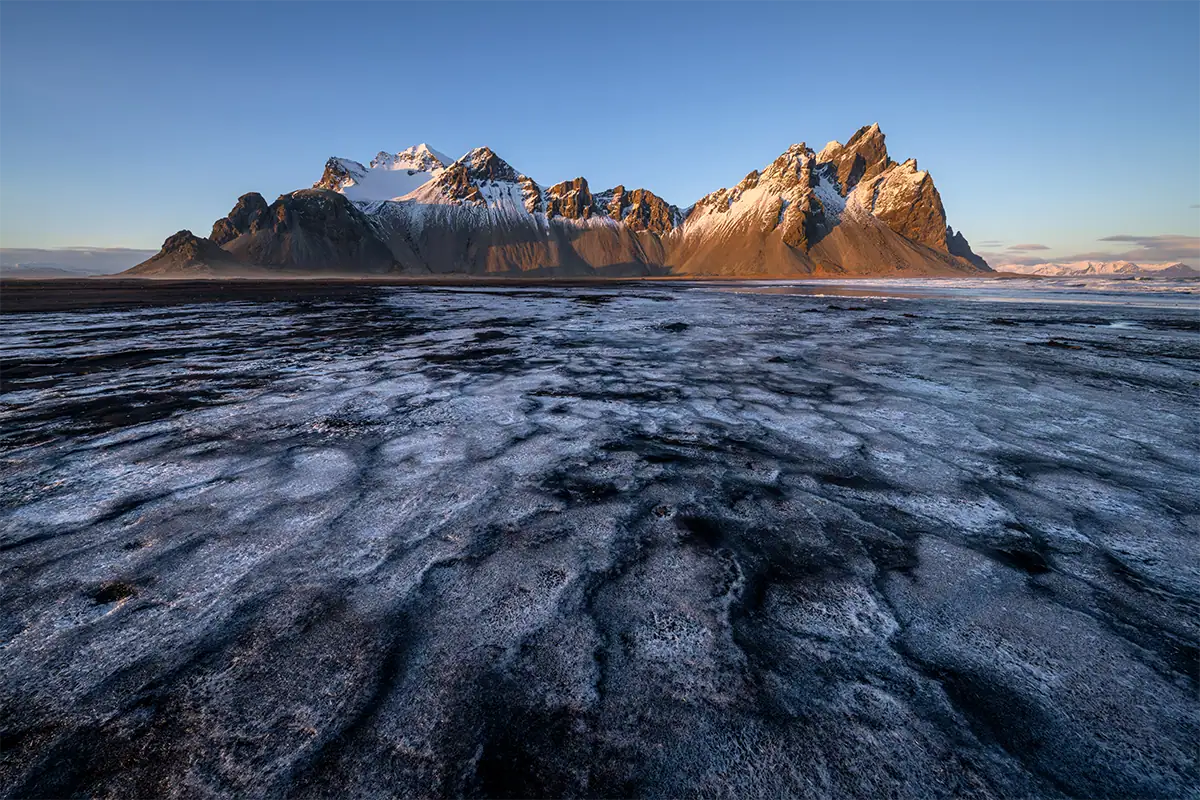
Camera Settings for Mountain and Open Vista Photography

The best camera settings for mountain and open vista photography are aperture f/8-f/11, ISO 100-200, and a shutter speed that keeps the image sharp. Use a tripod when possible, focus about one-third into the scene, and prioritize deep depth of field from foreground to distant peaks.
Mountain landscapes and open vistas often include a large distance between the closest foreground element and the farthest background. That means depth of field is the main priority. Aperture f/8-f/11 is usually the best starting point because it balances sharpness and depth without pushing too far into diffraction softness.
If the foreground is very close to the camera, focus carefully. A common starting technique is to focus about one-third of the way into the scene, then review the image at high magnification to confirm both foreground and background sharpness. More advanced photographers may use hyperfocal distance, which is the focus point that maximizes depth of field for a given aperture, focal length, and sensor size.
Keep ISO low whenever the camera is stable. ISO 100 or 200 helps preserve detail in mountain ridges, trees, rocks, clouds, and distant atmospheric layers. If you are handholding in wind or low light, increase ISO only as much as needed to maintain a safe shutter speed. According to Wikipedia’s article on image stabilization, the standard rule of thumb is a shutter speed of at least 1/focal length, and with modern high-resolution sensors 1/(2×focal length) may be more appropriate. Increase ISO only as much as needed to reach that threshold.
Lens choice changes the look of open vistas. A wide-angle lens emphasizes depth and foreground scale, while a telephoto lens compresses distant ridges and makes mountain layers appear closer together. Try both when possible. The wide view may show the full place, while the telephoto view may produce a cleaner composition.
Recommended starting point:
Camera Settings for Golden Hour Landscapes
The best camera settings for golden hour landscapes are aperture f/8-f/11, ISO 100-400, RAW format, and careful exposure for the brightest highlights. Use a tripod as light fades, watch the histogram, and slightly underexpose when needed to protect bright skies and sunlit clouds.
Golden hour light changes quickly. At the beginning of sunset or after sunrise, you may have enough light to handhold at ISO 100 or 200. As the sun drops, shutter speed slows, and a tripod becomes much more important.
The biggest challenge is mixed light. According to Cambridge in Colour’s tutorial on the RAW file format, RAW provides considerably more dynamic range than JPEG because sensor data has not been converted using tone curves, meaning exposure can be adjusted after capture to recover detail a JPEG would permanently discard. The sky may be much brighter than the foreground, especially when the sun is near the frame. If you expose only for the land, the sky may blow out. If you expose only for the sky, the foreground may become very dark. RAW format helps because it gives you more flexibility to recover shadows and highlights later.
Use your histogram rather than relying only on the rear LCD. If the graph is pushed hard against the right edge, highlights may be clipped. Reduce exposure slightly, use exposure compensation, or reframe to reduce the brightest area in the image.
Golden hour is also when lens flare can become an issue. Use a lens hood when appropriate, shade the lens with your hand outside the frame, and take a test image to check for flare spots. A wide-angle lens is useful for dramatic skies, while a telephoto lens can isolate sunlit ridges, trees, or distant layers.
For more help, read Tamron’s golden hour photography tips and best settings for sunset and sunrise photos.
Recommended starting point:
Camera Settings for Stormy and Dramatic Sky Landscapes
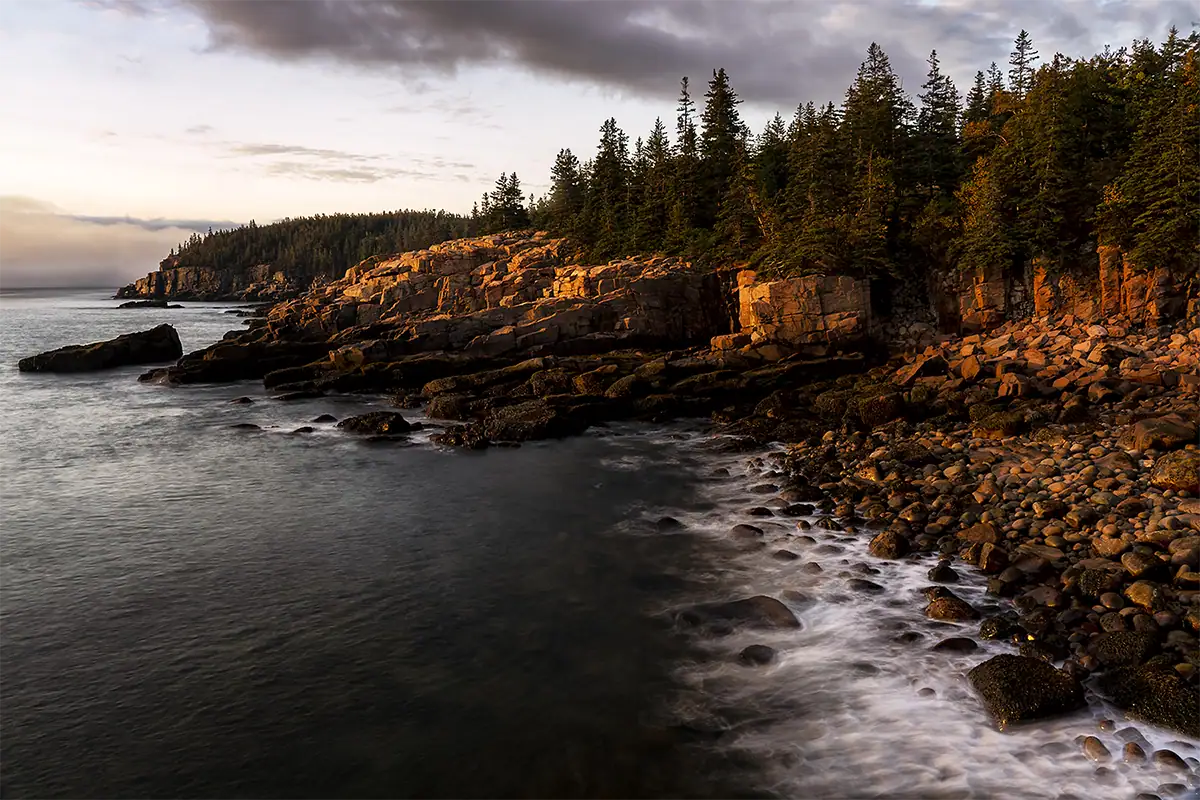
The best settings for stormy and dramatic sky landscapes depend on whether you want to freeze movement or create long-exposure blur. Start with aperture f/8-f/11, ISO 100-400 and choose a fast shutter for sharp clouds or a slower shutter with an ND filter for streaked motion.
Stormy skies can transform a landscape, but they also create exposure challenges. Bright breaks in the clouds, dark foregrounds, and fast-moving weather can all appear in the same scene. RAW format is especially important because it gives you more room to recover detail in both highlights and shadows.
If clouds are moving quickly and you want them sharp, use a faster shutter speed such as 1/250 sec. or faster. If you want clouds to stretch across the sky in a long-exposure effect, use a tripod, low ISO, and an ND filter to reach multi-second shutter speeds.
Wind is another factor. In stormy conditions, grasses, trees, flowers, and water may move constantly. If your foreground is moving and you want it sharp, use a faster shutter speed. If you are using a long exposure for the sky, accept that some foreground movement may blur, or choose a more stable subject like rocks, mountains, or architecture.
Do not ignore safety. Avoid exposed locations during lightning, high winds, or dangerous surf. Dramatic weather can create powerful photos, but no photo is worth unsafe conditions.
Ian Plant puts it directly: “Be there when the weather changes! Your best chance to capture dramatic conditions occurs when weather fronts come in and move out.”
A wide-angle zoom can include the full scale of a dramatic sky, while a telephoto lens can isolate light breaking through clouds or compress layers of rain, mountains, and atmosphere.
Recommended starting point:
Camera Settings for Night and Astrophotography Landscapes
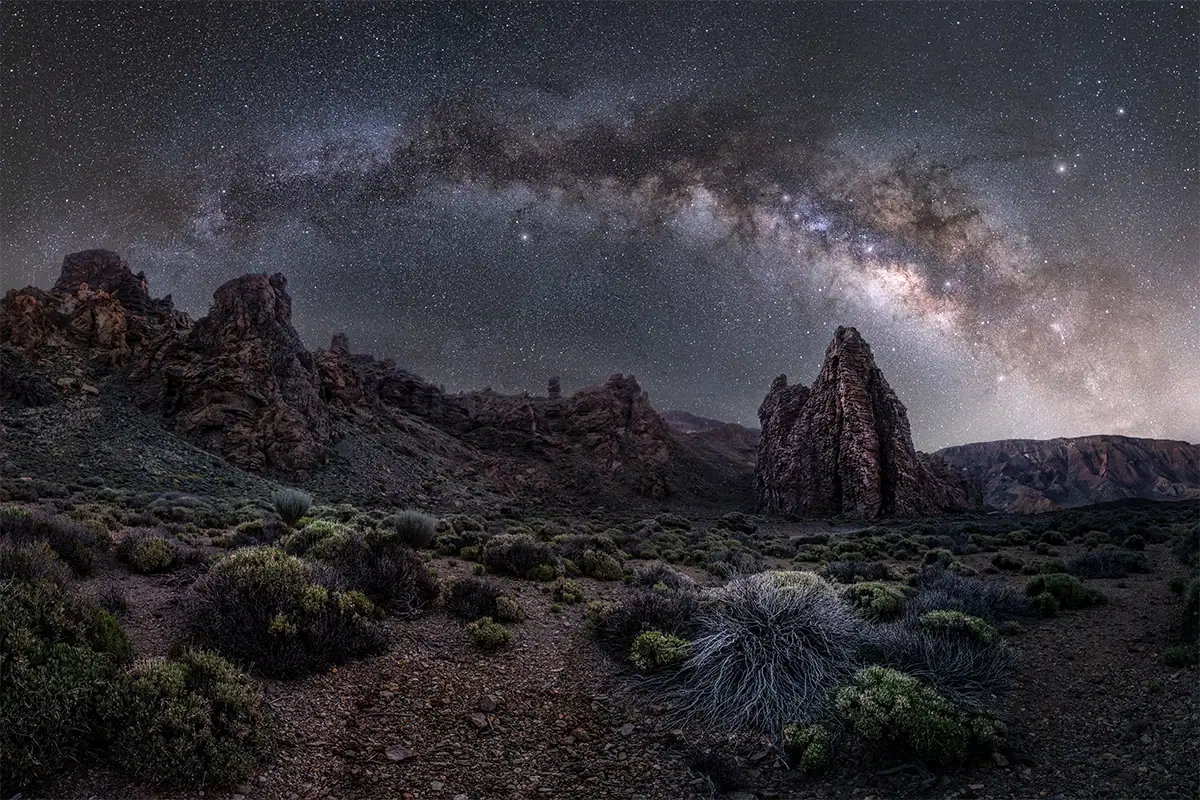
The best astrophotography landscape settings are a wide aperture, ISO 1600-6400, RAW format, and a long shutter speed around 10-25 seconds, depending on focal length and star movement. Use a tripod, manual focus, and a wide or fast lens to capture the night sky clearly.
Night landscapes are different from most landscape photography because you are not trying to maximize depth of field at f/8-f/11. Instead, you need to gather as much light as possible. That means using a wider aperture such as f/2.8 or f/4, increasing ISO, and using a long exposure.
Start with your lens wide open or close to wide open. Set ISO around 3200 and shoot in RAW. For shutter speed, use the 500 rule as your starting point: divide 500 by your focal length to find the maximum exposure before stars begin to trail. According to Photography Life’s guide on the 500 rule vs. NPF rule, beyond roughly 30 seconds even an ultra-wide lens will show noticeable star blur due to Earth’s rotation, and shorter focal lengths give you more exposure time before that blur becomes visible. Review the image and adjust. If the image is too dark, raise ISO. If stars still trail, shorten the shutter speed.
Manual focus is critical. Autofocus often struggles in the dark. Use live view, magnify a bright star or distant light, and adjust focus until it appears as small and sharp as possible. After focusing, avoid touching the focus ring.
A fast wide-angle lens is especially helpful for astrophotography landscapes because it captures more sky and allows longer shutter speeds before star movement becomes obvious. A fast F2.8 zoom can be a flexible option for night landscapes, especially when you want to frame both the Milky Way and the foreground.
Recommended starting point:
Camera Settings for Foggy and Low-Contrast Landscapes
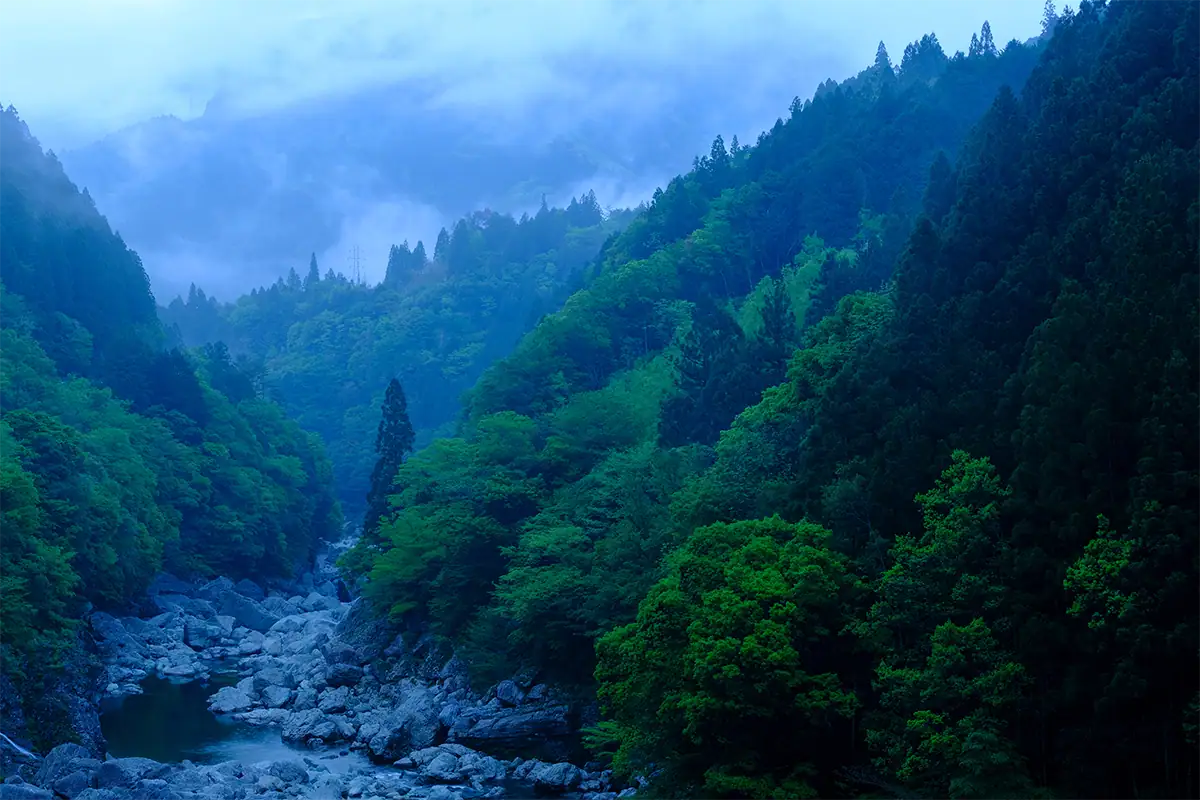
The best settings for foggy and low-contrast landscapes are aperture f/8-f/11, ISO 100-400, RAW format, and careful exposure compensation when the camera meter is fooled by bright mist. Slightly overexpose when fog appears too gray, but protect highlights so detail remains recoverable.
Fog simplifies a landscape by reducing contrast, hiding distractions, and separating layers. It is excellent for forests, lakes, mountains, fields, and quiet minimal compositions. But because fog is bright and reflective, your camera’s meter may underexpose the scene, making white mist look dull gray.
Use exposure compensation if needed. Start with +1/3 or +2/3 EV when the fog looks too dark, then check the histogram to make sure highlights are not clipped. Shooting in RAW gives you more control over contrast, white balance, and highlight recovery during editing.
Aperture depends on your composition. Use f/8-f/11 when you want the full landscape sharp. Use a wider aperture if you want to isolate a tree, person, cabin, or detail against the fog. Shutter speed is usually not the creative focus unless there is moving water, wind, or rain in the scene.
Foggy landscapes often work well with telephoto lenses because compression makes layers of trees, hills, or ridgelines feel closer together. Wide-angle lenses can work too, but they need a strong foreground subject so the scene does not feel empty.
Recommended starting point: