 Instant Savings
 Support
 Find a Dealer
The moon, shining large in the night sky, has fascinated photographers for generations. For many, the desire to capture its craters and glowing presence is the reason they first learn how to take photos of the moon. Yet when it comes time to actually try, the results are often disappointing—too small, too bright, or blurred. The good news is that by selecting the right lens to photograph the moon, using the proper moon photography settings, and following a few moon photography tips, even beginners can take stunning shots. This guide will show you step by step how to photograph the moon for sharp and detailed results.
What You’ll Learn In This Article:
- How to photograph the moon clearly with the right camera gear and lenses
- The best moon photography settings for aperture, shutter speed, and ISO
- Tips for stabilizing your camera and reducing blur in night photography
- Creative ways to compose moon photos with scenery, buildings, and backgrounds
- How to capture different moon phases—from crescent to full moon—like a pro
Why Use a Mirrorless Camera Instead of Your Smartphone?
When people first search for how to photograph the moon, a common question is whether a smartphone is enough. Modern phones have improved dramatically, and with the right apps and settings, they can take basic images of the moon. However, the reality is that a smartphone camera has several limitations that prevent it from producing the kind of sharp, detailed moon photos most people hope for.
Mirrorless Camera Benefits Over Smartphones:
- Larger Sensor: A mirrorless camera with an interchangeable lens delivers far superior results because of its larger sensor, which collects more light and reveals the fine details of the moon’s craters and textures.
- Optical Zoom Reach vs. Digital Zoom: Unlike a phone, which relies heavily on digital zoom, a mirrorless setup allows you to attach a true telephoto or ultra-telephoto lens, giving you the optical reach needed to fill the frame with the moon and preserve image quality.
- Better Low Light Capabilities: In addition, mirrorless cameras handle low-light conditions much better than phones, reducing grain and noise in your night sky shots.
- Control Over Exposure: Perhaps the biggest advantage is control. With a mirrorless camera you can manually adjust aperture, shutter speed, and ISO for moon photography to expose the bright surface of the moon correctly without blowing out highlights or losing contrast. This control makes it possible to balance sharpness, exposure, and clarity in a way that smartphones simply cannot.
- Focal Length Options: On top of that, the flexibility of using different lenses means you can shoot everything from a close-up of the moon’s surface to creative wide-angle compositions that place the moon above a cityscape or natural landscape.
While smartphones are convenient for casual snapshots, using a mirrorless camera with the right interchangeable lens will consistently give you sharp, detailed, professional-looking moon photos that capture the beauty of the night sky.
Essential Gear for Photographing the Moon
To consistently capture the best pictures of the moon, you’ll want the right equipment when learning how to photograph the moon.
Telephoto Lens (Ultra-Telephoto Lens)
The most important tool for photographing the moon is a telephoto or ultra-telephoto lens since the most important factor in photographing the moon is reach. A lens to photograph the moon should have at least 200–300mm focal length to capture surface details. For filling the frame with the moon, a 400mm–600mm lens is ideal. With a longer focal length, you can capture sharper close-ups without excessive cropping in post-processing.
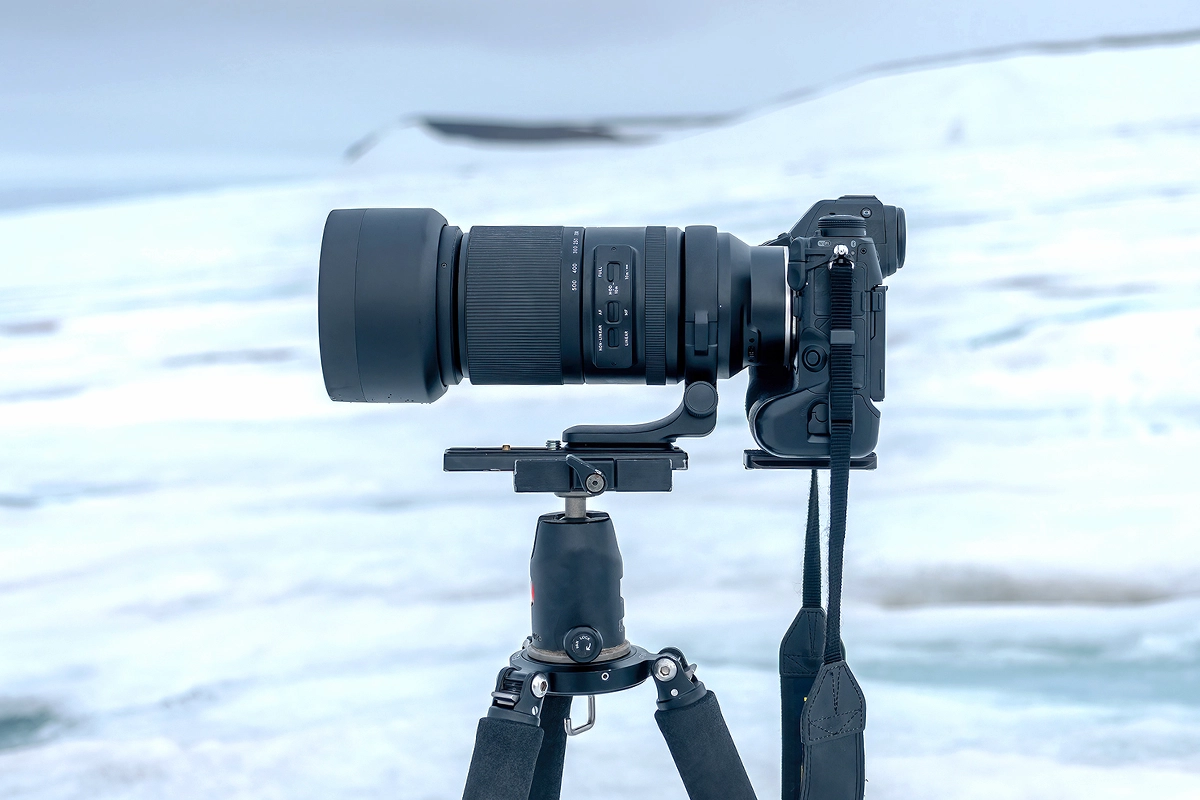
Tripod and Remote Shutter Release
At long focal lengths, stability matters. Using a tripod for night photography prevents camera shake, while a remote shutter release (or self-timer) helps reduce blur. Together, these tools help you achieve crisp, shake-free moon photos.
Best Camera Settings for Moon Photography
The moon is brighter than most people expect, and getting exposure right can be tricky. Using the right photography settings will help you capture detail without overexposing.
Shooting Mode
Manual mode is essential, since auto settings like aperture priority mode or shutter priority tend to overexpose the moon. Learning these settings is key to mastering how to take photos of the moon with consistent results.
Aperture (F-Number)
Unlike typical night photography, the moon is bright enough that you don’t need to shoot wide open. An aperture between f/8 and f/11 is ideal for capturing sharp detail in the lunar surface and edges, which is part of the best settings for moon photography.
Shutter Speed
Although the moon appears still, it moves steadily across the sky. A shutter speed between 1/200 and 1/400 second usually works well to avoid blur. For handheld shooting, increase to 1/800 second. This adjustment is especially important when trying to see the full moon in sharp focus. On a tripod, you can use slightly slower speeds without issue.
ISO Sensitivity
Start with a low ISO, around 100–200, for the cleanest image with minimal noise. If you’re shooting a crescent or half-moon where light is lower, you may need to raise ISO to 400–800 or even higher. Fine-tuning ISO for moon photography ensures the surface detail remains sharp without noise.
Top Moon Photography Tips
Beyond gear and settings, a few key techniques can help you capture the best pictures of the moon.
TIP 1: Check the Moon’s Phase and Position
Always check whether you’ll be shooting a crescent, half-moon, or full moon. Planning lets you decide whether you want a picture of a half-moon, to see the full moon at its brightest, or to experiment with moon in daytime compositions. Try using free night apps like the NASA app, or even a dedicated nite photography app to plan your shots more effectively.
TIP 2: Choose the Right Shooting location
If you simply want a clear shot of the full moon, any open space will do. But if you want creative compositions that combine the moon with buildings, landscapes, or water, scout your location in advance. These moon photography tips for location will add creative depth to your portfolio.
TIP 3: Think About Composition
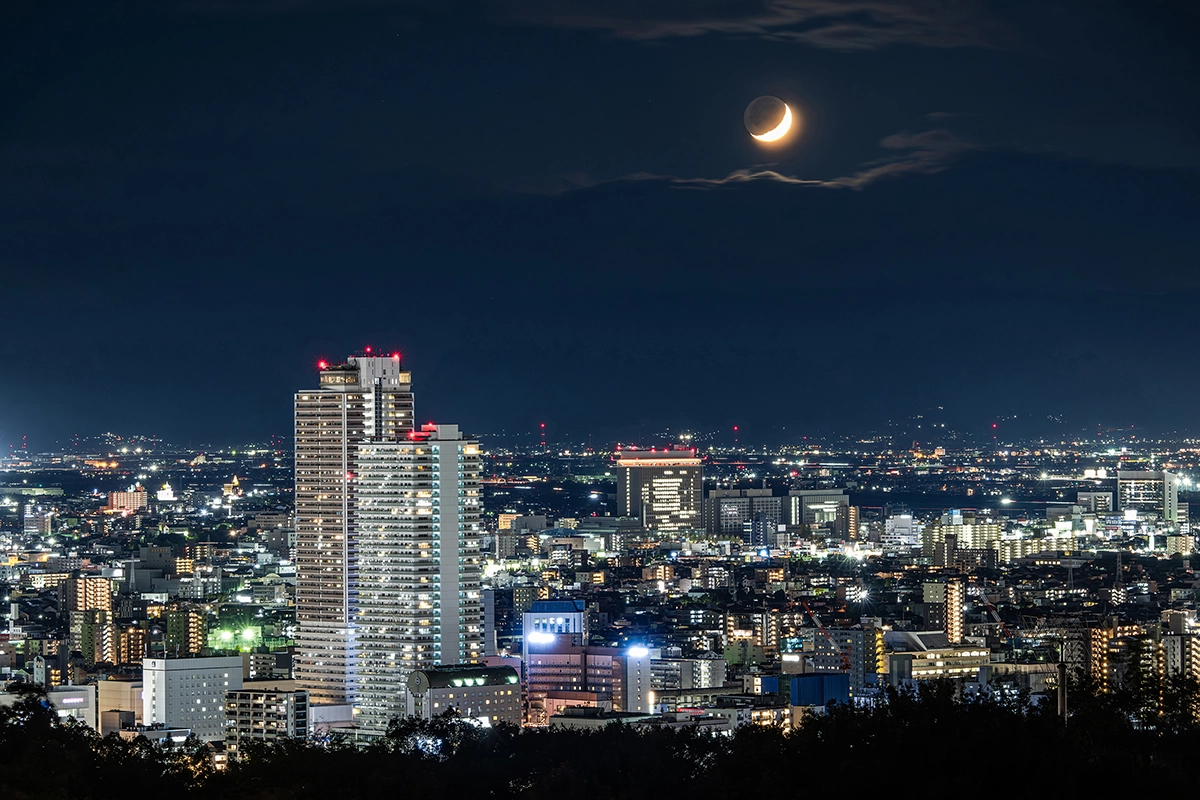
A photo of the moon filling the frame is dramatic, but adding foreground elements can make your image unique. Try placing the moon behind city skylines, mountain ranges, or reflective lakes to add depth and atmosphere and create the best pictures of the moon.
TIP 4: Adjust White Balance for Mood
The moon’s color can shift depending on the atmosphere. Experiment with white balance to create different effects—warmer tones for a golden moon or cooler tones for a crisp, bluish look. Auto white balance works fine, but custom settings give more creative control. If you shoot RAW, you can refine colors later during editing—especially helpful when learning how to edit moon photos for a dramatic effect.
TIP 5: Crop for Impact
If your lens doesn’t fill the frame, cropping in post-processing is perfectly fine. With a good base image, you’ll still capture the best pictures of the moon.
With these techniques, you’ll not only take sharper images but also learn how to photograph the moon in more creative and memorable ways.
How to Photograph Different Moon Phases and Scenes
Your approach should shift depending on whether you’re shooting a crescent, half, or full moon.
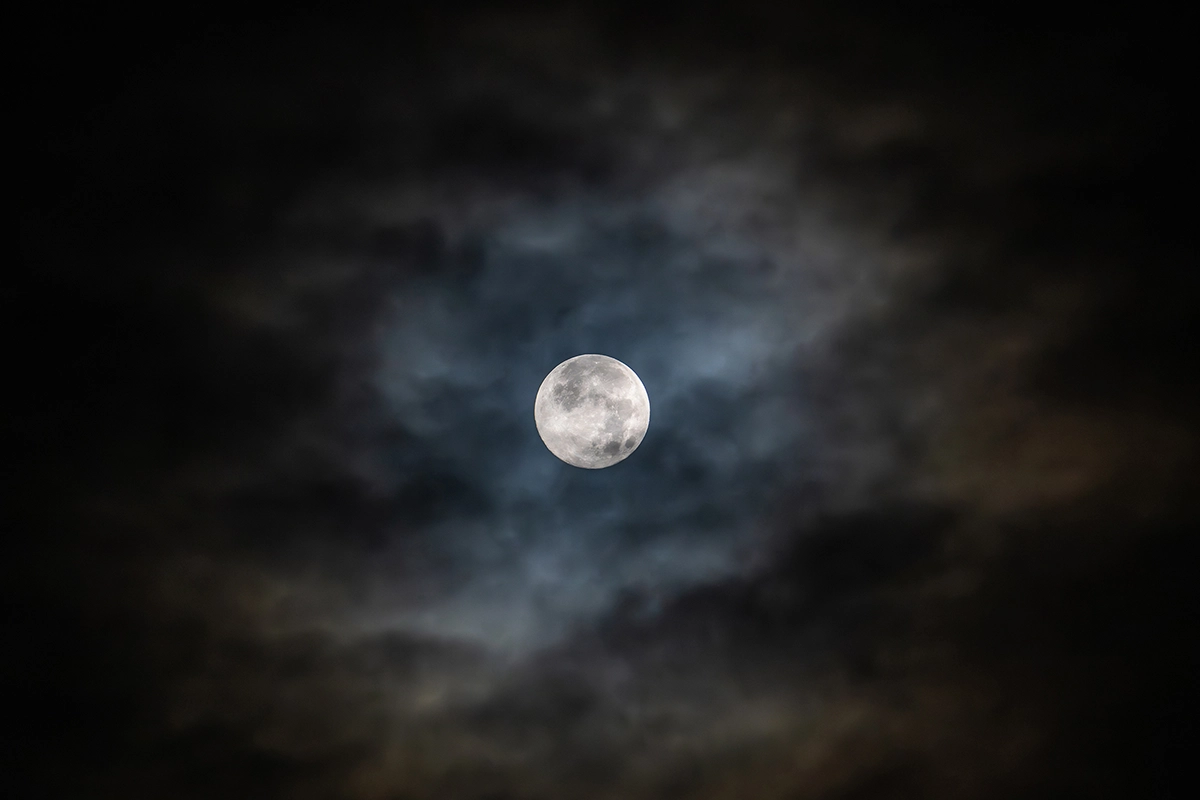
Full Moon Photography
When you go outside to see the full moon, it often looks brighter than expected, so you’ll need the right full moon photography settings to capture detail without overexposure. For crisp detail, start with full moon photography settings of f/8–f/10, 1/100–1/400 sec., and ISO 100–200. Adjust as needed to avoid overexposure. Speed up the shutter if the moon looks too bright. Or use the exposure compensation dial to reduce the exposure. These are widely considered the best settings for moon photography.
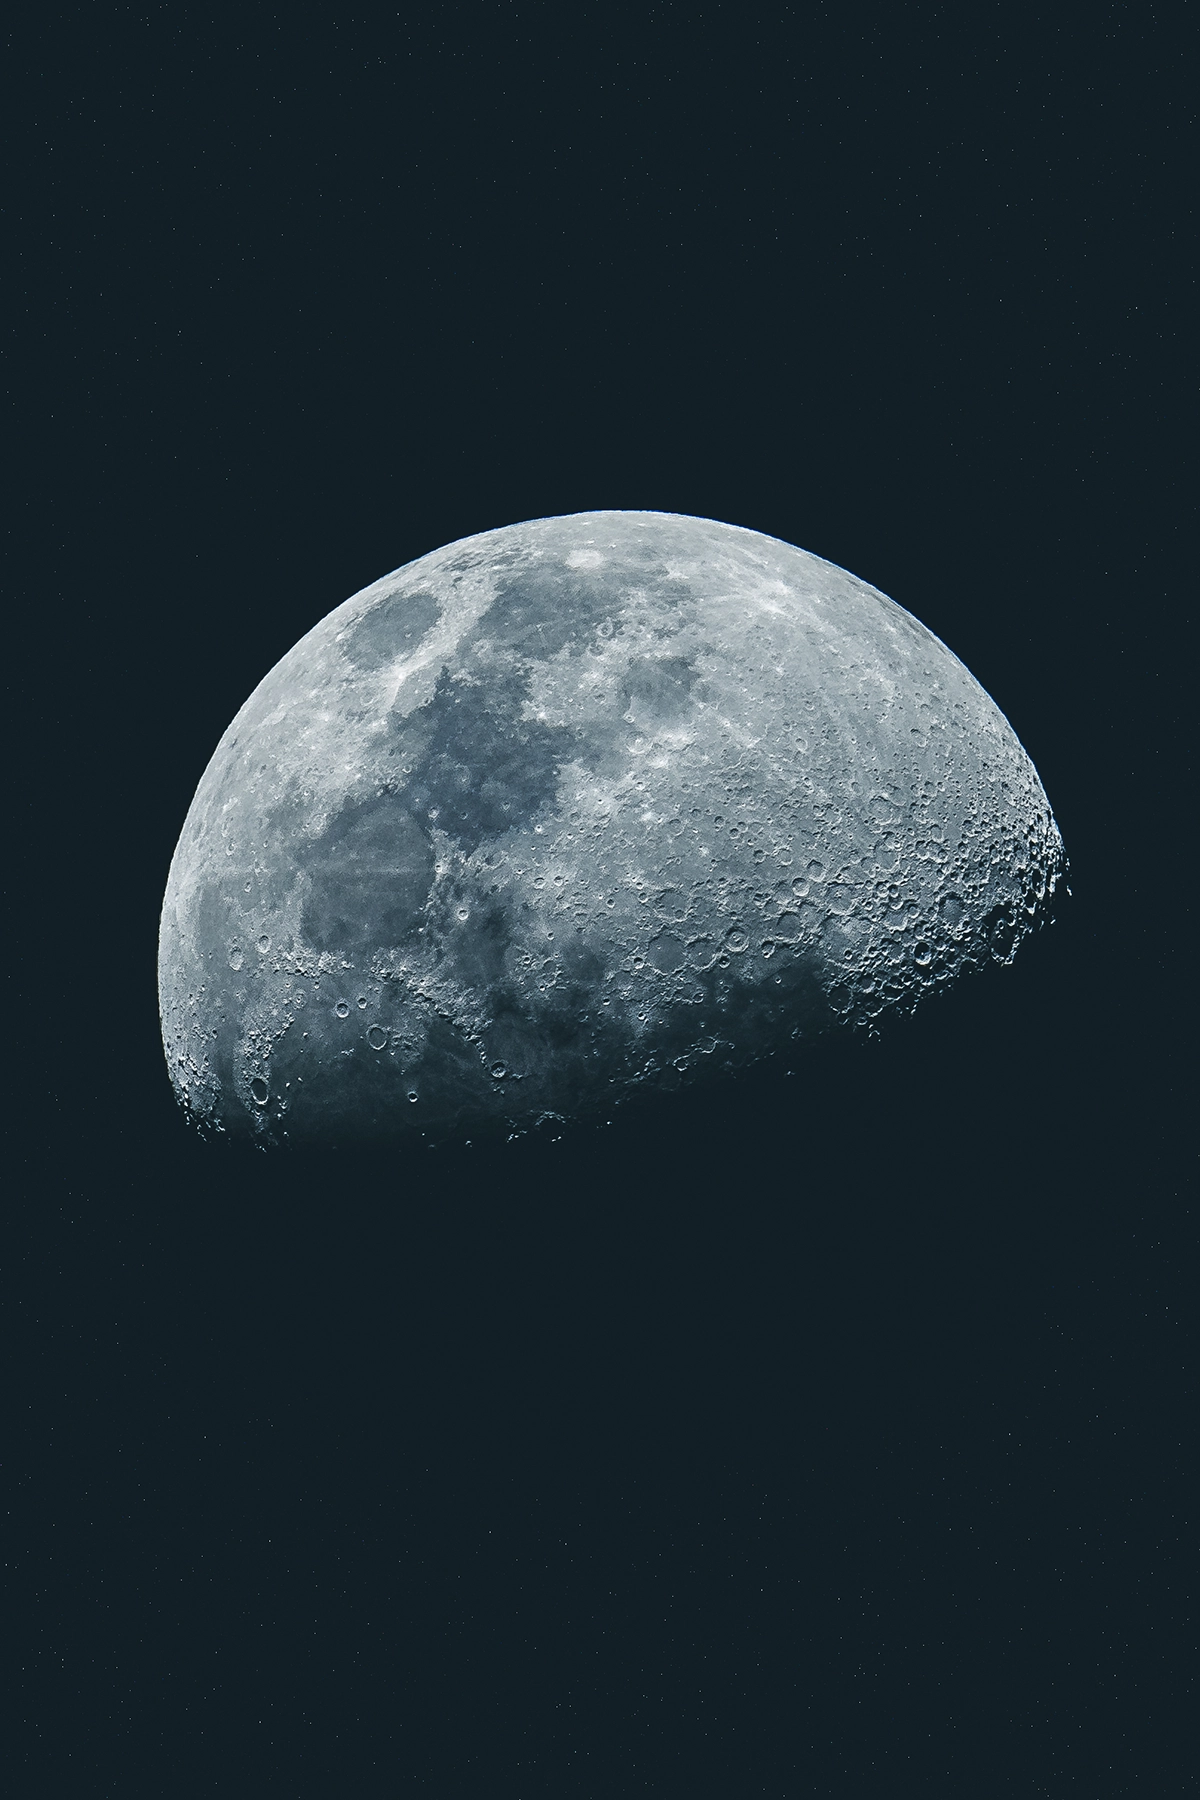
Crescent and Half-Moons
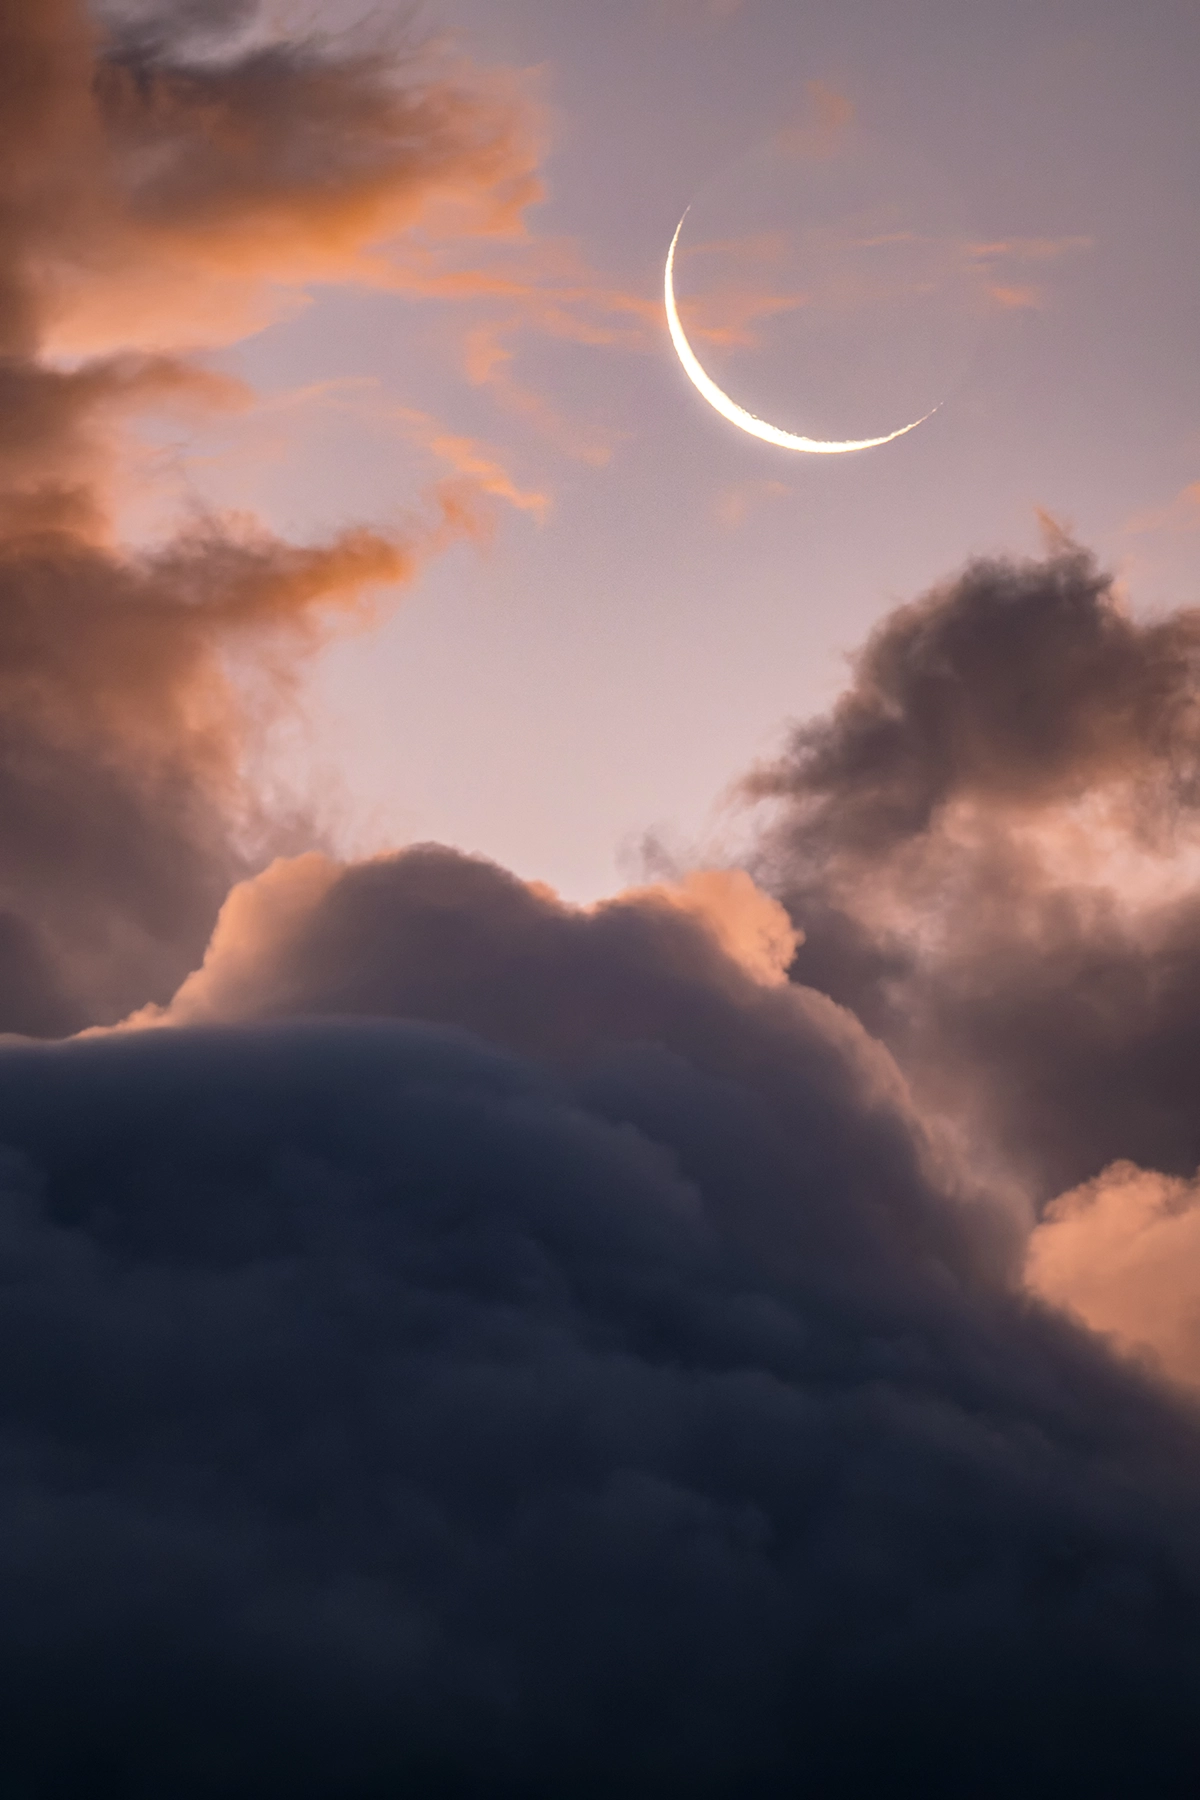
Crescent and half-moons are dimmer, so you may need slightly slower shutter speeds and wider apertures. Shooting during the blue hour can create stunning contrasts between the glowing moon and a colorful sky.
Moon in Daytime
One overlooked but exciting technique is capturing the moon in daytime. Because the sky is brighter, you’ll need to adjust exposure carefully, but the contrast of the moon against blue skies can create stunning images.
Photographing the Supermoon
If you want to know how to photograph the supermoon, the same rules apply but pay extra attention to composition. Pairing the oversized moon with foreground elements like buildings or mountains makes the effect even more dramatic.
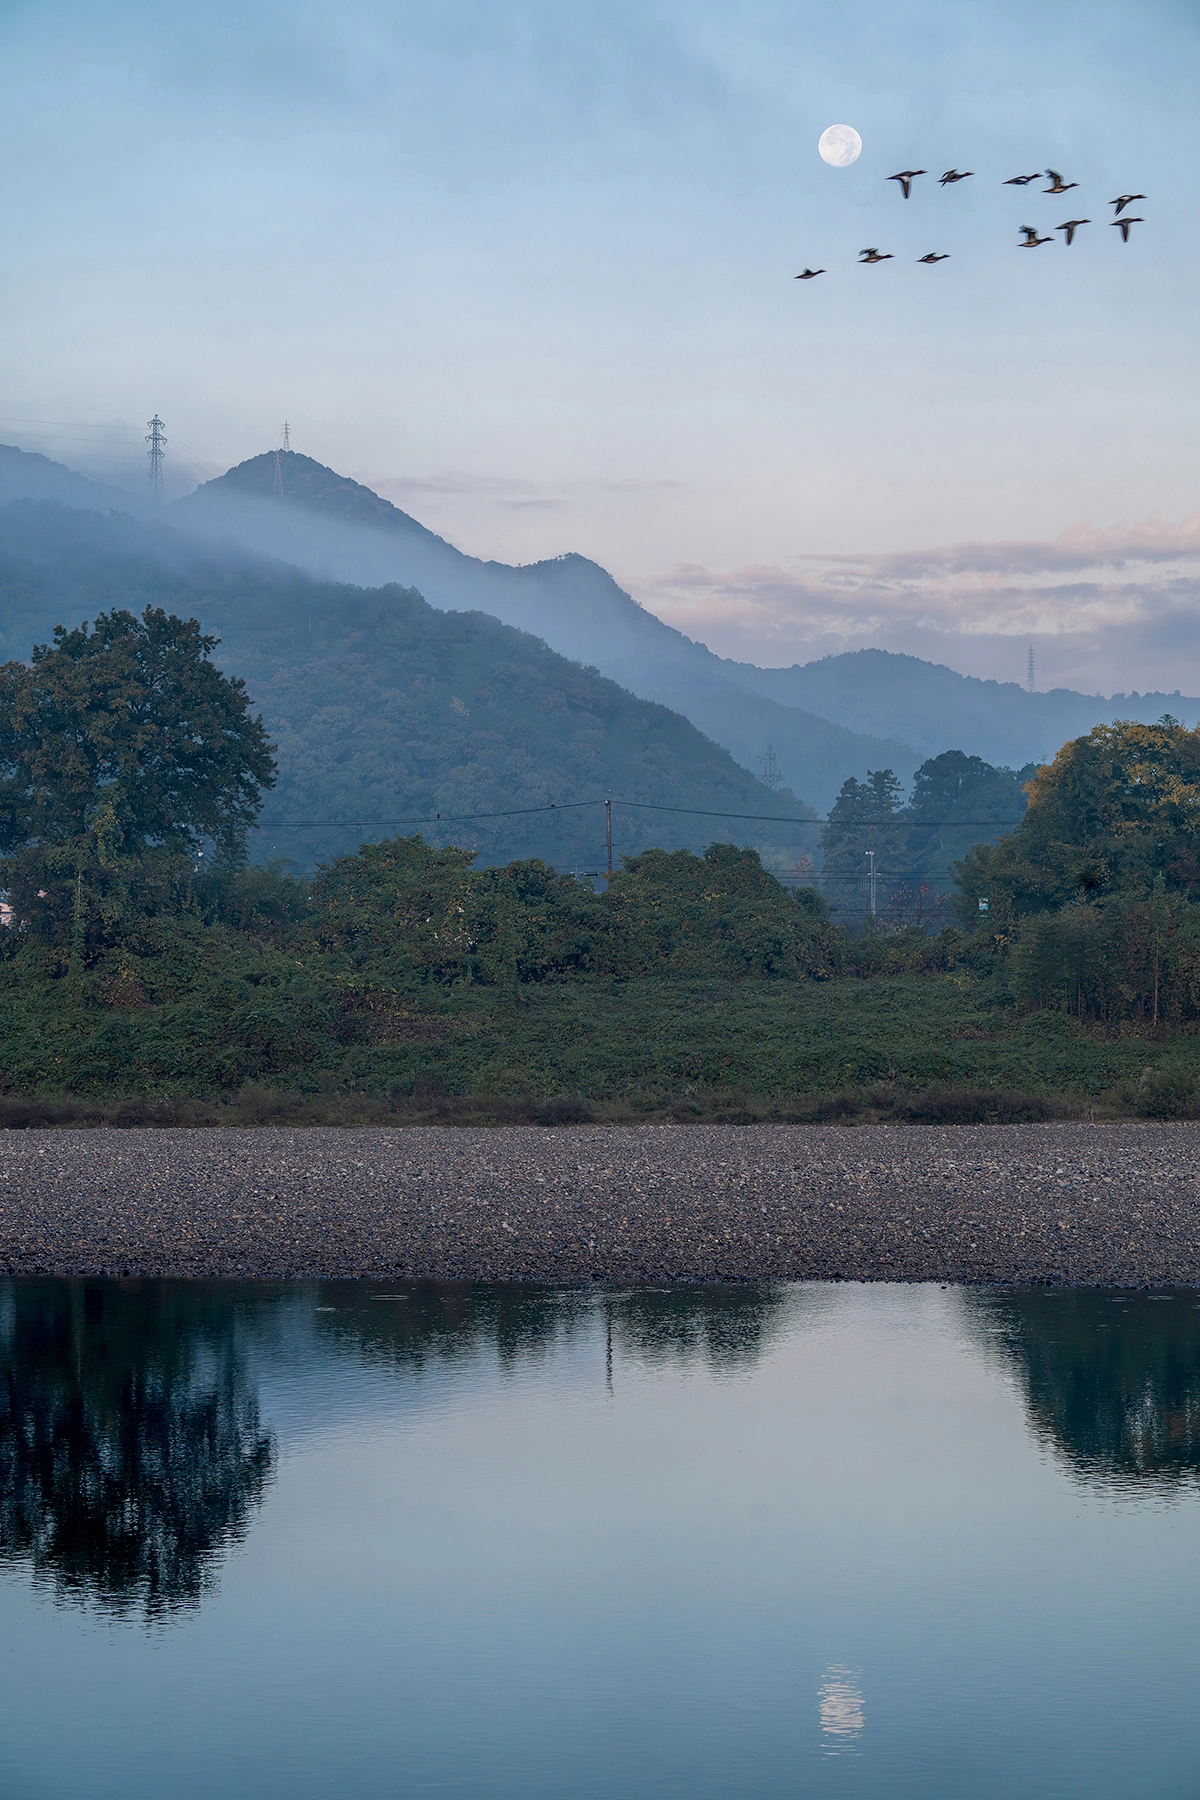
Moon with Scenery and Buildings
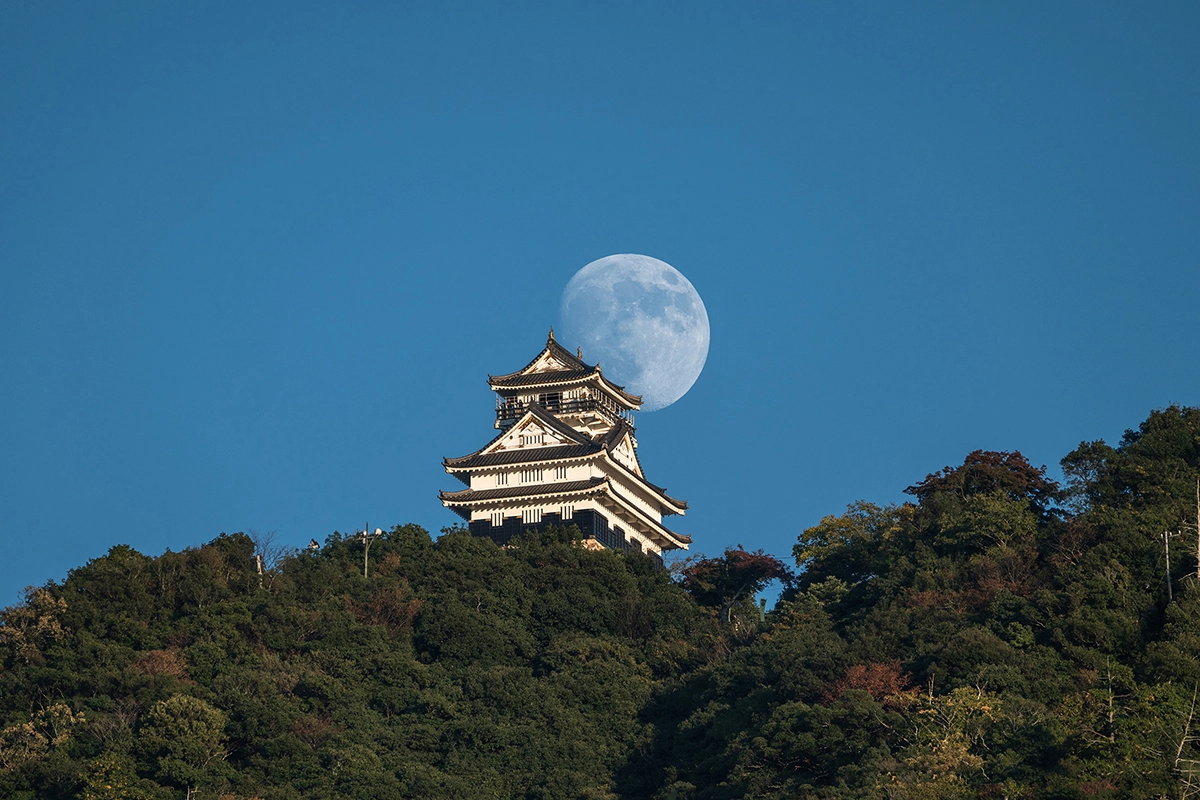
When combining the moon with landscapes or architecture, use a wide-angle lens to include foreground elements. The best time to shoot is at moonrise or moonset, when the moon’s brightness is more balanced with the surrounding scene.
Capturing a Hazy “Oboroizuki” Moon
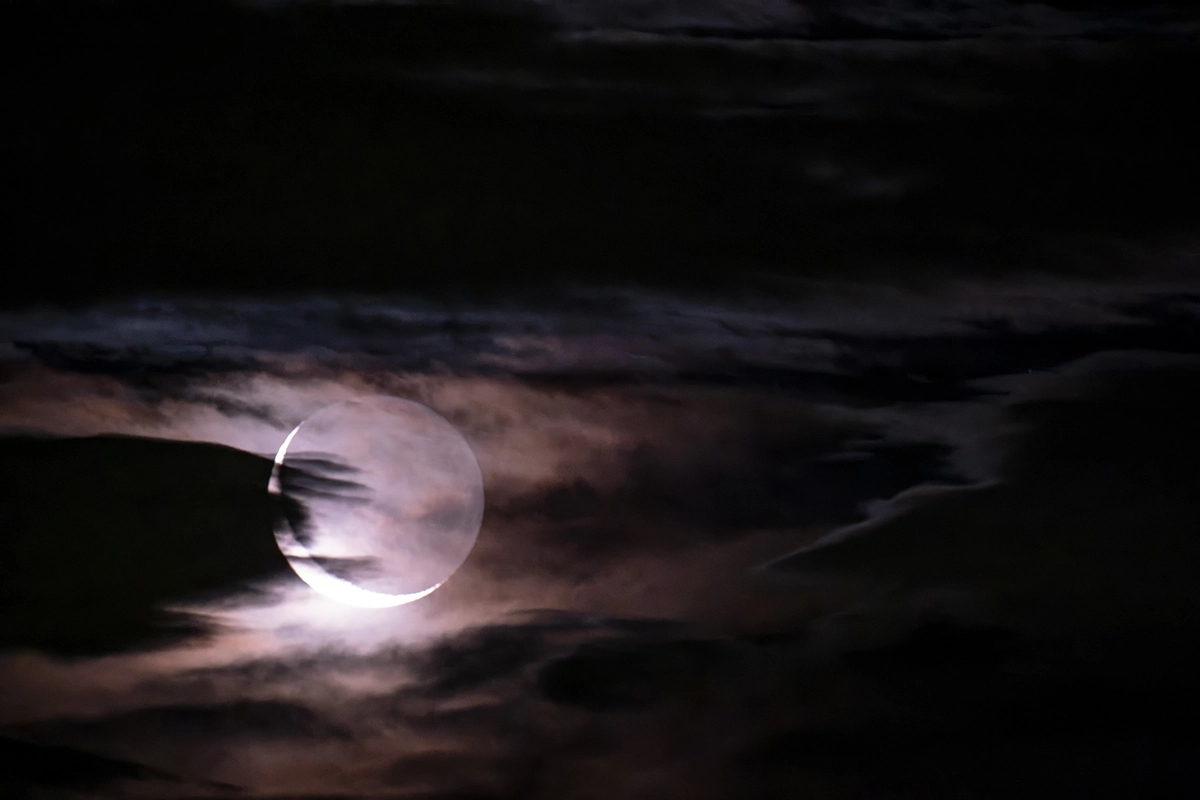
On cloudy nights, the moon often takes on a hazy, dreamlike glow. Use a slower shutter speed (around 1/10 to 1 second) and adjust aperture for a softer, atmospheric effect.
Choosing the Best Lens for Moon Photography
The right lens to photograph the moon depends on your goals. A 200–300mm lens reveals surface texture, while a 400–600mm lens delivers frame-filling images. Wider apertures help when light is low, especially for crescent or half-moons. For sharpness, choose a lens with good autofocus and stabilization
Focal length
For clear, detailed shots, a telephoto or ultra-telephoto lens with at least 200mm focal length is recommended. Longer lenses, such as 400mm or 600mm, will reveal more surface detail and minimize the need for cropping.
F-Number (Aperture)
A lens with a wider maximum aperture (lower f-number) is especially helpful when shooting crescent or half-moons, since more light reaches the sensor. Weight and handling also matter, as larger lenses can be heavy—make sure you’re comfortable using them with a tripod. Finally, consider autofocus performance and image stabilization, both of which help achieve sharp results when photographing the moon.
Size and Weight
The longer the focal length of a telephoto lens, the larger it tends to be. Since large and heavy lenses affect the ease of carrying and handling, it is recommended that you actually hold the lens in your hand to confirm the size and weight. A tripod is often used when shooting the moon, but a light and compact lens will make it easier to suppress camera shake when shooting hand-held.
Auto Focus and Image Stabilization Mechanisms
Since moon photography requires focusing in dark conditions, AF (autofocus) performance is important. We recommend that you choose a lens that can focus smoothly and track moving subjects.
If handheld shooting is a consideration, choosing a lens with an image stabilization mechanism will give you peace of mind. The image stabilization mechanism helps you take pictures with less camera shake, even at slower shutter speeds.
Take on the challenge of moon photography with tips on exposure settings and lens selection
Recommended Tamron Telephoto Lenses for Moon Photography
- 25-200mm F/2.8-5.6 Di III VXD G2 (Model A075) for Sony E
- 28-300mm F/4-7.1 Di III VC VXD (Model A074) for Sony E
- 50-300mm F/4.5-6.3 Di III VC VXD (Model A069) for Sony E
- 50-400mm F/4.5-6.3 Di III VC VXD (model A067) for Sony E and Nikon Z
- 70-300mm F/4.5-6.3 Di III RXD (Model A047) for Sony E and Nikon Z
- 150-500mm F/5-6.7 Di III VC VXD (Model A057) for Sony E, Fujifilm X, and Nikon Z
Final Thoughts on How to Take Photos of the Moon
In this article, we have reviewed many tips for better moon shots such as the best settings for moon photography, why a mirrorless camera delivers the best pictures of the moon, how to stabilize your setup with a tripod for night photography, and how to capture everything from a picture of a half-moon to the dramatic supermoon.
Mastering how to photograph the moon is a rewarding skill for photographers of all levels. By using a mirrorless camera, a quality lens to photograph the moon, and stabilizing your setup with a tripod for night photography, you’ll consistently capture the best pictures of the moon. From full moon photography settings to creative compositions like moon in daytime or the spectacular supermoon, the right approach ensures sharp results every time.
Learn more about Tamron lenses at an authorized Tamron dealer near you or shop directly at the official TAMRON Store to find the perfect lens for your moon photography journey.