Creating depth with a wide-angle lens is one of the most powerful ways to make your landscape photography more immersive and dynamic. In this post, renowned photographer Ian Plant shares his top tips and image examples to help you master this technique. Explore how leading lines, curves, and foreground elements can transform your wide-angle compositions into stunning, three-dimensional scenes.
By Guest Contributor Ian Plant
What You Will Learn in This Article
- How to use leading lines to guide the viewer’s eye through your photo
- Ways to compose engaging foregrounds that add visual progression
- Tips for balancing background points of interest with foreground elements
- The difference between using straight lines and curves for depth
- How to apply these techniques with both wide-angle and telephoto lenses
TIP 1: Use Leading Lines to Draw the Viewer Into the Scene
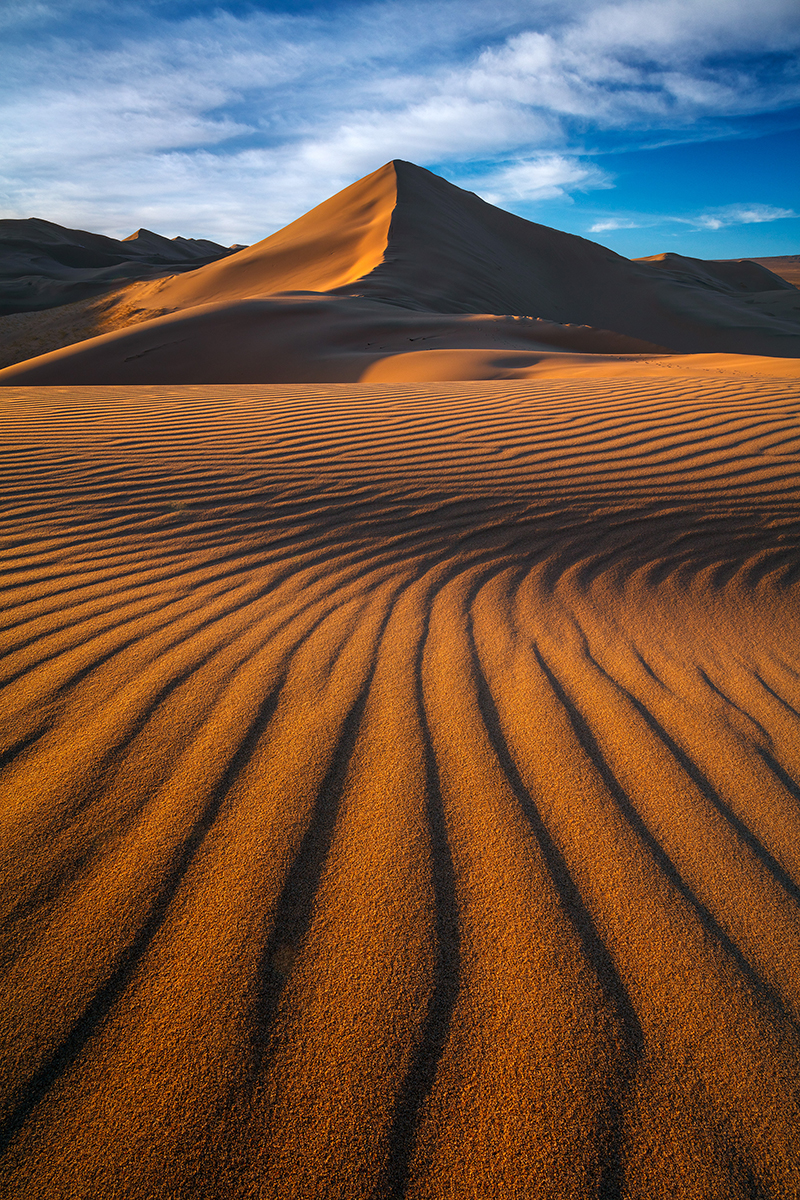
Leading lines connect the foreground of the image with the background. This creates a visual path for the viewer, encouraging them to more deeply explore the composition. The transition from foreground to mid-ground to background also creates the illusion of depth. Getting close with your wide-angle lens will exaggerate the size of your foreground lines; this is what I did to create depth using a wide-angle lens with these ripples in the sand dunes of the Gobi Desert of Mongolia.

TIP 2: Create Depth with a Wide-Angle Lens by Using an Engaging Foreground Element
Leading lines and other leading shapes are great, but you don’t always have to be so direct with your compositions. You can also create depth and draw the viewer into the scene using more subtle visual progressions. It all starts with an interesting foreground. For this photo taken in Torres del Paine National Park in Chile, I selected a curving stretch of shoreline to frame the reflection of the mountains and the gorgeous sunrise sky. I was very careful to avoid any visual merger between the curving shoreline and the reflections.

TIP 3: Anchor Your Composition with a Strong Background Point of Interest

Leading elements push the viewer’s eye, while a point of interest pulls the viewer to the part of the composition where the point of interest is located. This helps you to direct the viewer’s attention where you want it to be. For this photo taken in the dunes of Death Valley, I have two points of interest competing for the viewer’s attention: the setting sun to the right, and the lone photographer to the left. This a great composition tip for creating depth with a wide-angle lens.
TIP 4: Incorporate Curves to Create Flow and Hold Attention
Lines get directly to the point, but curves take their time getting there. Leading curves get the viewer’s eye moving back and forth, while they also draw the viewer deeper into the composition. This encourages the viewer to explore more of the photo. So, while the effect might not be as strong as when using leading lines, curves are more likely to hold the viewer’s interest longer. I used the squiggly curves created by water eroding the soft, colorful claystone of Badlands National Park; the curves come in from the lower edges and corners of the image, holding the viewer in the central part of the composition.

TIP 5: Ensure Your Leading Elements Direct Toward a Purpose
Leading lines that don’t lead anywhere important aren’t likely to successfully engage the viewer’s interest. It’s a good idea to first define your background point of interest, and then look for leading shapes that point the viewer in that direction. For this photo taken in a slot canyon in Utah, my point of interest is the sandstone in the background that is glowing with color, which is light reflected from the sunlit rocks at the top of the canyon. Once I had selected my background point of interest, I looked for leading elements that would point the viewer towards that spot; in this case, striations in the sandstone of the canyon wall.

TIP 6: Apply These Techniques Beyond Wide-Angle Photography
Although it can be easier to use leading shapes and a progression of visual elements when working with wide-angle lenses, you can often use the same techniques even when working with longer focal lengths. For this photo taken in the sand dunes of Death Valley during a sandstorm, I was using a short telephoto zoom. But I was still able to incorporate a visual progression of elements, in this case the multiple layers of shadow and sunset light on the dunes. The layers, working together, create a logical path for the viewer to explore more of the image, starting at the bottom (foreground) and working up to the dunes in the background at the top.

Final Thoughts on Creating Depth with a Wide-Angle Lens
Mastering the art of creating depth with a wide-angle lens can transform your photography from flat to captivating. By thoughtfully combining foreground interest, leading lines or curves, and a compelling background, you create immersive compositions that pull viewers into your world.
Whether you’re photographing desert dunes, mountain lakes, or slot canyons, these techniques—shared by Ian Plant—offer a clear path to making more impactful, story-driven images. So grab your wide-angle lens, get low, get close, and start exploring the layers of your landscape.
