Lake Tahoe: Through the Lens
Dalton Johnson’s Tamron 17-28mm F2.8 and 150-500mm VC lenses capture this jewel of the Sierra Nevada in all its glory.
Author: Jenn Gidman
Images: Dalton Johnson
Share Article
Nestled in the heart of the Sierra Nevada, Lake Tahoe is a breathtaking expanse of rugged peaks, alpine forests, and pristine waters. For adventure photographer Dalton Johnson, however, it’s more than just a scenic destination near home—it’s also a photographic canvas. “I grew up an hour and a half away from here, left to live on the road for about eight years, and now I’m back, more or less,” he says. “For this Lake Tahoe photo project, the goal was to photograph black bears, climb three of the tallest peaks in the area—Mount Rose, Freel Peak, and Mount Tallac—and sleep at the top of all three peaks to take pictures of the stars and sunrise.”
For his Lake Tahoe excursion, Dalton used the Tamron 17-28mm F/2.8 Di III RXD ultra-wide-angle zoom and the 150-500mm Di III VC VXD ultra-telephoto zoom lenses for his Sony mirrorless camera system. “I typically carry two lenses with me when I head out on these types of trips,” Dalton explains. “The 17-28mm is ideal for shooting wide views, which comes in handy at a beautiful location like Lake Tahoe, plus it offers that maximum F2.8 aperture to optimize the light I’m working with. It’s also super-light and compact—especially critical when I’m on long treks up the mountain. The 150-500mm VC, meanwhile, offers me the versatility and telephoto reach I need to zoom in on details and local wildlife. The Vibration Compensation (VC) feature on that lens ensures camera shake on the trails is minimized in my images.”
DALTON’S QUICK TIPS
Go big and wide.
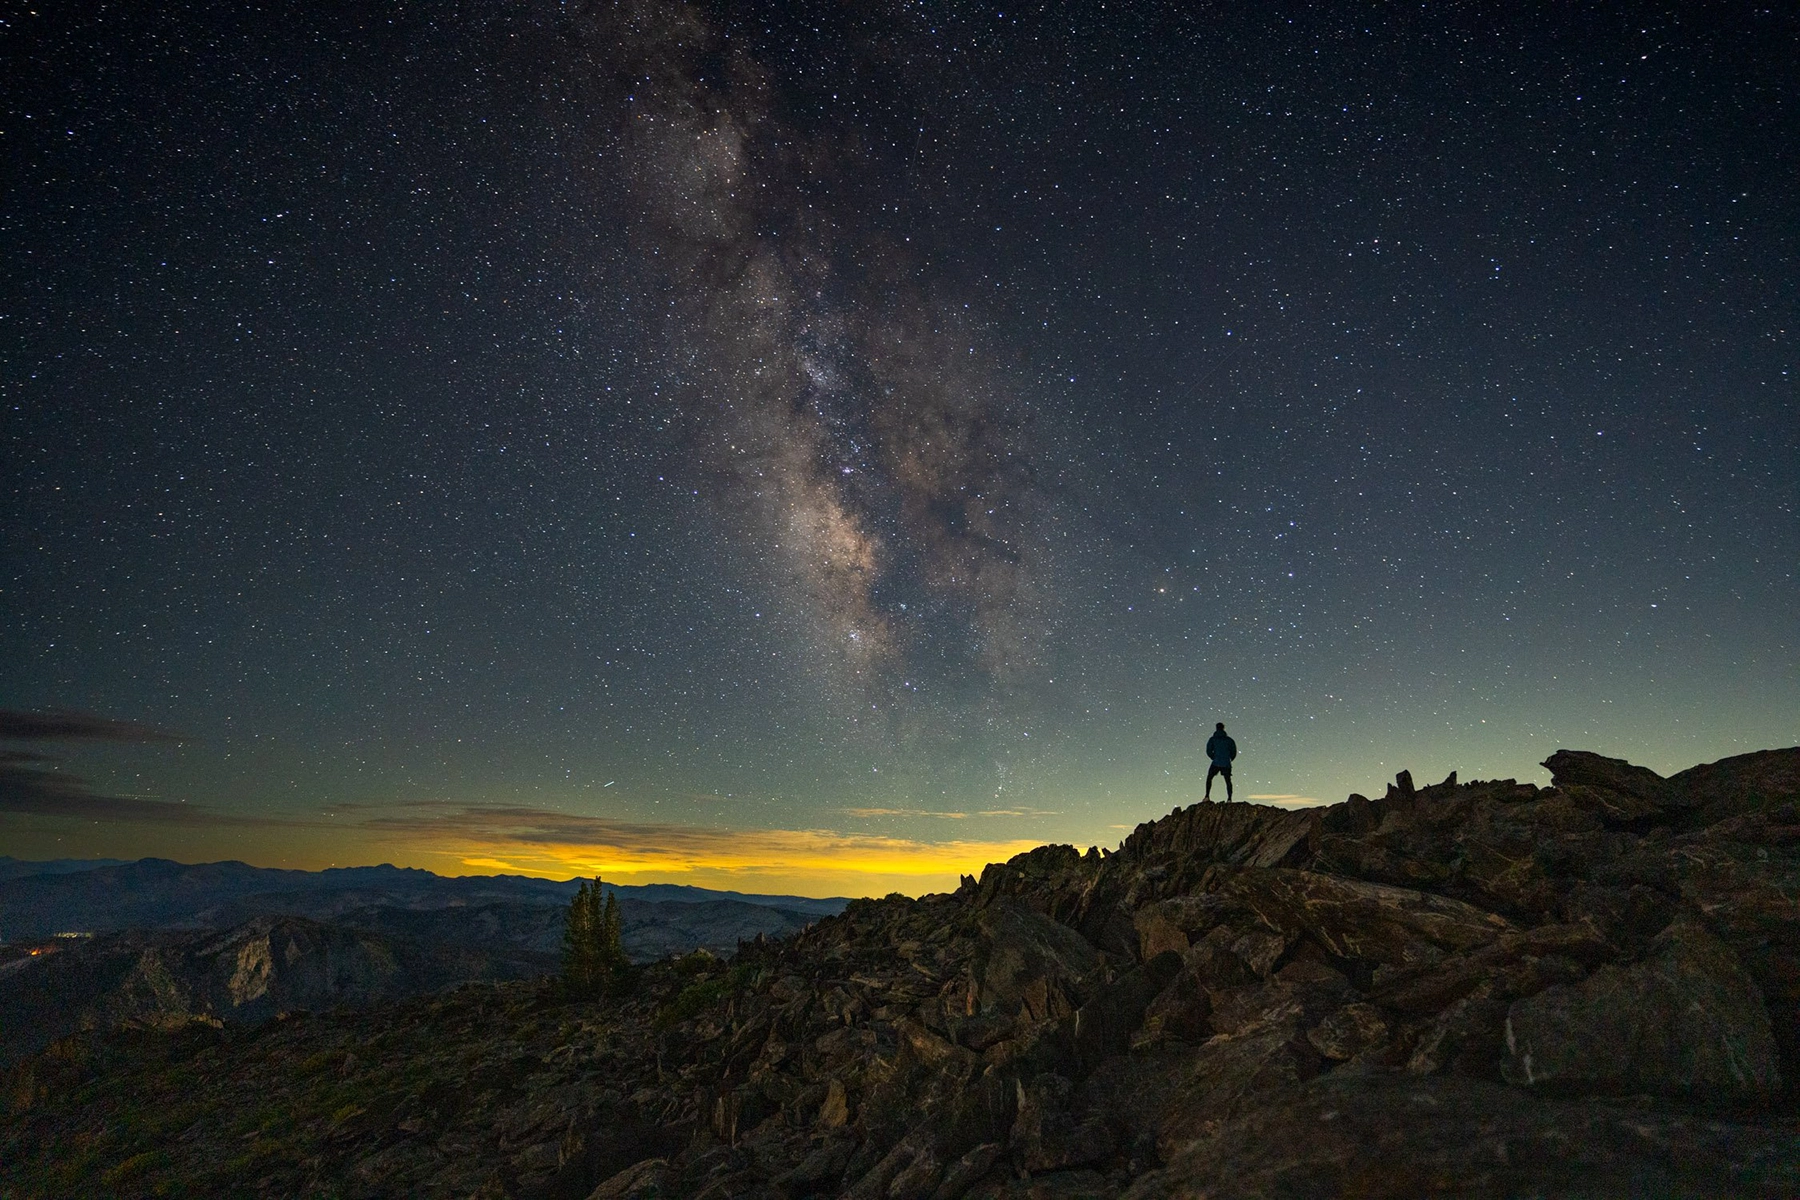
If you look at my selection of images here, you’ll notice they all have a slightly different feel. That’s because when I’m photographing landscapes, I always think about my images in terms of being wide, mid, or close. Both the sunstar at sunset photo and the Milky Way photo are perfect examples of using the Tamron 17-28mm F2.8 to best achieve a more expansive view. Try to think in layers for photos like this—foreground, midground, and background—to add depth and guide the viewer’s eye through the scene. Shooting during golden hour or blue hour can enhance the drama of a landscape, bringing out rich colors and textures.

Midrange photos, like the one here of the hiker along the ridgeline, are similar in terms of crafting an effective composition by using natural leading lines and strong foregrounds, if possible. In this case, the ridge subtly directs one’s attention toward the sunset on the horizon, while the hiker provides a more immediate focal point. This encourages the viewer to linger, exploring different aspects of the image rather than taking it in all at once.

Zoom in for wildlife.
This is where my Tamron 150-500mm VC lens comes into play, as you can see with the bear image here. This lens is an essential tool for capturing those detailed close-ups of wildlife while keeping a safe and respectful distance. Its powerful zoom allows me to frame tight shots of animals in their natural habitat without disturbing them. The black bears here in Tahoe are somewhat docile, if bears can be called docile, but this bear, which was chowing down on some pine nuts, wasn’t too happy that I was encroaching on its mealtime, even from a distance. It even false-charged me at one point, taking a step forward and growling at me as a warning. Luckily, I could zoom in from a far enough distance with the 150-500mm VC.

Get creative with framing.
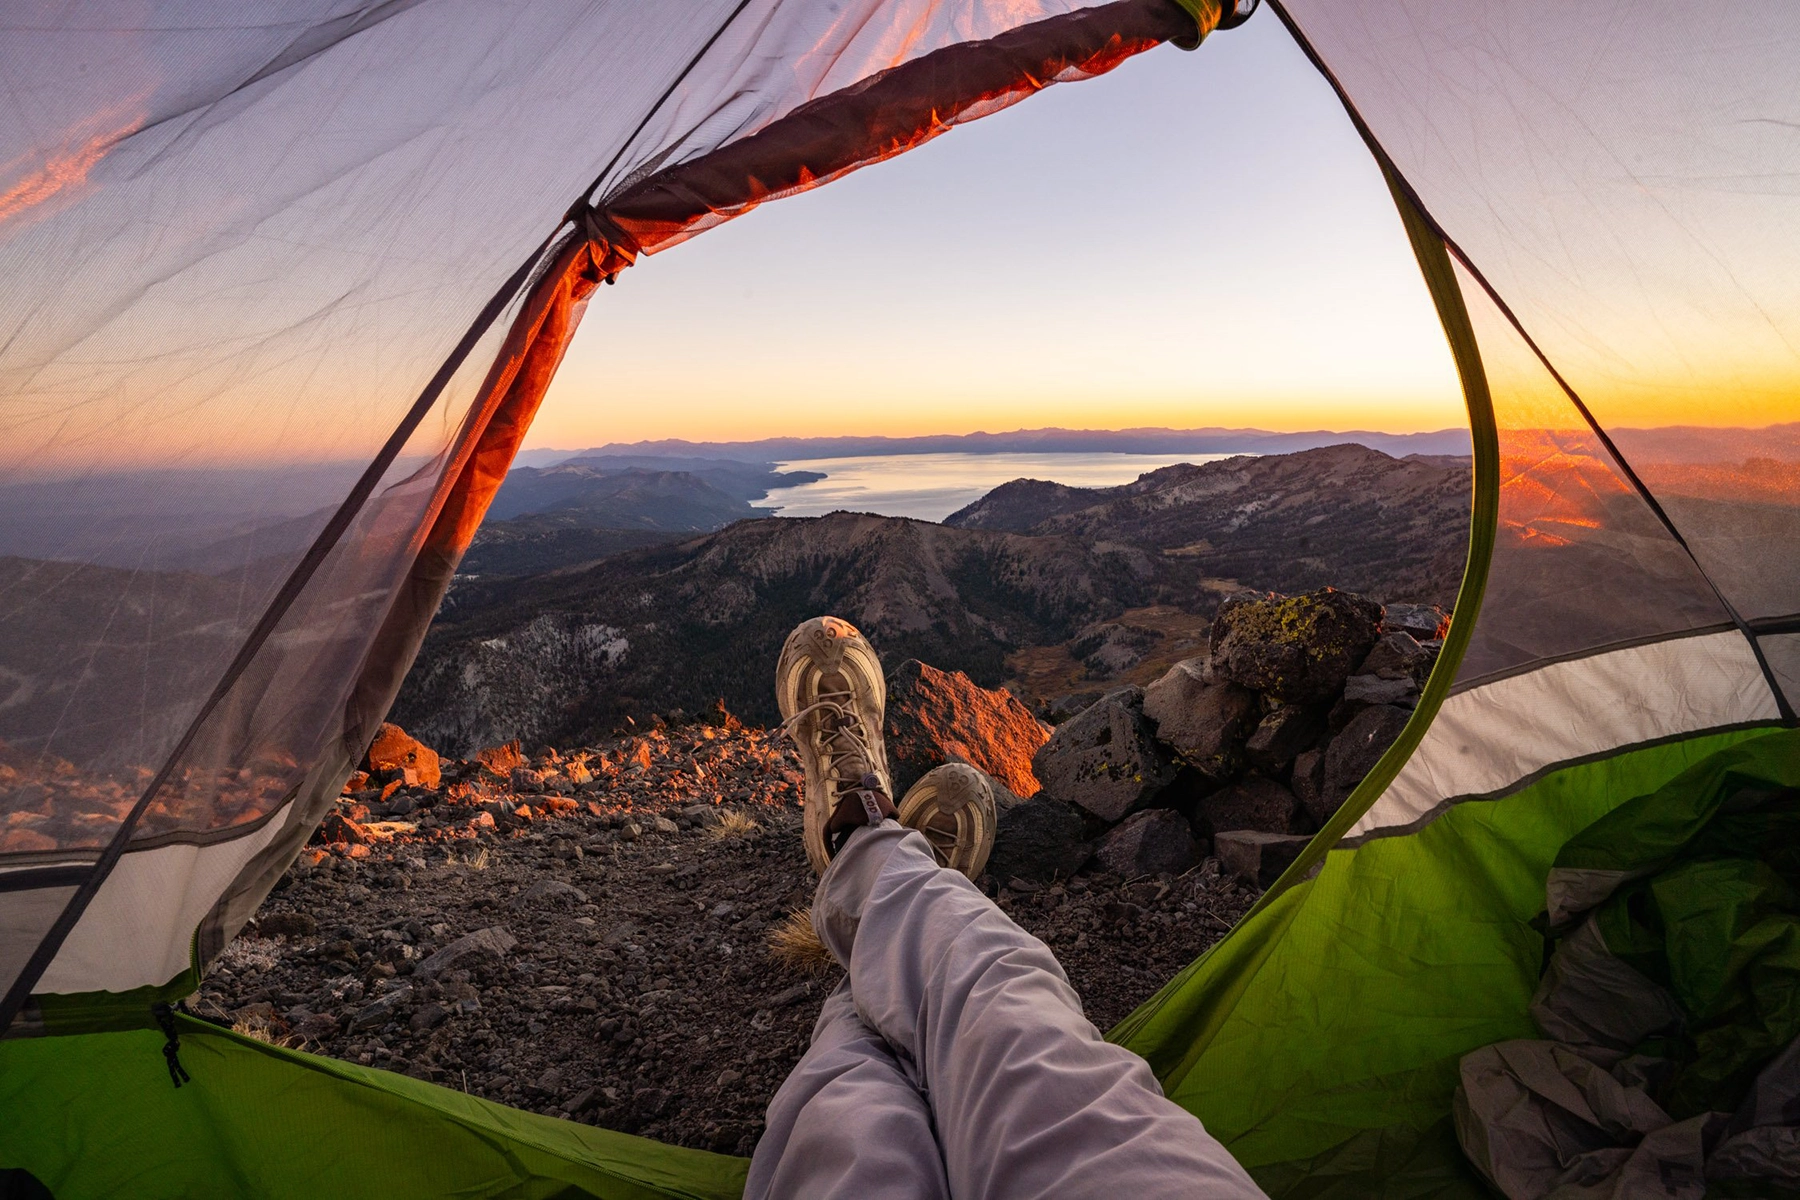
Framing a shot in innovative ways can transform a simple scene into an immersive experience, drawing viewers into the moment. Creating a “frame within a frame,” like I did with the tent photo here on top of Mount Rose, is one way you can achieve this. If I’d just exited the tent and snapped a photo, then I would have added too much white space to the sunrise image. This type of framing gives the image a more first-person type of view to draw viewers in, as if they’re waking up on Mount Rose, too.
Stick around after dark.
When shooting landscapes, don’t pack up after sunset—some of the most magical moments happen afterward. Typically, August and September are peak times of year to shoot the Milky Way in North America, though on the night I shot this image, a full moon was rising, which can limit the window of opportunity. I took the photo just after sunset, about 30 minutes before the moon actually rose, which is why the sky isn’t very dark yet. That burst of color on the horizon, however, with its unique blend of blues and oranges, helped make the shot. Using a fast Tamron lens like the 17-28mm F2.8 helps with light capture, making it easier to balance the night sky with any remaining ambient light.