By Jenn Gidman
Images by Frank Kuszaj
During the day, Frank Kuszaj is a professional real-estate photographer. When the sun goes down, however, he looks up toward the sky and into space. “I’ve always loved the stars,” the Missouri photographer, who’s been specializing in night sky photos for about a decade, says. “I remember in 1997, when the Hale-Bopp comet was visible to the naked eye from Earth—I was fascinated.”
Frank has been shooting of late with his Sony mirrorless camera with the Tamron 70-180mm F/2.8 Di III VXD telephoto lens. “First, I like that this lens isn’t too heavy, so it’s easy to carry with me out to the remote areas where I’m shooting,” he says. “Its focal-length range is also handy for astrophotography. I can go somewhat wide at 70mm, but then zoom in to 180mm when I’m doing my deep-sky photos. Plus, when I shoot in crop mode, that 180mm effectively becomes 270mm with the 1.5x crop factor on my Sony’s sensor.”
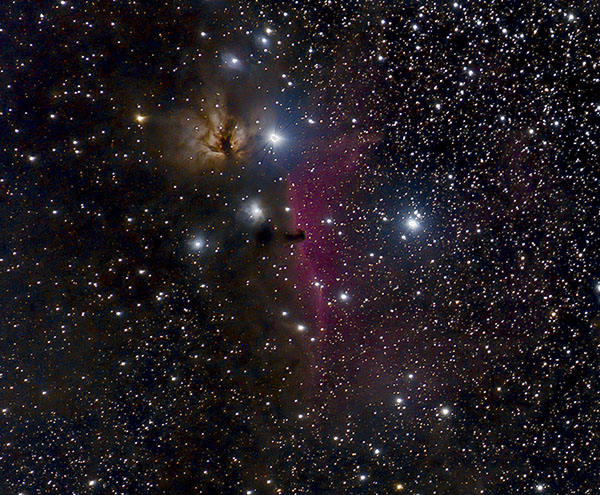
70-180mm (180mm), F/2.8, 2 minutes, ISO 1600
For those who want to try their own hand at astrophotography, Frank suggests first using a star finder app like Star Walk or Stellarium to help you pinpoint where the Milky Way and other celestial objects will be in the sky and at what time. Checking the weather in advance is also crucial, as clouds that roll in right as you’re about to start shooting can ruin the whole night.
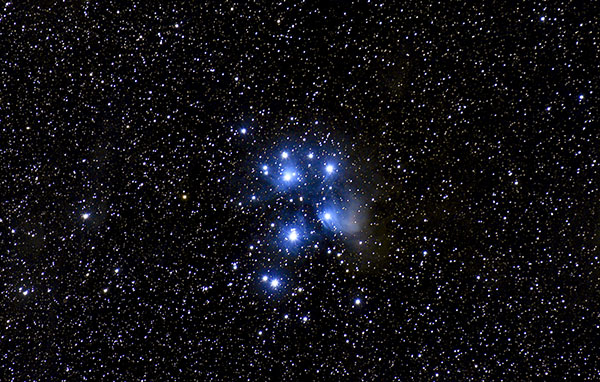
70-180mm (180 mm), F/3.5, 90 sec., ISO 1600
Looking for a place with as little light pollution as possible is also key, perhaps with the help of a dark-sky map. Frank lives in Eureka, a suburb of St. Louis, and he usually heads to a town called Cook Station, about a 2.5-hour drive from home, for his night sky photos. “There’s something called the Bortle Scale, which measures how much light pollution is in different areas, and Cook Station is about a 3 out of 9 (with 9 being the most light pollution, like what you’d find in the middle of a city),” he says. “It’s one of the darkest places in Missouri.”
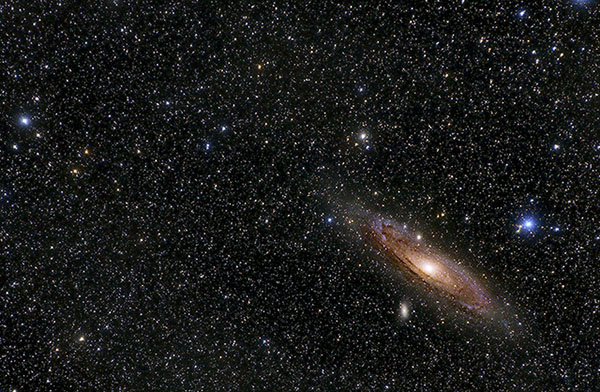
70-180mm (180 mm), F/2.8, 1 minute, ISO 1600
Once you’re there and ready to shoot, turn off the image stabilization on your camera. Make sure you have a sturdy tripod, as well as a remote camera release or intervalometer. “You don’t want to be touching your camera, to avoid shake,” he says. “I usually have my camera on an intervalometer so it takes the photos automatically. I also have a star tracker, which slowly moves in unison with the rotation of the Earth, so you can take a much longer exposure than you’d normally be able to. A star tracker is especially important when you’re shooting two-, three-, or four-minute-long exposures of galaxies while doing deep-sky photography.”
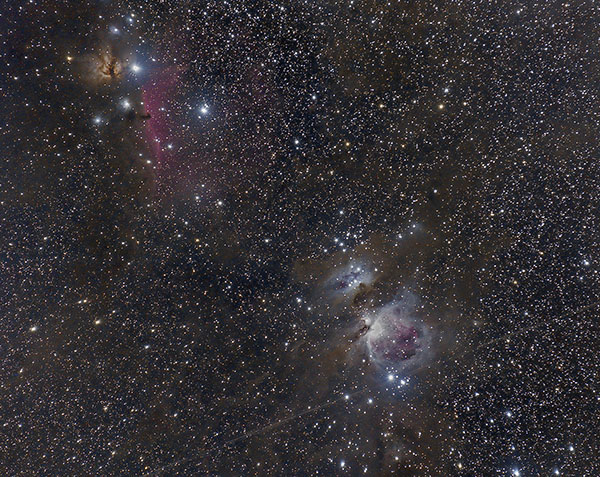
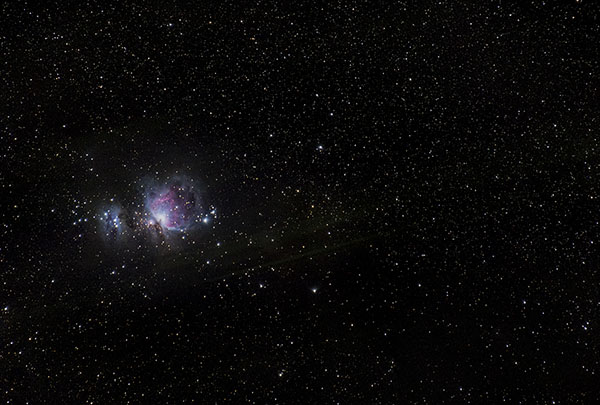
70-180mm (180mm), F/2.8, 90 seconds, ISO 1600
Frank usually has a plan beforehand of what he wants to shoot, and once he’s on-site, he’ll typically set up two cameras: one for deep sky photos, and another for random interesting shots that he catches on the fly. “For those photos, I’ll often see what’s out on the landscape that I can incorporate into the image, like a barn or old schoolhouse, just so that it’s not a straight galaxies photo,” he says. “When I am shooting the galaxies, nebulas, and star clusters, I’m usually zoomed all the way in, focused on whatever particular thing I’m concentrating on.”
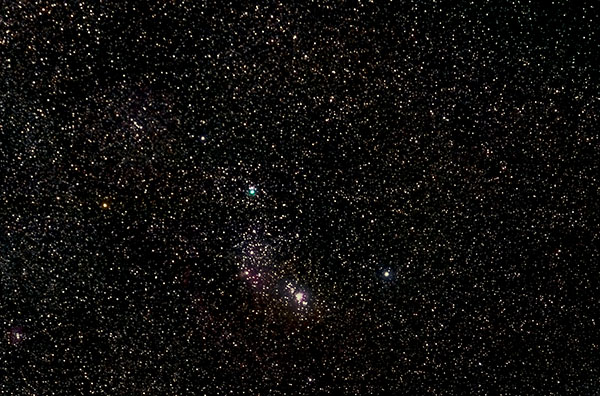
70-180mm (70mm), F/2.8, 1 minute, ISO 3200
For camera settings, Frank recommends an f-stop as low as possible (“I’m usually at F/2.8”), while his ISO is usually between 1600 and 6400. While his shutter speed varies depending on what he’s shooting, he often uses the 500 rule, which is 500 divided by whatever focal length he’s using. “This formula gives you the longest shutter speed you can use before your camera starts picking up star movement and capturing star trails,” he says.
For focusing purposes, Frank puts his camera in manual focus mode, then seeks out the brightest star or planet in the sky. “Then I switch my camera to Live View, zoom in as much as I can on that star or planet, and adjust my focus until that star or planet is like a pinpoint, perfectly focused,” he says. “Once I’ve got that set up, I don’t adjust my focus for the rest of the night.”
One of Frank’s recent photos of the Quadrantid meteor shower ended up being selected in February 2020 as NASA’s “Astronomy Picture of the Day.” “I took this in the middle of January from my usual spot,” he says. “I was out there with a friend to capture deep-sky photos, not to photograph the meteor shower.”
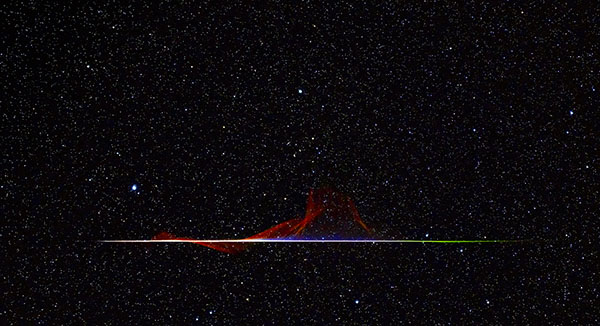
70-180mm (70mm), F/2.8, 1 minute, ISO 3200
Frank says they’d been taking pictures for about five hours when they decided to shoot one more target, the galaxy group known as the Leo Triplet, before packing it in. “I’d set my camera up to aim for that, ready to shoot one-minute-long exposures at F/2.8 and at 3200 ISO,” Frank says. “I had the camera going automatically for about 15 minutes. Suddenly, we saw a bright green meteor burn through the sky, like a flaming fireball. It left a trail after it that looked like smoke and lingered for five minutes.”
The friends started jumping up and down at having seen such a sight, though Frank didn’t think his camera had actually been able to capture it, as he’d had it zoomed in to capture the triplet. “But when I went to look at the camera, there the meteor was, almost perfectly horizontal in the frame,” he says. “I’d made a mistake when setting up the camera to capture the triplet: Instead of being all the way zoomed in at 180mm, I was at 70mm. If I’d had it set up the way I’d wanted it initially, it would have been zoomed in too much and I would never have captured this photo.”
Frank notes that those experimenting with night sky photography themselves shouldn’t get discouraged if their first outing or two doesn’t deliver exactly the photos they’re looking for. “You might fumble a bit in the beginning, because it takes a bit of practice to get astrophotography right,” Frank says. “But with a little time, you’ll soon be capturing awesome shots of the night sky.”
