Instant Savings
 Support
 Find a Dealer
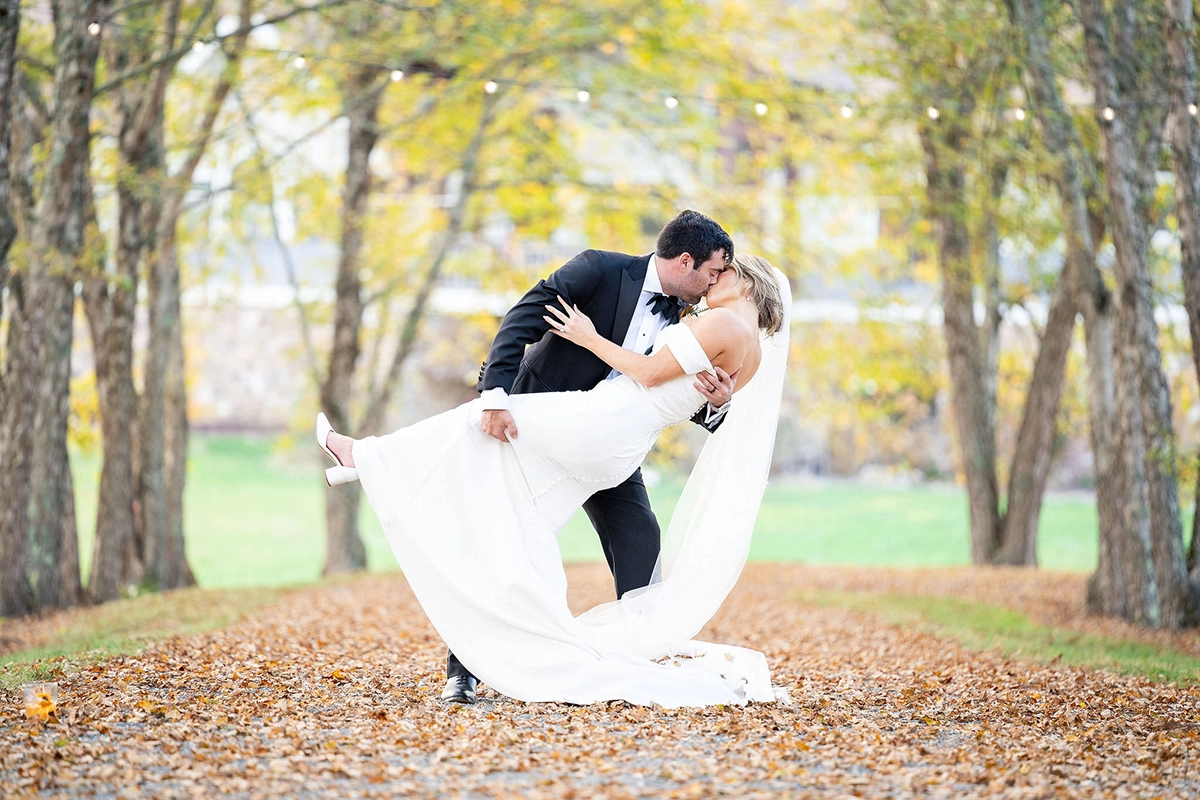
Four Practical Techniques to Elevate Your Wedding Photography
Strong wedding imagery comes from intentional choices, how you shape light, where you position yourself, and how you anticipate meaningful moments.
Author & Images: Scott Stockton
Share Article
Small Tweaks. Stronger Stories. Better Wedding Photos.
From wedding photographer Scott Stockton, these four practical techniques show how small adjustments in light, timing, and lens choice can make a big impact. Learn how to use hard light for dramatic details, natural window light for soft portraits, and longer focal lengths like the 70–180mm to capture candid moments without disrupting the day. A quick read packed with ideas you can use immediately.
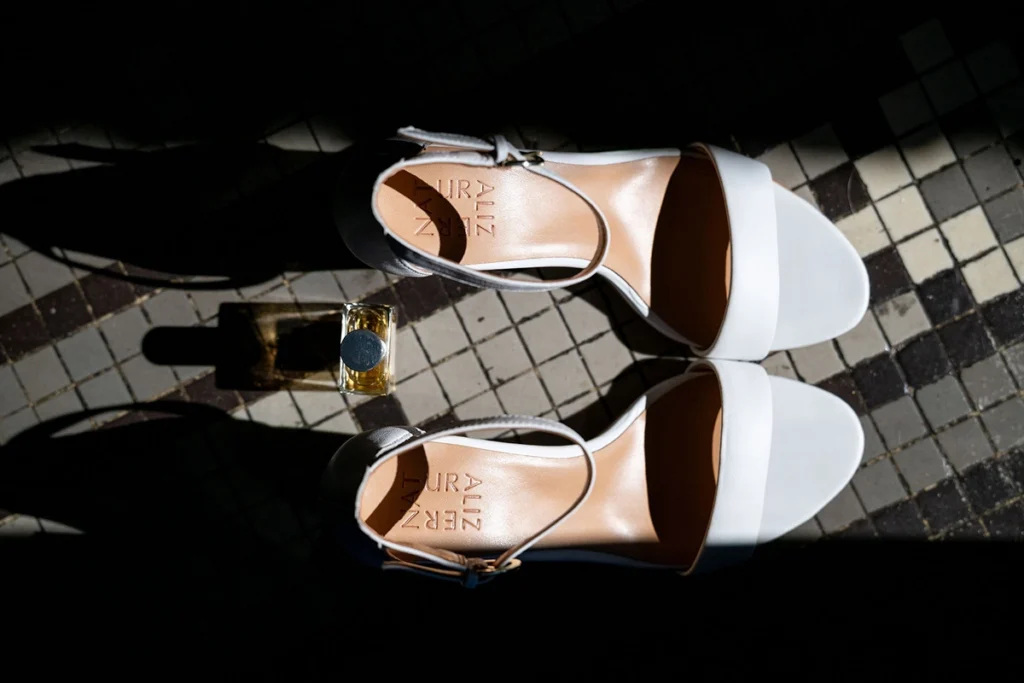
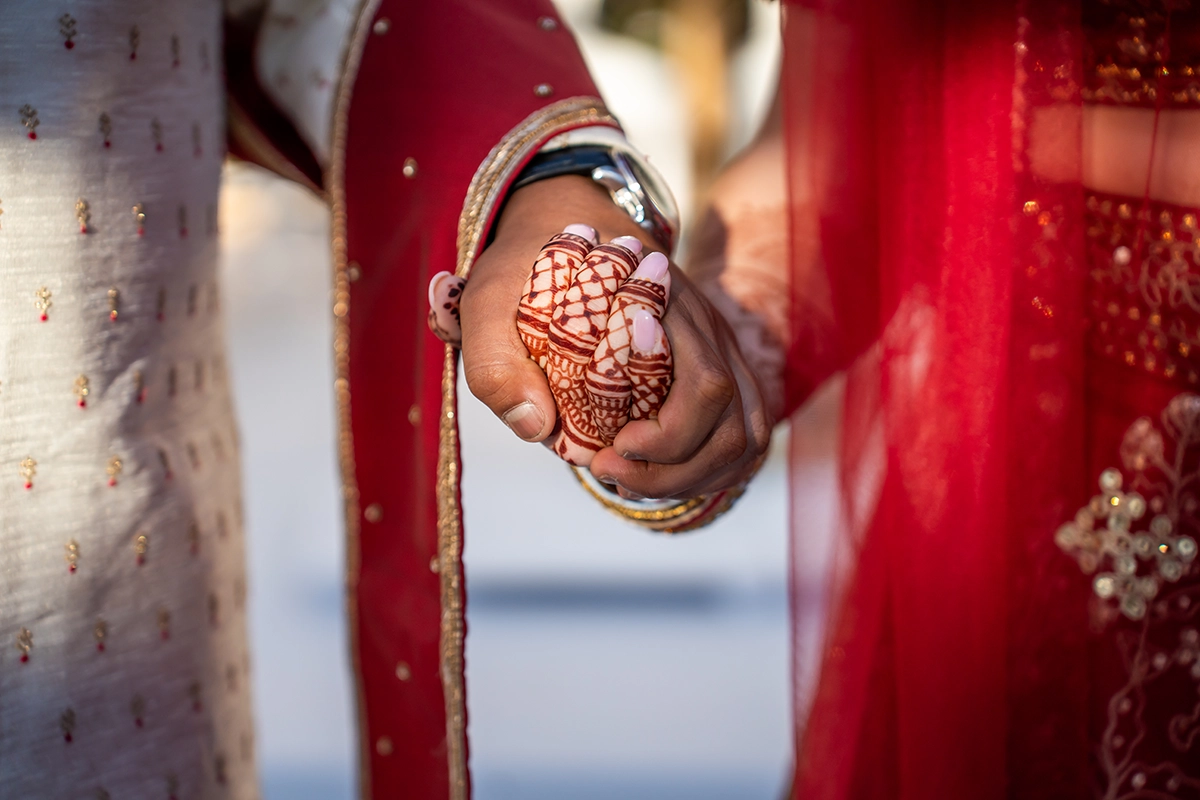
TIP 1: Use Harsh Light To Create Dramatic Detail Photos
My biggest cheat code for shooting details is using harsh light coming in from windows or doorways during the getting ready portion of the day. Hard light can be incredibly effective for photographing wedding details such as shoes, rings, invitations, florals, and dress textures. Placing objects in direct sunlight or using a bare light source creates strong highlights and defined shadows that add depth and dimension. Look for interesting shadow patterns, angles, and negative space to make small details feel intentional and visually striking. This technique brings contrast and texture into your detail imagery and helps elevate them beyond simple documentation.
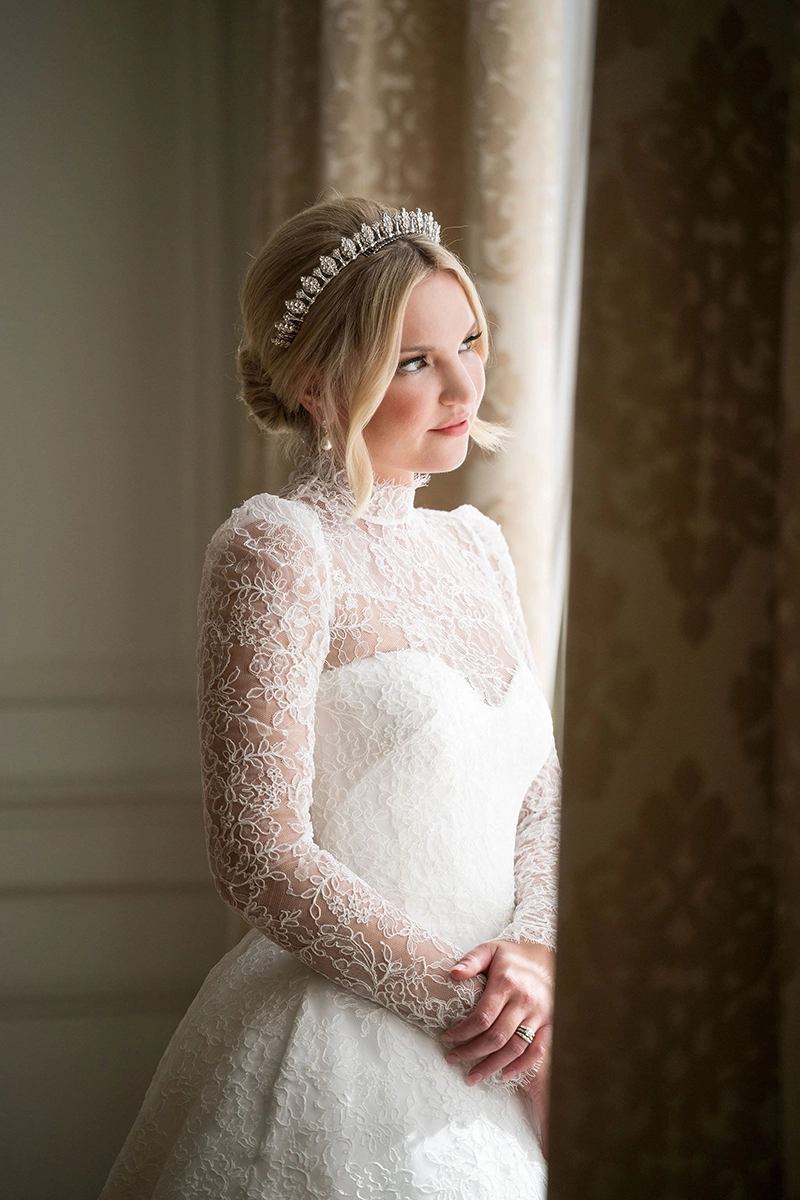
TIP 2: Use Window Light For Soft Natural Portraits
When photographing portraits during getting ready or quiet moments throughout the day, window light provides some of the most flattering and consistent lighting available. Position your subject at a slight angle to the window to create soft directional light across the face, and turn off overhead lights to avoid mixed color temperatures. If the sunlight is harsh, sheer curtains can help diffuse the light for smoother skin tones and gentle shadow transitions. This approach creates clean, portraits that feel natural.
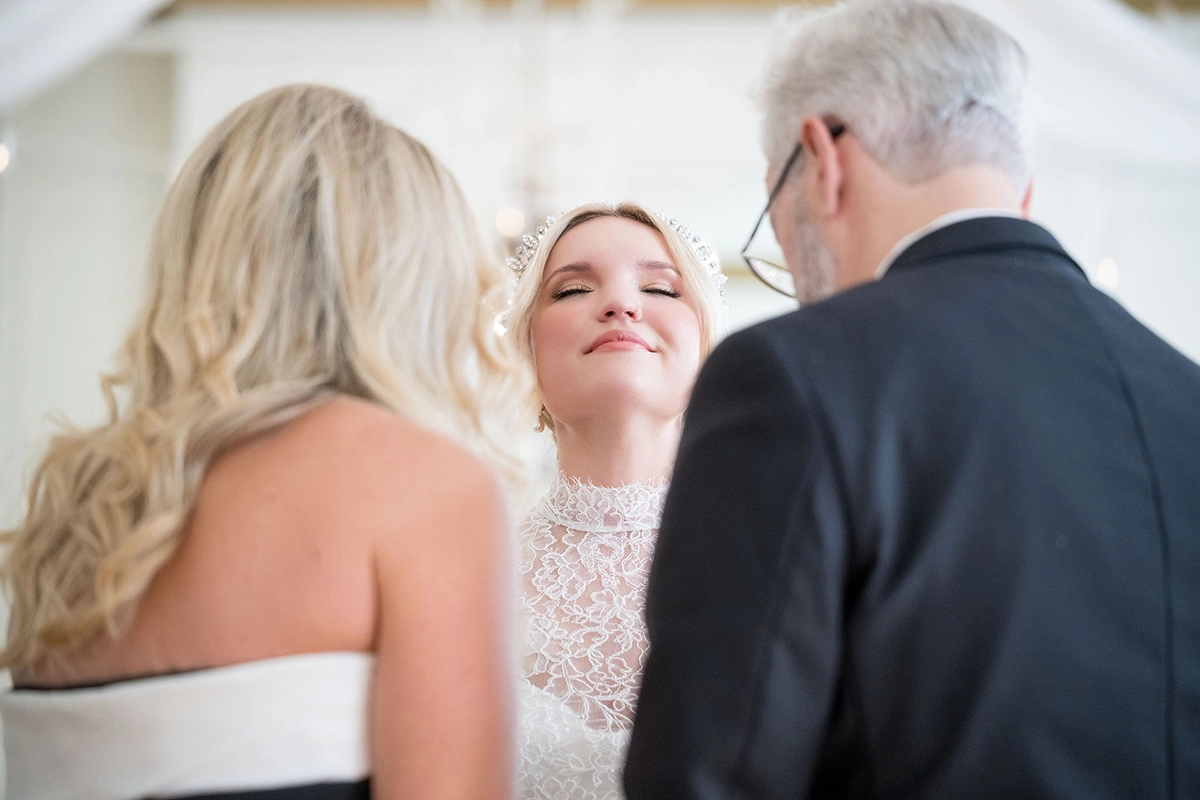
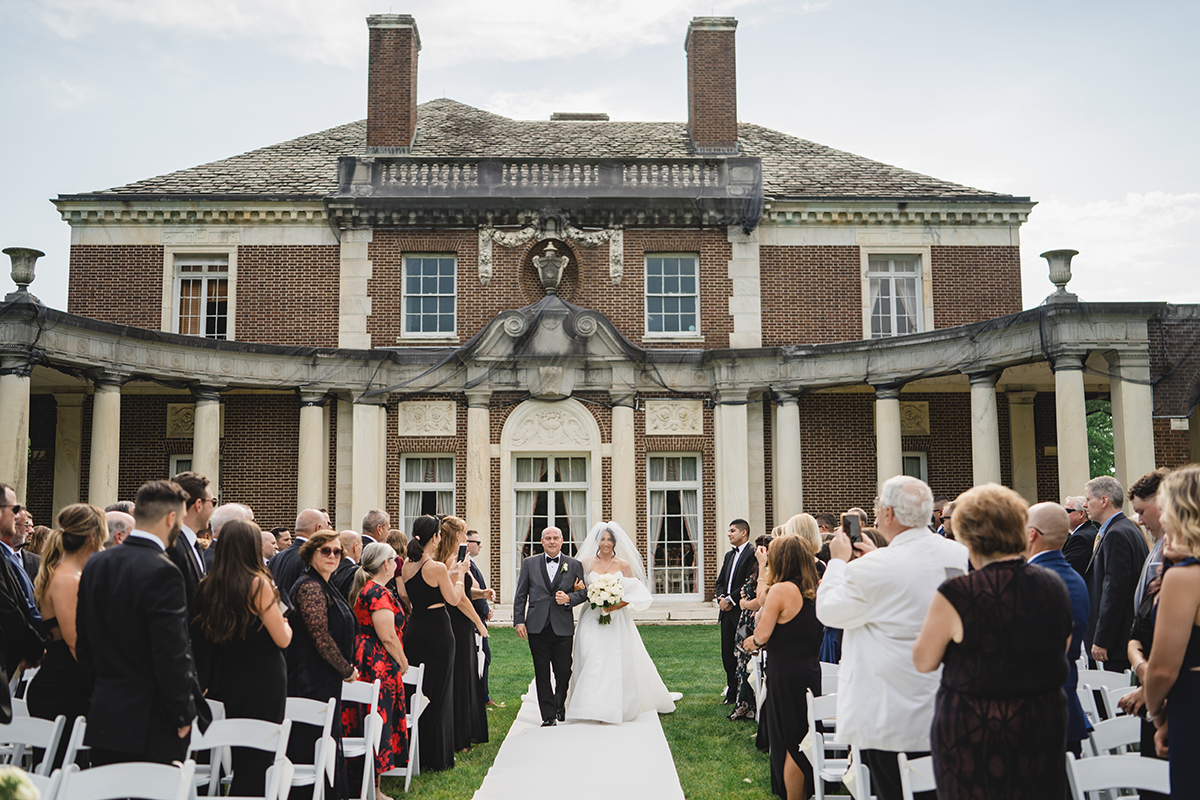
TIP 3: Step Back to Capture Authentic Candid Moments
Some of the most meaningful moments during a wedding day happen when people forget the camera is there. Shooting from a distance allows you to capture genuine reactions during vows, speeches, and emotional exchanges without interrupting the moment. Anticipate expressions rather than chasing them, use continuous autofocus when needed, and remain aware of guest sight-lines. This approach preserves authenticity and results in images that feel natural, immersive, and emotionally rich.
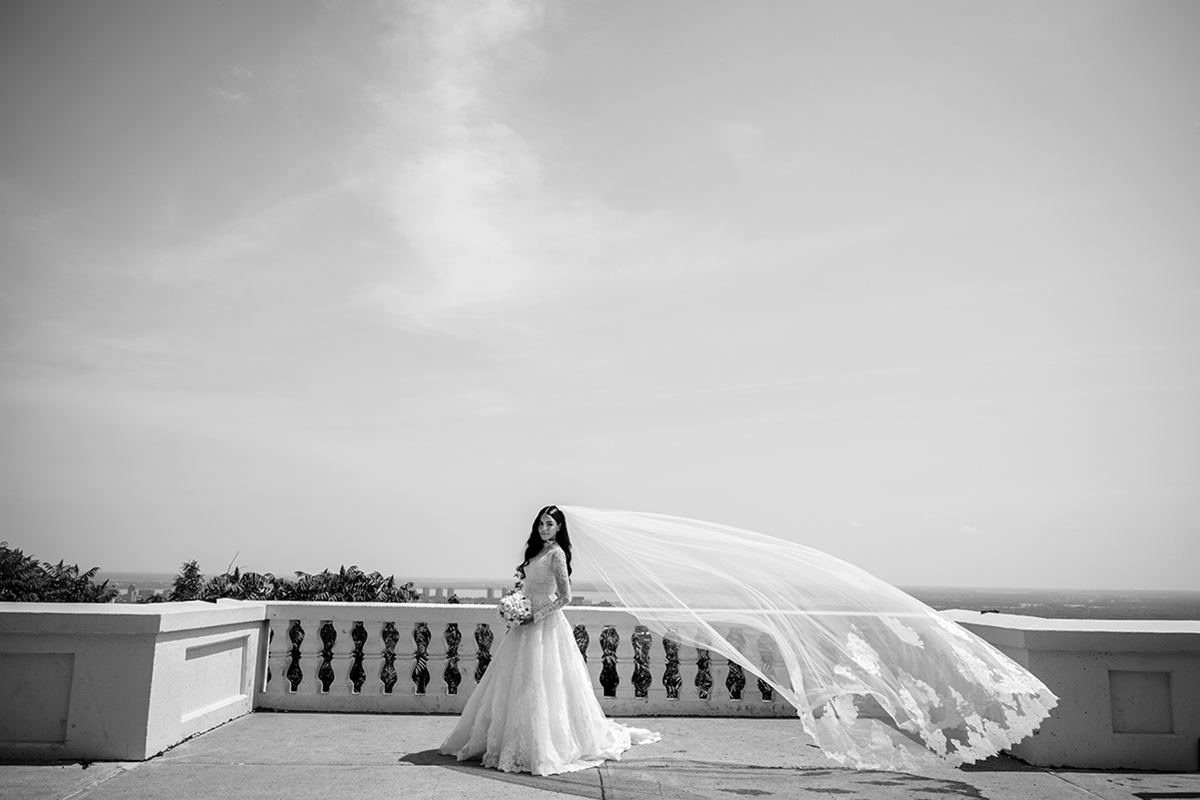
TIP 4: Use Compression For Flattering Couple Portraits
Longer focal lengths naturally compress facial features and backgrounds, creating a polished and cinematic look for couple portraits. By stepping back and allowing more distance between your subjects and the background, you can achieve smoother background separation and a more flattering perspective. Keep compositions clean, use foreground elements when available to add depth, and guide couples into relaxed, connected poses. Compression helps create images that feel intentional, refined, and visually impactful. For good compression you want to use telephoto lenses. My tool of choice is the 70-180 G2 lens.
At the end of the day, strong wedding imagery comes from intentional choices, how you shape light, where you position yourself, and how you anticipate meaningful moments. These simple techniques can elevate your work regardless of what camera system you’re using, but having reliable tools makes it easier to execute consistently in fast-paced, real-world wedding environments. The example images captured on the Tamron 70–180mm Z mount demonstrate how thoughtful technique paired with dependable performance can translate into clean, expressive, and professional results that couples will treasure for years to come.
See more by Scott Stockton on his Instagram