Instant Savings
 Support
 Find a Dealer
Essential Candid Wedding Photography Tips
Candid wedding photography is about capturing real emotion as it unfolds—unscripted, unpredictable, and full of life.
Author & Images: Rabih Madi
Share Article
Candid wedding photography is about capturing real emotion as it unfolds—unscripted, unpredictable, and full of life. For photographer Rabih Madi, tools like the TAMRON 28-75mm F/2.8 Di III VXD G2 and 16–30mm F/2.8 Di III VXD G2 offer the flexibility to react fast and tell richer stories. From using light to shape your subjects, to embracing wide angles for context, to anticipating those in-between moments, these tips will help you stay ready for the magic happening when no one’s posing.
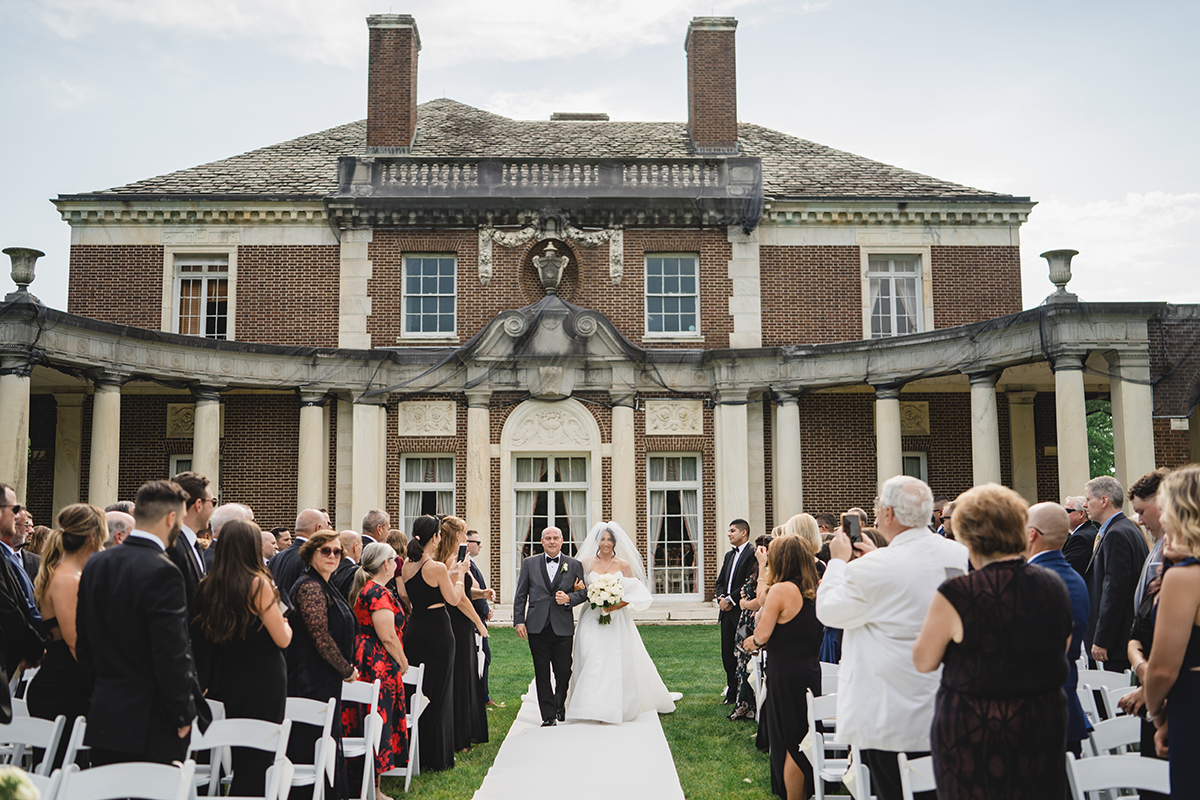
TIP 1: USING ENVIRONMENT TO CREATE STORY
A wedding day is packed with emotion, meaningful moments, and the occasional surprise (or ten) that no one saw coming. During the reception, I often switch to a wider focal length—like the trusty 28-75mm—to capture the energy of the room and the layers that build the story. Cropping too tightly can strip away those surrounding elements that add context and depth. And let’s be honest—these days, everyone is filming on their phones. So as the saying goes, if you can’t beat them… join them! By leaning into the wider end of the lens, I can frame the couple’s reaction alongside their guests’ wild applause as they make their grand entrance—phones in the air, smiles all around, and a whole lot of magic in one shot.
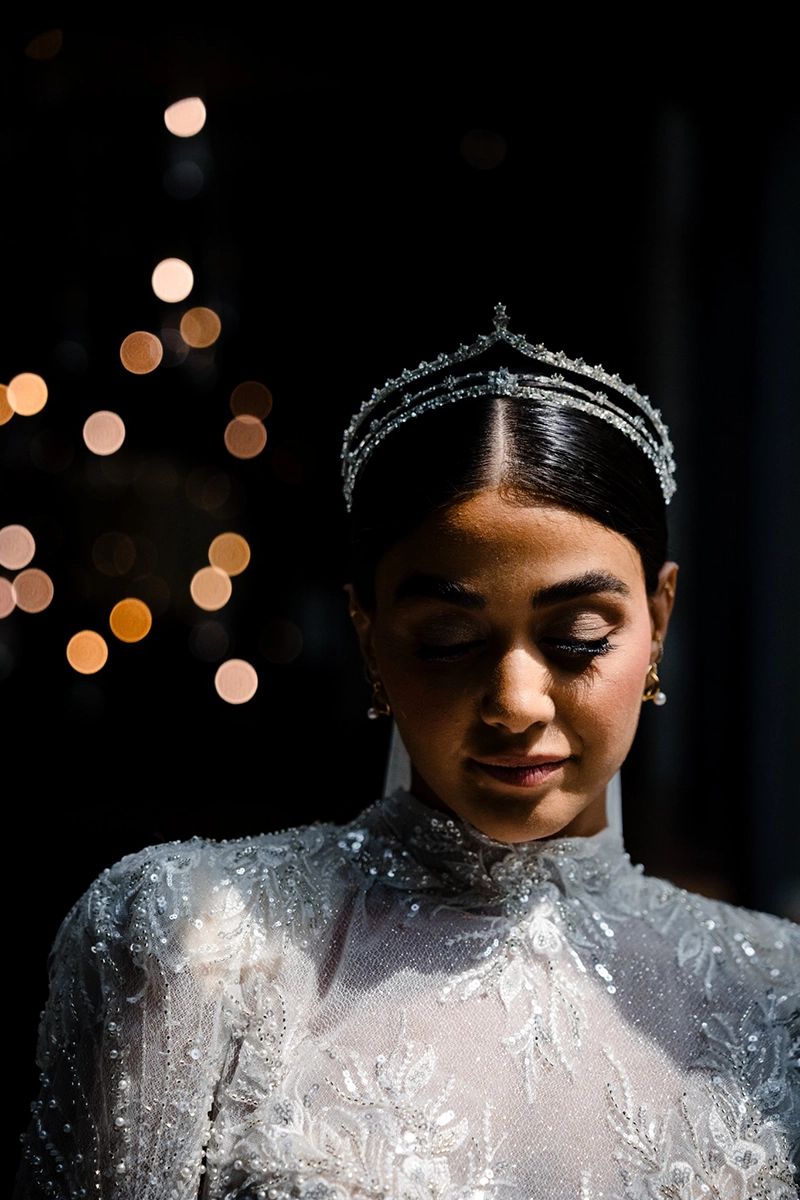
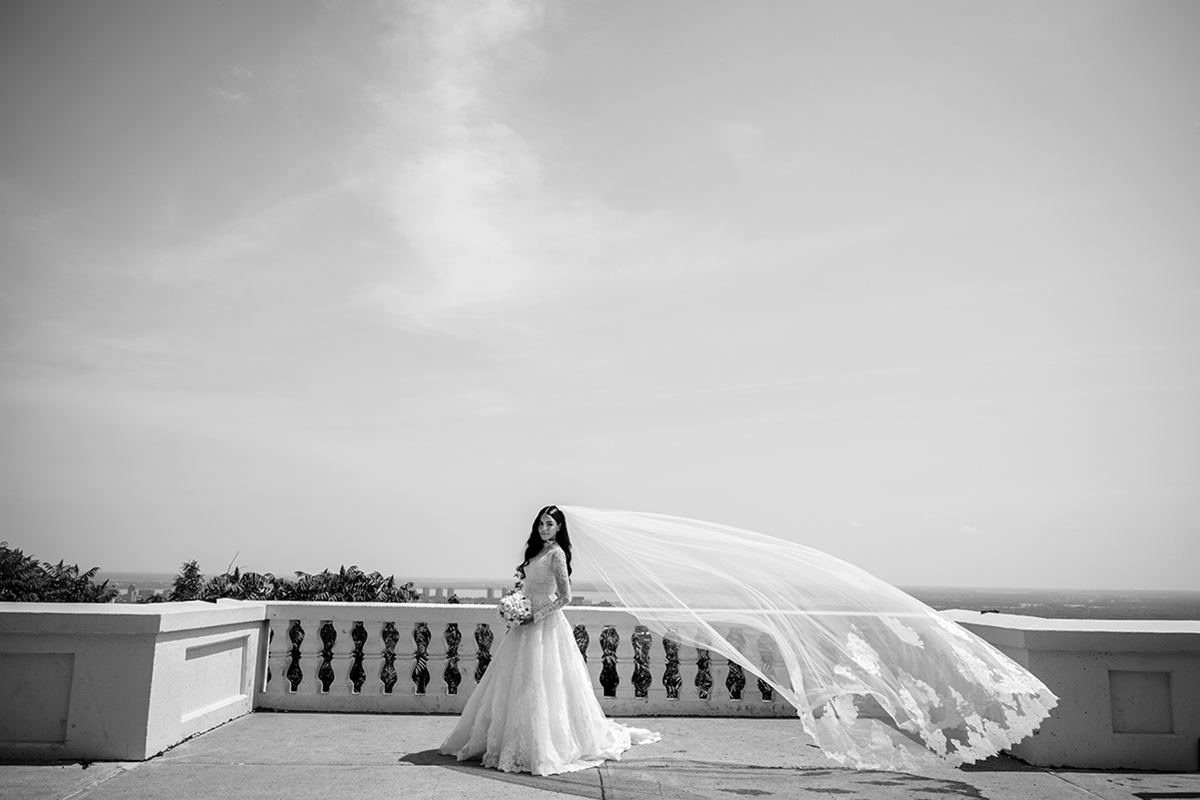
TIP 2: LIGHT SEPARATION USING YOUR CAMERA’S LIGHT METER
In my work, I rely on light separation to sculpt the subject away from the background or foreground, creating visual hierarchy and directing the viewer’s eye with intent. On a wedding day, I rarely use a light meter, but with natural light and modern camera sensors, evaluating contrast becomes intuitive. I begin by identifying the brightest point in the scene—typically the bride’s face or dress—then expose for that highlight. Next, I pan toward the shadows to assess range. I prefer a dynamic range difference of 2 to 3 stops, which preserves highlight detail while retaining enough latitude in the shadows for subtle recovery in post.
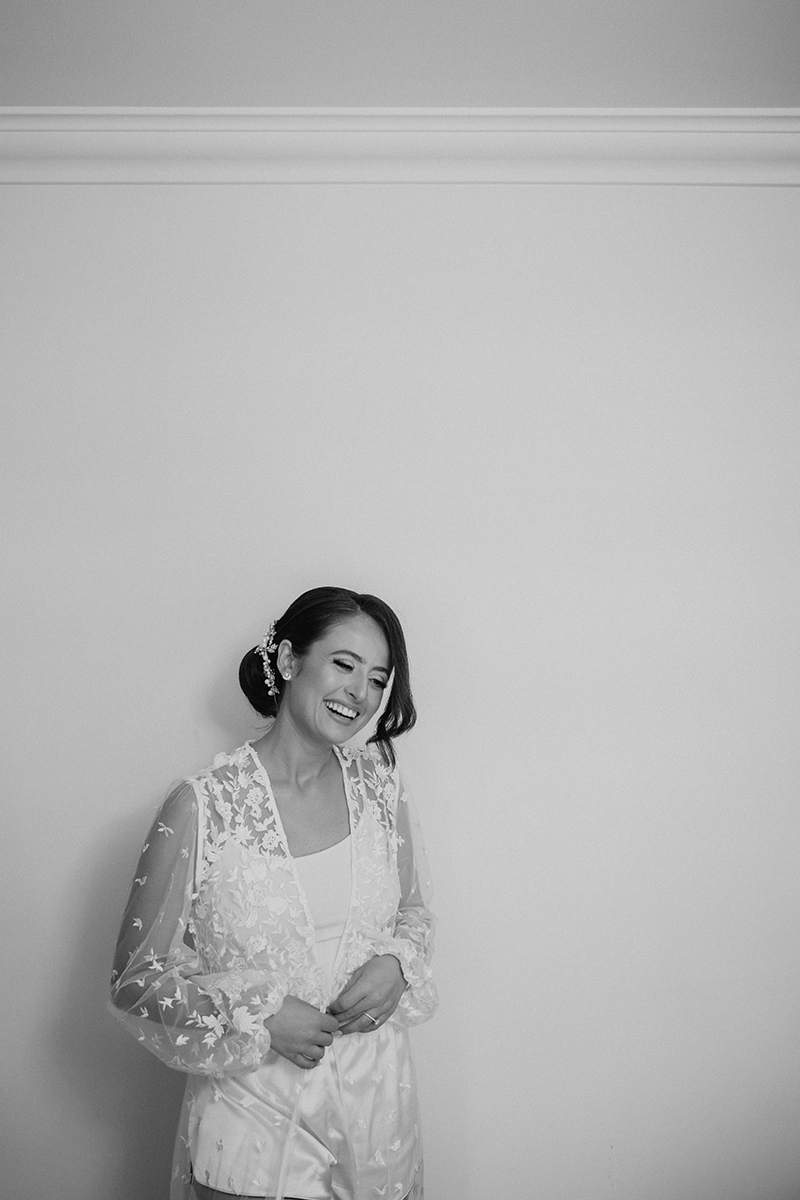
TIP 3: ANTICIPATION IN THE “IN BETWEEN MOMENTS”
As we all know, weddings are packed with emotion—but I often see photographers chasing “the big moment” and overlooking the in-betweens. And honestly, that’s where the real magic hides. In this photo, the bride was waiting for someone to arrive, and you could feel the excitement building—she was just about to get dressed. So, I did what any hopeful (and slightly sneaky) photographer would do: I quietly waited, camera ready, settings dialed in, silently rooting for either laughter or some good old-fashioned happy tears. Spoiler alert: I wasn’t disappointed. The key is to hope for these moments, but always be ready—even if nothing happens. Because when it does… that’s the shot people remember.
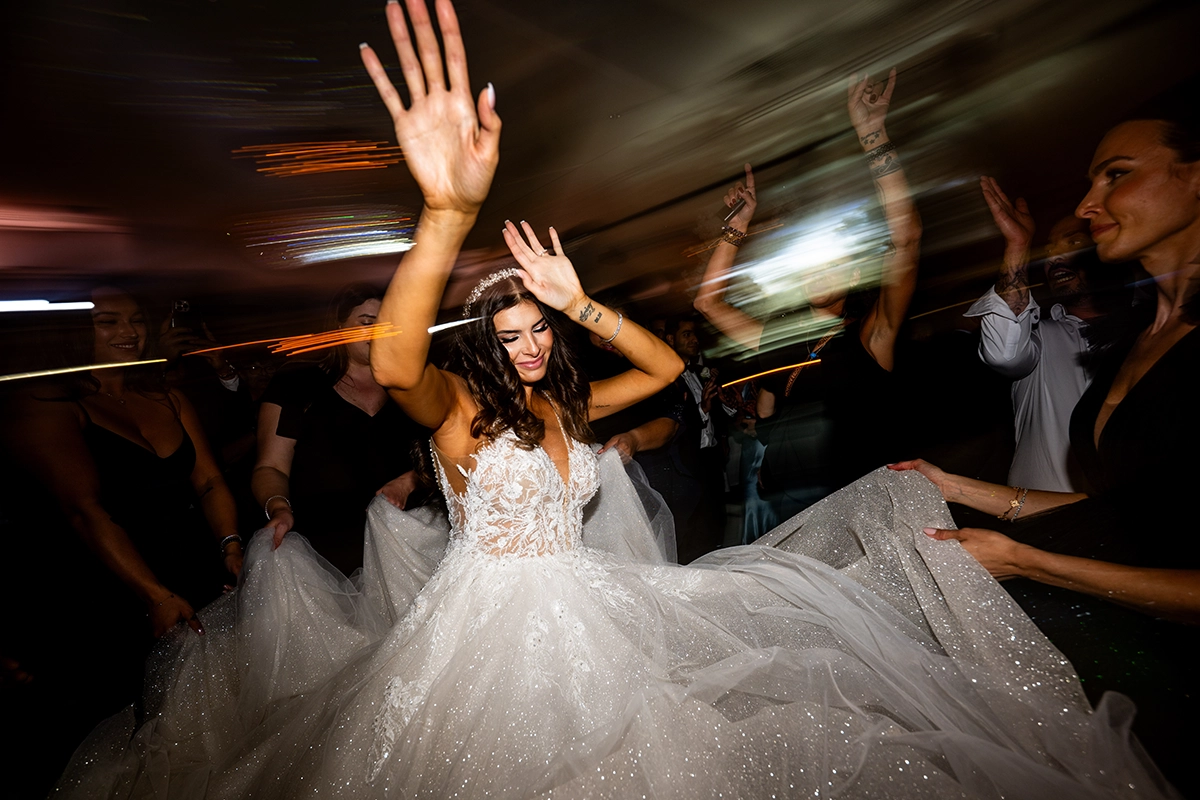
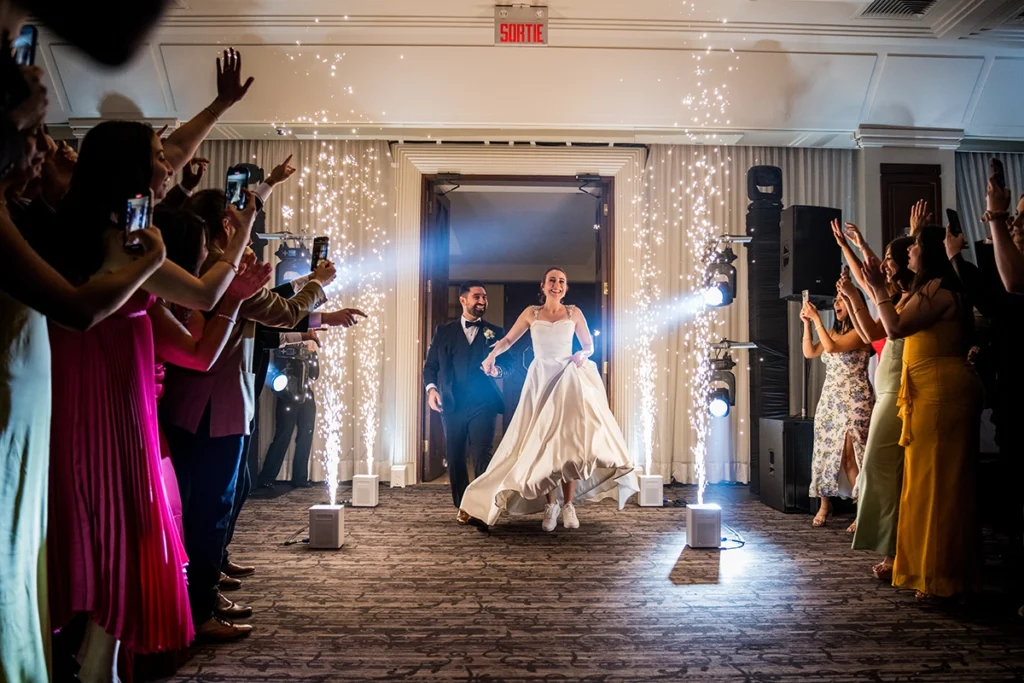
TIP 4: DIRECT FLASH + MOTION
I’m a huge fan of manual flash — for me, it’s the most reliable way to stay in full control of how my image turns out. That said, there are moments when TTL truly shines, and this is one of them. When shooting with direct flash, TTL handles exposure beautifully, especially when your subjects are close but constantly moving in and out of range.
For a creative twist, try shutter drag: set your shutter speed between 1/10 and 1/20, and as you take the shot, gently twist or move your camera. This creates a dynamic sense of motion while the flash freezes your subject in crisp focus.
Another perk of using direct flash is efficiency — since the flash power stays low, you can shoot all night long without worrying about draining your batteries.
TIP 5: LAYERING FOR STORY TELLING
As photographers, our goal is to tell our subject’s story within a single frame. After all, isn’t it said that a picture is worth a thousand words? That’s exactly what I aim for. By using a wide-angle lens, I can incorporate multiple elements into the scene to help convey that story—almost like capturing an environmental portrait.
When shooting wide, be mindful of where you position your subject. Avoid placing them too close to the edges to minimize distortion. While this lens performs incredibly well in that regard, keeping your subject near the center ensures the sharpest and most natural results.
Once your subject placement is set, focus on composing the supporting elements in your frame to create a sense of balance and harmony—that’s where storytelling truly comes to life.
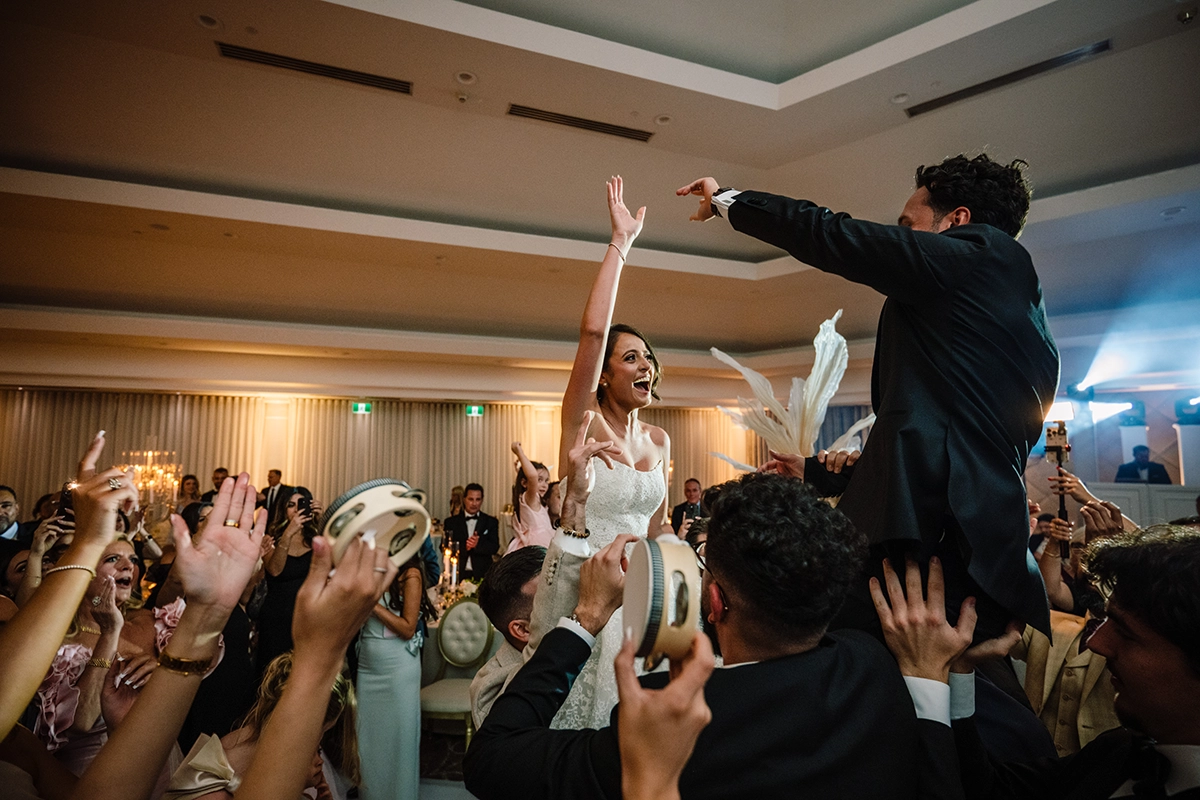
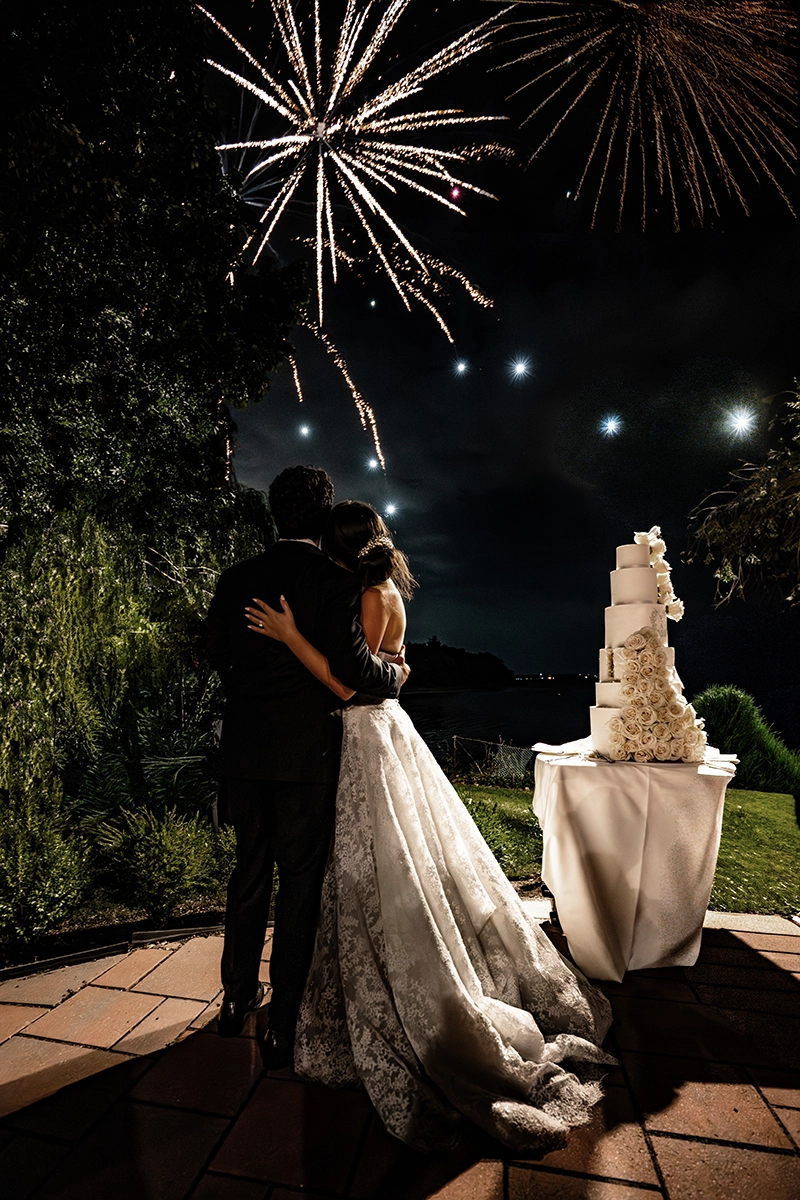
TIP 6: WIDE SIDE FOR SAFE SIDE
There are moments during a wedding day when, as a photographer, I have zero control over what’s about to happen. Will it turn into a wild party? Or will it stay calm and quiet? One thing’s for sure—you have to be ready for the unexpected. When the party starts, it really starts! That’s why having a wide-angle lens is essential. It lets me capture the energy of the crowd while still keeping the bride and groom as the main focus.
The wider the lens, the safer you are when it comes to keeping them in focus—because with all the jumping, dancing, pushing, and chaos, it’s nearly impossible to keep your eye glued to the viewfinder. Most of the time, you’re shooting on instinct and hoping for the best. That’s exactly why the 16–30mm is my go-to for capturing the full energy and emotion of the wedding party!