 Instant Savings
 Support
 Find a Dealer
- Explore the importance of focus stacking in macro photography and how you can create images with a greater depth of field.
- Learn about the equipment you need, from cameras and lenses to tripods and software.
- Get a step-by-step guide on how to perform focus stacking.
- Understand focus stacking post-processing techniques.
- Learn how to overcome common challenges.
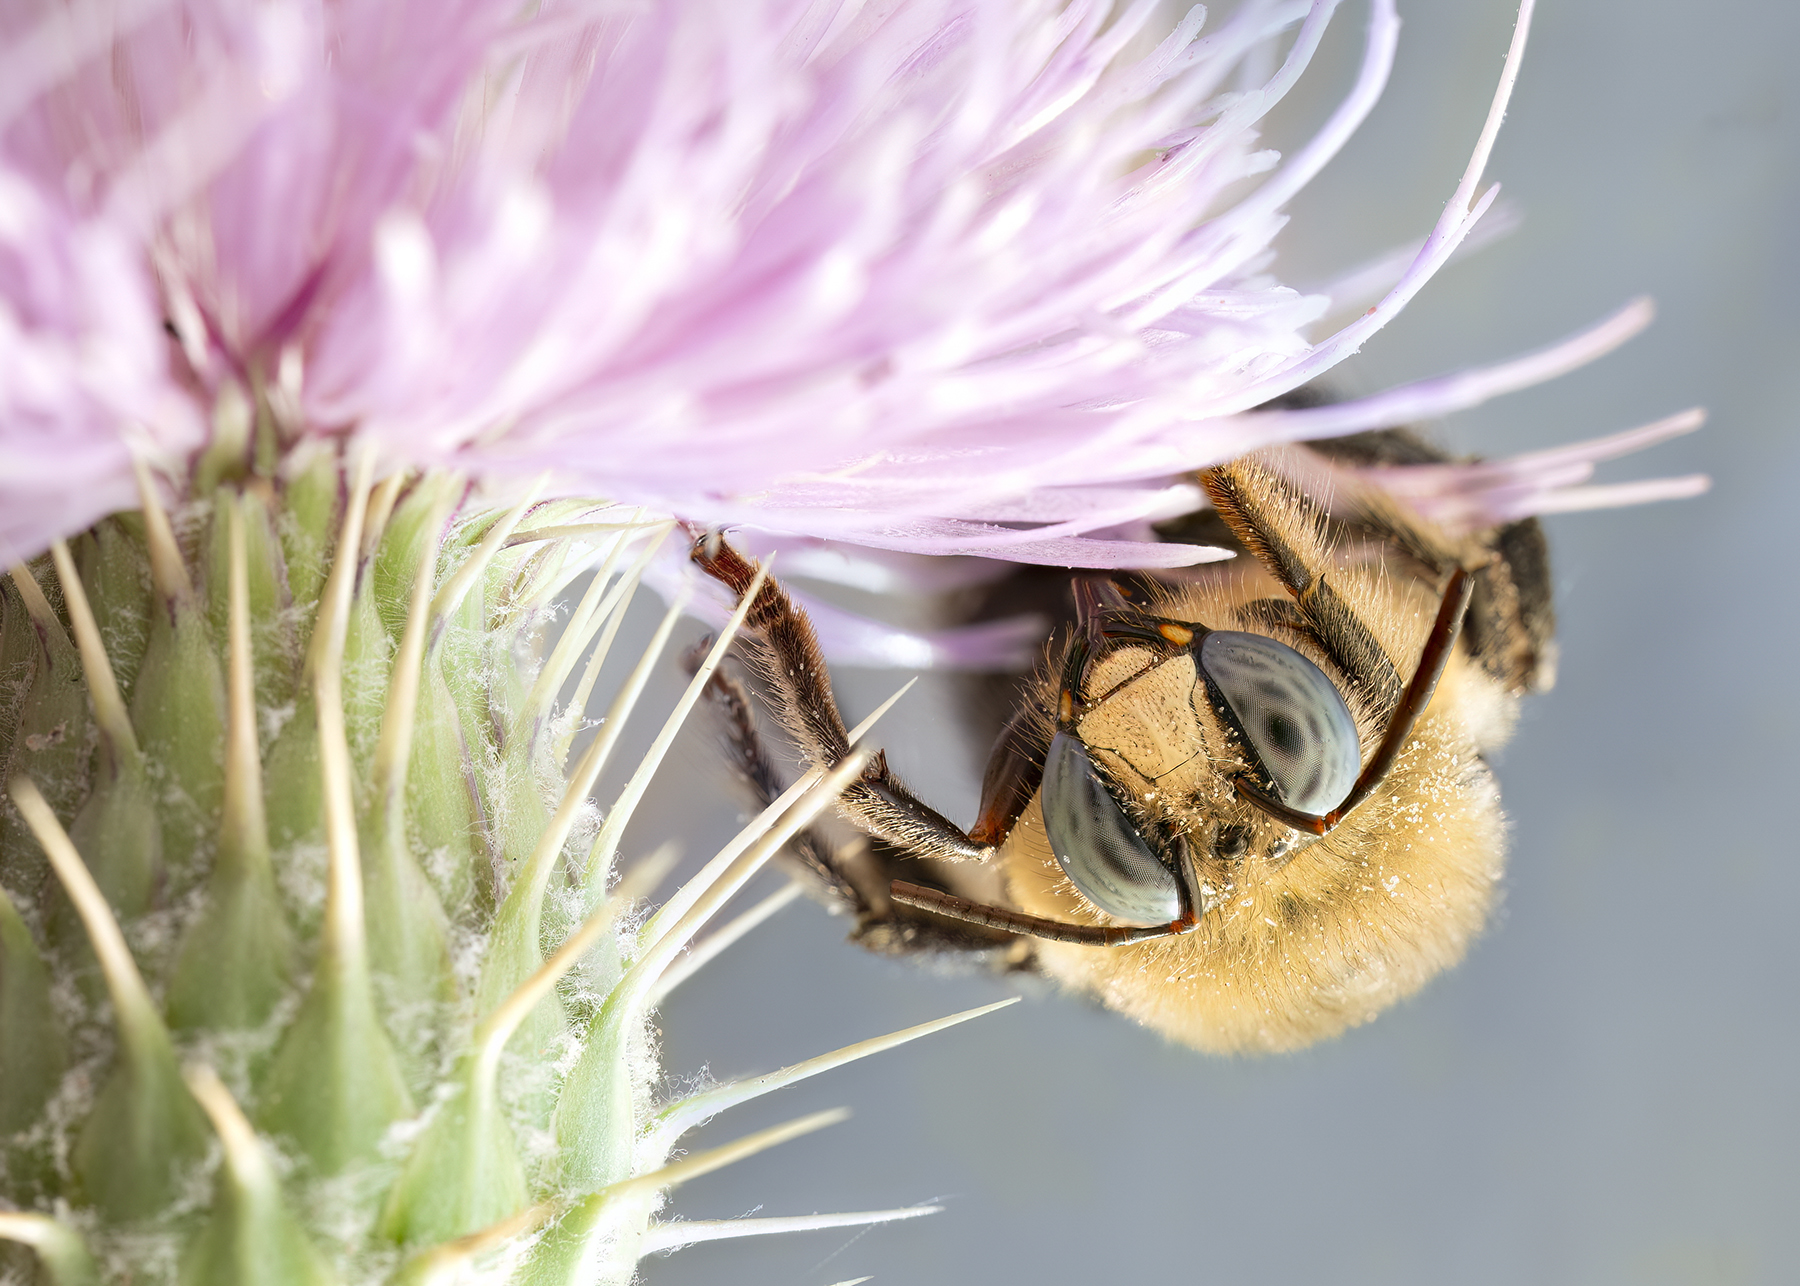
Macro photography is fascinating because it lets us see the world in ways our eyes can’t. But it comes with challenges. One of the biggest is achieving a large depth of field.
This is where macro focus stacking techniques come into play. They can help you capture sharp, detailed images from foreground to background.
This guide is part 2 of a 4-part series on macro photography and video. We hope it will help you master macro focus stacking.
Understanding Macro Focus Stacking
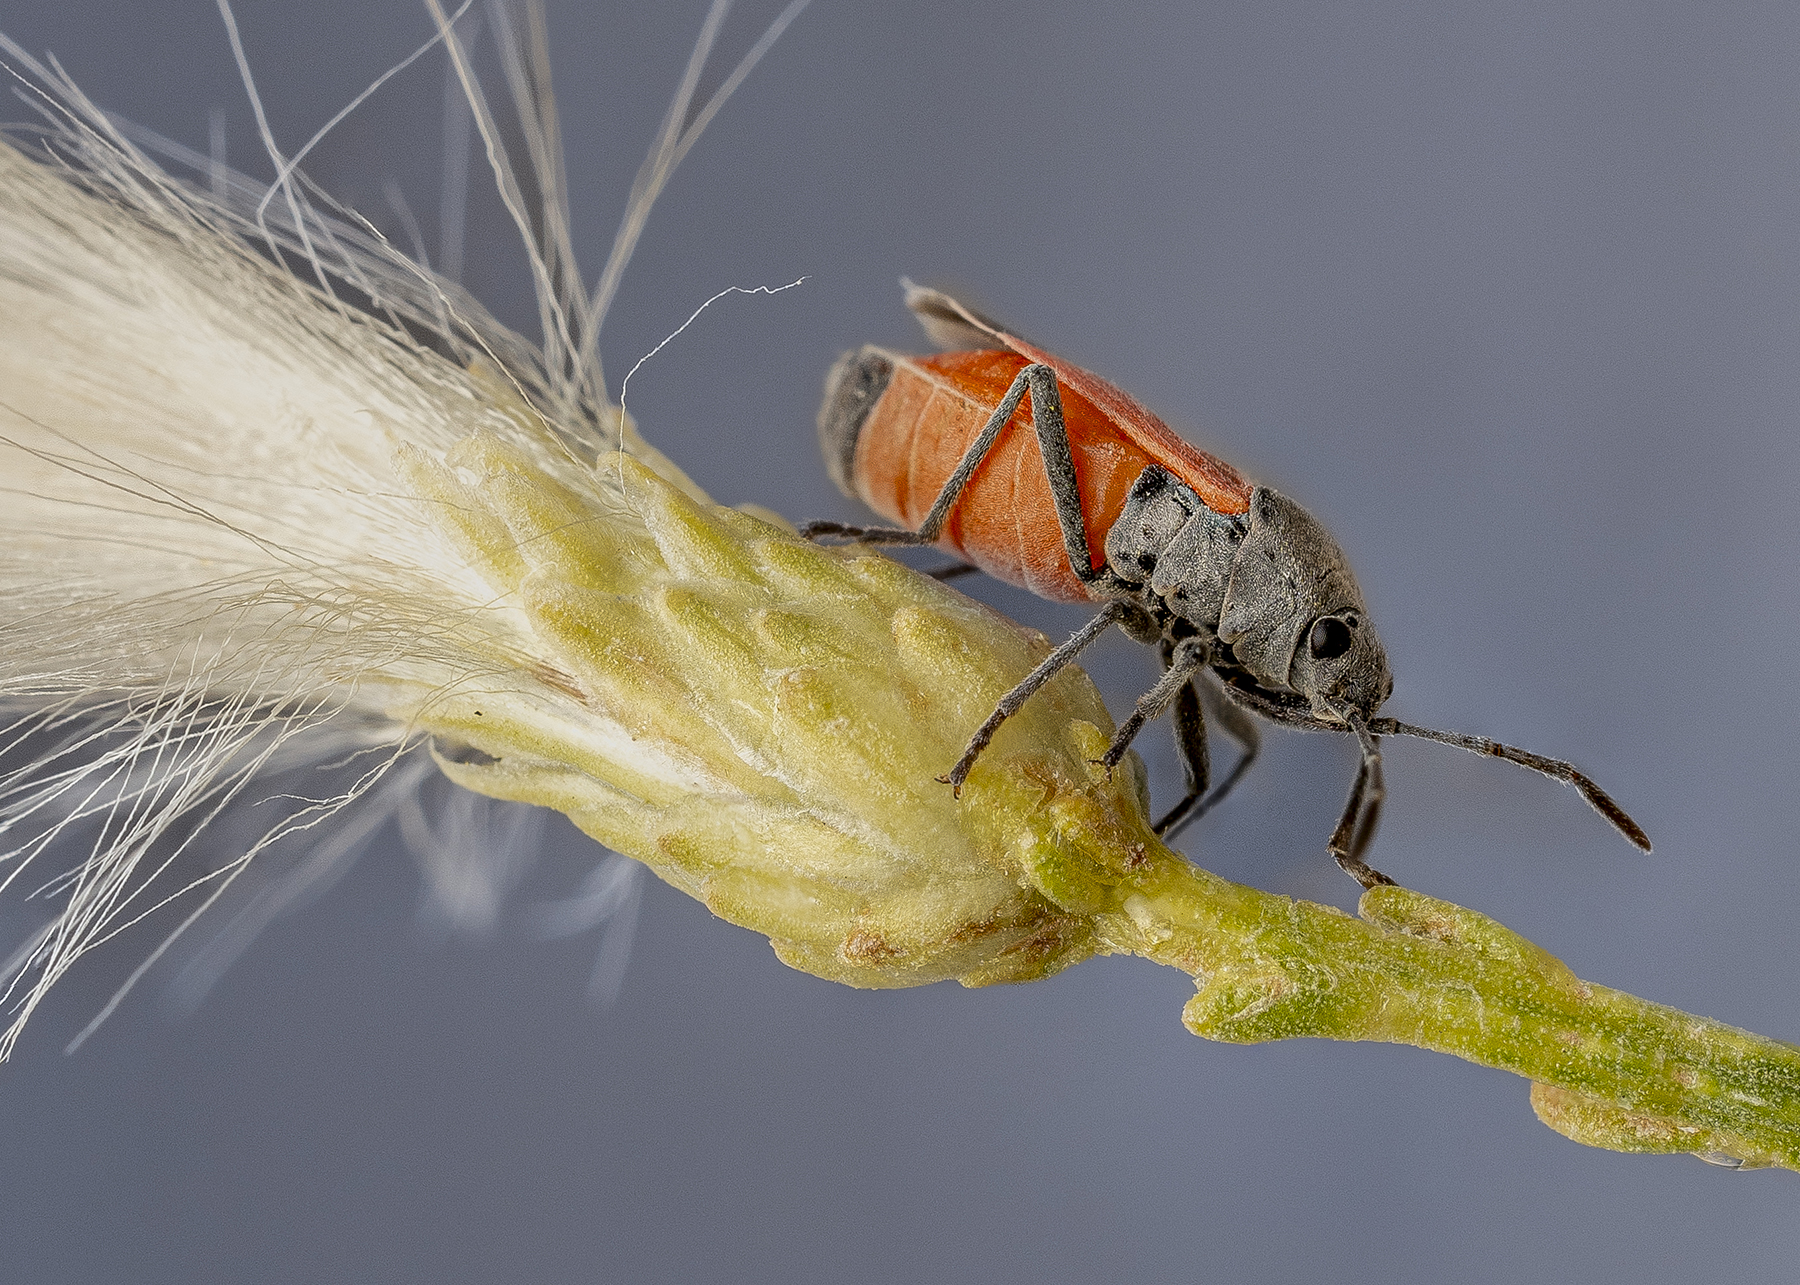
Macro photography focus stacking is a specialized technique. It involves capturing multiple images with different focus points. Then, the images are merged to create a single, sharp photo.
The main goal is to overcome the limited depth of field that in inherent in macro photography. When shooting close-ups, only a small area is in focus, making the rest of the scene blurry. Sometimes, most of the subject can be out of focus, leaving just a thin razor-sharp section.
The focus stacking method allows you to achieve unparalleled clarity. By stacking images, every detail from front to back becomes visible.
In recent years, focus stacking has become essential in macro photography. Both amateur enthusiasts and professionals use it to enhance their work.
Understanding how it works is crucial. It requires both skillful shooting and careful post-processing, a balance that is essential for achieving the desired outcome.
What is Macro Focus Stacking?
Macro focus stacking is a technique used to improve sharpness and detail. It can make a significant difference in macro photography results.
The process involves taking several images at various focal points. Each image captures a different part of the subject in focus.
Once all images are captured, you blend them. Specialized software is often used for this purpose. The result is a single image with extended depth of field.
The Importance of Depth of Field in Macro Photography
Depth of field is a critical element in any photograph. It determines which parts of an image are in focus. In macro photography, managing depth is especially challenging.
When shooting up close, the depth of field narrows significantly. Only a small slice of the subject may be sharp. This can leave much of the scene out of focus.
Using macro focus stacking helps solve this problem. It allows photographers to maintain sharpness across the entire image. This is vital for showcasing subjects in all their detail.
Without stacking, the limitations of depth of field restrict what you can effectively capture in a single shot. Mastering focus stacking means overcoming these limitations. It ensures that your macro images are both sharp and compelling.
Equipment Essentials for Macro Focus Stacking
Having the right equipment is crucial for macro focus stacking. It ensures precision and consistency throughout the process. Here’s a brief list of essential equipment for macro stacking:
- Camera and Lens: A good mirrorless camera and dedicated macro lens are at the core of your setup. Both should allow for fine control over focus points. A lens like the Tamron 90mm F/2.8 Di III VXD 1:1 Macro has a smooth focus ring. This helps you make small focus adjustments easily.
- Tripods and Focusing Rails: Reliable support equipment keeps your shots steady. This includes a sturdy tripod and a focusing rail, which are essential for sharp images.
- Remote Shutter Release: Using a remote shutter release reduces camera shake during shooting.
- Ring Light or Flash: When natural light is not good enough, artificial lighting helps create a clean, well-lit subject.
- Software: Additionally, you’ll need post-processing software to blend the stack of images into a single remarkable shot.
Investing in quality gear enhances your ability to execute focus stacking effectively. Better equipment can result in stunning macro photography results.
Choosing the Right Camera and Lens
Your mirrorless camera must have manual focus capabilities. This allows precise control over where your focus lies.
Pair your camera with a 1:1 macro lens for best results. A lens dedicated to macro work offers both detail and depth. The design specifically captures small subjects with clarity. When turning the focus ring, it should be smooth and taut to ensure precision.
Tamron provides both 1:1 and 1:2 macro lenses, each suited to different needs. Options include prime lenses like the 24mm 1:2 wide-angle macro, the 50-300mm 1:2 telephoto zoom for greater working distance, and the best-in-class 90mm 1:1 macro with a fast f/2.8 aperture.
Having the right camera and lens will fundamentally shape your images and make focus stacking more efficient.
Tripods, Rails, and Other Must-Have Accessories
- Using a tripod is non-negotiable in focus stacking. Stability is necessary to align images correctly in post-processing.
- A focusing rail is another crucial accessory. It allows precise, incremental adjustments. This control is essential when capturing multiple focal points.
- Remote shutter releases are also beneficial. They help eliminate camera shake during the shooting process. Additionally, consider using a macro flash for consistent lighting.
These accessories make it possible to execute complex focus stacking projects. They help provide the precision and stability needed for creating sharp, focus-stacked images. Such tools can greatly enhance your macro photography experience by ensuring effective and consistent results.
Step-by-Step Guide to Focus Stacking

Focus stacking, at first glance, might seem complex. However, when broken down into steps, it becomes much more manageable. This guide is designed to make the process easier for you. By following these steps, you’ll produce stunning macro images with extended depth of field.
Setting Up Your Shot
- Start by selecting your subject. This could be anything from a delicate flower to an intriguing insect. Ensure your subject is well-lit. Proper lighting on your subject allows you to use a lower ISO, resulting in cleaner, sharper images.
- Next, set up your camera on a sturdy tripod. Stability is key to preventing blur in your stacked images. Use a focusing rail for precise adjustments. This tool helps move your camera in small increments without shaking.
- Adjust your aperture for the optimal shot. Use a smaller aperture, such as f/5.6 to f/8, to achieve greater depth of field while maintaining sharpness and avoiding diffraction. Very small apertures like f/16 or f/22 can cause diffraction, which reduces image sharpness—particularly in macro photography. Additionally, starting with a slightly deeper depth of field per shot (compared to wide apertures like f/2.8 that produce a very shallow depth of field) minimizes the number of images needed for focus stacking.
- Set your ISO. Use as low an ISO as possible to avoid noise in the final image.
Capturing the Focus Stack
With your setup ready, begin capturing the images.
- Focus on the nearest part of your subject first.
- Gradually move the focus through the subject until you reach the farthest point.
To ensure you capture all necessary details, move the focus in small increments. You can do this manually or use your camera’s focus bracketing feature. For precision, use a remote shutter release to minimize any shake.
Continue this process until all areas of the subject are in focus in each of the images. It’s crucial not to skip any sections to avoid gaps in focus. Remember, the more complex the subject, the more images you might need to take.
Focus Bracketing vs. Manual Stacking
Focus bracketing is an automatic feature found in some cameras. It allows you to capture multiple images at different focus points quickly. This feature can save time and ensure consistency.
Manual stacking, on the other hand, gives you full control. You control how much the focus changes between shots. This method can be more precise but requires more patience and skill.
Choose the method that suits your style and equipment. Both techniques can yield excellent results when used correctly.
Post-Processing Techniques for Focus Stacking

Post-processing is a crucial phase in focus stacking. It’s where individual photos merge into one seamless image. This process often involves specialized software, essential for aligning and blending the shots accurately.
The primary goal of post-processing is to enhance sharpness throughout the scene. By combining the sharpest parts of each photo, you create an image with great depth. Different software tools offer unique benefits, from user-friendly interfaces to advanced customization options. Selecting the right tool can significantly impact your final result.
Attention to detail is key during post-processing. Small artifacts or misalignments can detract from the image’s quality. Taking time to meticulously align each frame is crucial for a perfect stack.
Consistency across your set of images is vital. Ensuring similar exposure and color balance across shots will lead to a natural look. This uniformity is essential for creating an image that feels cohesive from front to back.
Aligning and Blending Images
- Aligning your photos is the first step in post-processing. This ensures that all images line up perfectly. Software like Photoshop and Helicon Focus automate this, offering precision with ease. Alignment reduces the risk of blurring and ghosting, common issues in macro stacking.
- Blending is where the final image comes to life. Each image contributes its sharpest parts to the final picture. The result is an image with consistent sharp focus throughout. Software can significantly simplify this blend, automating what could be a tedious manual task.
Focus stacking software handles multiple exposures with precision. By automatically selecting the sharpest areas from each shot, it creates a smooth and cohesive image. This step is crucial for achieving the signature depth and clarity of focus stacking photography.
Advanced Techniques: Layer Masks and Retouching
- Layer masks are tools for manual control in photo editing software. They allow you to make precise adjustments to specific areas. This control is invaluable when automatic blending doesn’t meet your expectations. It lets you tweak the blend for optimal sharpness and focus.
- Retouching comes into play after blending. It’s about refining the image to remove any remaining artifacts or imperfections. Techniques might include cloning and healing tools to correct errors. Retouching ensures that the final output is clean and polished.
- Advanced post-processing also involves adjusting colors and contrast. These tweaks enhance the image’s visual appeal. They help bring out textures and details that focus stacking reveals. Adjust the white balance, color, contrast and tone to achieve your desired result.
By mastering these techniques, you can elevate your photography, showcasing intricate details in every macro shot.
Common Challenges and Solutions in Focus Stacking
Macro focus stacking can be rewarding, but it’s not without challenges.
- Alignment: One major hurdle is aligning each shot perfectly. Even minor movements can disrupt the stack, leading to blurred areas.
- Inconsistent Lighting: Changes in light affect the final blend, causing color shifts or exposure issues. Using consistent lighting helps maintain uniformity across your series of images.
- Subject Movement: Focus stacking often deals with tiny subjects, making movement an issue. Even a slight breeze can blur details, especially in outdoor settings. Controlling your environment or waiting for calm conditions can be effective solutions.
- Artifacts: Artifacts and ghosting are common challenges in focus stacking, caused by blending errors and misaligned layers that create visual distortions. With careful post-processing, you can fix these issues and ensure a flawless final image.
Dealing with Movement and Alignment Issues
Movement is a persistent challenge in focus stacking. Even indoor shoots can suffer from subtle vibrations. Using a sturdy tripod can minimize this impact. Ensuring stability is vital, as even breathing can shift the setup during long sessions.
Manual alignment is essential when software auto-alignment fails. Slight manual tweaks in software can correct misalignments. This precision ensures each part of your image is sharp and clear.
Overcoming Diffraction and Ghosting
Diffraction often blurs macro images taken with small apertures. It compromises sharpness, defeating the purpose of stacking. The solution lies in using a mid-range aperture for better clarity.
Ghosting occurs when blending multiple layers. It results in faint outlines where elements misalign. Careful layer management in post-processing can eliminate these discrepancies, preserving detail in the final image.
Tips for Perfecting Your Focus Stacking Technique
Achieving perfection in focus stacking requires dedication. Excellence comes from refining your skills and learning from each attempt. Here are a few essential tips to enhance your focus stacking technique and improve your macro photography results.
- Experimentation is crucial. Try different subjects, lighting conditions, and settings to discover what works best for you. This exploration helps develop a deeper understanding of your equipment and its limitations. Over time, you’ll intuitively know how to adjust your approach for varying scenarios.
- Feedback is invaluable. Share your work with fellow photographers for constructive critiques. This exchange of ideas can shed light on potential improvements. Online communities and forums serve as excellent resources for learning from experienced focus stackers and gaining fresh insights.
- Consider creating a checklist to ensure consistency. This practice helps to establish a reliable routine. By following a standardized procedure, you minimize errors and maintain focus on creative aspects. This consistency translates into higher quality results.
Conclusion
Macro focus stacking opens a world of possibilities for photographers. It allows for enhanced depth and detail beyond what a single image can provide. By mastering these techniques, you can elevate your macro photography to new heights.
Success in focus stacking hinges on practice and a methodical approach. Invest time in understanding your equipment and refining your skills. With patience and persistence, you’ll create stunning, sharp images that capture the intricate beauty of the macro world.