 Instant Savings
 Support
 Find a Dealer
In the world of e-commerce, product photography holds a pivotal role. It’s the visual communication that bridges the gap between a product and potential customers.
Images & Tips by Taylor Brumfield
High-quality product images can make or break online sales. They have the power to attract, engage, and convince buyers. But how do you capture such images for your client?
This comprehensive article offers product photography tips to help you master the art of product photography. Whether you’re a seasoned photographer or a beginner, there’s something for you here.
With tips from professional product photographer Taylor Brumfield who specializes in beauty product photography, we’ll walk you through the basics of product photography.
What You’ll Learn In This Article:
- You’ll learn about the essential equipment needed and how to set up your own product photography studio.
- We’ll delve into the importance of lighting and how to use it effectively.
- Choosing the right backdrop for your product images is crucial. We’ll guide you on how to select and use product photography backdrops to enhance your product’s appeal. You’ll also learn about the different camera lenses for product photography.
- Composition and styling play a significant role in professional product photography. We’ll share tips on how to style your products and use composition techniques to create eye-catching images.
- Shooting the product involves a lot of techniques and tips. We’ll discuss camera settings, capturing different angles, and tips for shooting specific product types.
- Post-processing is where you enhance your images. We’ll cover basic and advanced editing techniques to improve your product images.
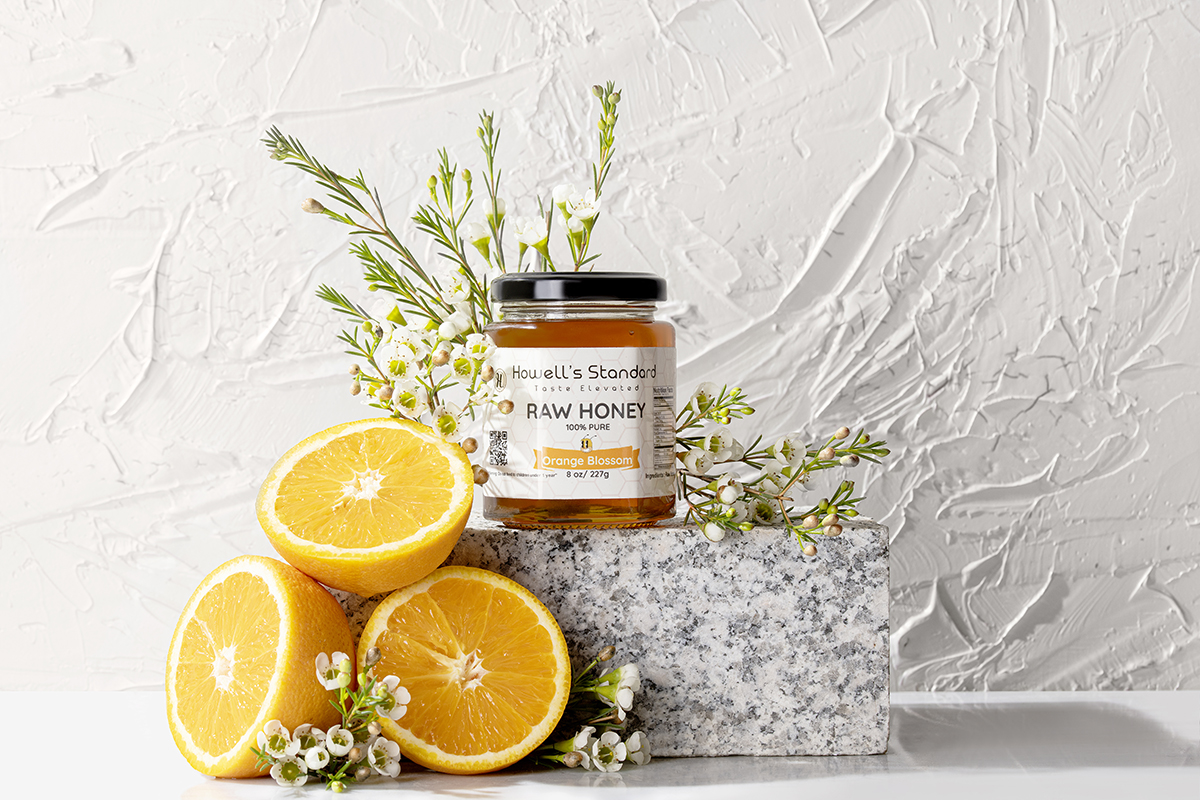
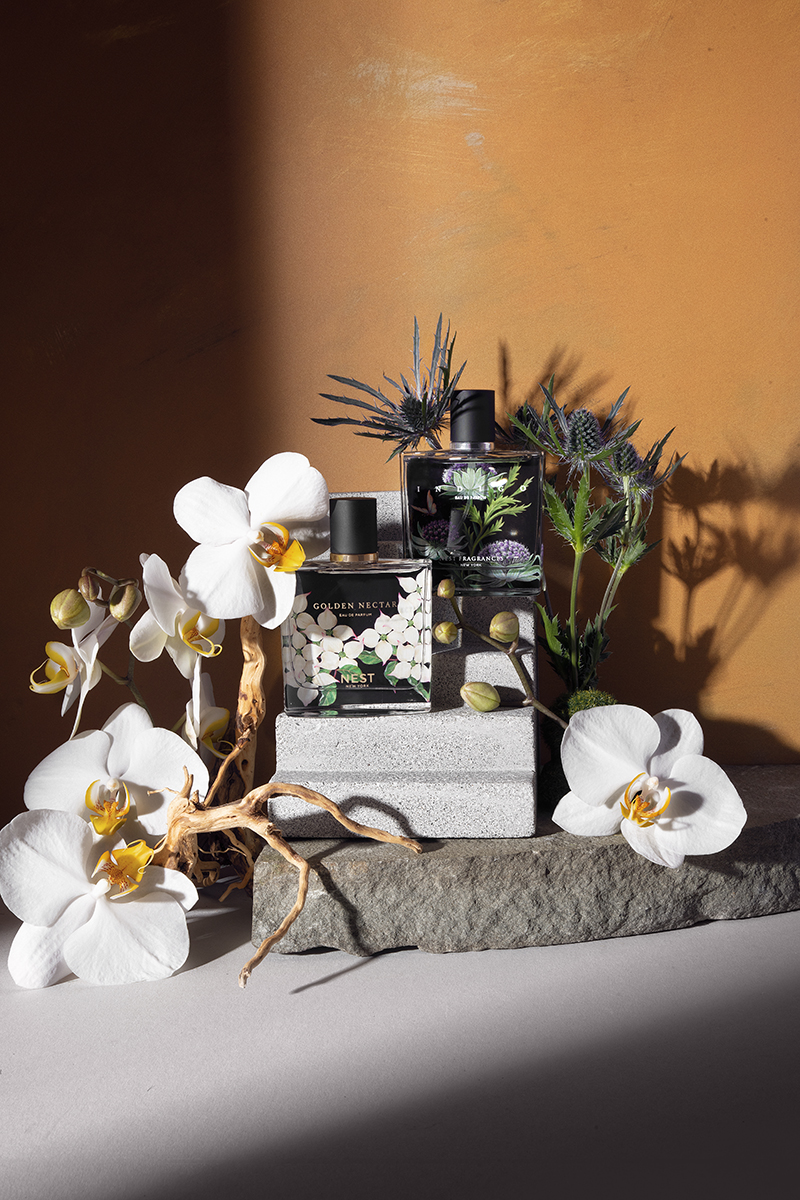
Taylor’s Tip:
This client is a Honey Brand that sells different flavors of honey. They were adamant about using not only their botanical ingredients but also plenty of natural textured backgrounds that show that their brand is rooted in nature. It is important to have plenty of textures and props on hand that can meet any client need. I take a “its better to have and not need than need and not have” approach to collecting things. Recently, I actually found the block of granite on the side of the road, cleaned it off and sanded it and lo and behold the client loved it and wanted to use it in their production. Now, I collect stones, bricks, backdrops, glassware, driftwood and other stable organic props and goods and keep them on hand for the off chance that the client doesn’t want MDF props. I also make backdrops and props myself that reflect this natural aesthetic. This backdrop is actually handmade with scraped plaster putty over a square of drywall. I wanted a 3D natural looking texture, and I use this drop often in my work that requires natural organic looking backdrops with depth and texture
Understanding the Basics of Product Photography
Product photography is a specialized branch of commercial photography. Its primary goal is to present a product in the most appealing and accurate way possible. To do that, it’s all about highlighting the features, functionality, and benefits of a product.
The quality of your product images directly impacts the perception of your client’s brand. High-quality images can enhance the brand’s credibility and increase customer trust. On the other hand, poor-quality images can deter potential customers and harm the brand’s reputation.
There are different types of product photography. These include:
- single product shots
- lifestyle images
- group photos of multiple products
Each type serves a different purpose and requires a unique approach. For example, sellers typically use single product shots for product listings and use lifestyle images to show the product in use.
Understanding your client’s target audience is crucial in product photography. You need to know what appeals to them and what doesn’t. This understanding will guide your choice of styling, composition, lighting, and even the type of product photography to use.
Essential Equipment for Product Photography
Product photography requires a set of specific tools. These tools can range from basic to advanced, depending on your needs and budget. However, there are a few essential pieces of equipment that every product photographer should have.
- The first and most obvious piece of equipment is a good camera. Whether you choose a DSLR or a mirrorless camera, it should be capable of capturing high-resolution images. It should also offer manual controls for exposure settings.
- Next, you’ll need a variety of lenses. Different lenses can dramatically change the look and feel of your product images. A macro lens is good for close-up details, while a wide-angle lens shows the whole product in its surroundings.
- A sturdy tripod is another must-have. It ensures stability and consistency in your shots, especially when shooting multiple products. It also allows for slower shutter speeds without the risk of camera shake.
- Other essential equipment includes lighting equipment, backdrops, reflectors, and props. These tools can help you control the look and feel of your product images. They can also help you highlight the product’s features and create a specific mood or atmosphere.
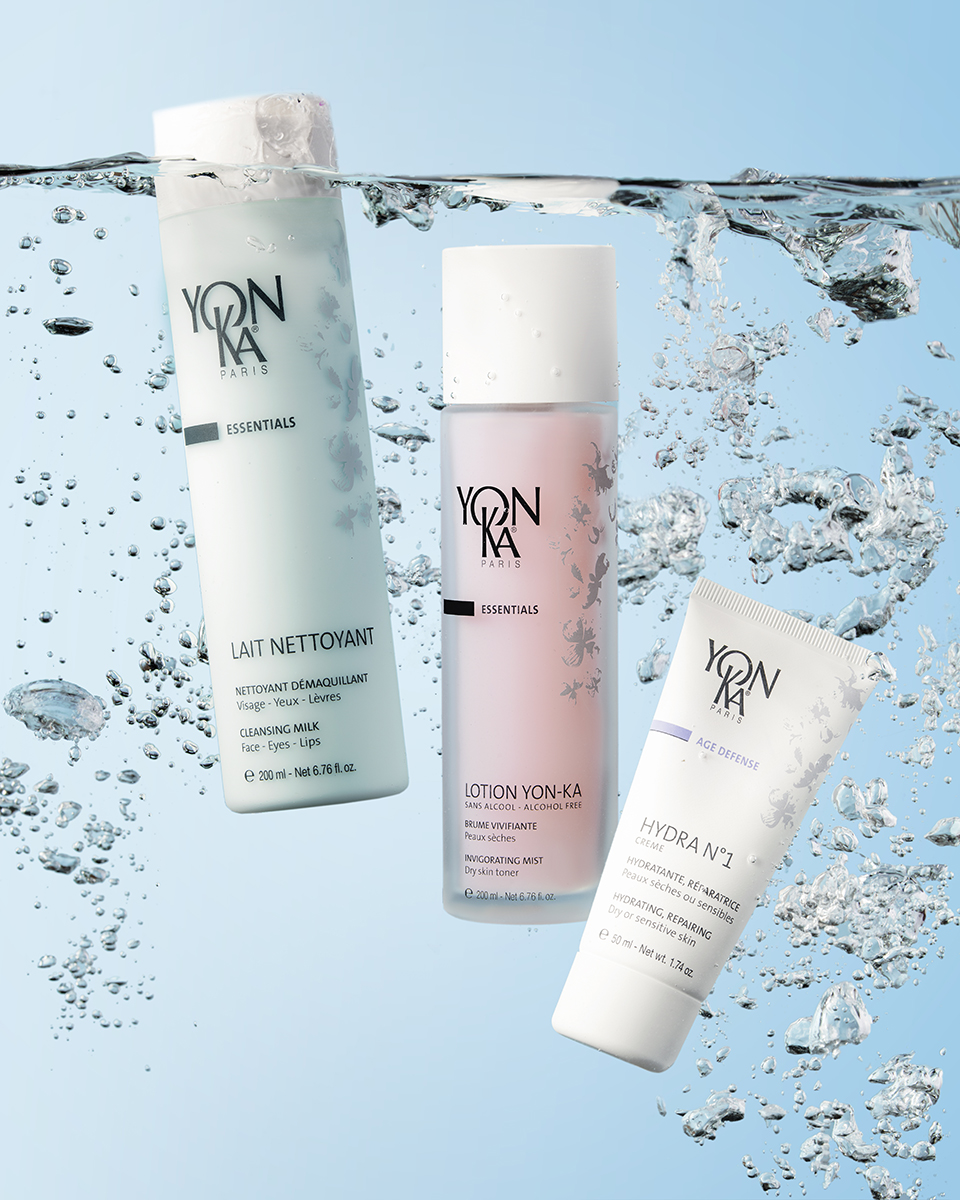
Taylor’s Tip:
It is essential to have a great tripod as a product photographer that is firmly plantable on the ground and doesn’t move with the camera shutter and also allows for being weighted. This shot required at least 15 different individual shots where I pulled different aspects and composited them into one single photo. I have to do this often not just with stills but also with stop motion. It’s also integral in video work especially if I have only one of the products and I’m destroying it for the shot. If I have a wobbly tripod, I would consistently be missing shots.
Choosing the Best Camera Lens for Product Photography
The lens you choose can dramatically affect your product images. Different lenses offer different perspectives, depths of field, and levels of detail. Therefore, it’s essential to choose the right lens for each product and shot.
A macro lens is a must-have for product photography. It allows you to capture detailed close-ups of your product. This is especially useful for small products or when you want to highlight specific features of a product.
Tamron’s 90mm F/2.8 Di III VXD (Model F072) prime lens is great for product photography with Sony and Nikon Z mirrorless cameras. With excellent edge-to-edge sharpness and beautiful bokeh, the lens will provide the quality sure to impress your clients.
A standard zoom lens, typically in the range of 50mm to 85mm, is also useful. It provides a natural perspective that is similar to the human eye. This makes it a versatile choice for a variety of products and shots.
Tamron’s 28-75mm F/2.8 Di III VXD (Model A063) and 35-150mm F/2-2.8 Di III VXD (Model A058) are excellent choices for improving your photography. They offer a wide range, clear images, and unique flexibility that allows you to choose multiple angles with just one lens. Both lenses are available for Sony and Nikon Z mirrorless cameras.
Tripods and Stability in Product Shots
A sturdy tripod is a crucial tool in product photography. It ensures stability and consistency in your shots. This is especially important when shooting multiple products or when using slow shutter speeds.
A tripod allows you to maintain the same camera position and angle for each shot. This is essential for consistency, especially when shooting a series of products. It also allows you to use slower shutter speeds without the risk of camera shake, which can result in blurry images.
Setting Up Your Product Photography Studio
Setting up a product photography studio doesn’t have to be complex or expensive.
Choose a suitable space that is large enough to accommodate your products, equipment, and backdrops. You will need room to work around your subject. Your product photography setup should also have good natural light, although this is not essential if you plan to use artificial lighting.
Selecting the Right Backdrops
The backdrop you choose can have a significant impact on your product images. It can help to highlight the product, create a specific mood, and add visual interest to your shots.
A white background or light-colored backdrop is a popular choice for product photography. It creates a clean, neutral background that allows the product to stand out. It’s also versatile and works well with a wide range of products.
However, don’t be afraid to experiment with different colors and textures. A colored or textured backdrop can add depth and interest to your images. It can also help to convey a specific mood or style.
Lighting: The Make or Break of Product Photography
Lighting is a crucial element in product photography. It can make or break your images. It can highlight the product’s features, create depth, and set the mood of the image.
There are two main types of product photography lighting: natural and artificial. Each has its pros and cons, and the best choice depends on your specific needs and circumstances.
The key to good lighting is understanding how it works and how to manipulate it. This involves understanding the direction, intensity, and color of light. It also involves knowing how to use shadows and reflections to your advantage.
Here are some general tips for good lighting in product photography:
- Use diffused light to avoid harsh shadows and highlights.
- A combination of direct and indirect light is used to create depth and dimension.
- Experiment with different lighting angles to highlight different aspects of the product.
- Reflectors fill in shadows and highlight details.
- Adjust your camera settings to suit the lighting conditions.
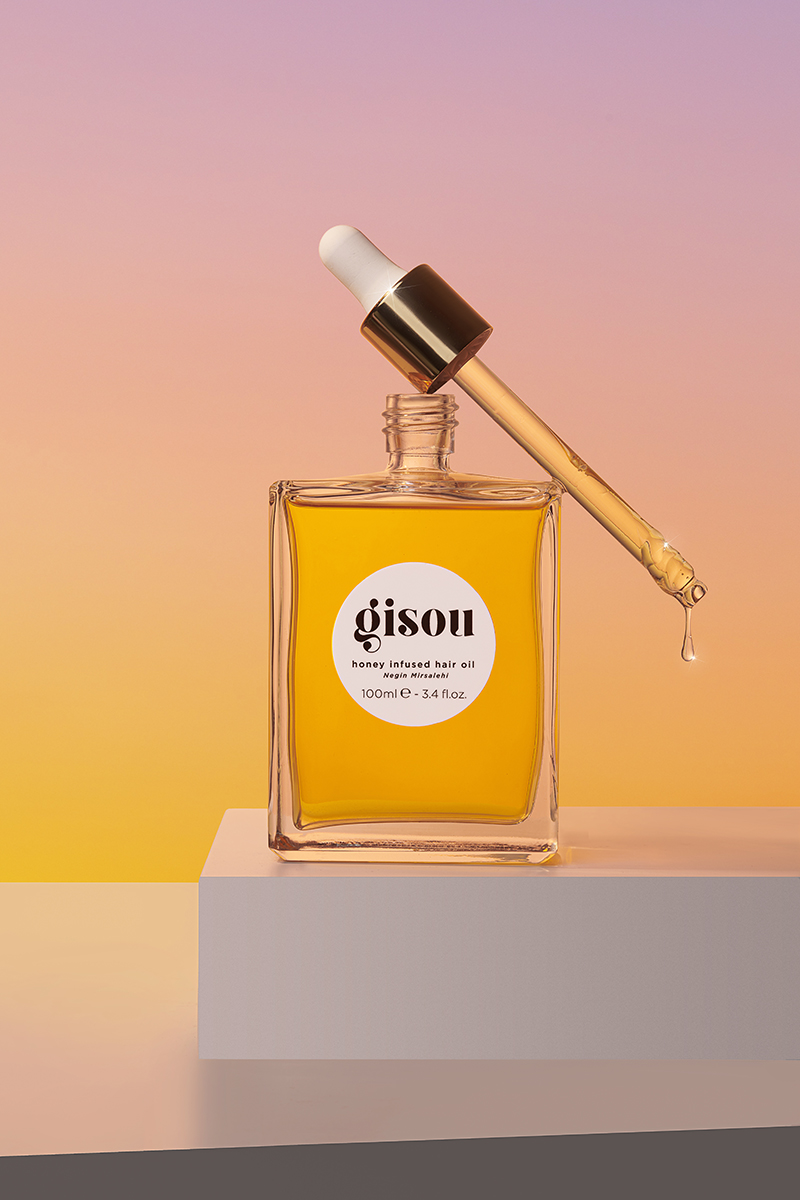
Taylor’s Tip:
I love to use gradients to add drama and contour to my shots. Here I knew I would want to do a desert themed, warm and golden background with some light coming through the product. I used a soft box as my key light and created my warmth and glow with a speed light with an orange gel aimed at the left backside of the product. It bounced off my light background which pushed the light through the product and also gave me the desert sunset base I needed. The final gradient I added in post but in order for it to look organic and realistic, I needed to create a foundation in my actual lighting that reflected my end goal.
Natural Light vs. Artificial Light
Natural light is a great option for product photography. It’s free, readily available, and can produce beautiful, soft lighting effects.
However, natural light can be unpredictable and difficult to control. Weather conditions affect it and it changes throughout the day. This can make it challenging to achieve consistent results.
On the other hand, artificial light gives you complete control over the lighting conditions. You can adjust the intensity, direction, and color of the light to suit your needs. You can also use it at any time of the day or night, regardless of the weather.
However, artificial lighting equipment can be expensive. It can also take time to set up and adjust. Plus, it requires a power source, which may not always be available.
Best Lighting Setups for Different Products
Different products require different lighting setups. The best lighting for product photography depends on the size, shape, and material of the product, as well as the desired mood and style of the image.
- Small, flat products: a lightbox can be a good option. It provides even, diffused light from all sides, which can help to highlight details and eliminate shadows.
- Larger, three-dimensional products: a two-light setup can work well. This involves using one main light to illuminate the product, and a second light to fill in shadows and add depth.
- Reflective products: a tent setup can be effective. This involves surrounding the product with diffused light to minimize reflections and glare.
Remember, the best lighting setup is the one that makes your product look its best. Don’t be afraid to experiment and try different setups until you find the one that works for you.
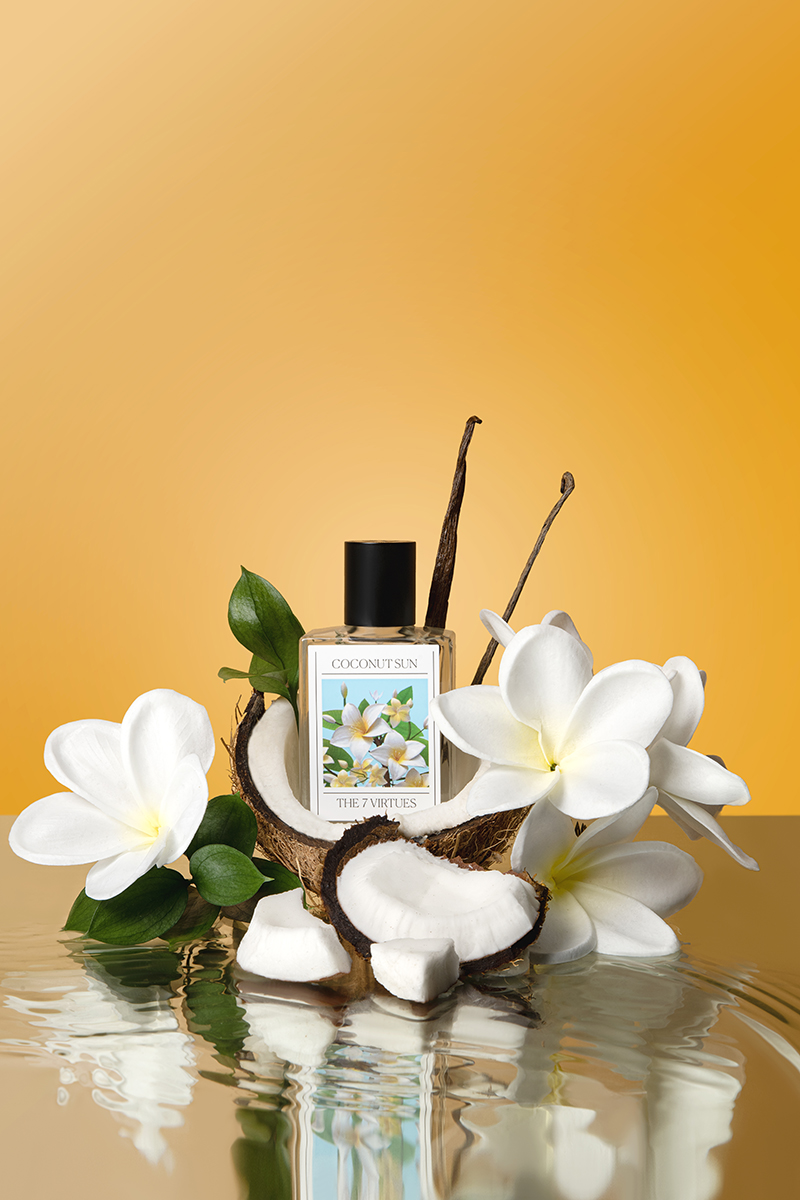
Taylor’s Tip:
Play with depth and dimension by using a reflective acrylic sheet or mirror underneath the products. Here I created a “low tide” for my client because the central aspect of this product is that it helps provide water to underserved communities around the world. It was very important to show the “water” aspect as well as center the “sunshine” and “tropical” aesthetic surrounding this product. Mirror shots also tend to do well on social media and make for strong imagery. I use diffused lighting, usually a 24×36 inch soft box, so that I can get contrasty punchy lighting but keeping the reflections on the mirror very manageable and soft.
Composition and Styling for Eye-Catching Product Images
Composition and styling play a significant role in product photography. They can make your product stand out and tell a story. They can also guide the viewer’s eye and create a pleasing visual experience.
The key to good composition and styling is understanding the principles of design. This includes balance, contrast, emphasis, movement, pattern, rhythm, and unity. It also involves knowing how to use color, texture, shape, and space to your advantage.
Here are some general tips for good composition and styling in product photography:
- The rule of thirds creates balance and interest.
- Leading lines guide the viewer’s eye towards the product.
- Negative space highlights the product and create a clean, minimalist look.
- Experiment with different angles and perspectives to show the product in a new light.
Taylor’s Tip:
Shadows and playing with light and depth, contrast and visual interest to otherwise simple styling. Here I used two boards to carve out my lighting and draw focus to my product. I had originally tried shooting without the dramatic shadows but it was a bit boring and flat BUT I also didn’t want to change my styling because something about it resonated with me. So, I decided to go ahead and try out these shadows and it was exactly what I felt this shot needed to ground it and add that extra amount of interest.
The Art of Arrangement: Styling Your Products
Styling involves arranging the product and other elements in the scene in a visually pleasing way. It can help to showcase the product’s features, demonstrate its use, and create a certain mood or atmosphere.
Here are some tips for styling your products:
- Use props that complement the product and add context.
- Arrange the elements in the scene in a way that guides the viewer’s eye towards the product.
- Experiment with different arrangements to find the one that best showcases the product.
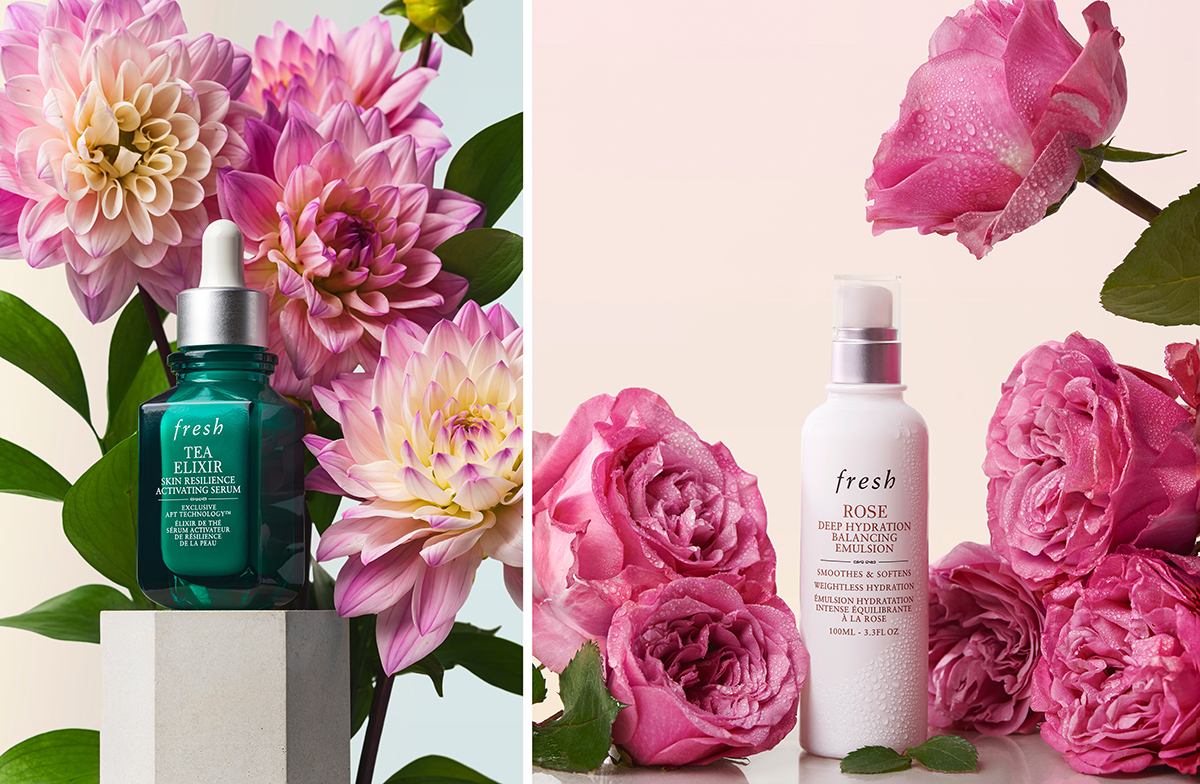
Taylor’s Tip:
Brands will often look through your portfolio for direct inspiration as well as to see if you are able to accomplish the scale and scope of a project that they need. It is wise to create and post the content you would like to be hired for. I created the photo on the left independently and posted it to my social media and website and tagged the brand in my post. The brand followed me for a while and ended up reaching out to hire me for a yearlong retainer. They had the photo I created independently in the mood board that they sent over for the product they wanted me to shoot in the photo on the right. Then, they said although they don’t want a literal recreation, that they liked the use of rich colors, pastels, organic textures and well contoured product. Here, they wanted the same ‘vibe’ as my independent project and I was able to give them that and they loved the finished asset.
Shooting the Product: Tips and Techniques
Shooting the product is where all your preparation comes to fruition. It’s where you capture the images that will showcase your product in the best possible light. It’s also where you can experiment and get creative to create unique, eye-catching images.
Here are some general tips for shooting your product:
- Use a tripod to ensure sharp, consistent images.
- Experiment with different camera settings to find the ones that best capture your product.
- Try different angles and perspectives to show all aspects of the product.
- Take multiple shots to ensure you have plenty to choose from.
Camera Settings for the Perfect Shot
Understanding and using the right camera settings is crucial for capturing the perfect shot. It can make the difference between a mediocre image and a stunning one.
Here are some tips for using camera settings in product photography:
- Use a small aperture (large f-number) to ensure the entire product is in focus.
- Shoot with a fast shutter speed to capture sharp images, especially if the product or camera is moving.
- Choose the lowest ISO setting possible to reduce noise and ensure high image quality.
Capturing Different Angles and Perspectives
Capturing different angles and perspectives can show all aspects of the product. It can also create a more dynamic and interesting visual experience for the viewer.
Here are some tips for capturing different angles and perspectives to shoot from:
- Above to show the top of the product.
- From the side to show the product’s profile.
- Below to create a powerful, imposing image.
Tips for Specific Product Types: Beauty, Reflective, Textured
Different types of products require different shooting techniques. For example, beauty products often benefit from close-up shots that show their texture and color. Reflective products require careful lighting to avoid glare. Side lighting enhances the texture of textured products by highlighting it.
Here are some tips for shooting specific product types:
- Beauty products: use close-up shots and soft lighting.
- Reflective products: use diffused lighting and a polarizing filter to reduce glare.
- Textured products: use side lighting to highlight the texture and depth.

Taylor’s Tip:
Add some visual interest and show key aspects of the product in your shot by incorporating textures. This product is a very high viscosity nail polish. I wanted to show the gorgeous rich colors and shine while also demonstrating just how thick and sumptuous the formula is which was a central need for the client to show to their consumer. Droplet shots also tend to do really well on social media which is great for me and great for the client!
Post-Processing: Enhancing Your Product Photography
Once you’ve captured your product images, the next step is post-processing. This is where you enhance your images and correct any imperfections. It’s an essential part of the product photography process and can significantly improve the quality of your images.
Post-processing involves a range of techniques, from basic adjustments to advanced retouching. Even if your images look great straight out of the camera, a little post-processing can make them look even better.
Basic Editing Techniques to Improve Your Images
Basic editing techniques can significantly improve your images. They can correct exposure issues, enhance colors, and sharpen details.
Here are some basic editing techniques to improve your images:
- Adjust the exposure to ensure the image is neither too bright nor too dark.
- Boost the contrast to make the image more vibrant.
- Sharpen the image to enhance details and textures.
Advanced Editing: Retouching and Color Correction
Advanced editing involves more complex techniques like retouching and color correction. Retouching removes unwanted parts of an image, and color correction makes sure the colors are accurate and consistent.
Here are some tips for advanced editing:
- Use retouching tools to remove dust, scratches, and other imperfections.
- Apply color correction tools to ensure the colors in your image match the actual product colors.
Conclusion: Continuous Improvement and Adaptation
Product photography is a dynamic field that requires continuous learning and adaptation. As trends change and new technologies emerge, it’s important to stay updated and adapt your techniques accordingly.
Stunning product photography requires both technical skills and a clear understanding of the product. It also involves knowing the story you want to tell. With patience, practice, and a keen eye for detail, you can create product images that not only look great, but also effectively communicate the value of the product to your client’s audience and improve ecommerce website sales.