 Instant Savings
 Support
 Find a Dealer
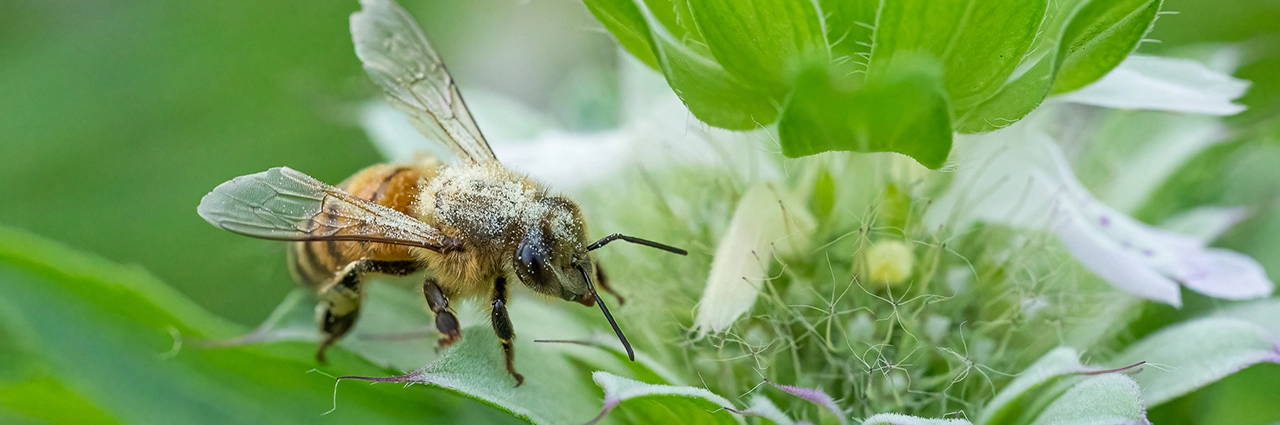
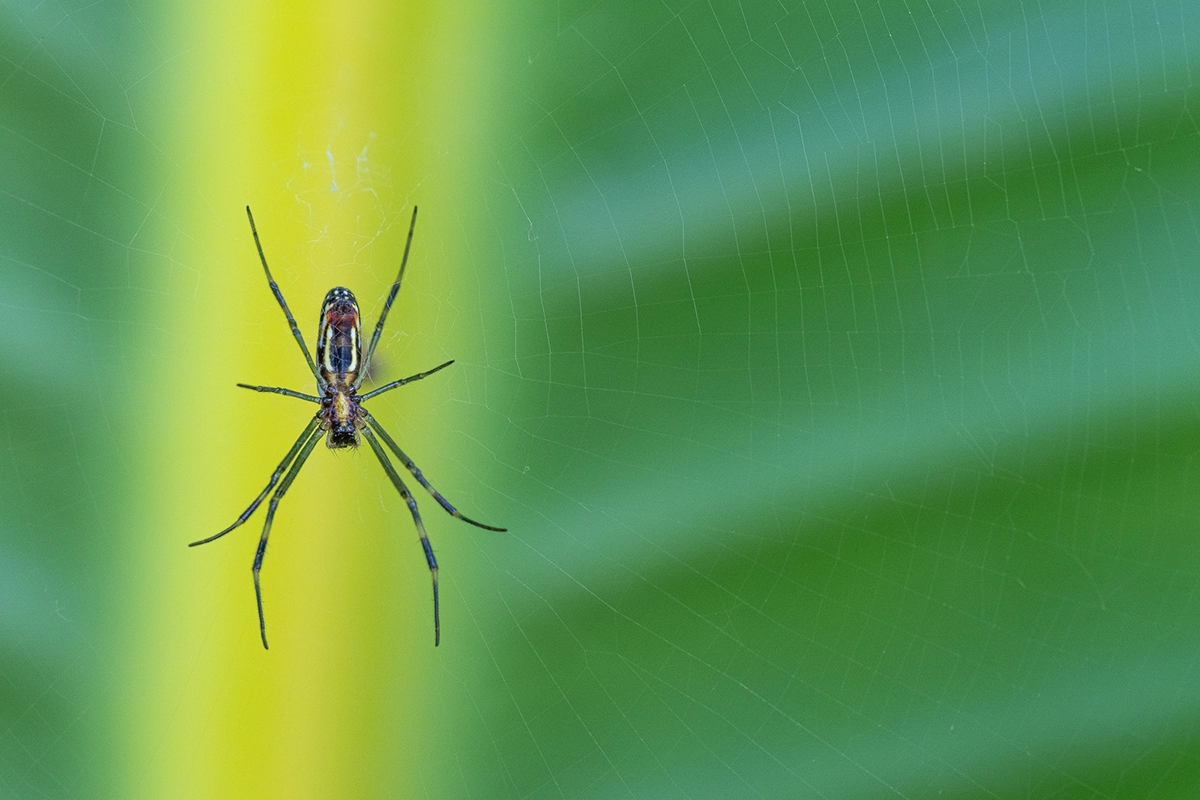
There’s a hidden universe buzzing quietly in my garden every summer. Ants navigate elaborate trails under the hydrangeas, bees hover over coneflowers with hypnotic precision, and butterflies flutter past like animated brushstrokes. Years ago, I might have missed it. But then I picked up a macro lens, knelt in the grass, and discovered the art of photographing insects.
That single moment sparked my deep passion for insect macro photography, especially bee photography and butterfly photography in my own backyard. I quickly learned that macro photography of insects reveals an unseen world—and with the right lens and some patience, how to photograph insects became one of the most rewarding skills I’ve ever developed.
By Guest Contributor Alyce Bender
What You’ll Learn in This Article:
- How to choose the right gear for macro photography
- When and why the best time of day to photograph insects is
- Understand how backgrounds play a critical role in insect and macro photography
- Tips for approaching and focusing on insects to improve sharpness and composition
- Suggestions on how to take insect macro photography further through creative techniques
Insect macro photography has become more than a hobby for me. It’s a daily ritual, a form of meditation, and a constant source of creative inspiration. Over time, I’ve refined my gear, studied insect behavior, and collected a mental notebook of tricks that make the process smoother and more rewarding.
Whether you’re just getting into macro photography or you’re looking to elevate your bee photography and butterfly photography to the next level, I’d love to share the five most valuable tips that have shaped my journey—plus why my Tamron 90mm Macro lens has become an irreplaceable part of my toolkit.
TIP 1: Choose the Right Gear (Why I Use the Tamron 90mm Macro Lens)

I’ve tried a few different setups over the years, but the one piece of gear that consistently delivers beautiful results is my Tamron 90mm F/2.8 Di III MACRO VXD lens. It’s a 1:1 true macro lens, meaning it can capture subjects at life-size magnification. That’s a game-changer when photographing insects, where tiny details—like the pollen grains on a bee’s leg or the compound eye of a butterfly—make all the difference.
Why I love the Tamron 90mm for photographing insects:
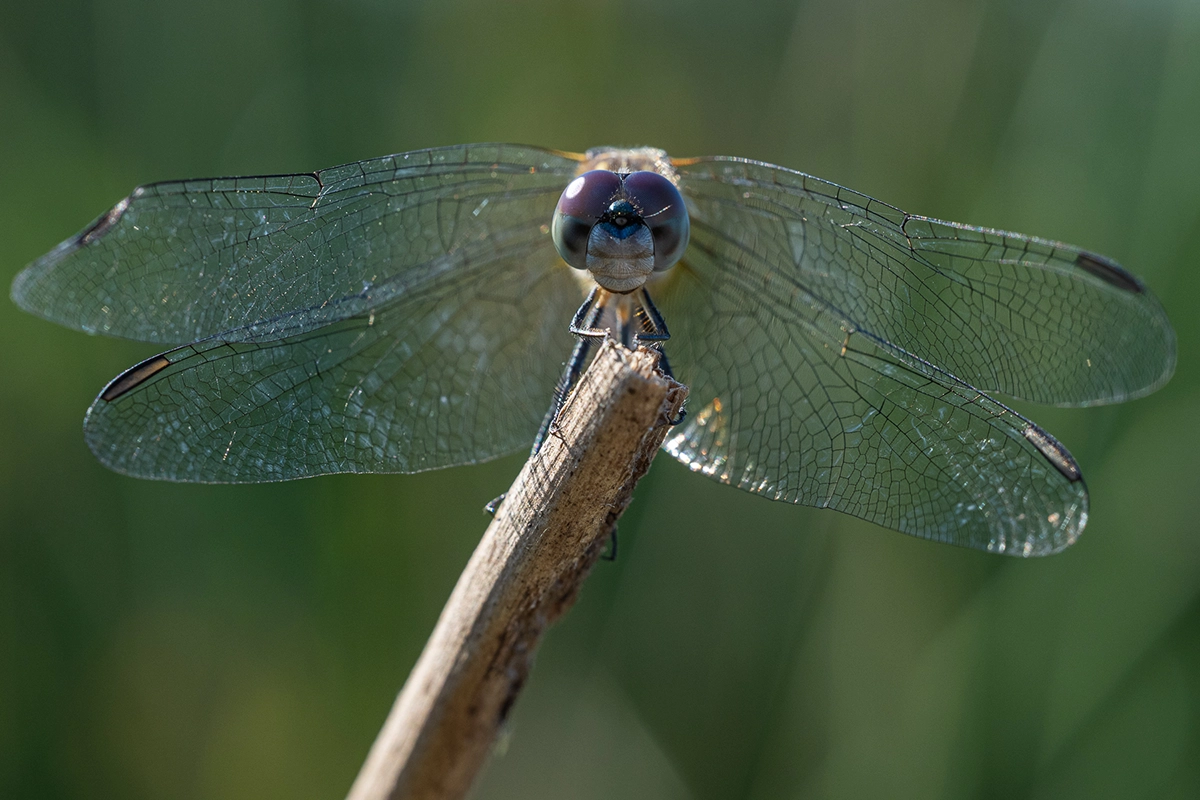
- Ideal working distance: At 90mm, I can photograph shy or skittish insects without having to get uncomfortably close. This has made a huge difference when working with say dragonflies or butterflies, where a few extra inches of space mean the difference between a perfect image and a startled subject.
- Sharpness and detail: The lens produces incredibly crisp images. Every tiny hair, scale, and wing vein pops when I review the photos.
- Image stabilization: The built-in VC (Vibration Compensation) helps with handheld close-up photography, especially when I am working quickly with fast moving subjects.
- Lightweight and affordable: Compared to some other macro options, the Tamron is surprisingly compact and accessible for the quality it delivers.
I pair this lens with my Sony mirrorless camera bodies, usually working in manual mode. For anyone getting serious about macro photography techniques, this lens is a brilliant place to start—or upgrade to.
TIP 2: Time Your Sessions for Insect Behavior and Light
Timing is everything in insect macro photography. I’ve found that the garden’s rhythm changes throughout the day and understanding that rhythm can mean the difference between frustration and flow.
Best times for photographing insects:
- Early morning: My absolute favorite. The light is soft, shadows are gentle, and most insects are still slow from the cool night air. This makes it easier to approach them without spooking them. I’ve captured some of my most detailed insect photos in the early morning, just as they start their busy day.
- Late afternoon (Golden Hour): This is perfect for soft, warm tones. Butterflies are still active, and bees will be wrapping up their flower rounds. Just be aware that things move a bit faster than in the morning.
- Avoid midday: The light is harsh, insects are more active, and shadows become difficult to manage. If I have to photograph during this time, I use a diffuser or shaded area (sometimes just the hat off my head!) to soften the light.
Learning insect behavior also helps. Bees often return to the same flowers in a loop, and butterflies have preferred basking spots and will fly if a shadow is cast on them. Spending just 5–10 minutes observing can help you anticipate the moment for the perfect shot.
TIP 3: Focus on the Eyes and Let Autofocus Work for You
In close-up photography, even the smallest motion can throw my subject out of focus. That’s why one of my most consistent macro photography tips is to focus on the eyes. Eyes bring my subject to life and give the viewer a point of connection within the frame.
The Tamron 90mm really shines here—with its fast and accurate autofocus. Even where the subject is in constant motion, I rely on autofocus to grab the eyes or head quickly—often using single-point AF for more control. The Tamron’s autofocus motor locks on and it’s quiet enough not to disturb the more sensitive insects.
Sometimes, I’ll stop down to f/8 or f/11 to get a little more depth of field—especially for larger subjects like lizards—but I often shoot wider (f/2.8–f/5.6) for a dreamier background and soft falloff.
Don’t be discouraged if your first few sessions result in a lot of near misses. Macro photography techniques require patience and a steady hand, but each session teaches you something.
TIP 4: Simplify Your Backgrounds for Stronger Compositions
In close-up photography, and especially when photographing insects, the background plays a much bigger role than one would expect. Because I’m working at high magnification and shallow depth of field, even small distractions—like a stray stem, a harsh highlight, or a clutter of overlapping leaves—can pull the viewer’s eye away from my subject.
That’s why I’ve developed a habit of scanning not just the insect, but the entire frame before clicking the shutter.
A clean background helps when photographing insects:
- Direct the viewer’s attention to the insect’s detail, especially the eyes, texture, and wings.
- Create visual contrast, so the subject stands out clearly.
- Add mood or atmosphere—a soft blur of color can feel dreamy or vibrant depending on your choice of aperture and angle.
How I Simplify Backgrounds in the Field
Here are a few practical macro photography techniques I use to control and enhance backgrounds:
- Change Your Angle: Sometimes, a small shift in perspective is all it takes. I’ll move a few inches to the side or lower myself to the ground to frame my subject against open space—like sky, dirt, or a patch of blurred foliage.
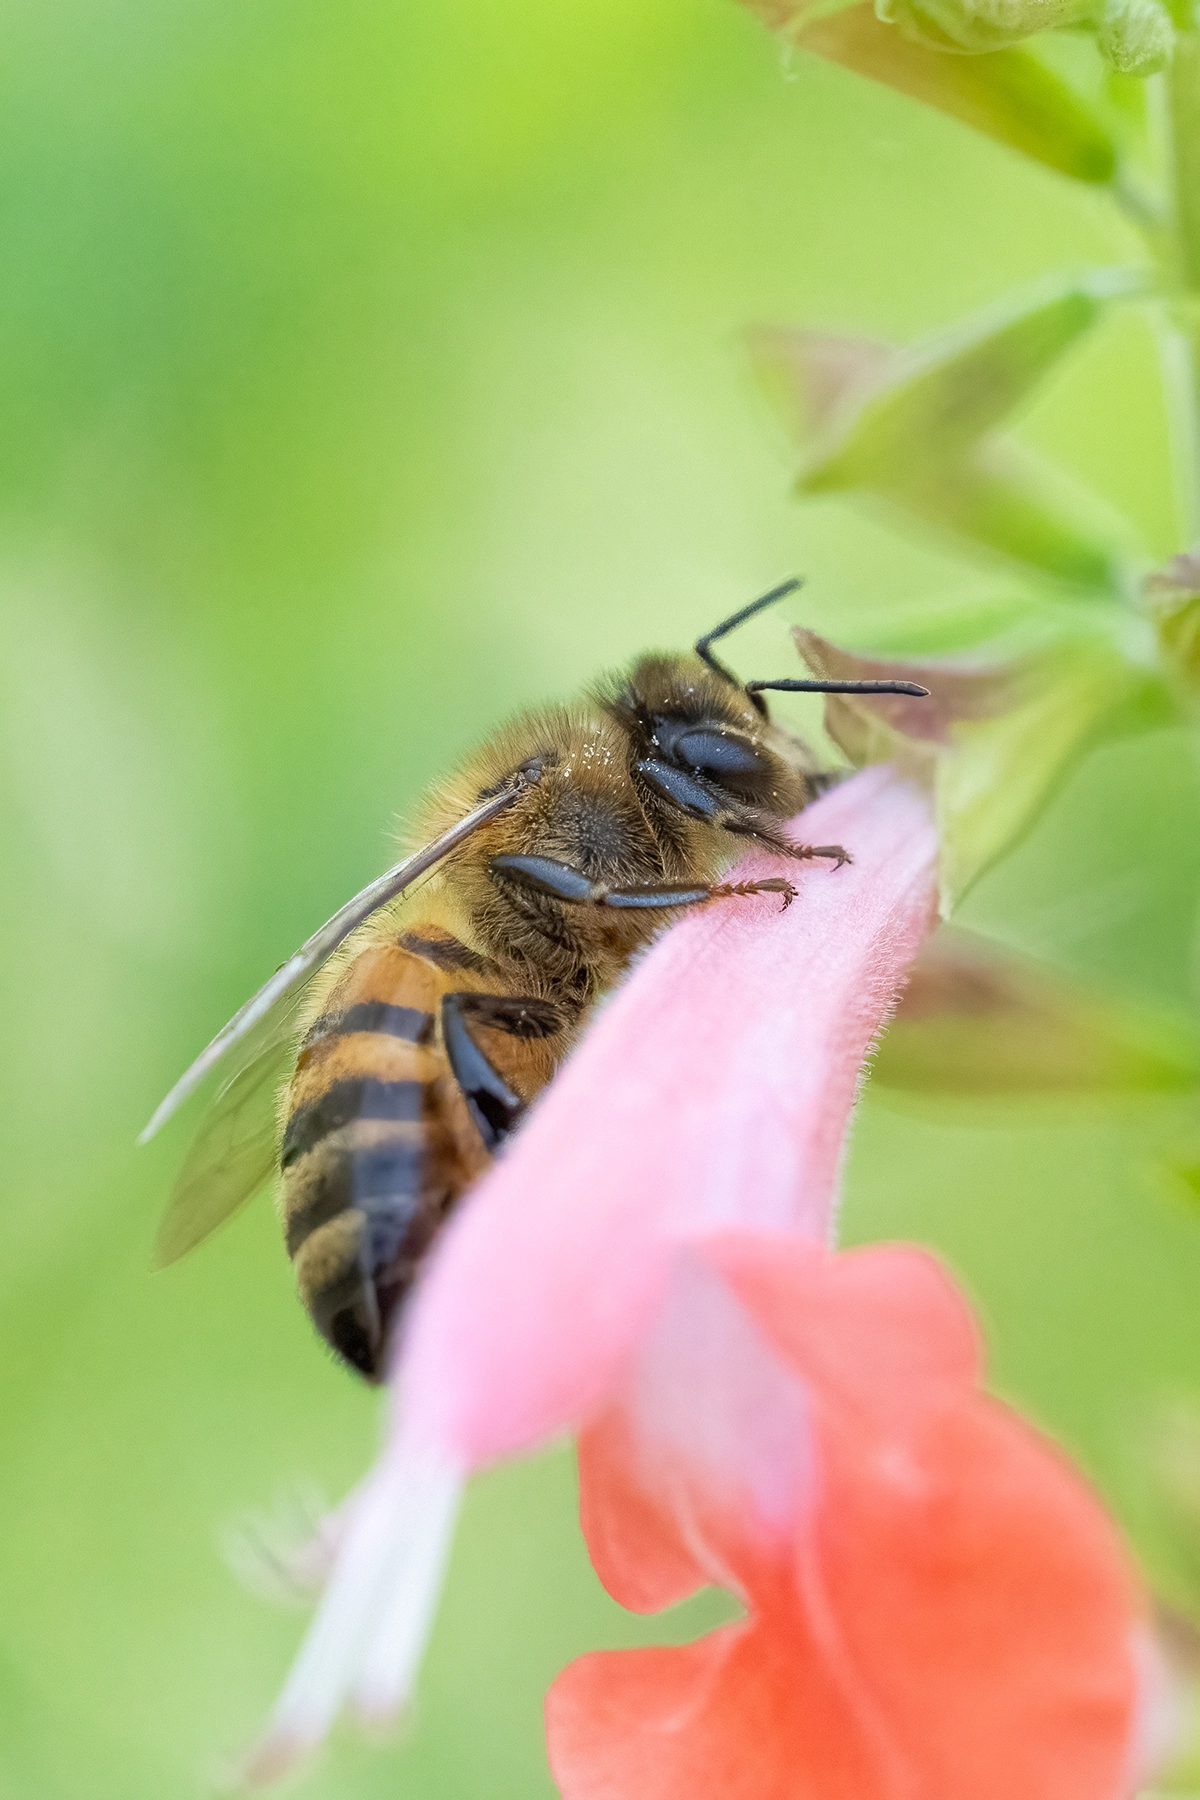
- Use a Wide Aperture: One of the reasons I love the Tamron 90mm Macro lens is how beautifully it renders background blur (bokeh). I often shoot around f/2.8 to f/5.6 to create that creamy, out-of-focus backdrop that isolates the insect. I’ll place the point of focus right on the eye or head, then let the rest of the frame fall away. This makes tiny creatures look dramatic and larger-than-life—one of my favorite macro photography ideas.
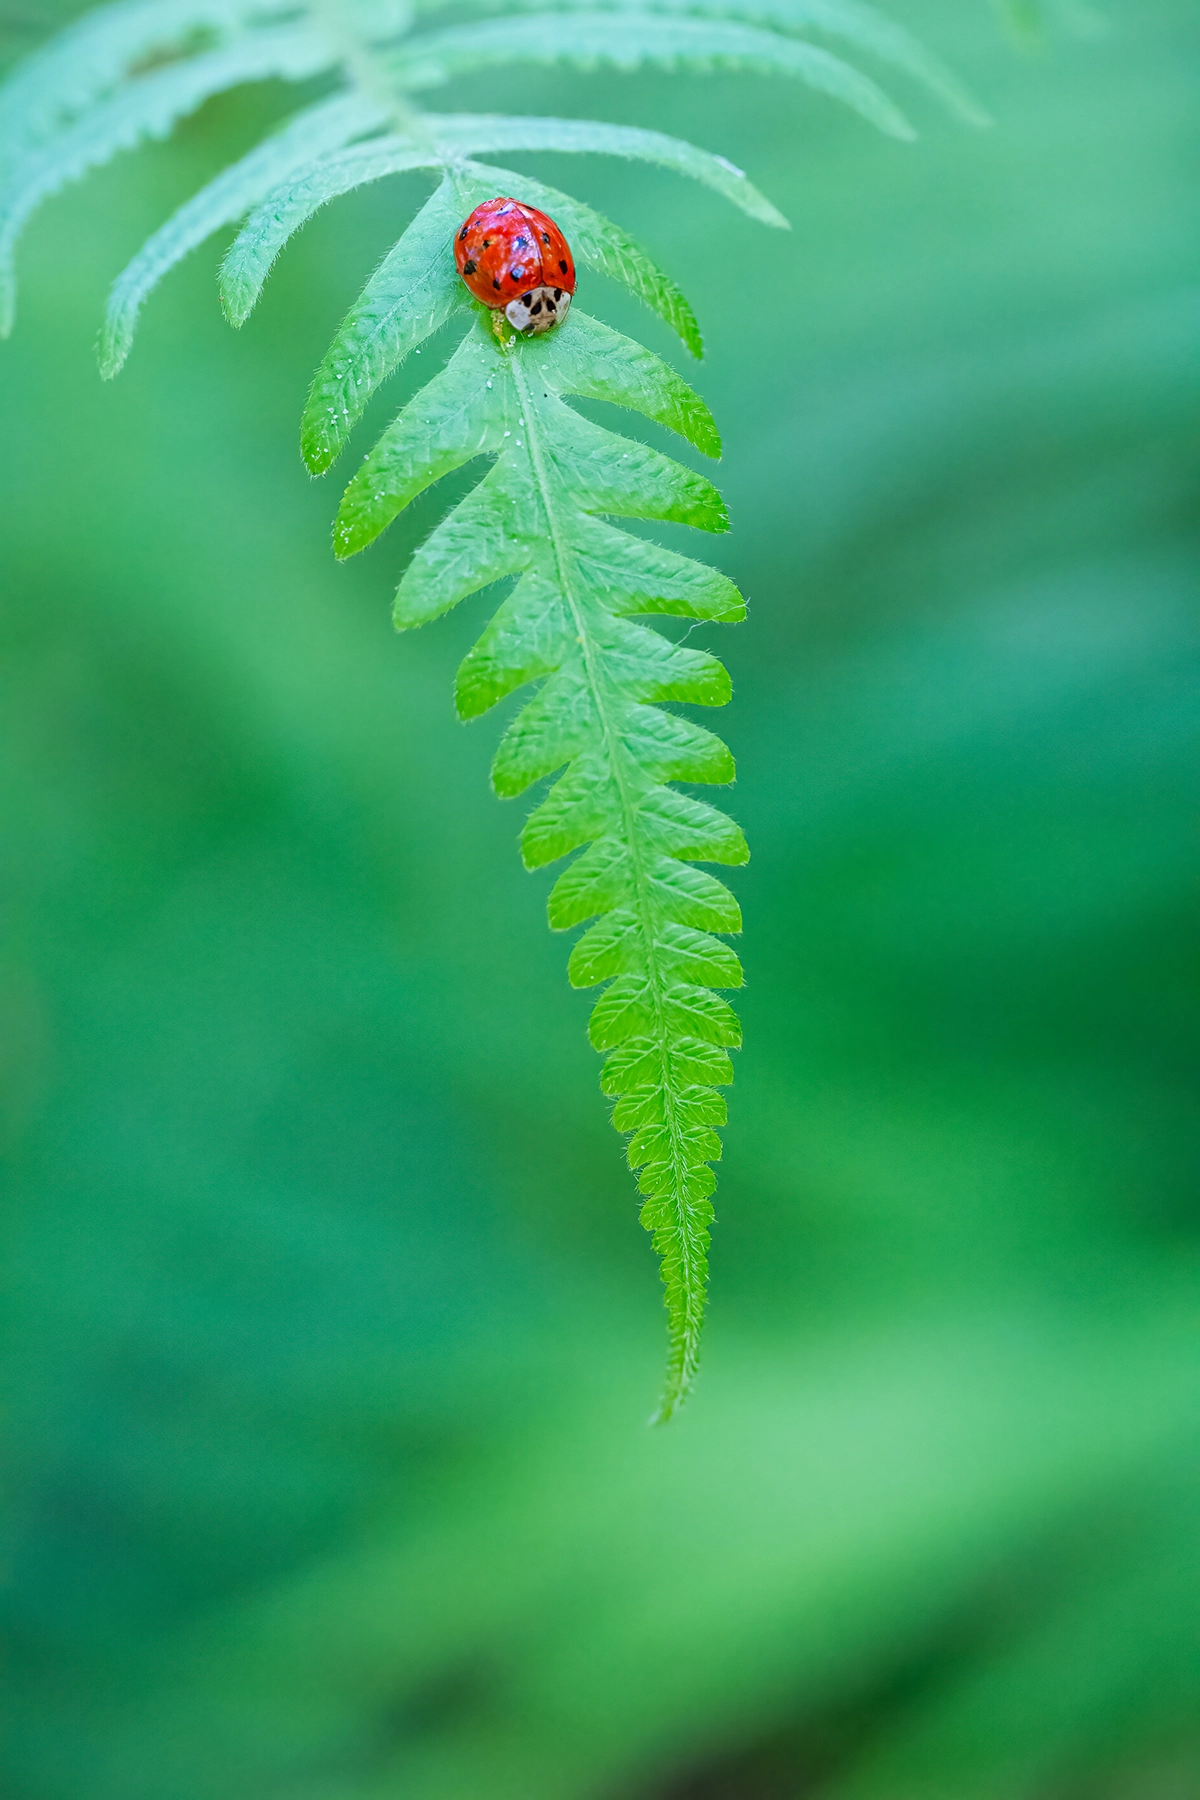
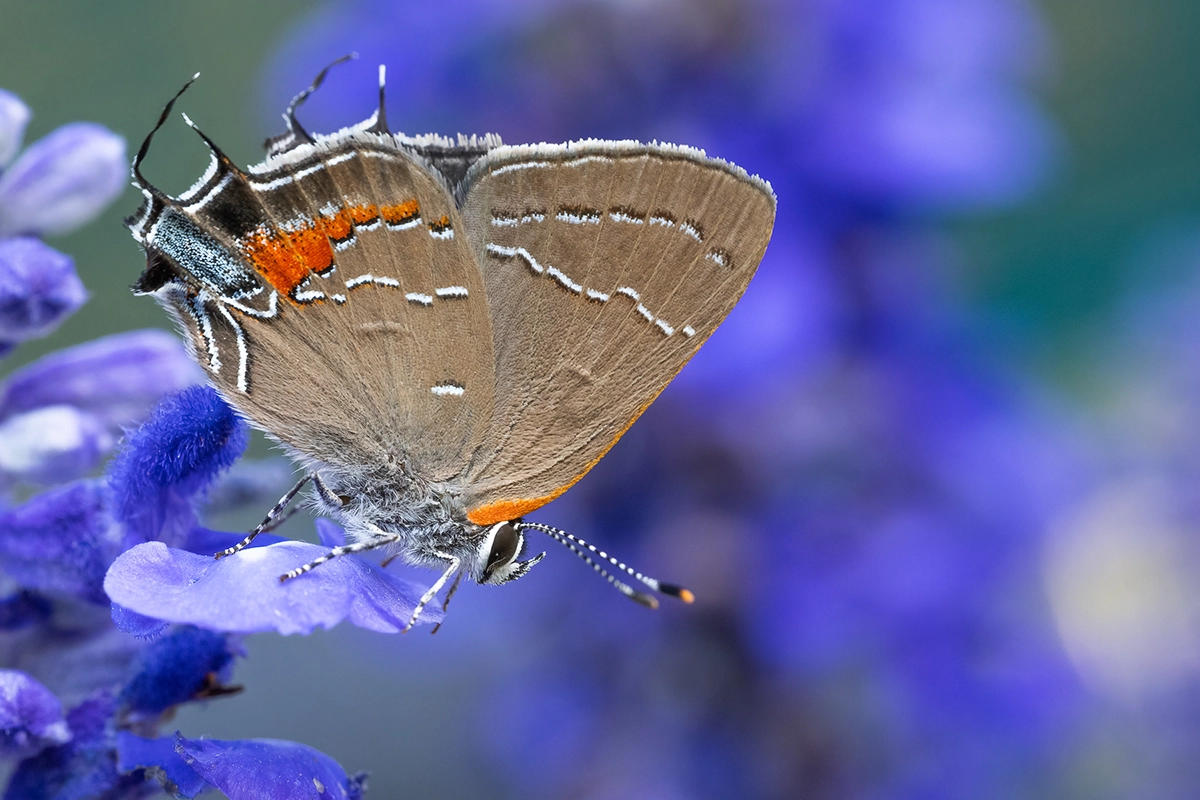
- Pay Attention to Color Contrast: Color plays a powerful role in macro insect photography. If the subject blends into the background, the image feels flat. But if there’s strong contrast—like a red ladybug on a green leaf or a yellow butterfly against a purple flower—it instantly draws the viewer’s eye. When I’m setting up a shot, I look for backgrounds that complement or contrast with the insect. I’ll sometimes wait for the insect to move to a better flower or reposition slightly to use a more appealing color palette.
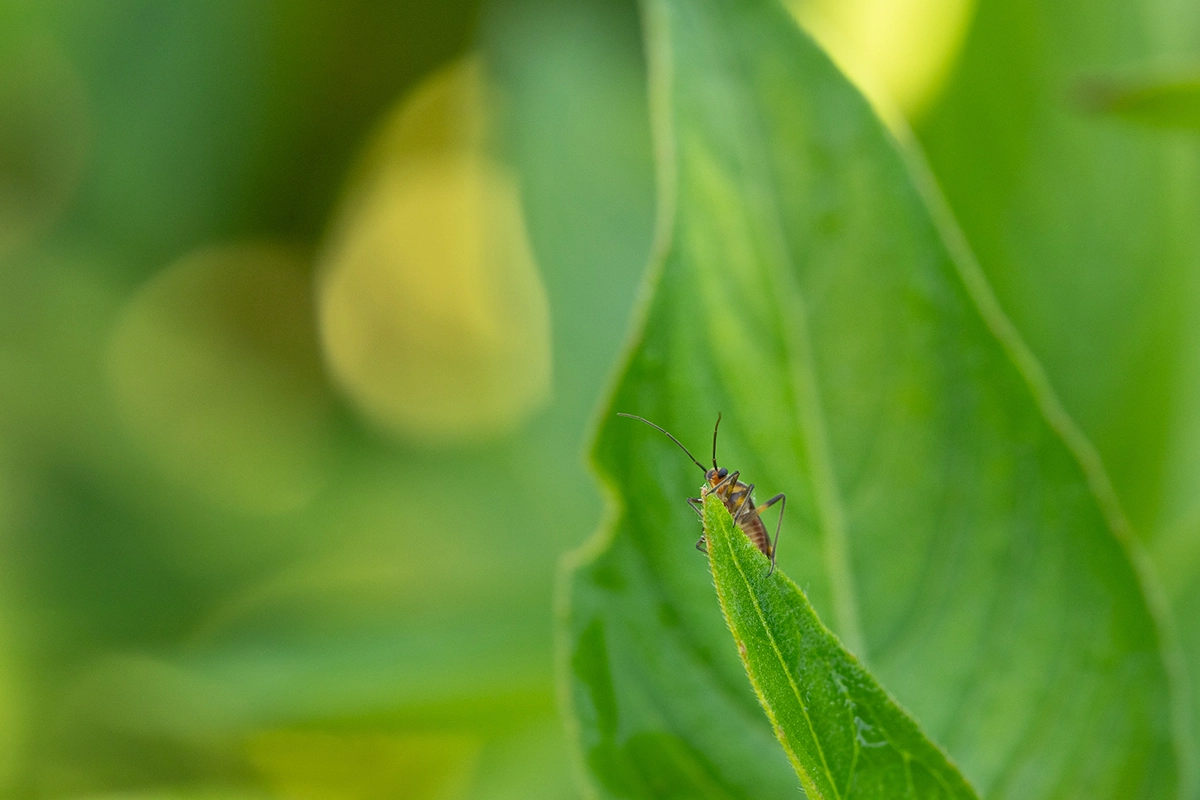
- Use Distance to Your Advantage: The further the background is from the insect, the blurrier and softer it will appear. I try to photograph insects that are perched on the edge of a flower or elevated leaf, with nothing directly behind them. This helps me create that soft, ethereal background without any distractions.
TIP 5: Try Creative Techniques: Example – Infrared
One of the joys of macro photography is experimentation. Once I got comfortable capturing “standard” images, I started exploring more artistic approaches—and it opened up an entirely new layer of creativity.
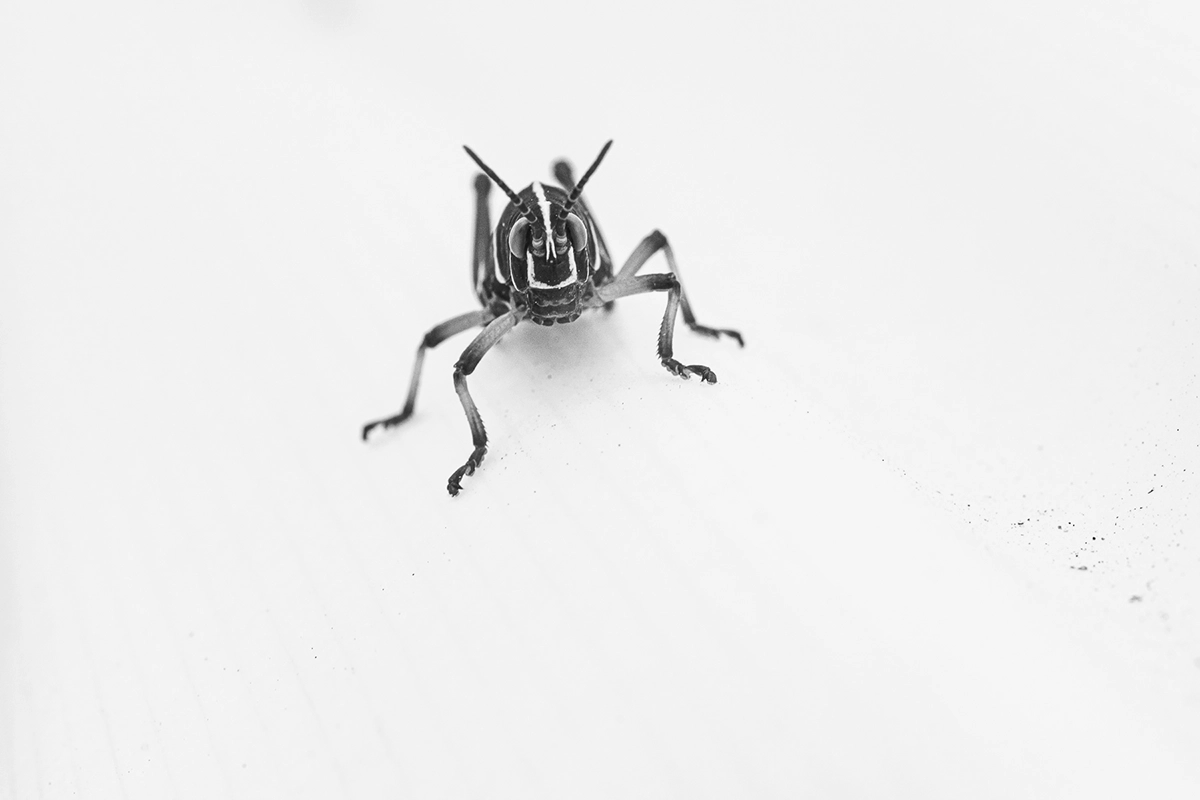
Infrared Insect Macro
Infrared macro photography is less common, but it’s one of the most unique techniques I’ve explored. With an infrared-converted camera, I am able to capture insects in surreal, glowing landscapes. As I process my IR images to black and white, leaves and grass turn white or silvery, and the insects appear like visitors from another world.
IR macro works best with:
- Bright sunny days: Rather than hiding from harsh light, IR makes use of it. High UV and IR content in full sun produces the best tonal contrast.
- High-texture environments: Think bark, dry leaves, flowering heads—anywhere the monochrome detail adds character to your frame.
Infrared is trickier—it requires strong sunlight, additional technical knowledge, and thoughtful post-processing. But the creative payoff? Totally worth it. Every successful IR macro shot I’ve taken feels like discovering a secret version of reality.
BONUS TIP: Respect Your Subjects
As I’ve grown more immersed in photographing insects, one thing has become crystal clear: respect is everything. These creatures have their own rhythms and roles. I never chill them, trap them, or disturb their habitat just to get a photo.
Instead, I treat my sessions like a nature walk—with a camera. If a subject flies off or hides, I let it go. Sometimes the missed photo is just a reminder to slow down and appreciate the moment.
There’s something powerful about creating images that celebrate life rather than controlling it. It’s a philosophy that keeps nature photography in general deeply rewarding for me.
Final Thoughts on My Approach to Photographing Insects

Macro photography isn’t about the most expensive gear or the rarest subjects. It’s about looking closely, noticing the overlooked, and capturing moments of quiet beauty in unexpected places.
With my Tamron 90mm Macro lens, a little patience, and a lot of curiosity, I’ve turned my backyard garden into a world of visual storytelling. Whether I’m following the shimmer of a dragonfly or following a marching ant at sunrise, I know I’m seeing something special—something real.
So if you’re drawn to the intricate, the small, the hidden—pick up your camera, step outside, and start photographing insects. The garden is waiting.
Safe travels and interesting light until next time! Cheers.
Learn more about the Tamron 90mm macro lens at an authorized Tamron dealer near you or visit the TAMRON Store.
About Alyce Bender

Alyce Bender is a professional nature photographer, writer, educator, U.S. Air Force veteran, and Tamron Americas ambassador. Her passion for the natural environment compels her to connect others with nature through education and experiences that promote conservation, creativity, and ethical photography. Her work has been featured in group and solo shows across the U.S. as well as in domestic and international publications from the U.K. to Japan. When leading tours, Bender’s goal is to help photographers expand their personal vision and naturalist skills. When not in the field, she offers a variety of educational and mentorship programs. Website | Instagram