 Rabais instantanés
 Support
 Trouver un détaillant
L'astrophotographie peut être un défi, mais avec les bonnes techniques, vous pouvez capturer des images époustouflantes du ciel nocturne. Dans cet article, nous vous présentons 3 conseils de pro pour photographier la Voie lactée, du choix du bon matériel à la maîtrise de la composition. Que vous débutiez ou que vous cherchiez à améliorer vos prises de vue, ces conseils pour l'astrophotographie vous aideront à tirer le meilleur parti de vos sessions et à améliorer vos images du ciel nocturne.
Images et conseils de Jonny Hill
Ce que vous apprendrez dans cet article :
- Comment choisir le bon objectif grand-angle pour prendre de superbes photos de la Voie lactée ?
- Pourquoi les phases de la lune sont-elles importantes et comment planifier vos prises de vue en conséquence ?
- L'importance des éléments de premier plan dans la création de compositions dynamiques
- Conseils de pro pour photographier des ciels nocturnes à couper le souffle
CONSEIL 1 : UTILISER UN OBJECTIF LARGE
Utilisez un objectif ultra grand angle comme le Tamron 17-28mm F/2.8 Di III RXD (Modèle A046) ou 11-20mm F/2.8 Di III-A RXD (modèle B060) zoome, ou la touche Tamron 20mm F/2.8 Di III OSD (Modèle F050) de premier choix. La prise de vue à 20 mm ou plus vous aidera à capturer la plus grande partie possible du cœur de la voie lactée, et la distorsion d'un objectif grand angle permet de créer des images spectaculaires.
CONSEIL N° 2 : PLANIFIER EN FONCTION DES PHASES DE LA LUNE
La lune est l'une des sources de lumière naturelle les plus brillantes du ciel nocturne. Bien qu'elle soit magnifique, elle peut constituer un obstacle majeur lorsque vous essayez de photographier des étoiles ou la Voie lactée. Même une lune à moitié pleine peut masquer les faibles détails célestes et réduire le contraste de vos images. Pour prendre des photos nettes et contrastées du ciel nocturne, essayez de prendre des photos pendant la phase de la nouvelle lune ou dans les quelques jours qui la suivent, lorsque le ciel est le plus sombre.
Utilisez des applications d'astronomie telles que PhotoPills, Stellarium ou Sky Guide pour suivre les phases de la lune, les heures de lever et de coucher de la lune et la visibilité de la Voie lactée. En planifiant vos prises de vue en fonction d'une nuit sans lune, vous augmenterez considérablement vos chances d'obtenir des clichés nets et détaillés, remplis d'étoiles et de textures galactiques.
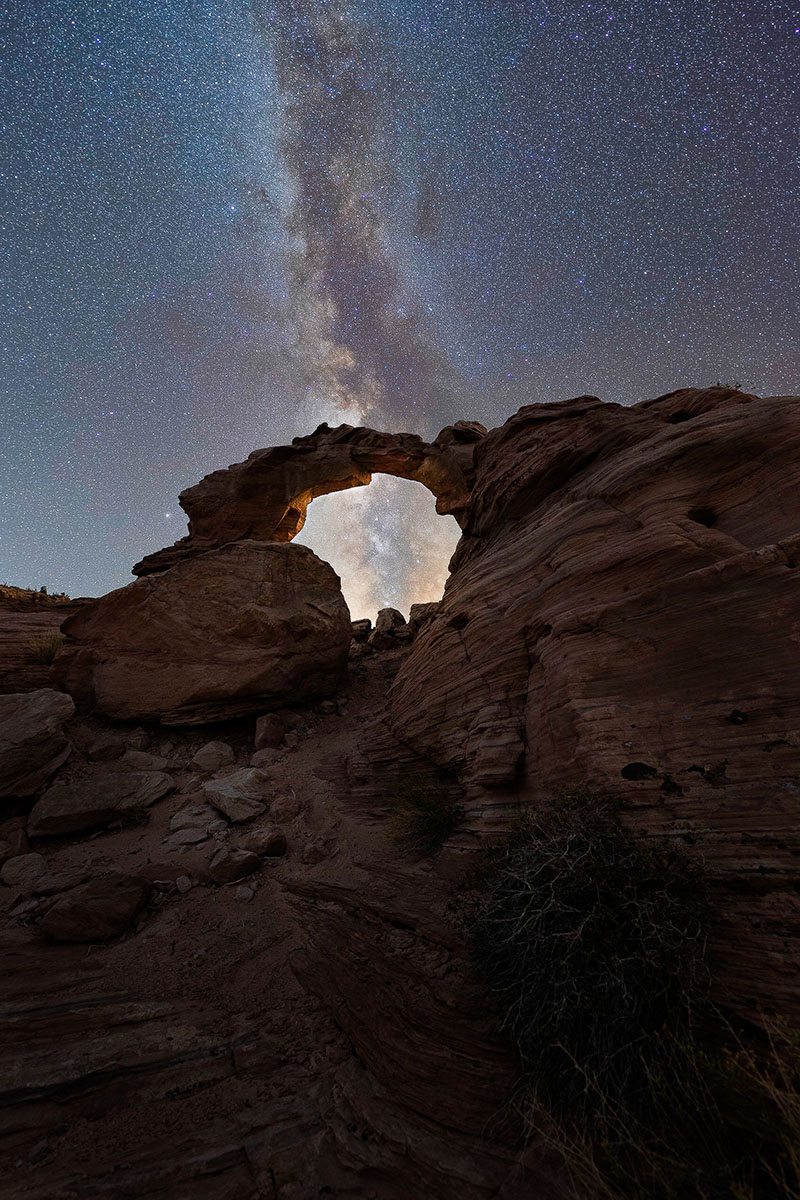
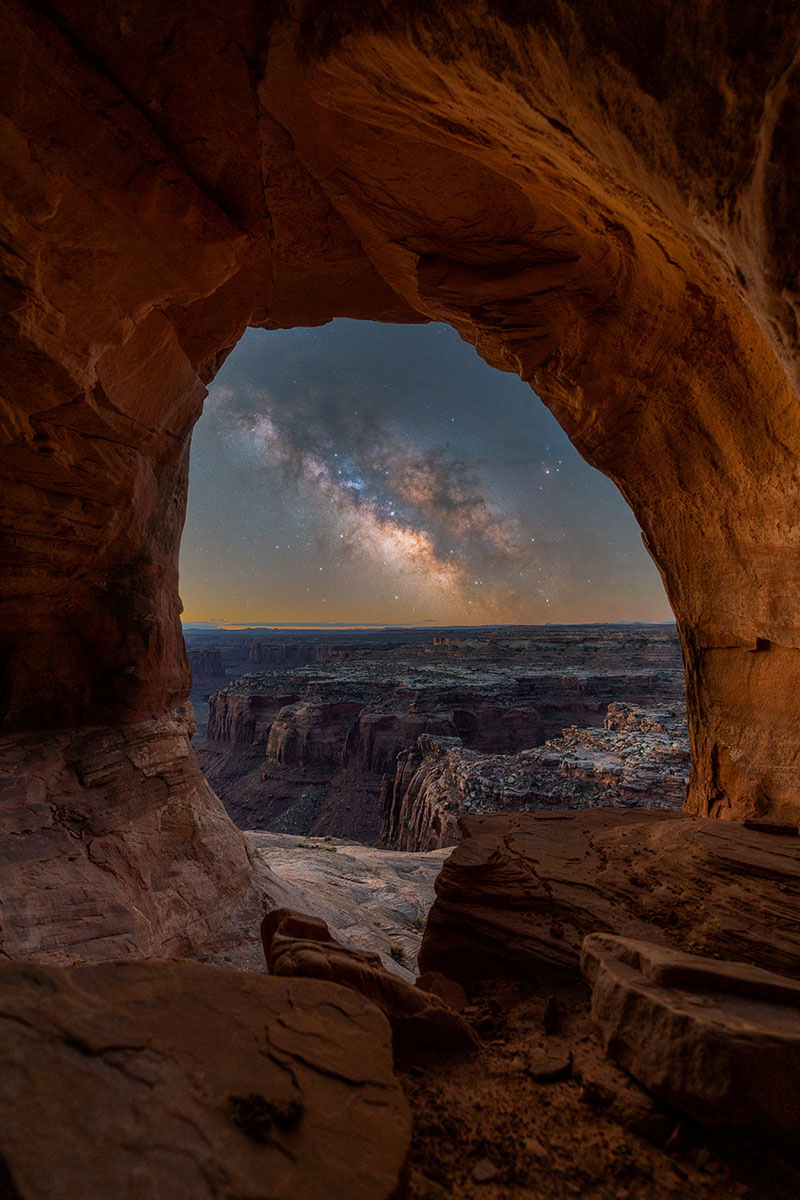
CONSEIL 3 : AJOUTER UN ÉLÉMENT DE PREMIER PLAN
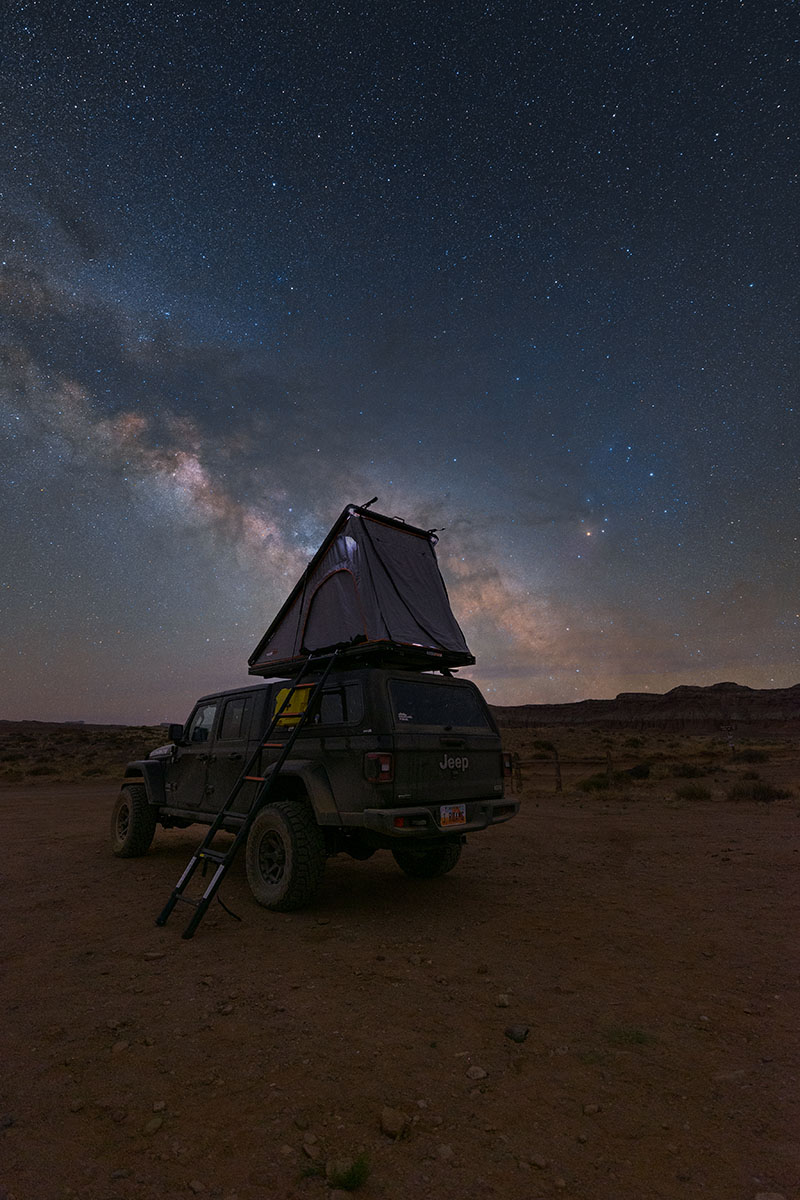
Un ciel étoilé est stupéfiant en soi, mais l'intégration d'un élément de premier plan intéressant peut transformer votre photo d'une simple prise de vue nocturne en une histoire captivante. Les sujets de premier plan créent de la profondeur, de l'échelle et du contexte, attirant le spectateur dans l'image et lui donnant un sentiment d'appartenance.
Votre premier plan peut être aussi simple qu'un arbre silhouetté, une fleur sauvage ou un affleurement rocheux. Pour des résultats plus dynamiques, essayez d'utiliser des surfaces réfléchissantes comme un lac ou une flaque d'eau pour refléter les étoiles, ou incluez des structures comme une tente, une cabane ou même une personne avec une lanterne pour ajouter de l'ambiance et de la narration.
Lors de vos repérages, recherchez des formes et des lignes fortes qui complèteront le mouvement de la Voie lactée dans le cadre. Un premier plan bien choisi renforce non seulement l'intérêt visuel, mais permet également d'ancrer le drame cosmique du ciel nocturne dans le monde que nous connaissons.
Capturer la nuit comme un pro
L'astrophotographie est autant une question de préparation que de créativité. En utilisant un objectif grand angle, en planifiant les phases de la lune et en incorporant des éléments de premier plan intéressants, vous pouvez améliorer considérablement la qualité et l'impact de vos images du ciel nocturne. Grâce à ces conseils de Jonny Hill sur l'astrophotographie, vous serez en mesure de capturer la Voie lactée dans toute sa splendeur. Sortez sous les étoiles, expérimentez avec votre matériel et laissez le ciel nocturne inspirer votre prochain chef-d'œuvre.
En savoir plus sur grand angle objectifs pour l'astrophotographie à un revendeur Tamron agréé dans votre région ou visitez le site Magasin TAMRON aujourd'hui.
Plus de conseils photo | Regarder les vidéos | En savoir plus sur les objectifs Tamron | Galerie de photos